Managing package languages / translations
Deliver a localized experience for your Studio apps by enabling multi-language support. By creating a translation map, you can replace hard-coded strings with dynamic keys, ensuring your content automatically adapts to the user's preferred language.
Both your default language and any additional languages need a translation map to be created on a package level. A translation map allows you to identify the terms you want to translate in that language and then assign that term with a unique translation key. This translation key can then be referenced within the YAML for your Views.
Supported languages
The following languages are supported:
English (US), Dutch, French, German, Italian, Japanese, Portuguese (Brazilian), Russian, and Spanish.
Before enabling additional languages, your default language must have a translation map within the package.
To create a translation map for your default language, follow these steps:
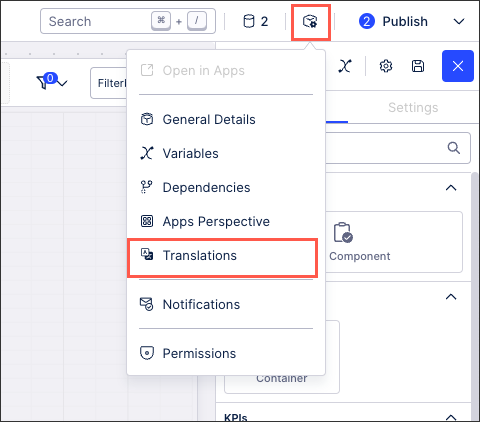
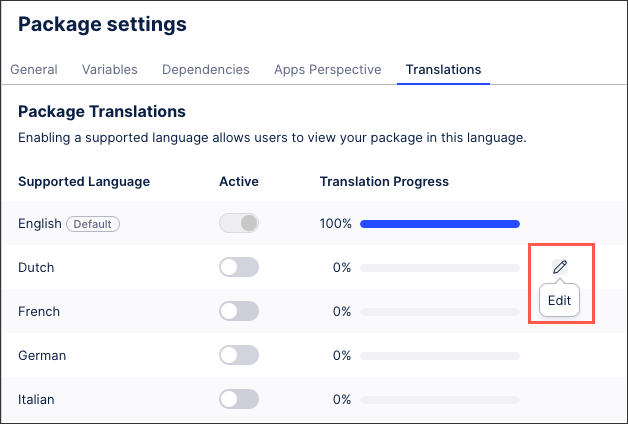
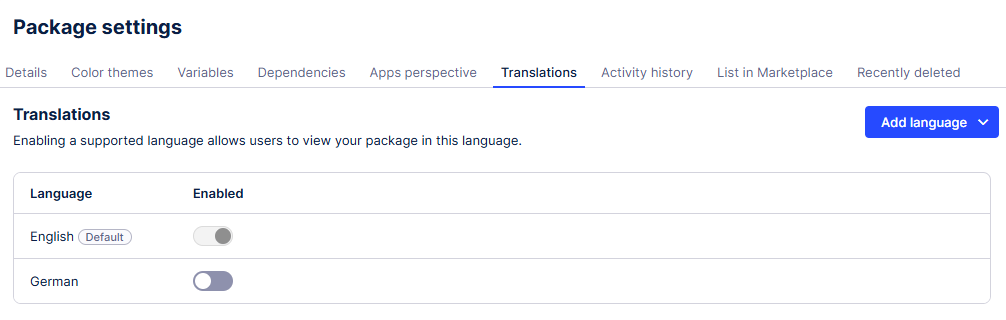
Click Package Settings - Translations:
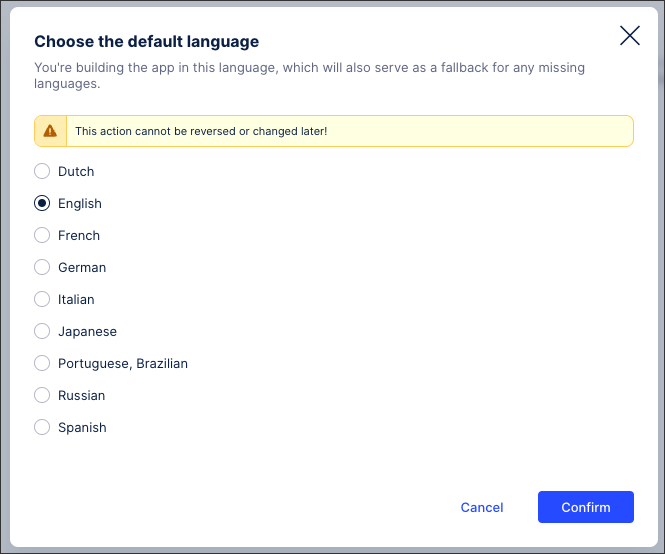
Click Enable Translations:

Choose your default language and click Confirm.
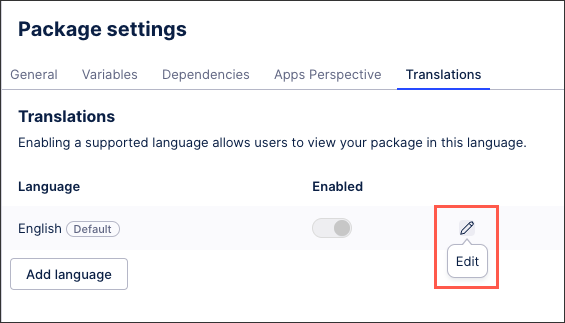
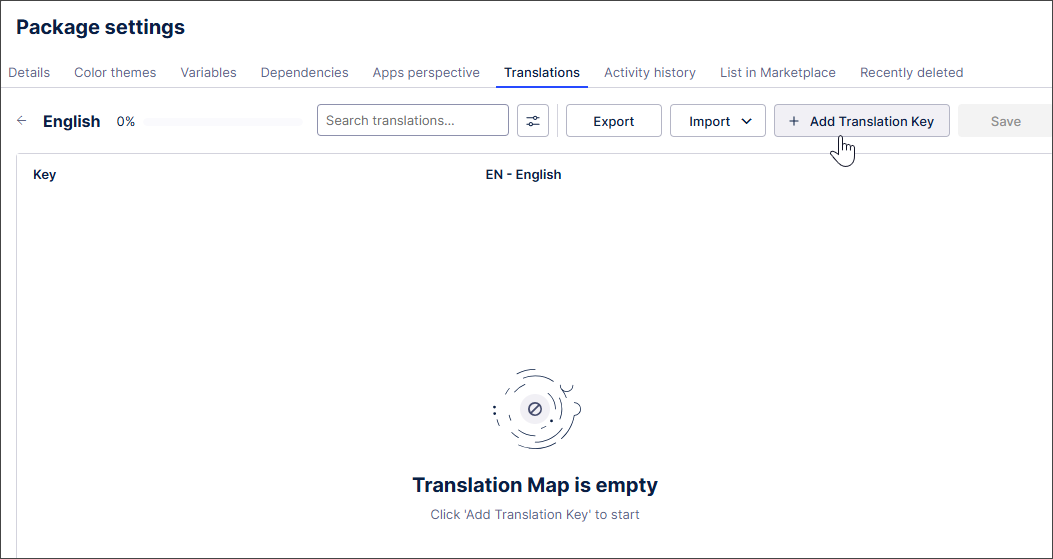
Click Edit:
Choose between the two options to manage individual package terms for your default language:
Translation mapping from file: This is a three step process:
Download a .csv file pre-filled with your table and column names.
Enter human-readable version names and a unique translation key.
Upload the file to apply the translation mappings.
The .CSV file should have three columns: the translation key, the default language value, and the target language.
Manual name mapping: This requires the terms you want to map to be already available in the default language. Once available there, you can manually add and edit the terms for each enabled language.
When manually mapping your terms, click Save to ensure your terms are added to the translation map.

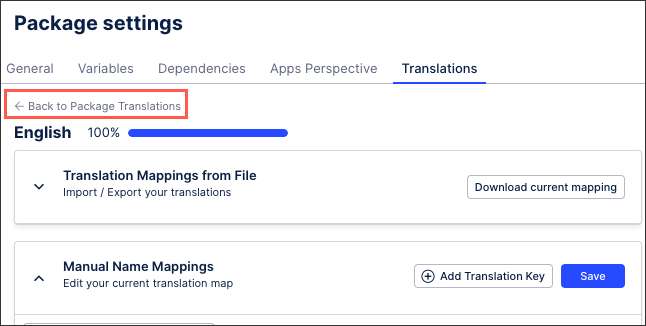
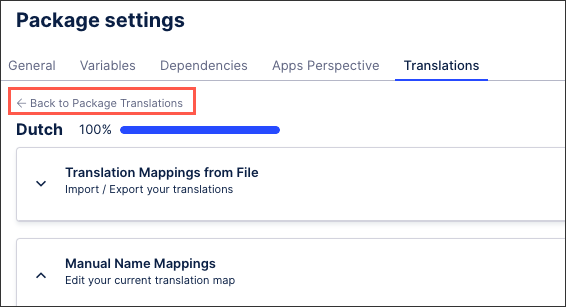
After managing the terms for your default language, click Back to Package Translations:
You can now enable additional languages for a packages, with further information provided below.
After creating your translation map for your default language, you can now enable additional languages for your package.
For each language you want to offer your package in:
From the Translations page, click Edit.
Choose between the two options to map your individual terms (with further information about each option available in Creating a translation map):
Translation mapping from file
Manual name mapping
After managing the terms for your additional language, click Back to Package Translations:
Click Active.
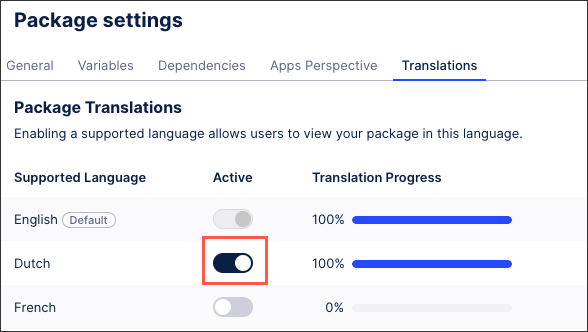
Optional: For your enabled languages to be available within your app, the latest version of the package must be deployed.
When working with package dependencies, it's important to understand how translations are handled:
Translations aren't copied over: When you assign a package dependency or perform an "update dependency" operation, the translation maps from the dependent package are not automatically copied to the source package.
Translation keys may appear: If an extension asset within your source package relies on a base asset from the dependent package that already has been translated, the extended asset will display the raw translation keys instead of the translated terms. This occurs because the source package lacks the necessary translation map to resolve those keys.
Manual resolution required: To ensure that translation keys from the dependent packages are correctly resolved in your source package, you must manually download the translation map (e.g., as a .csv file) from the dependent package and then upload it to your source package. This action provides the source package with the necessary mapping to display the translated terms.
You are also prompted to correct missing translations when your current View contains terms that don’t have corresponding translation keys in enabled languages.
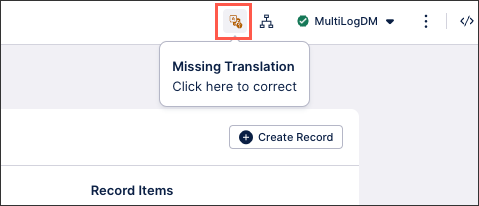
When correcting missing translations, the tool scrapes all strings from the YAML configuration and adds them to the translation map.
You can also translate your package variables, allowing you to provide mapped terms for each language you have enabled.
Variables are converted into a parameterized variable, such as {0}, and are added in numerical order from zero upwards:
First {0}
Second {1}
Third {2}
The order in which the variables are passed to the key is important. So, {0} represents the first variable passed to the key, {1} represents the second, and so forth.
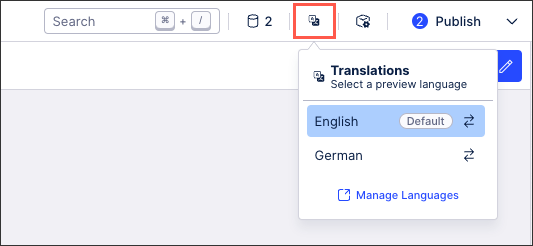
The language set in the user’s profile is displayed by default when viewing your app. Users can then manually switch between the available languages using the Translations menu:
 |
In Analyses, translation name items are saved as name mappings in the Data Model. In Views, translations are saved in the package settings.
Before migrating your Analysis to Views, you should import the name mappings from the Analysis to the View. This ensures your translated items are retained and are available in the View. The name mappings are automatically updated, with the name mapping key syntax #{name} used in the Analysis updated to the package translation syntax in Views "t(name.name)".
For more information about migrating analyses, see Migrating Analysis to Views.
Open the View you want to migrate your Analysis to.
Select Translations > Manage Languages.
The Package settings screen appears.
In your default language, select edit mode.
The translation map information appears. The translation map is empty here as the translation map hasn't been added yet.
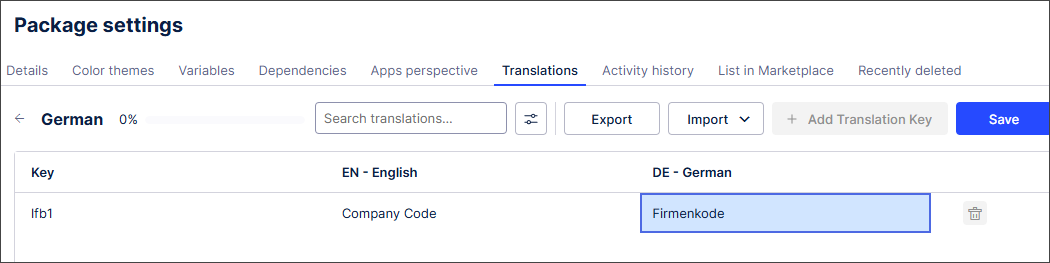
Select +Add Translation Key.
Enter the Analysis translation key and the key value for the default language.
Important
The translation key is used in the Analysis and has format
#{name}. In the Analysis, enter edit mode and select Translate for the component title. The translation key will display.In this example, the translation key is
#{LFB1}and this is added here aslfb1. The key value isCompany Code.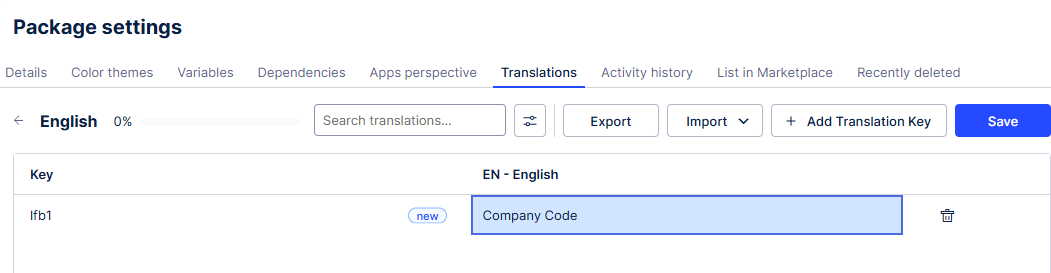
Select Save.
Select edit mode for a language you have translation content for in your Analysis.
Enter the key name in that language.
Select Save.
In the View, select the component that has been added and change the component title to the Views translation key syntax.
Tip
The translation key syntax in Views is
"t(name.name)". In this example, we'd uset("lfb1")lfb.Select edit mode for your default language and select Import > Import from Data Model.
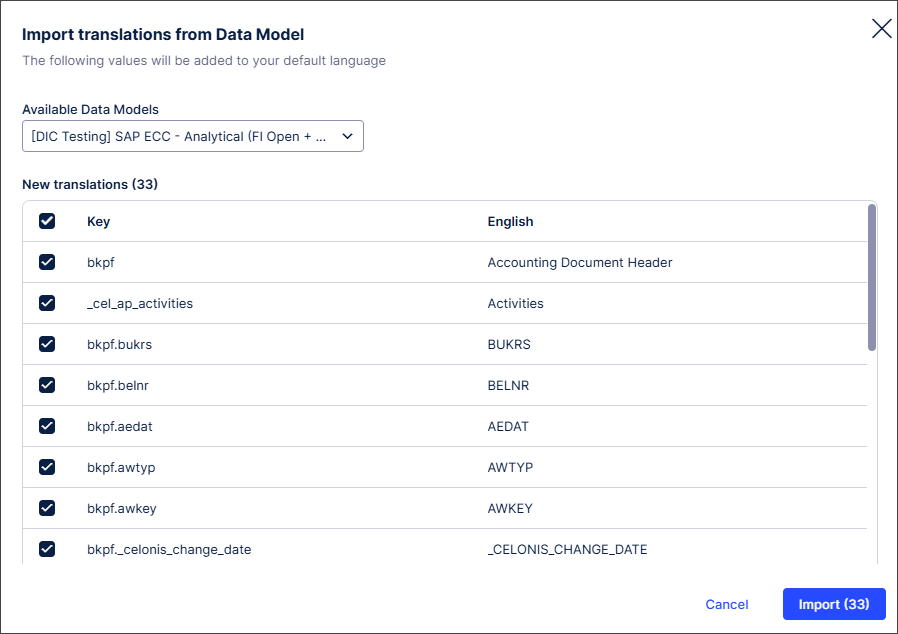
Select Import.
Repeat steps 10 to 12 for each language you want to import translations for.
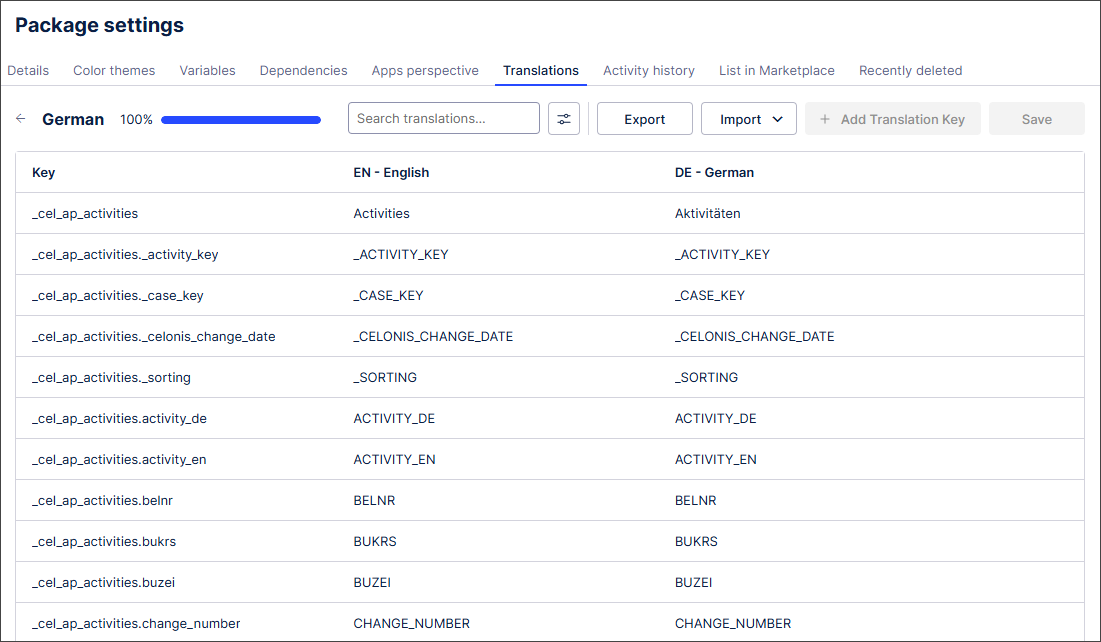
The translations are available and can be selected from the Views Translations menu.
This feature is currently available as a Public Preview only
During a Public Preview, only eligible customers can access this feature. Additionally, there may be minor updates to the functionality and design of these features when they are released in General Availability.
For more information about our Public Preview releases, including the level of Support offered with them, see: Feature release types.
Name mapping ensures the table and column names in the migrated Analysis are automatically translated in the View to the user's default language defined in their package settings.