Forward Parameters to Machine Learning Script
Unlock the full potential of your Machine Learning models by connecting them to live Action Flows. Learn how to use a standardized snippet to pass essential variables—like team domains and application keys—directly to your ML scripts for real-time automation.
This Action Flow snippet automates the handoff between your data pipeline and your machine learning models. It performs two core functions:
Build JSON: It collects the necessary parameters and converts them into a JSON structure compatible with the ML API.
POST Request: it sends a POST request to the ML execution endpoint to start the script with your custom parameters.
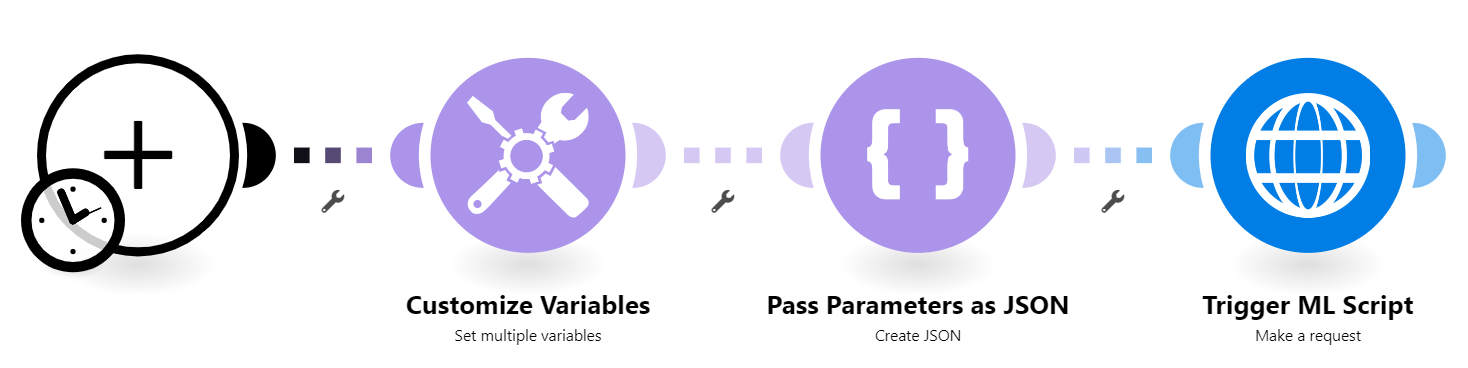 |
Below you will find the step-by-step guide for configuring each module of the Action Flow above.
Note
You can integrate any trigger sequence, e.g. Slack, Email, Celonis, etc.
An example for a Slack trigger sequence can be found at Trigger Machine Learning Script.
 |
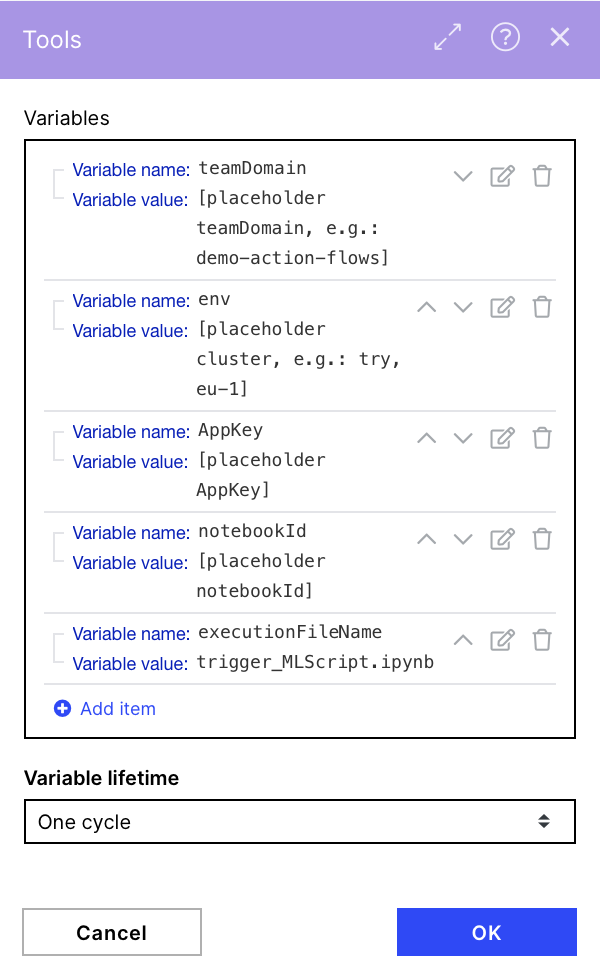
This is the most important module in this Action Flow where we have to adjust all the data specific to your team and account like the team domain or an Application Key with the right permissions
 |
Configuration:
Action Flows Module: Tools
Action: Set multiple variables
teamDomain: Enter your teamdomain, e.g. demo-action-flows
env: Enter your cluster, e.g. try, eu-1...
AppKey: e.g.:
GjV6ODBvghgv6r76r0YzkyLTkxZwjbflqjwhebfljwhebfqjhebfwlV5TEVCcjMzAHBFK0F8TXdGBTlqBWFlsVPN
notebookId: This will be added to the Template later when creating a ML App / adding Scripts to an existing ML App.
executionFileName: Name of the ML Script to be triggered, e.g. trigger_MLScript.ipynb
 |
This module creates a JSON file that is sent as a variable in the HTML request body to be used in our ML script.
Note
The API endpoint that forwards parameters to the ML workbench script has a maximum size limit of 96 KB. This is a hard limit and cannot be changed.
This limit is typically exceeded when trying to pass files to the ML Workbench. In this case, we recommend passing the parameters of the file metadata (i.e., file id, file path, download url, etc.) and then making an API call within the ML Workbench script to retrieve the file(s).
 |
Configuration:
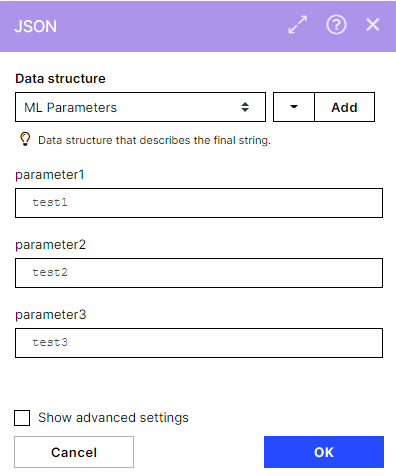
Action Flows Module: JSON
Action: Create JSON
Parameters, e.g.:
JSON file for Generator
{
  "parameter1": "test1",
  "parameter2": "test2",
  "parameter3": "test3"
}
Possible Data Types
You can pass parameters of any type that can be handled by standard Python or libraries, such as HTML, JSON, str, int, csv-files, txt-files, etc.
 |
This module sends a POST Request to our ML API and triggers the previously defined ML script.
Important
You do not have to change anything in this module.
 |
Configuration:
Action Flows Module: HTTP
Action: Make a Request
URL: https://{{teamDomain}}.{{env}}.celonis.cloud/machine-learning/api/executions
Method: POST
Headers:
Name: Authorization
Value: AppKey {{AppKey}}
Body type: Raw
Content type: JSON (application/json)
Request content:
{
"notebookId": "{{notebookId}}",
"executionFileName":"{{executionFileName}}",
"params": {{json}}
}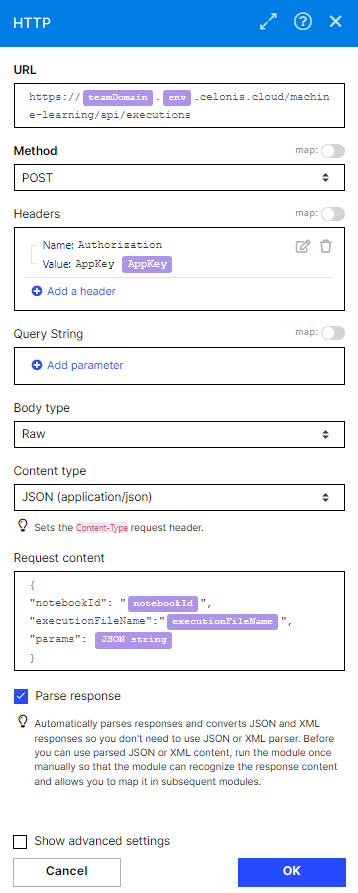 |
Import the script in a new or existing ML App. The ML script will run your pre-defined Python logic and can make use of the parameters that you have forwarded.
Creating your own Logic
The script includes further documentation on how to ensure the successful execution. Make sure to follow these steps as well.
If you apply your own logic and parameters, make sure to code robustly and test the script thoroughly. If an error occurs, the backend does not give an indicator what the error was.
Navigate to the Machine Learning tab.
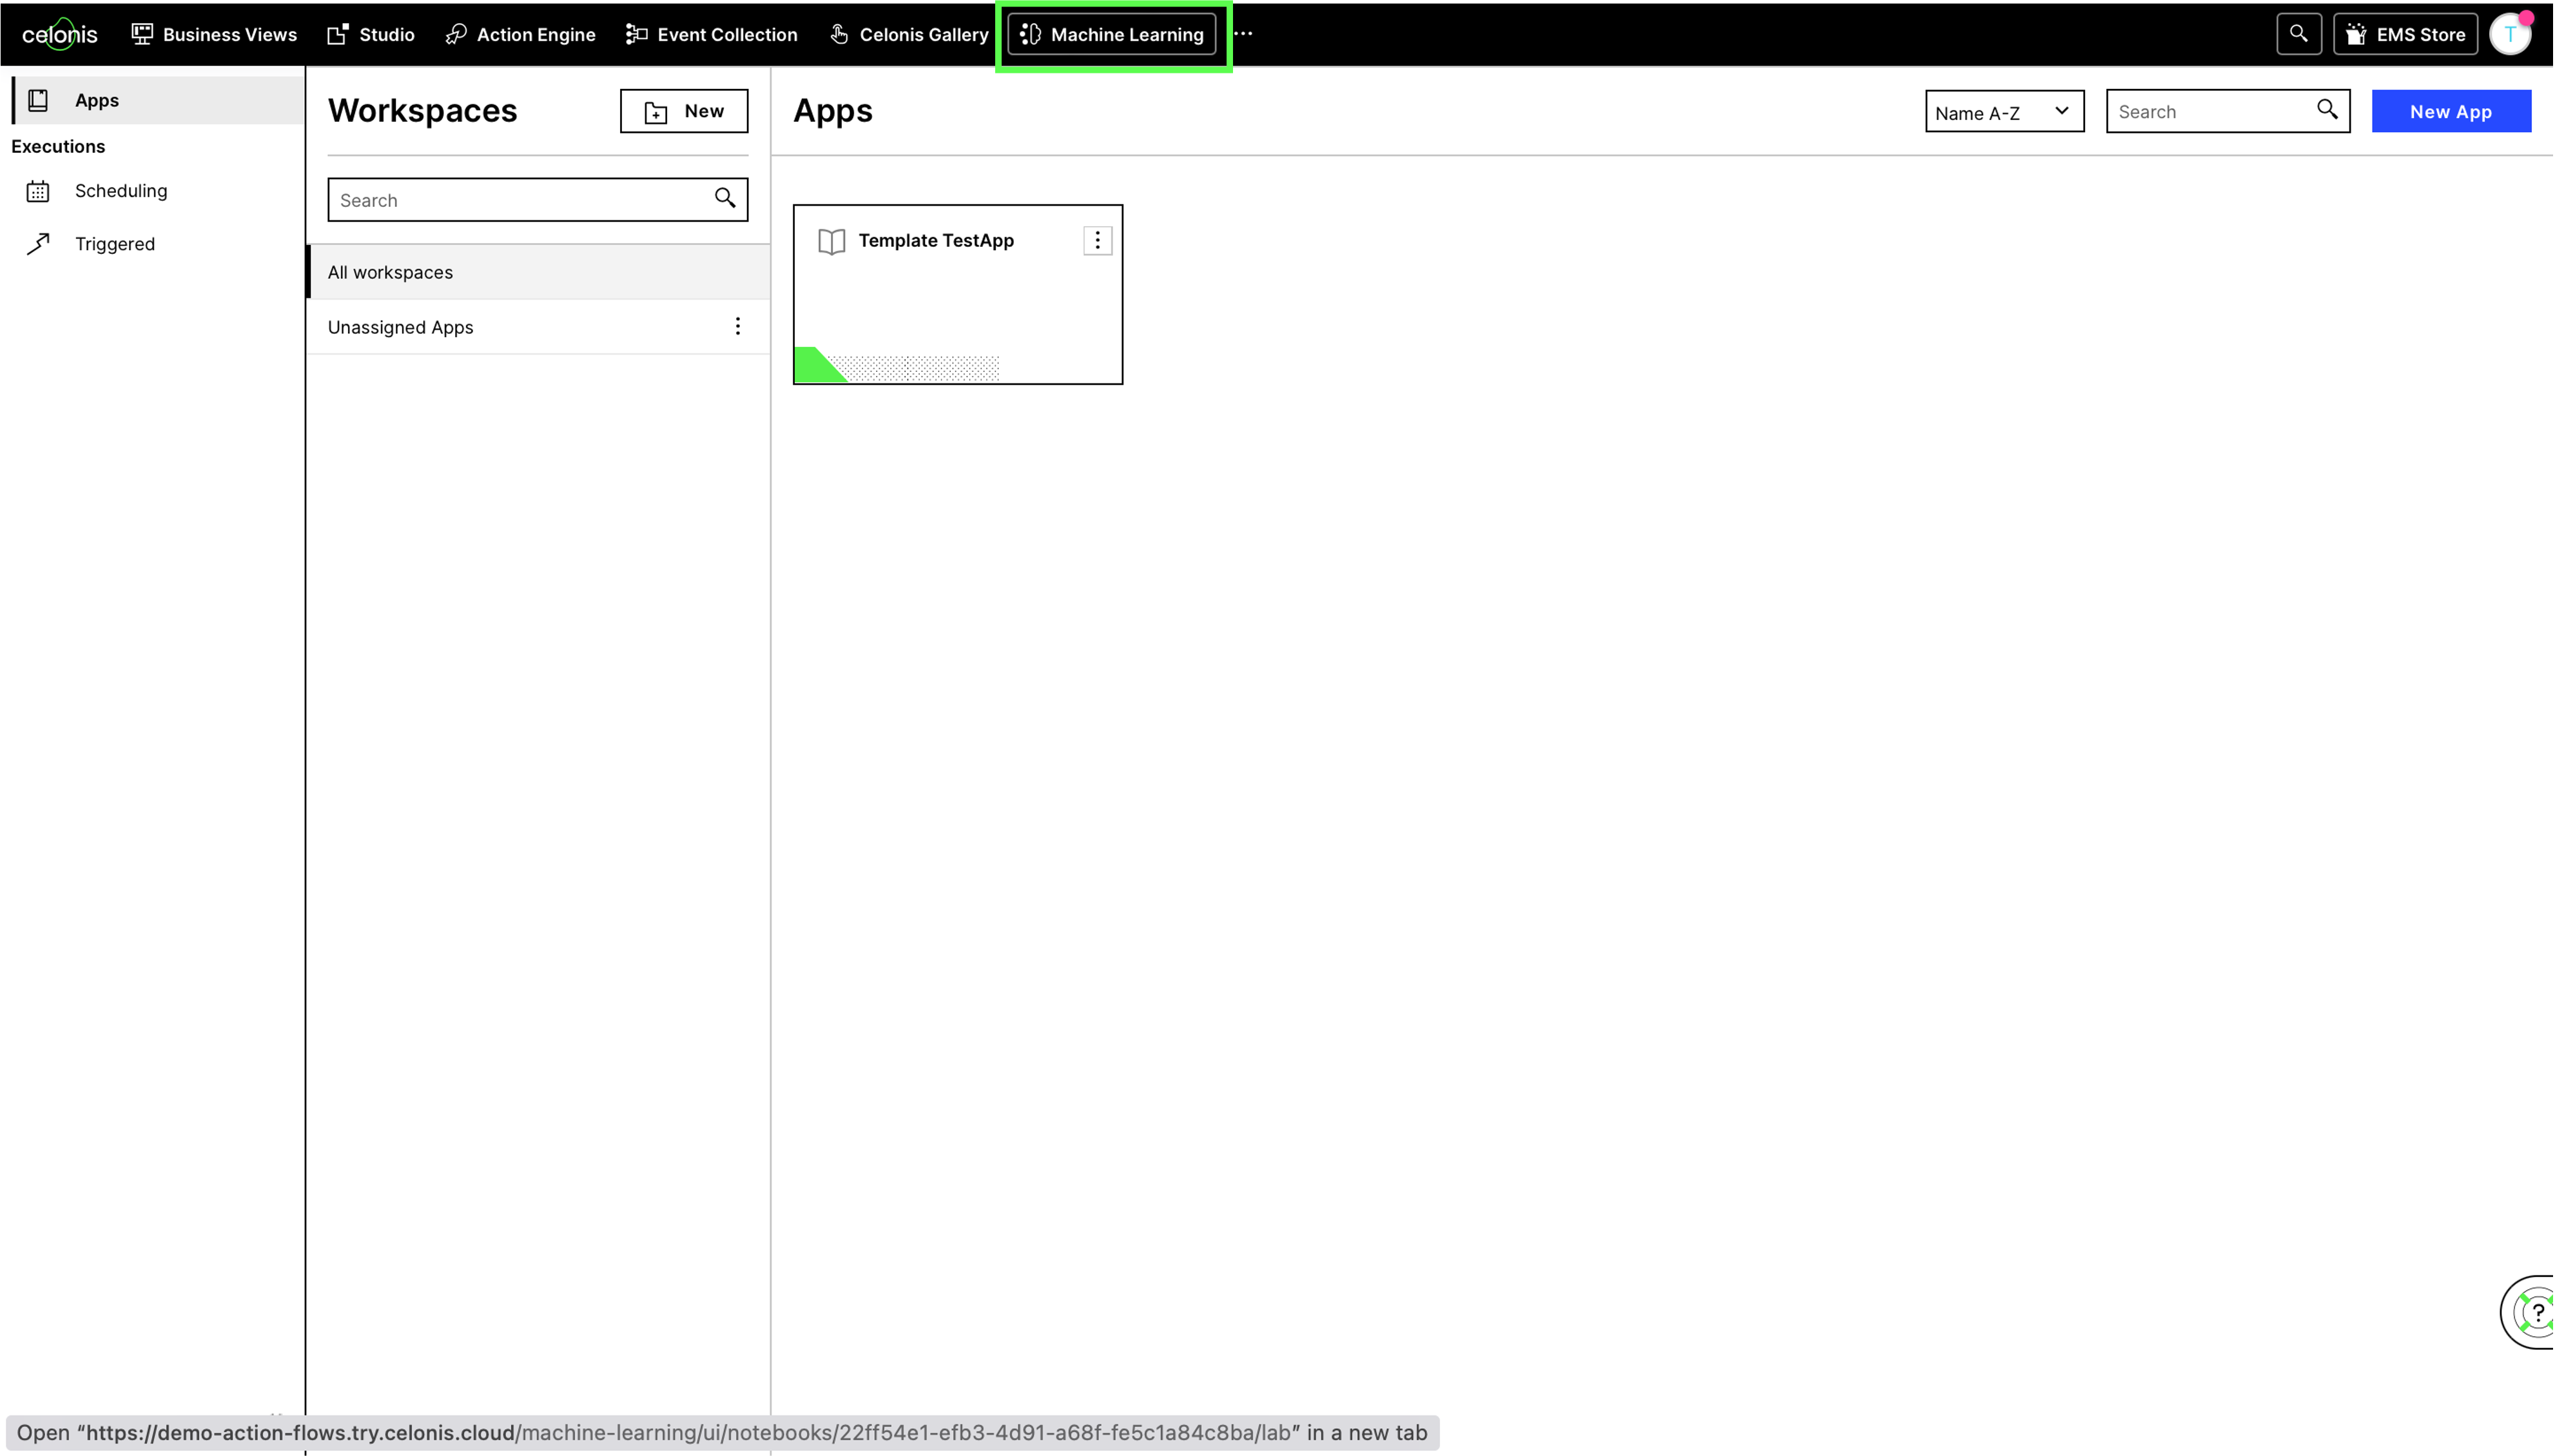
Open existing App or create a new one.
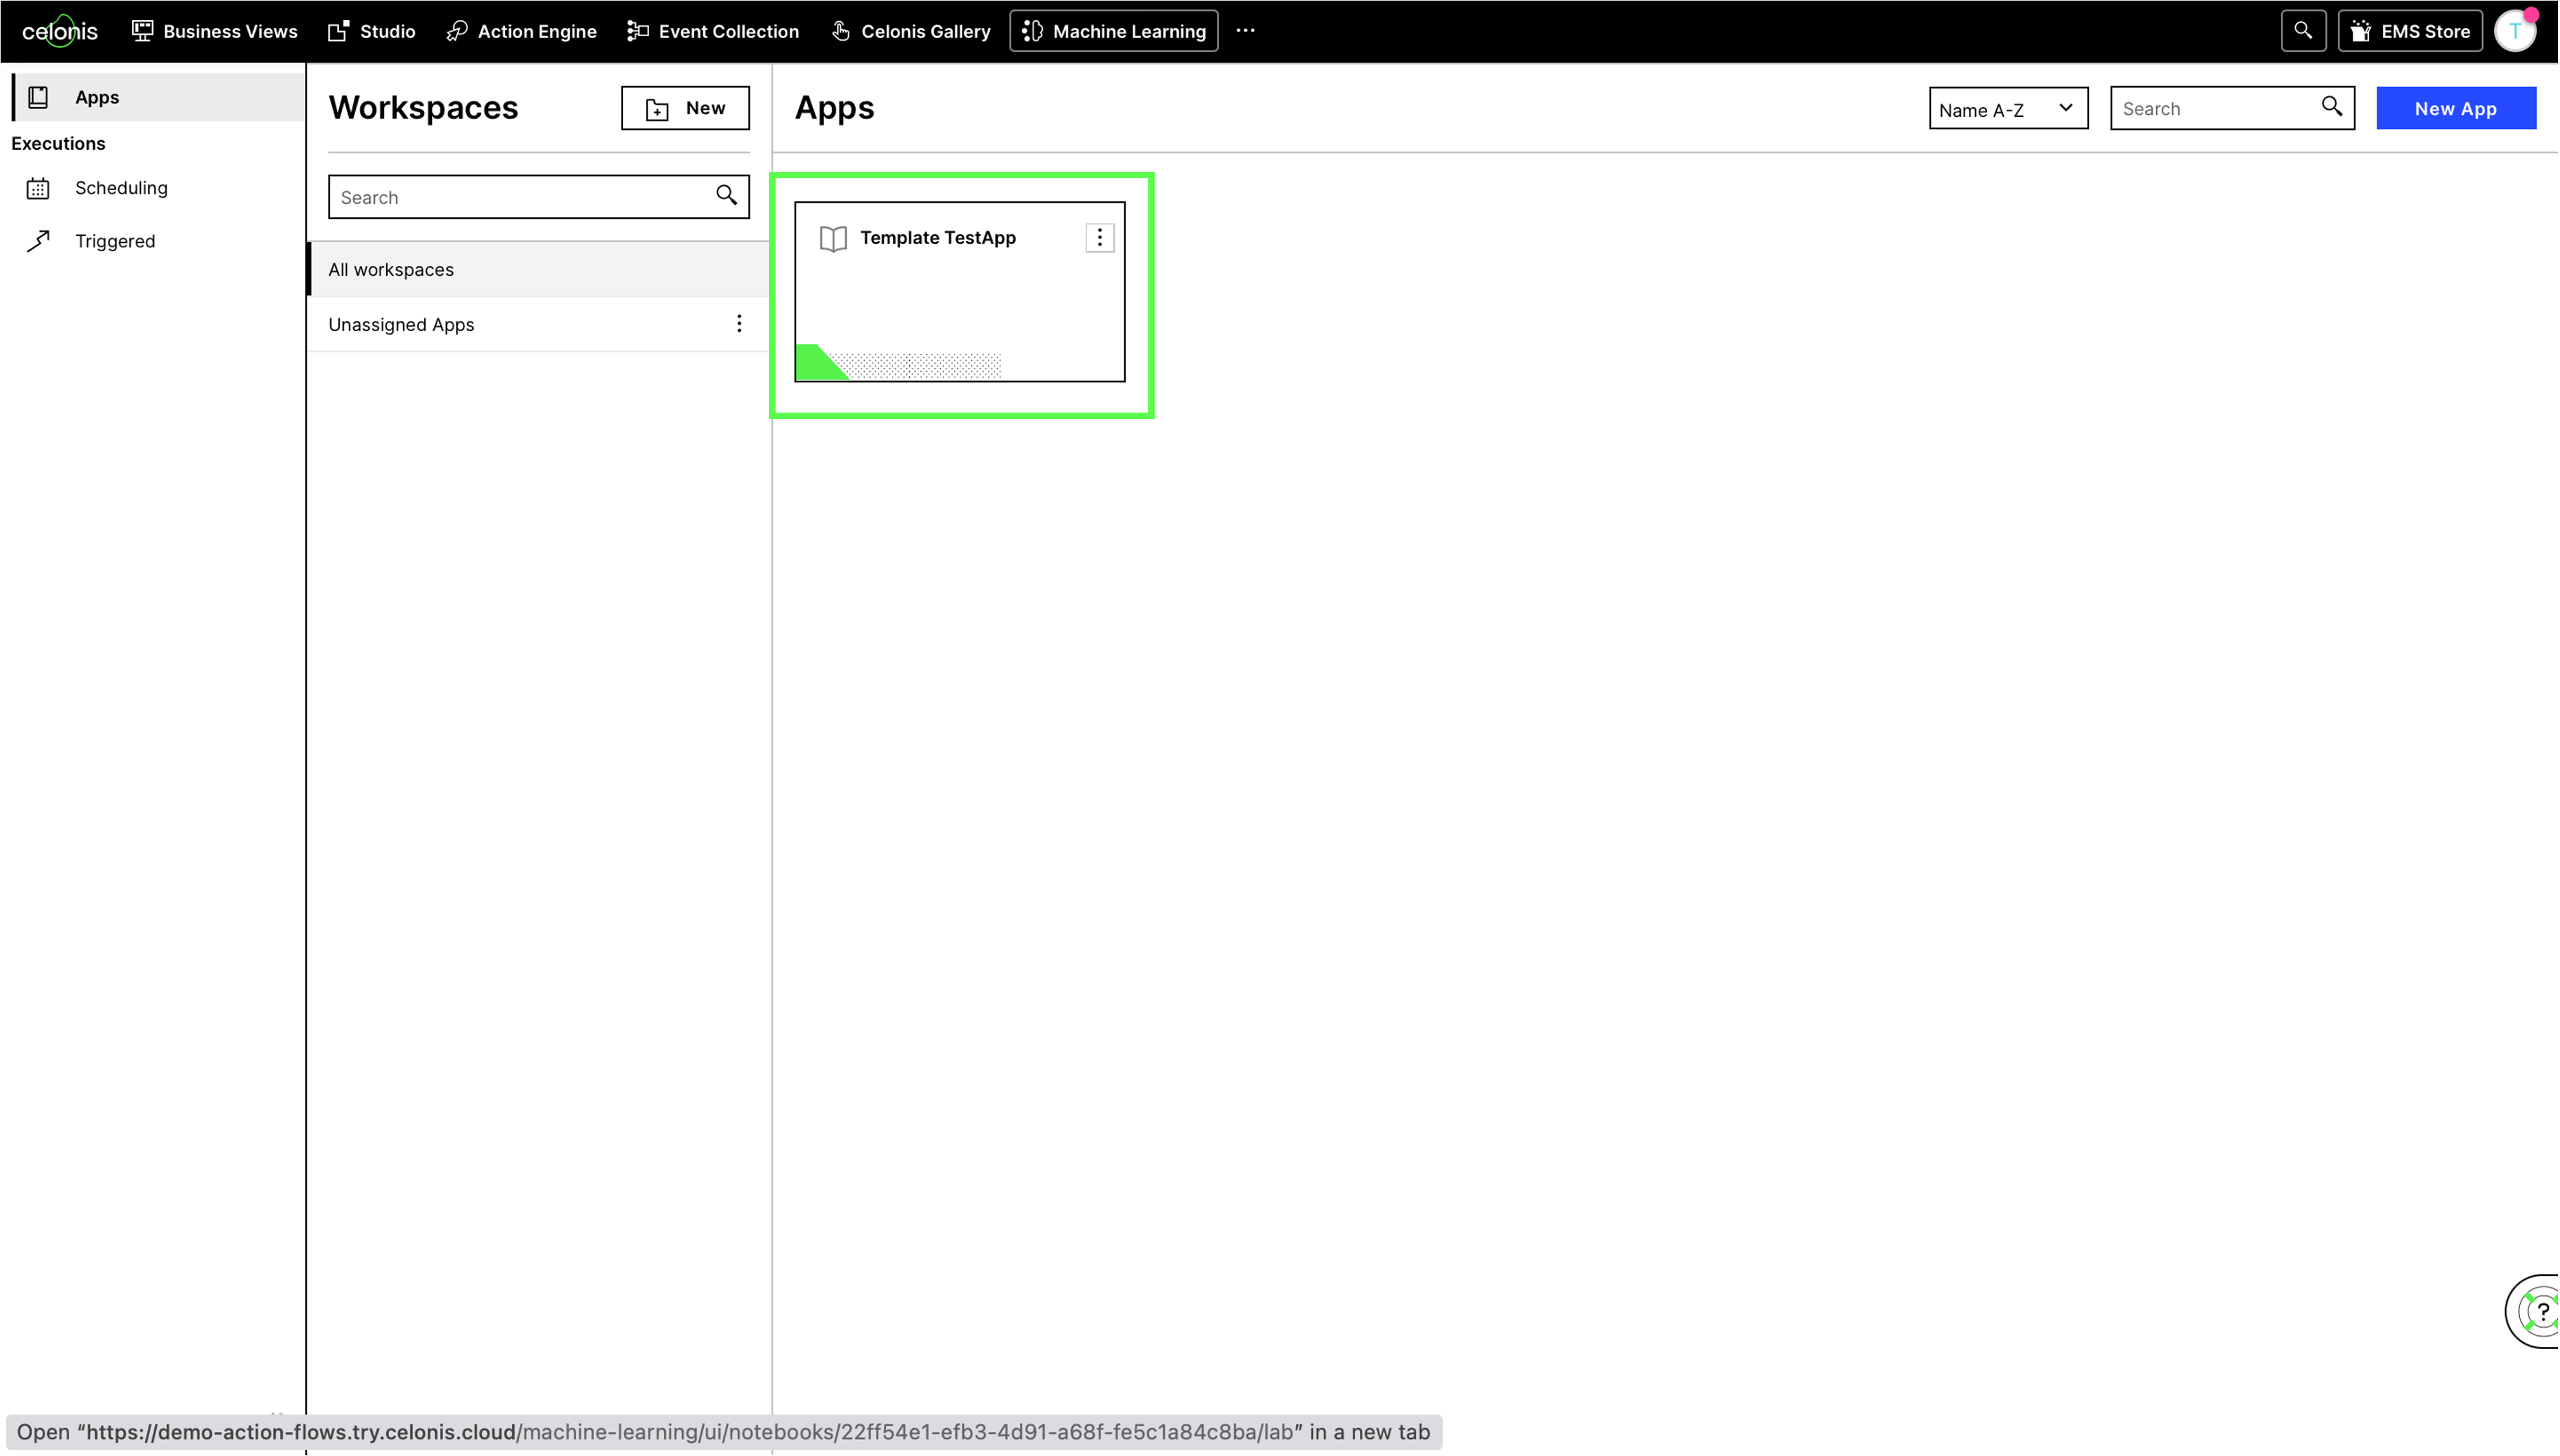
Delay
When creating a new ML App, it can take a few minutes up to one hour until it can be opened.
Import the Script provided above.

Make sure it is uploaded successfully and displayed in the section on the left.
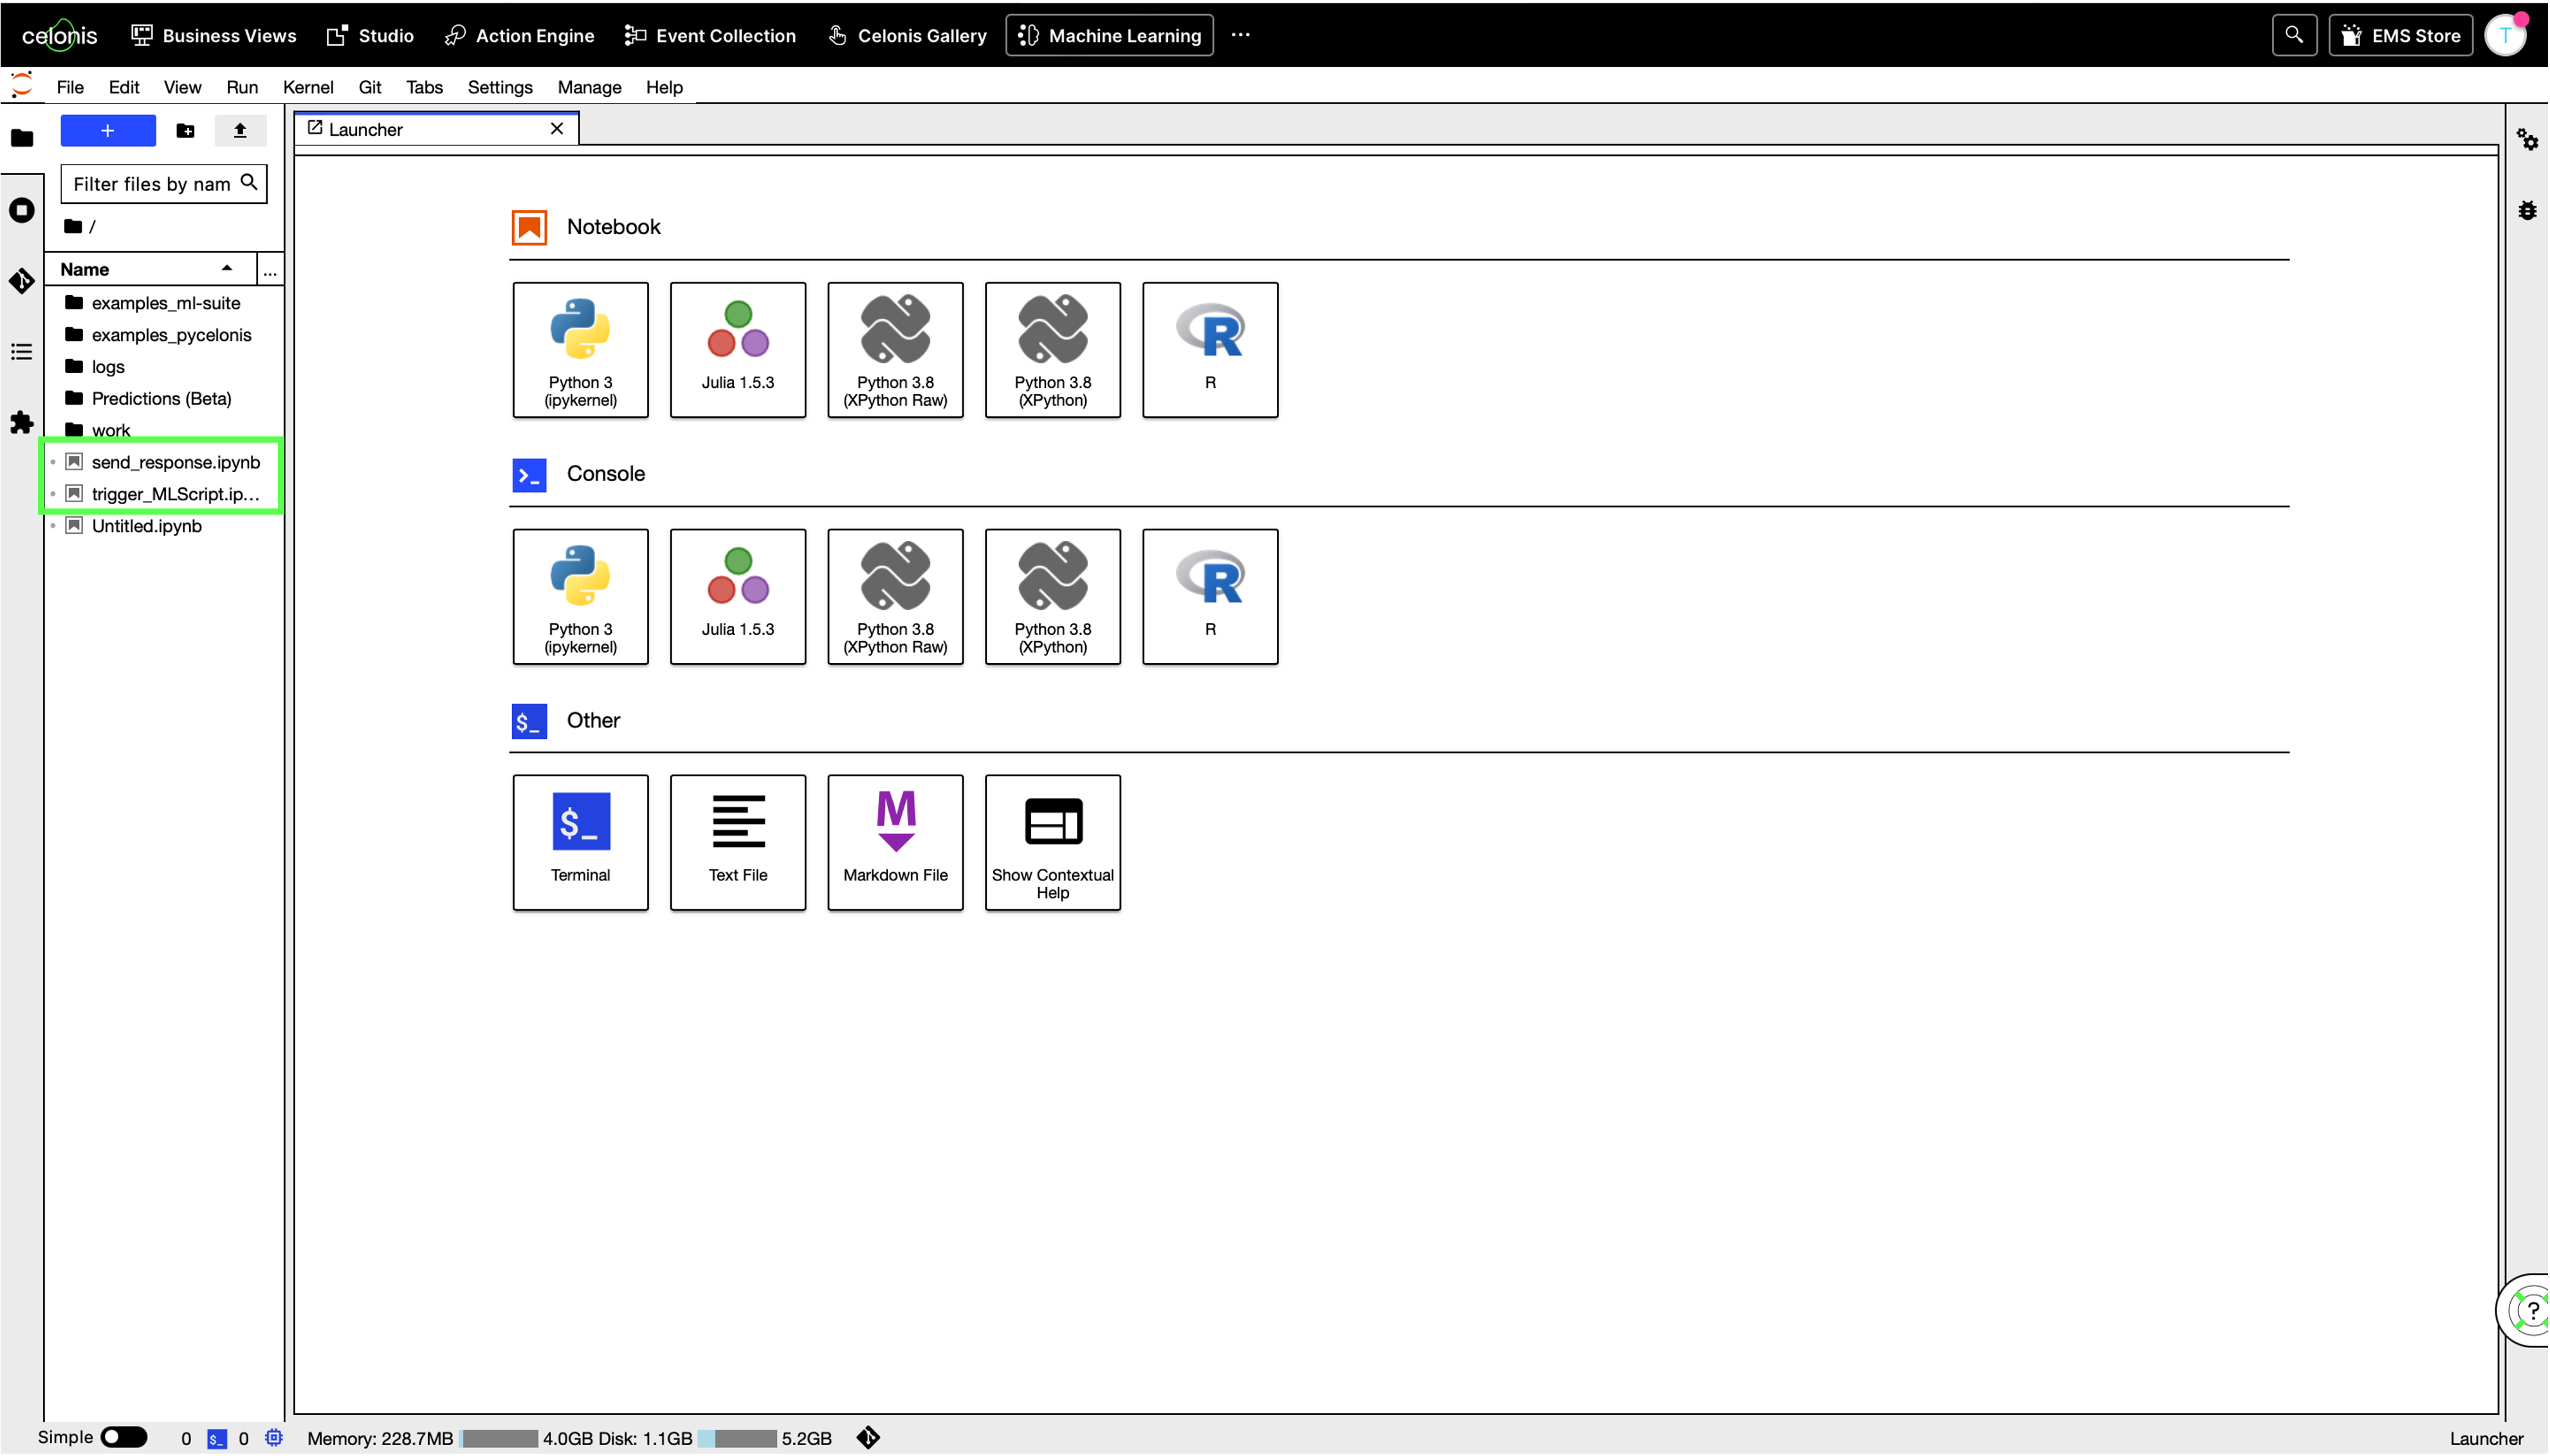
Copy the
notebookIdto the clipboard and add it to the variables as the value for the notebookId in the "Customize Variables" module in the Triggering Action Flow.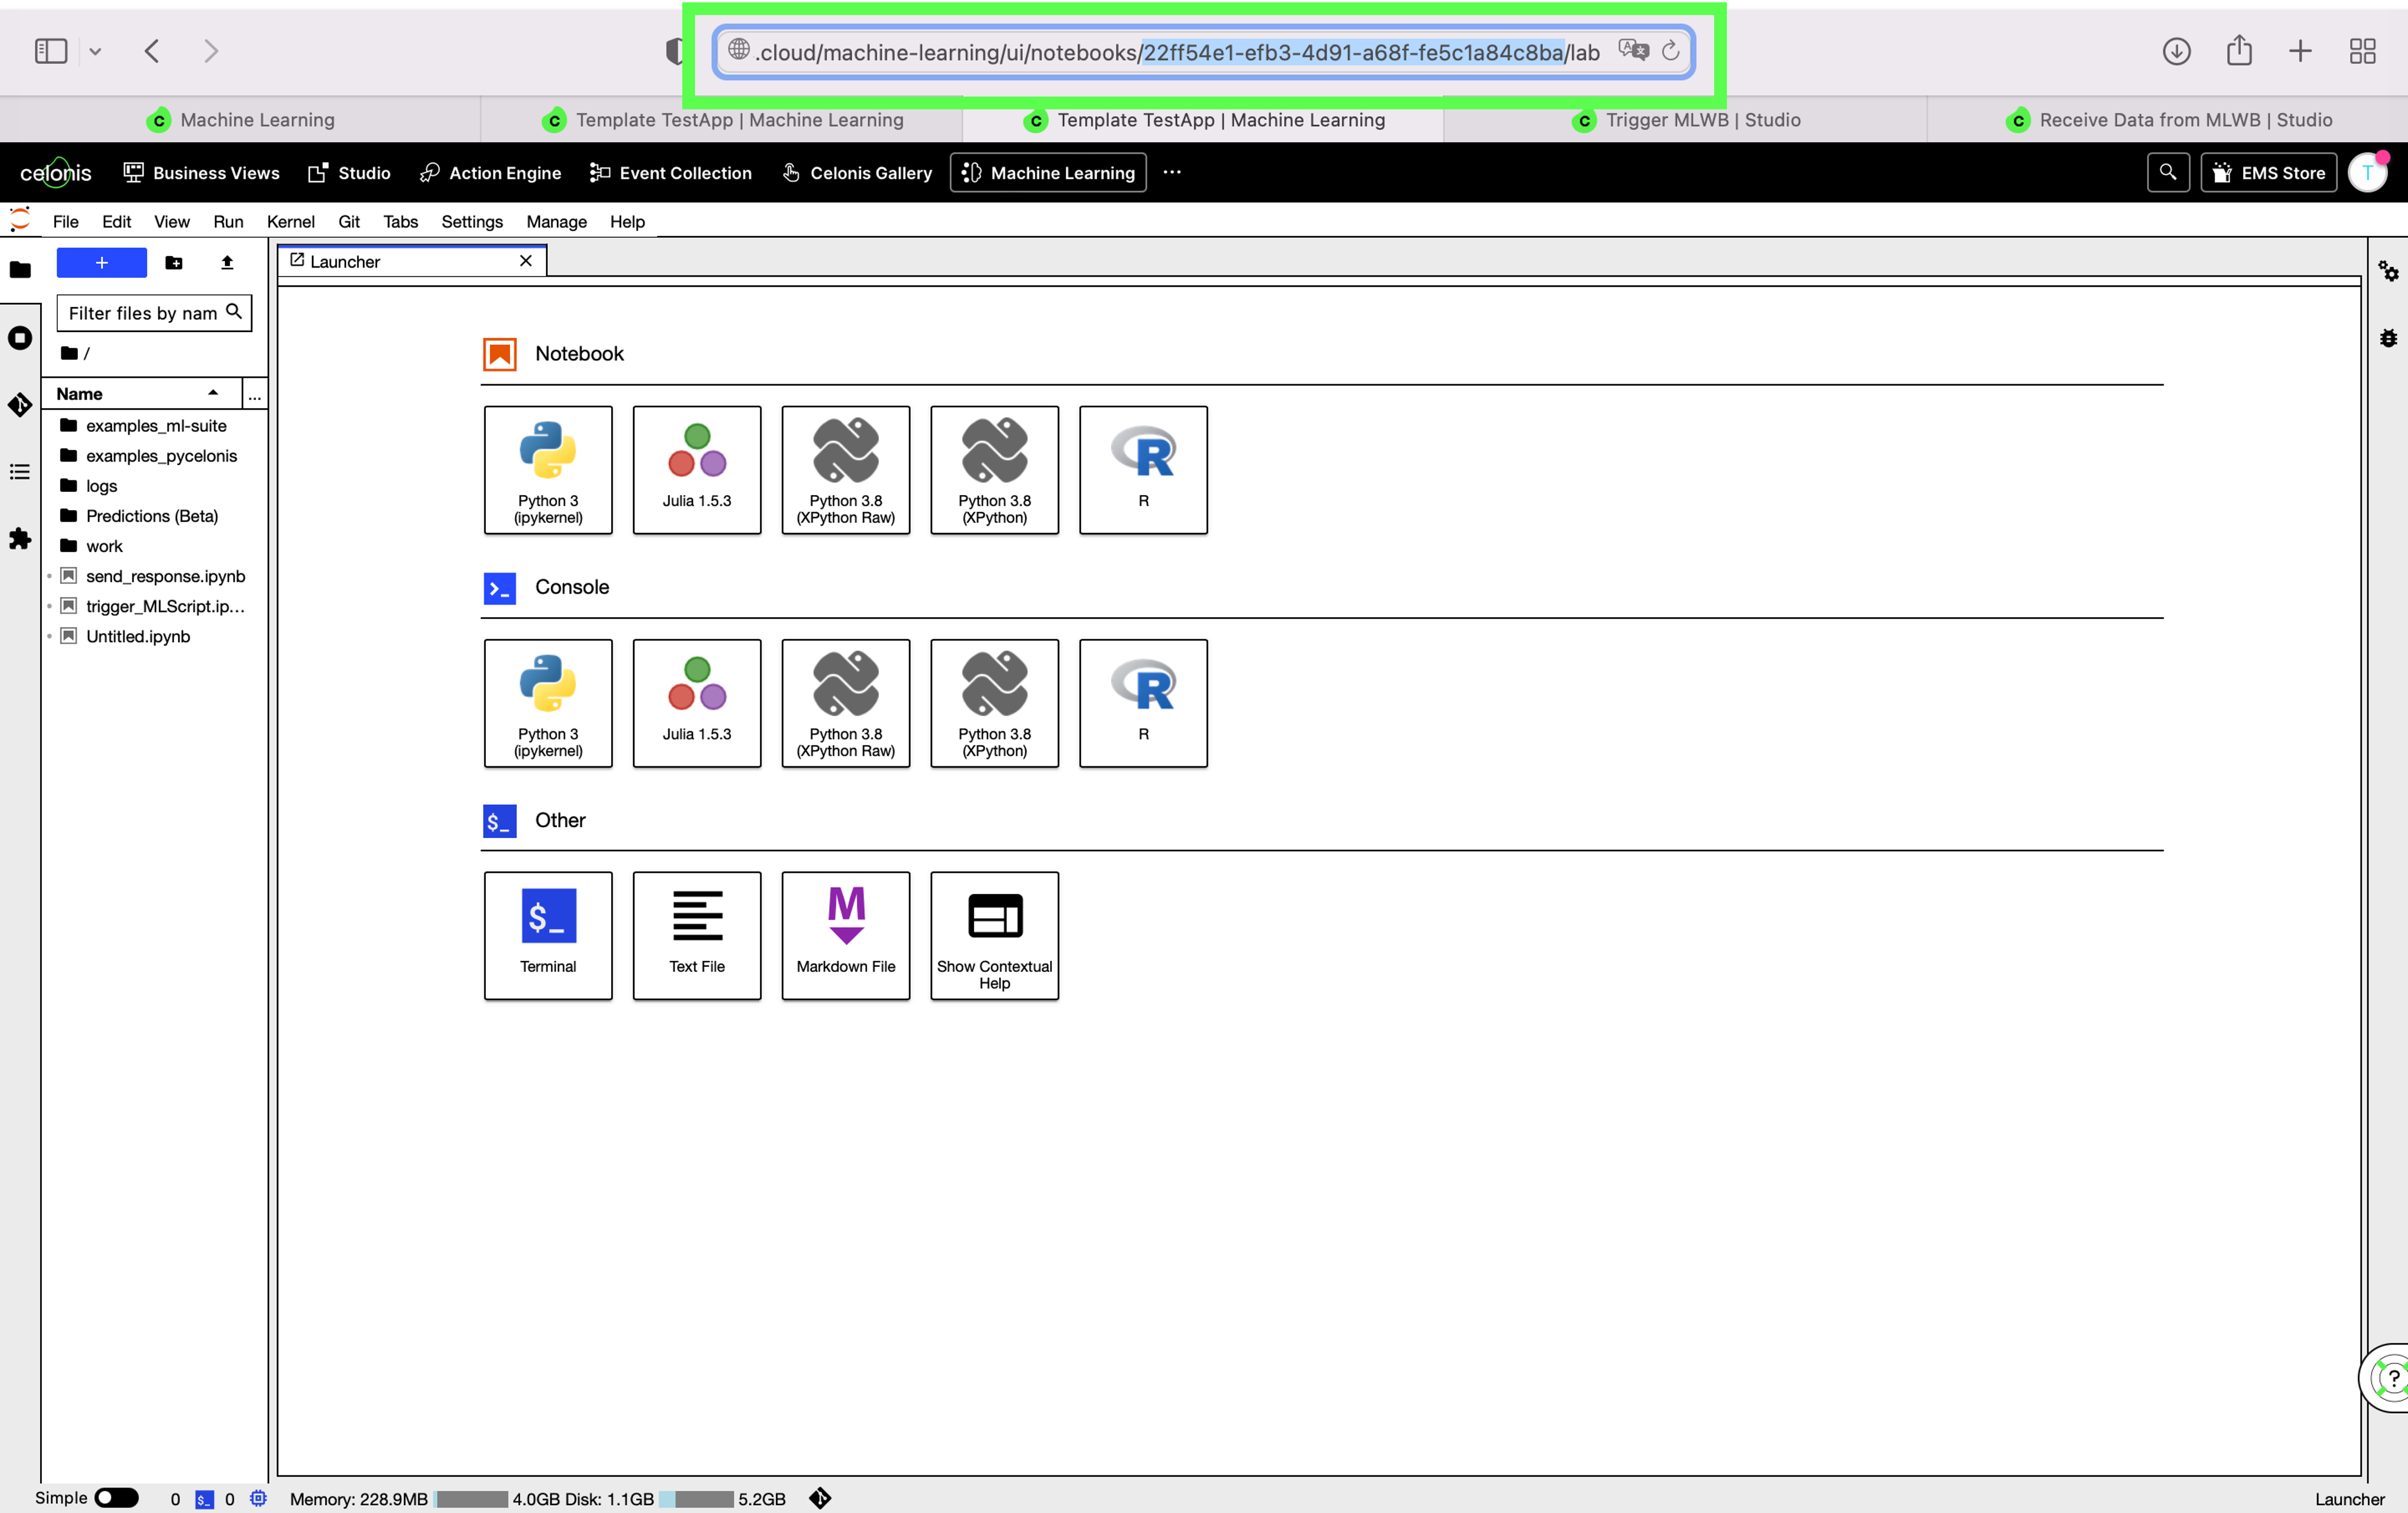
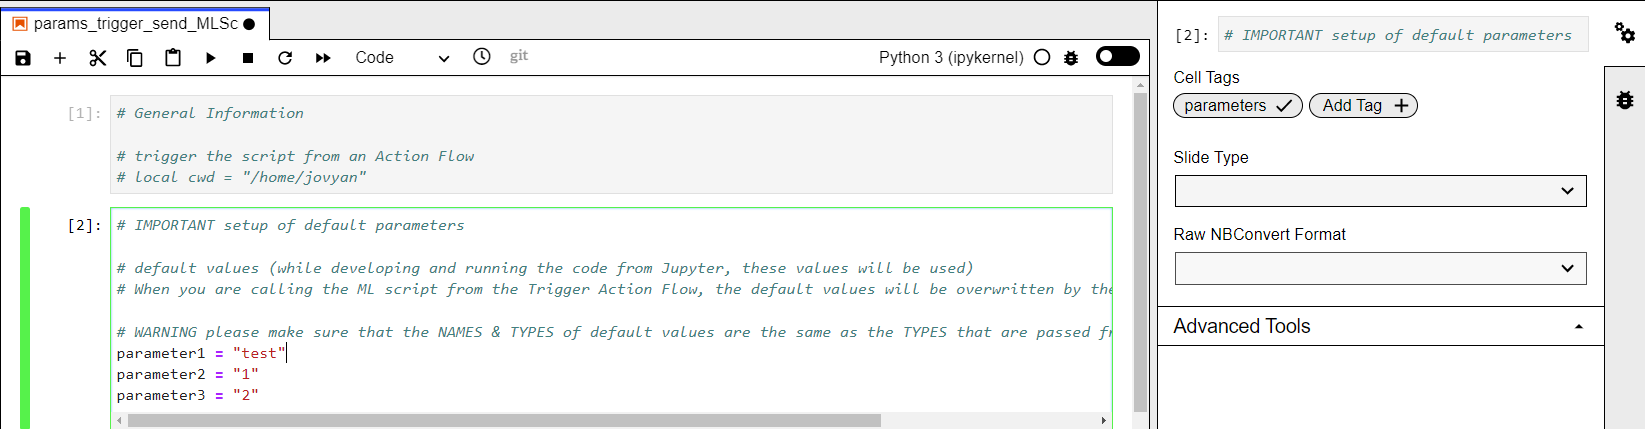
Mandatory Step for Parameters
When developing your Python code, you can define default values for the parameters to run the script by itself and test your logic.
IMPORTANT Tag the cell of your Notebook with the Tag "parameters" where you set your default values with the same data type that you will pass from the Action Flow. While developing and running the code from Jupyter, these values will be used. When you are calling the Notebook from the Action Flow, the default values will be overwritten by the ones passed by the Action Flow.