Adding Actions to Studio components
Actions are interactive triggers that allow users to execute automated workflows, such as launching Action Flows or sending emails, directly from a Studio component. By adding action buttons, you bridge the gap between data insights and immediate operational response.
In a standard dashboard, users identify issues but must leave the platform to fix them. Actions transform Studio Views into operational hubs, allowing users to trigger ERP updates, notify stakeholders, or resolve process bottlenecks without switching applications.
To add actions to Studio components:
In Celonis Platform, go to a selected View.
Select an existing component to which you want to add an Action or drag and drop that component from the component menu. For the list of components to which you can add actions, see the table before.
Add Action.

Select the action you want to add to the component.
Configure your action and click Done.
You can edit this Action at any time by returning to the table settings and clicking the Edit button.
Select the Action Flow to be executed when the action button is clicked.
If the select Action Flow requires an input, you can define expected input type using free text option or a drop list.
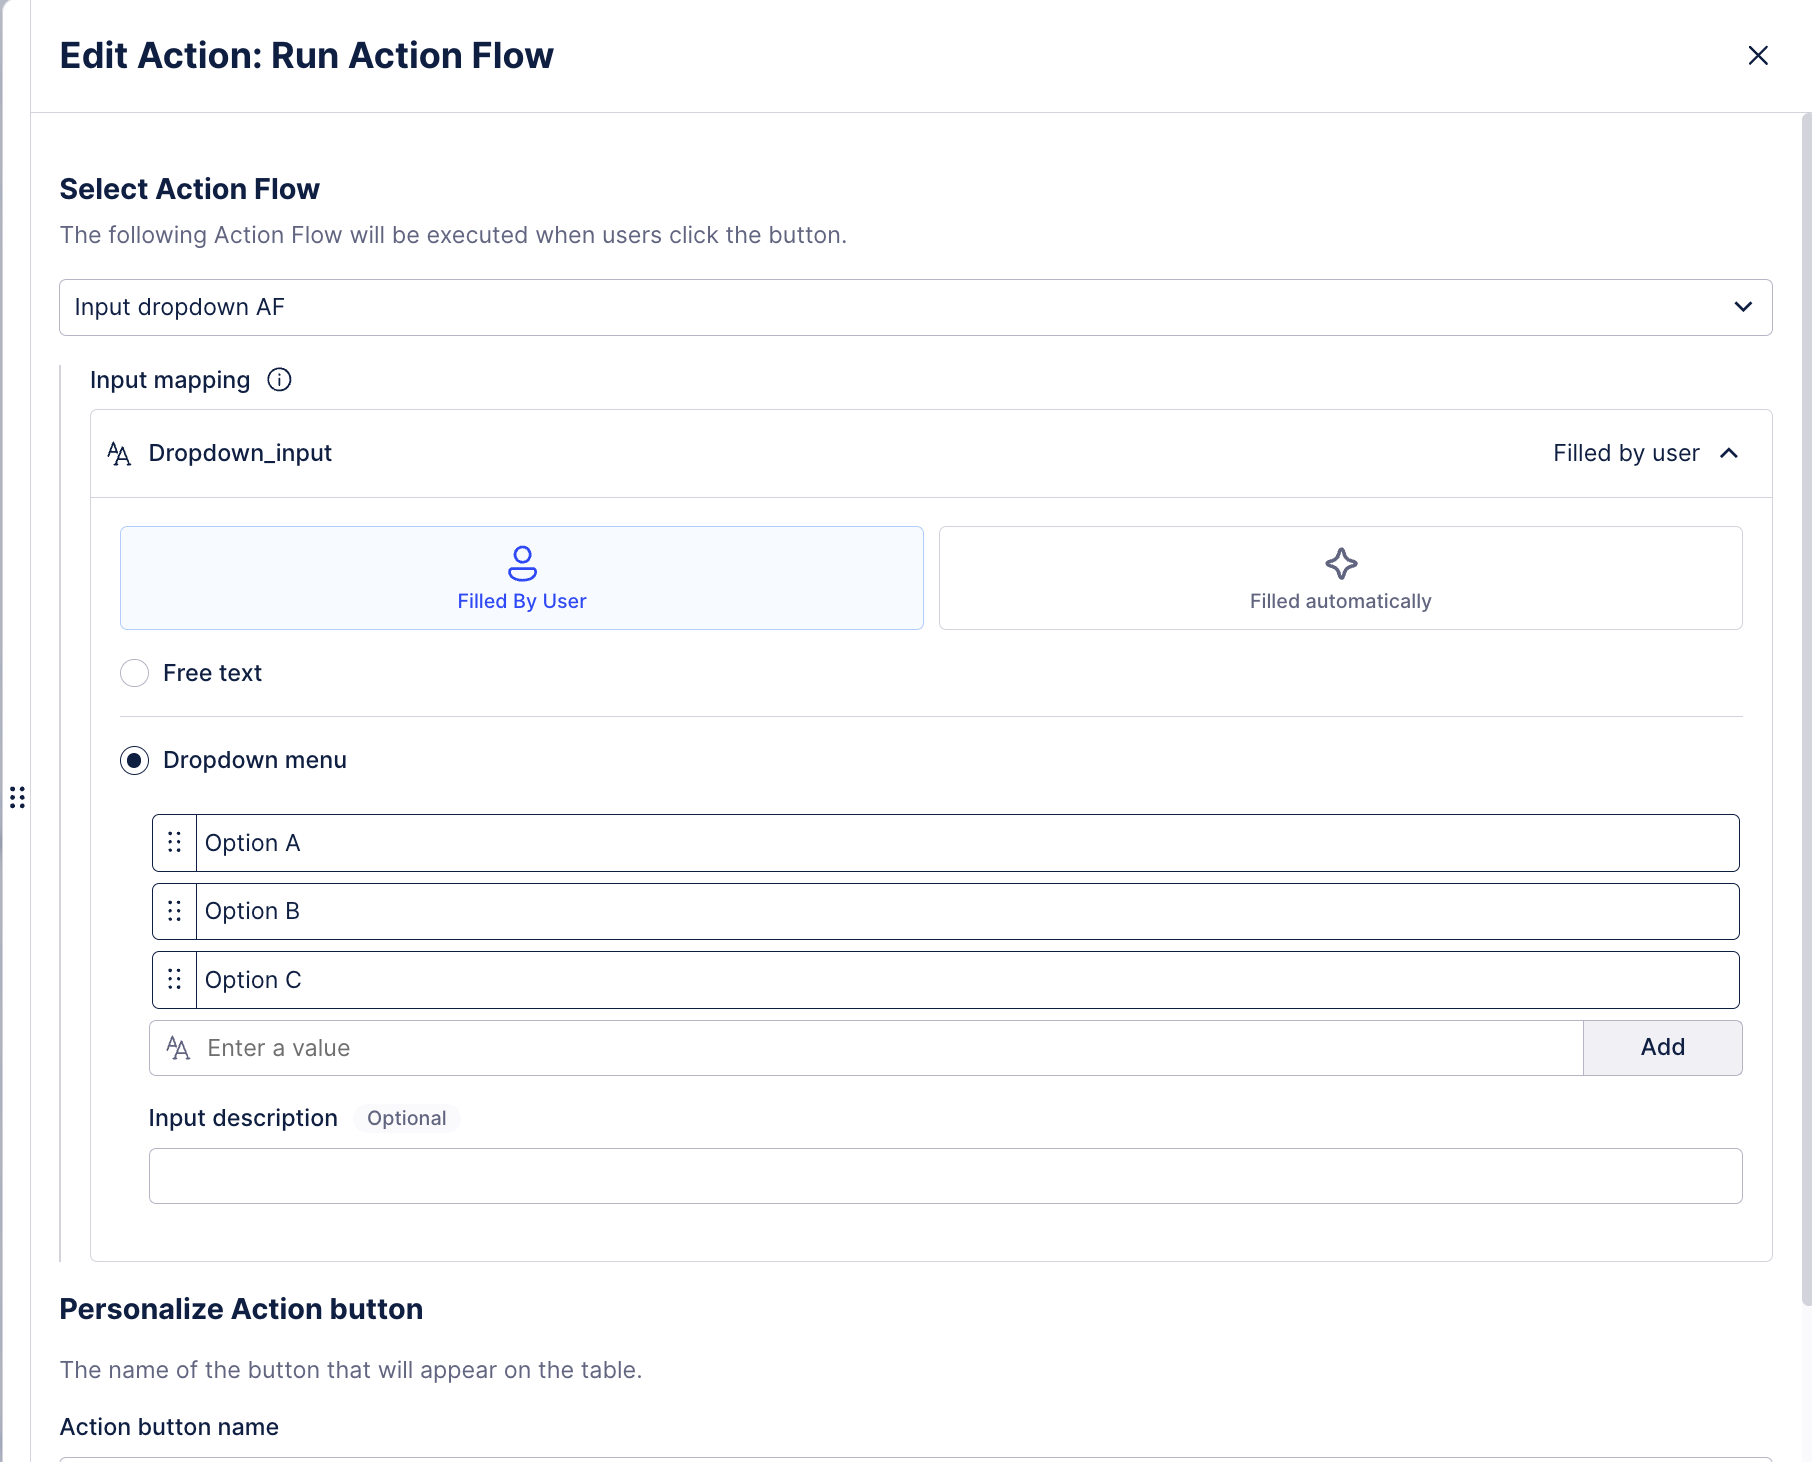
Give your Action button a name.
(optional) Add a tooltip to the Action button.
(optional) Click Add filter to define conditions for displaying your Action.
You will be redirected to the PQL editor, where you can specify for what table row values your Action will be enabled.
Note
Filtering is only available for Actions added to Table components.
The run Action Flow action has now been configured. You can edit this action at any time by returning to the table settings and clicking the Edit button.
Using table actions, you can update augmented attributes when interacting with them in a published View. With the attributed selected, a customizable button appears above the table, allowing you to update values in real-time.
Augmented attributes are a Knowledge Model asset that can be updated in real-time and without the data model reloading. For more information, see Augmented attributes.
Select the augmented attributes you want to update from those available and then personalize the action button.
(optional) Click Add filter to define conditions for displaying your Action.
You will be redirected to the PQL editor, where you can specify for what table row values your Action will be enabled.
Note
Filtering is only available for Actions added to Table components.
Click Done.
The update augmented attribute button has now been configured. You can edit this Action at any time by returning to the table settings and clicking the Edit button.
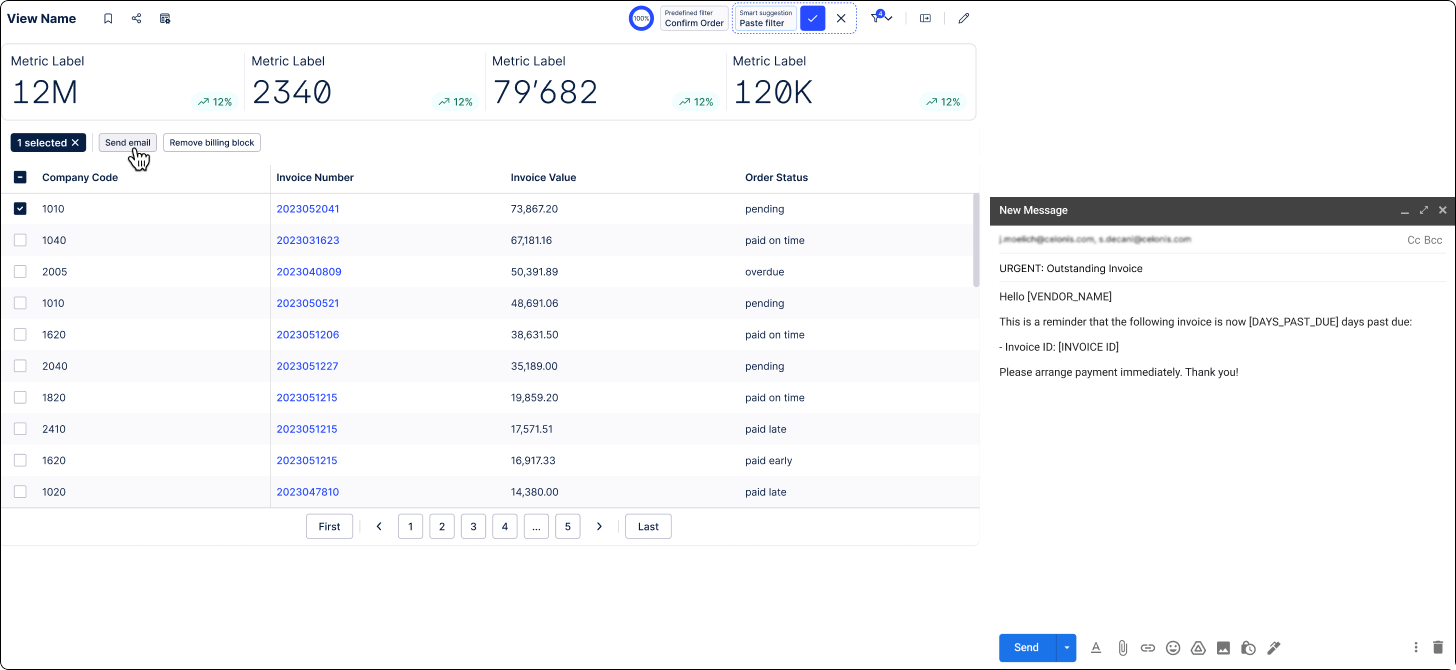
Send emails with a click of a button directly from Studio views.
Select how you would like action emails to be sent:
Default system mail application (mailto) - sends email from users email address
Celonis service - sends email from Celons service email address: noreply@celonismail.com
Customize the action button.
Give your Action button a name.
(optional) Add a tooltip to the Action button.
(optional) Create template for your email - enter recipients, subject, and body text.
When creating an email template, you can insert dynamic placeholders into the body text.
(optional) Define conditions for displaying your Action. Click Add filter.
You will be redirected to the PQL editor, where you can specify for what table row values your Action will be enabled.
Note
Filtering is only available for Actions added to Table components.
The send email action has now been configured. You can edit this Action at any time by returning to the table settings and clicking the Edit button.
Enter the full URL.
Give your Action button a name.
(optional) Add a tooltip for the Action button.
This action allows you to manually create Tasks for other users.
From the list of actions available for a given component, select Create Task.
Select the Data Model table for which users will be creating Tasks.
Define the Task title. Select one of the following:
Filled by user - allow users to provide the title when creating Tasks. You can either allow users to enter any title or provide a list of titles from which users will have to choose one.
Filled automatically - provide the title yourself for all Tasks created using this action.
Give your Action button a name.
(optional) Add a tooltip for the Action button.
(optional) Click Add filter to define conditions for displaying your Action.
You will be redirected to the PQL editor, where you can specify for what table row values your Action will be enabled.
Note
Filtering is only available for Actions added to Table components.
Click Add.