Setting up JDBC Extractors on Kubernetes
This guide is for deploying the containerized JDBC extractor to Kubernetes using kubectl. The provided manifests can also be used with GitOps (i.e. ArgoCD) for better management of your extractor deployment.
To set up the JDBC extractor on Kubernetes, you need the following:
A provisioned Kubernetes cluster
Appropriate RBAC setup
kubectlinstalled locally with the rightkubeconfigcontext setDocker, Podman, or another tool for interacting with OCI container images installed locally. This guide will assume you are using Docker but you can run the same commands with Podman or another suitable tool.
Access to a container registry and that you have logged in to the registry using docker login.
Note
Celonis currently does not provide our image via a public registry, a ZIP export of the built container image is provided on our Download Portal and can be uploaded to a customer-maintained image registry.
To do this, follow these steps:
In your dev environment, run the following command to verify
dockeris installed and configured for your user:docker run hello-world
You should get a message back that indicates a successful image pull and container run.
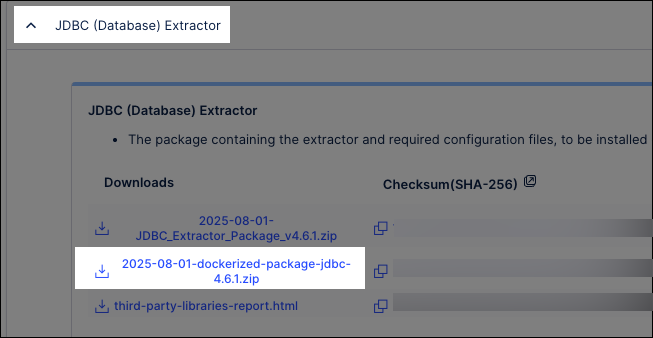
In the Celonis Platform, click Admin & Settings > Download Portal, and download the latest JDBC (Database) Extractor zip file:
Run the following command to unzip the file and change into the created directory:
unzip <YYYY-MM-DD>-dockerized-package-jdbc-<VERSION>.zip$ cd <YYYY-MM-DD>-dockerized-package-jdbc-<VERSION>
You may need to install unzip from your systems package manager if it is not already present.
Run the following command to load the extractor image into Docker:
docker load --input <connector_package_name>.tar
You can now use the
docker imagescommand to verify that the container image is present on the system:docker images
This should return results including:
REPOSITORY               TAG       IMAGE ID       CREATED        SIZE
connector-jdbc-on-prem   <VERSION>     a28b0627b300   2 weeks ago    877MB
Run the following command to re-tag the image for the remote registry:
docker tag connector-jdbc-on-prem:<VERSION>
<REGISTRY_AND_NAMESPACE>/<NEW_IMAGE_NAME>:<VERSION>
For example, if you want to keep the image name as
connector-jdbc-on-prem, the version is 3.7.4, and your registry/namespace isdocker.io/acme_inc, you would run the following command:docker tag connector-jdbc-on-prem:3.7.4 docker.io/acme_inc/connector_jdbc_on_prem:3.7.4
You can verify this was successful with the docker images command. Both images should appear separately but with the same
IMAGE ID.REPOSITORY TAG IMAGE ID CREATED SIZE connector-jdbc-on-prem 3.7.4 1ee472ded783 3 months ago 502MB docker.io/acme_inc/connector_jdbc_on_prem 3.7.4 1ee472ded783 3 months ago 502MB
Run the following command to push the image to the remote registry:
docker push <REGISTRY_AND_NAMESPACE>/<NEW_IMAGE_NAME>:<VERSION>
So following our example above, the command would look like this:
docker push docker.io/acme_inc/connector_jdbc_on_prem:3.7.4
You can now deploy to Kubernetes by following these steps:
Create a
kubernetes-manifest.yamlfile using the following information:# This is a comprehensive Kubernetes manifest to deploy the JDBC Extractor. # It includes a Secret, ServiceAccount, Deployment, and NetworkPolicy. # # How to use: # 1. Edit this file and replace all placeholder values (e.g., <YOUR_CONTAINER_REPO>, <CELONIS_CLIENT_ID_BASE64>). # 2. Make sure to update the resources section under the Deployment to match your specific sizing requirements. # 3. Make sure if you are using a private container registry, you have created the necessary image pull secret and uncomment the `imagePullSecrets` section. # 4. Take special care to ensure that the labels app.kubernetes.io/name, app.kubernetes.io/instance, and app.kubernetes.io/version are set correctly. # 5. Save the file as 'kubernetes-manifest.yaml'. # 6. Apply it to your cluster with: kubectl apply -f kubernetes-manifest.yaml -n <your-namespace> --- # 1. Secret: Stores all sensitive information. # IMPORTANT: The values here are base64 encoded. You must encode your actual secrets. # Example: echo -n 'your-real-secret' | base64 apiVersion: v1 kind: Secret metadata: name: jdbc-extractor-secret type: Opaque data: # Replace with your base64 encoded Celonis Client ID uplink-client-id: <CELONIS_CLIENT_ID_BASE64> # Replace with your base64 encoded Celonis Client Secret uplink-client-secret: <CELONIS_CLIENT_SECRET_BASE64> # --- Optional Proxy Credentials --- # If using a proxy, uncomment and replace with your base64 encoded credentials. # proxy-username: <YOUR_PROXY_USERNAME_BASE64> # proxy-password: <YOUR_PROXY_PASSWORD_BASE64> --- # 2. ServiceAccount: Provides a dedicated identity for the application pod. apiVersion: v1 kind: ServiceAccount metadata: name: jdbc-extractor-sa --- # 3. Deployment: Defines how to run the application container. apiVersion: apps/v1 kind: Deployment metadata: name: jdbc-extractor-deployment labels: app.kubernetes.io/name: celonis-jdbc-extractor app.kubernetes.io/instance: prod-extractor app.kubernetes.io/version: "3.7.4" app.kubernetes.io/managed-by: kubectl spec: replicas: 2 selector: matchLabels: app.kubernetes.io/name: celonis-jdbc-extractor app.kubernetes.io/instance: prod-extractor template: metadata: labels: app.kubernetes.io/name: celonis-jdbc-extractor app.kubernetes.io/instance: prod-extractor spec: serviceAccountName: jdbc-extractor-sa # --- Optional Image Pull Secret --- # If your container image is in a private registry, uncomment the following # lines and replace 'my-registry-secret' with the name of your secret. # imagePullSecrets: # - name: my-registry-secret containers: - name: jdbc-extractor # IMPORTANT: Replace with the path to your image in ECR. image: <YOUR_CONTAINER_REPO>/<IMAGE_NAME>:<VERSION> imagePullPolicy: IfNotPresent env: - name: MANAGEMENT_ENDPOINT_HEALTH_PROBES_ENABLED value: "true" - name: UPLINK_ENABLED value: "true" - name: UPLINK_URL # IMPORTANT: Replace with your Celonis team URL. value: "https://<your-team>.<your-realm>.celonis.cloud/uplink/api/public/uplink" - name: UPLINK_CLIENTID valueFrom: secretKeyRef: name: jdbc-extractor-secret key: uplink-client-id - name: UPLINK_CLIENTSECRET valueFrom: secretKeyRef: name: jdbc-extractor-secret key: uplink-client-secret # --- Optional Proxy Configuration --- # To enable, uncomment this section and provide your proxy details. # - name: PROXY_ENABLED # value: "true" # - name: PROXY_HOST # value: "<your-proxy-host>" # - name: PROXY_PORT # value: "<your-proxy-port>" # - name: PROXY_USERNAME # valueFrom: # secretKeyRef: # name: jdbc-extractor-secret # key: proxy-username # - name: PROXY_PASSWORD # valueFrom: # secretKeyRef: # name: jdbc-extractor-secret # key: proxy-password ports: - name: http containerPort: 8080 - name: debug containerPort: 5005 resources: requests: memory: "4Gi" cpu: "1000m" limits: memory: "16Gi" cpu: "8000m" # --- Optional Volume for Custom JDBC Drivers --- # To enable, uncomment this section. # volumeMounts: # - name: custom-driver-volume # mountPath: /app/drivers/oracle-driver.jar # The full path where the driver will be available inside the container # subPath: my-drivers/oracle-driver.jar # The path to the file *inside the PVC* # volumes: # - name: custom-driver-volume # persistentVolumeClaim: # claimName: <YOUR_PVC_NAME> # The name of your PersistentVolumeClaim --- # 4. NetworkPolicy: Allows necessary outbound traffic from the pod. apiVersion: networking.k8s.io/v1 kind: NetworkPolicy metadata: name: jdbc-extractor-allow-egress spec: podSelector: matchLabels: app.kubernetes.io/name: celonis-jdbc-extractor app.kubernetes.io/instance: prod-extractor policyTypes: - Egress egress: # Rule 1: Allow DNS lookups (crucial for resolving the uplink URL). - to: - namespaceSelector: matchLabels: kubernetes.io/metadata.name: kube-system podSelector: matchExpressions: - key: k8s-app operator: In values: - kube-dns - coredns - namespaceSelector: matchLabels: network.openshift.io/policy-group: dns podSelector: matchExpressions: - key: dns.operator.openshift.io/daemonset-dns operator: In values: - default ports: - protocol: UDP port: 53 - protocol: TCP port: 53 # Rule 2: Allow outbound HTTPS traffic (consider a more specific policy to whitelist Celonis IPs if no cluster-wide policy is managing this). - to: - ipBlock: cidr: 0.0.0.0/0 except: - 10.0.0.0/8 # Private networks - 172.16.0.0/12 # Private networks - 192.168.0.0/16 # Private networks - 127.0.0.0/8 # Loopback - 169.254.0.0/16 # Link-local - 224.0.0.0/4 # Multicast ports: - protocol: TCP port: 443 # HTTPS only # Rule 3: Allow traffic to internal database servers (if needed) # Uncomment and customize this rule if you need to connect to internal databases and repeat if needed # - to: # - ipBlock: # cidr: 10.0.0.0/8 # Adjust to your internal database IP or range of IPs # # Uncomment the following lines to allow specific database ports # ports: # - protocol: TCP # port: 1433 # SQL Server # - protocol: TCP # port: 1521 # Oracle # - protocol: TCP # port: 5432 # PostgreSQL # - protocol: TCP # port: 3306 # MySQLEdit the created
kubernetes-manifest.yamlfile, which contains the following resource manifests to deploy the on-premise extractor:Note
You may wish to modify some or all of these manifests according to your company practices for managing Kubernetes. For example, if you have a cluster or name space
NetworkPolicyyou may wish to omit theNetworkPolicysection.Secret: Stores sensitive credentials (Celonis client ID/secret, proxy credentials).
ServiceAccount: Provides dedicated identity for the application pod.
Deployment: Defines the application container with proper resource limits.
NetworkPolicy: Restricts network access following security best practices.
If needed, run the following command to create a Kubernetes
namespaceto deploy extractor to:kubectl create namespace <your-namespace>
If running multiple extractors, one design pattern is to create a separate namespace for each extractor. Another design pattern is to have a shared namespace for all extractors. If this pattern is followed, make sure you update
app.kubernetes.io/instanceand the name of each resource (Deployment, Secret, ServiceAccount, and NetworkPolicy) throughout the file to avoid conflicts.Create the image pull secret.
If you used a username and password to authenticate with your registry, you can run the following command:
kubectl create secret docker-registry my-registry-secret \
    --docker-server=<your-registry-server> \
    --docker-username=<your-username> \
    --docker-password=<your-password> \
    --namespace=<your-namespace>
Otherwise, see the Kubernetes docs for more information.
Prepare your secrets by encoding them your secrets in
base64:# Encode Celonis credentials echo -n 'your-celonis-client-id' | base64 echo -n 'your-celonis-client-secret' | base64 # If using proxy, encode proxy credentials echo -n 'your-proxy-username' | base64 echo -n 'your-proxy-password' | base64
Replace the following placeholder values:
Required replacements:
<YOUR_CONTAINER_REPO>: Your container registry URL<IMAGE_NAME>: Your JDBC extractor image name.<VERSION>: Your image version/tag.<CELONIS_CLIENT_ID_BASE64>: Base64 encoded Celonis client ID.<CELONIS_CLIENT_SECRET_BASE64>: Base64 encoded Celonis client secret.<your-team>: Your Celonis Platform team name.<your-realm>: Your Celonis Platform realm (e.g., us-1, eu-1).
Optional replacements (if using proxy):
<YOUR_PROXY_USERNAME_BASE64>: Base64 encoded proxy username.<YOUR_PROXY_PASSWORD_BASE64>: Base64 encoded proxy password.<your-proxy-host>: Your proxy server hostname.<your-proxy-port>: Your proxy server port.
Uncomment and populate sections for image pull secret, proxy configuration, volume for custom drivers, and network rules for internal database connections (see optional configurations for more details).
Run the following command to apply the manifest and create resources on the cluster:
kubectl apply -f kubernetes-manifest.yaml -n <your-namespace>
Using
kubectl applywill create resources that don't exist and update any existing resources if needed.The sample deployment is configured with two replicas. Given the same client ID and secret, replicas will load balance by default in an active-active configuration. To update anything about your Kubernetes deployment, just change the relevant information in the YAML manifest (i.e. image version) and re-run
kubectl apply.
Custom JDBC drivers
To use custom JDBC drivers:
Create a
PersistentVolumeClaimwith your driver files.Uncomment the
volumeMountsandvolumessections in the manifest.Update
<YOUR_PVC_NAME>with your PVC name.Adjust the mount paths as needed.
Proxy configuration
If your environment requires proxy access:
Uncomment the proxy-related sections in both the Secret and Deployment.
Provide your proxy credentials and configuration.
Set
PROXY_ENABLEDto "true".
Proxy configuration for Docker deployment
To deploy your JDBC extractor through Docker, use the following proxy settings:
docker run -e UPLINK_ENABLED=true \
           -e UPLINK_URL=https://<team>.<realm>.celonis.cloud/uplink/api/public/uplink \
           -e UPLINK_CLIENTID=<clientId> \
           -e UPLINK_CLIENTSECRET= <clientSecret> \
           -e PROXY_ENABLED=true
           -e PROXY_HOST=localhost
           -e PROXY_PORT=8080
           -e PROXY_USERNAME=username
           -e PROXY_PASSWORD=pass
           connector-jdbc-on-prem:<version>
Internal database access
If you need to connect to internal databases, modify the NetworkPolicy:
Uncomment "Rule 3" in the
NetworkPolicy.Update the CIDR ranges to match your internal networks. Or duplicate the rule per database if you prefer to whitelist specific IP(s) instead of a CIDR range.
Add specific database ports as needed.
Check deployment status
# View pod status
kubectl get pods -n <your-namespace> -l app.kubernetes.io/name=celonis-jdbc-extractor

# Check pod logs
kubectl logs -n <your-namespace> deployment/jdbc-extractor-deployment

# Describe pod for detailed information
kubectl describe pod -n <your-namespace> -l app.kubernetes.io/name=celonis-jdbc-extractor
Network troubleshooting
# Test network connectivity from pod
kubectl exec -it -n <your-namespace> deployment/jdbc-extractor-deployment -- getent hosts <your-team>.<your-realm>.celonis.cloud

# Check NetworkPolicy
kubectl describe networkpolicy -n <your-namespace> jdbc-extractor-allow-egress
Resource monitoring
# Check resource usage
kubectl top pods -n <your-namespace>

# View resource limits
kubectl describe deployment -n <your-namespace> jdbc-extractor-deployment
Resource allocation
The deployment is configured with production-ready resource limits. Adjust accordingly per your sizing requirements:
Requests: 4Gi RAM, 1 CPU core (guaranteed resources).
Limits: 16Gi RAM, 8 CPU cores (maximum allowed resources).
These limits support large-scale data extraction operations while preventing resource exhaustion.
Network security
The NetworkPolicy implements a restrictive security model:
Allowed Outbound Traffic:
DNS lookups (UDP/TCP port 53).
HTTPS traffic to external endpoints (TCP port 443).
Internal databases as specifically whitelisted.
Blocks access to private networks.
Blocked Traffic:
All internal network ranges (10.0.0.0/8, 172.16.0.0/12, 192.168.0.0/16).
Loopback addresses (127.0.0.0/8).
Link-local addresses (169.254.0.0/16).
Multicast addresses (224.0.0.0/4).
Environmental variables
Variable | Description | Required |
|---|---|---|
MANAGEMENT_ENDPOINT_HEALTH_PROBES_ENABLED | Enables healthcheck endpoints. | Yes (keep value as true) |
UPLINK_ENABLED | Enables Celonis uplink connection. | Yes |
UPLINK_URL | Celonis uplink API endpoint. | Yes |
UPLINK_CLIENTID | Celonis client ID (from secret). | Yes |
UPLINK_CLIENTSECRET | Celonis client secret (from secret). | Yes |
PROXY_ENABLED | Enables proxy connection. | No |
PROXY_HOST | Proxy server hostname. | No |
PROXY_PORT | Proxy server port. | No |
PROXY_USERNAME | Proxy username (from secret). | No |
PROXY_PASSWORD | Proxy password (from secret). | No |