Transformation Hub in Views: Configuring the object-centric data model
To get your app up and running, you will connect your KPI Logging Combined Data Pool to the Marketplace Installed Pool within Data Integration. By sharing global connections and synchronizing tables, you enable the app to pull real-time snapshot data. You will then configure the OCDM transformations (specifically for snapshots, KPIs, and logs) and deploy a custom perspective to your Studio package. Finally, you will secure the connection by granting the necessary permissions to an App Key, ensuring your data flows seamlessly into the Transformation Hub views.
If you are performing this setup right now, keep these high-level phases in mind:
Data linking: Use the "Share Data with other data pools" feature to link your source KPI logs to the app's target pool.
Selective transformation: Only enable the four primary objects (
THSnapshot,THKPI,THKPILog, andTHKPILogMetadata) during the initial setup to ensure a clean data load.Variable assignment: Don't forget to head back to your Studio Package Settings to assign the newly created perspective to your Data Model variable; otherwise, the app will appear empty.
Security: Ensure your App Key has "Editor" access at the package level and "All Permissions" at the data pool level to avoid writeback or loading errors.
Before you begin, ensure you have completed the following steps or meet the requirements listed below:
Installed app: You've installed the Transformation Hub in Views app, creating an auto-generated data pool titled 'Marketplace Installed Pool'. See: Installing the App.
Configured KPI Snapshots: You've activated the KPI Snapshots service and created a KPI Snapshot, creating an data pool titled 'KPI Logging Combined Data Pool'. See: KPI Snapshots.
Admin access: You have admin access to the Celonis Platform team you're working in, allowing you to create an application key. See: User and team roles
First, you need to share the data from your source pool (KPI Logging Combined Data Pool) to the app's target pool (Marketplace Installed Pool):
From your Celonis Platform team, click Data Integration .
Locate and open your
KPI Logging Combineddata pool, opening the data pool overview page.
Click Data Connections.
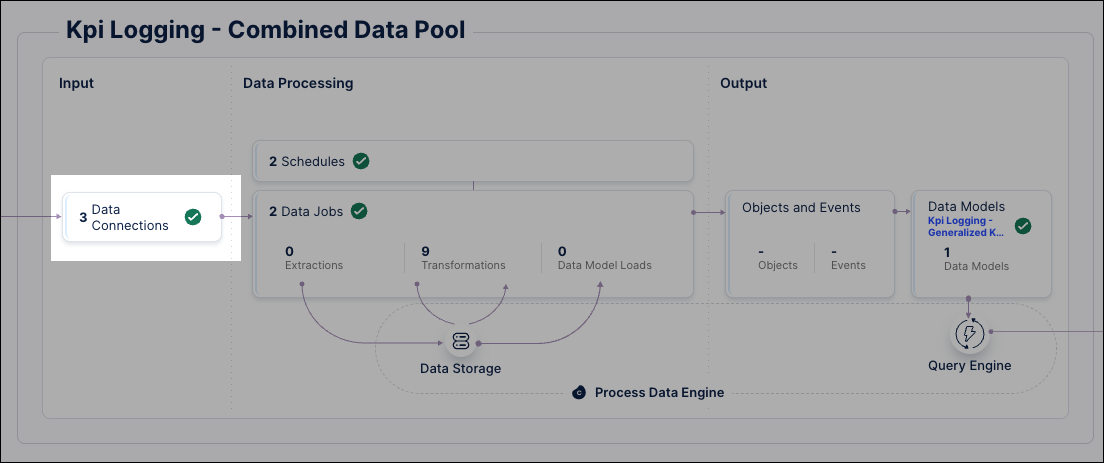
Locate your Global Data Connection and click Options - Share Data with other Data Pools.

Select your Marketplace Installed Pool and click Next.
Enable Automatically share new tables.
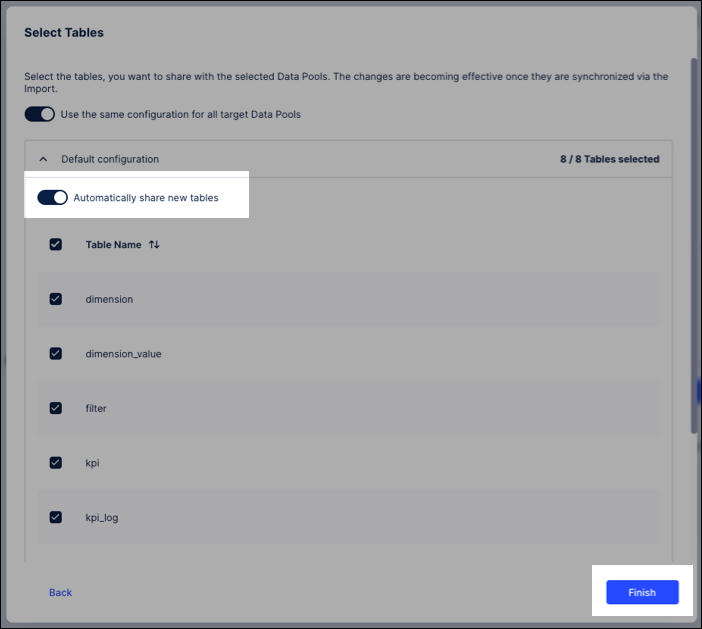
Click Finish.
With your data pools successfully linked, you are ready to begin Synchronizing and Importing.
You now need to pull the shared data into your target data pool:
Click Data Integration.
Locate and open your
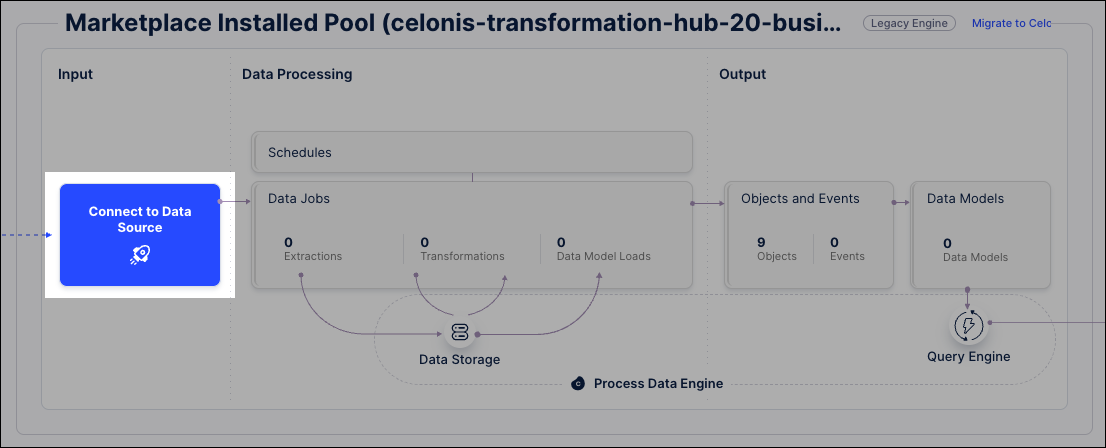
Marketplace Installed Pool.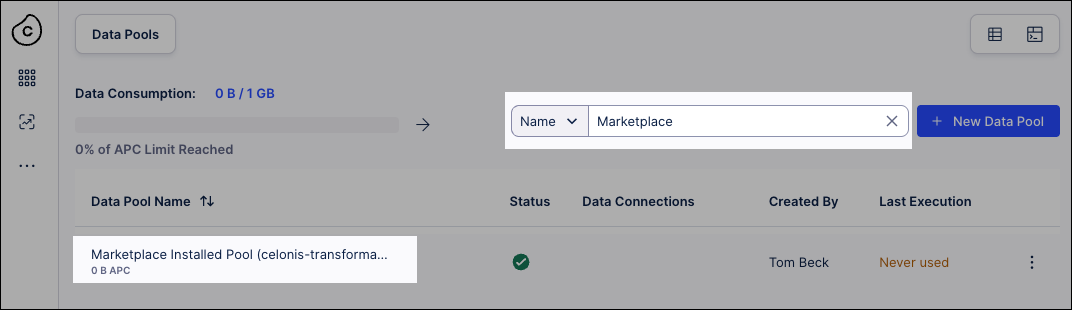
Click Connect to Data Source.
Select Import Data from another Data Pool , choose your source connection, and click Next.
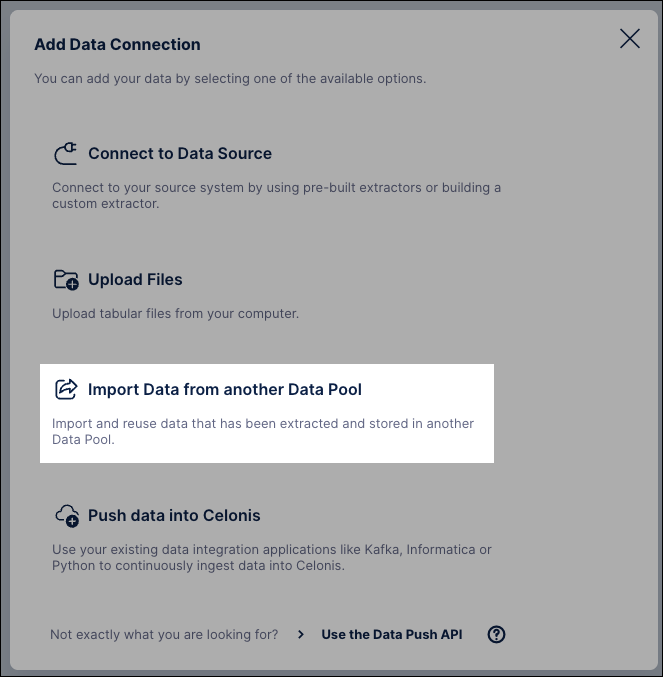
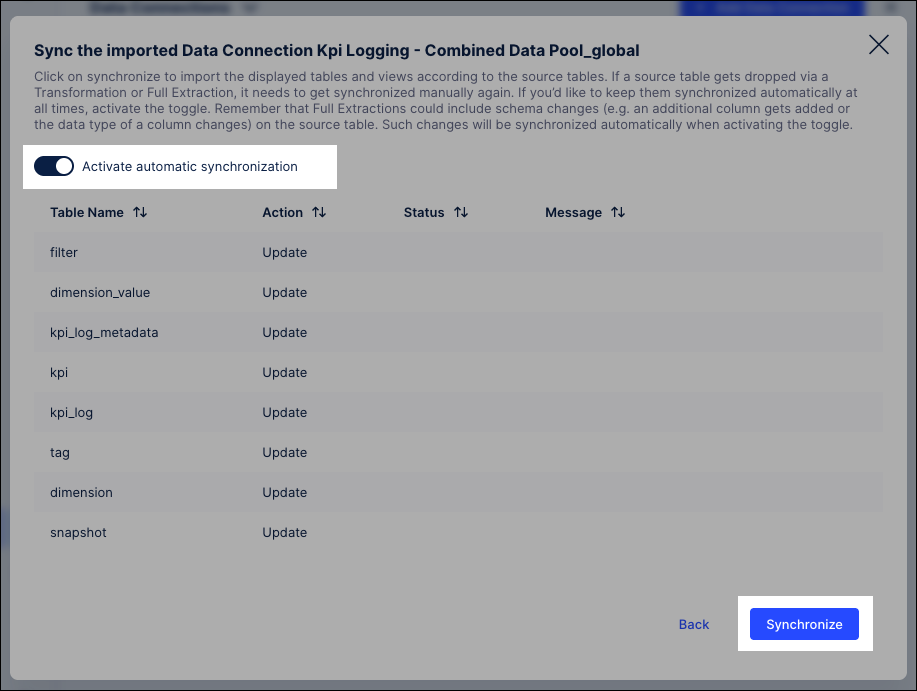
Enable Activate automationc synchronization and click Synchronize.
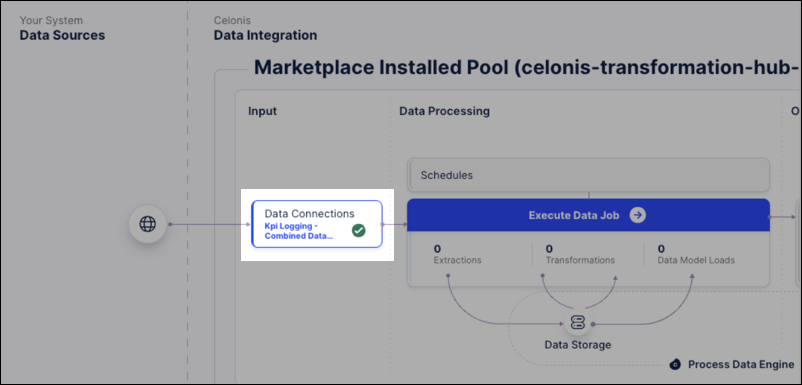
The data connection has now been established and is visible in your data pool:
Now that your data is synchronized, you can proceed to Step 3: Configuring OCDM transformations.
To prepare the specific objects required for the Transformation Hub:
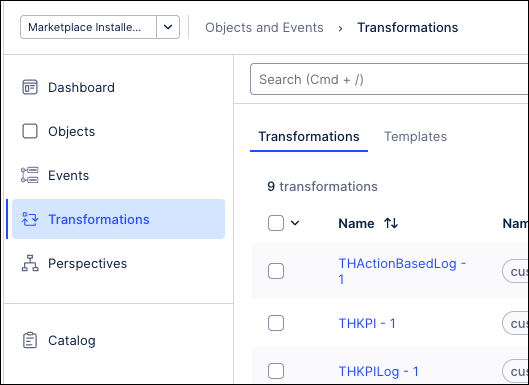
From your Marketplace Installed Pool data pool, click Objects and Events.
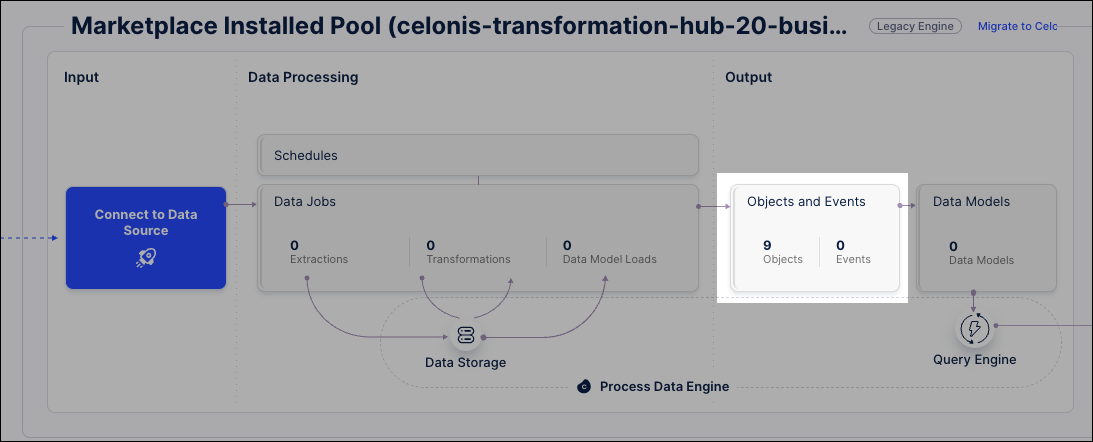
Alternatively, click Objects and Events from the main navigation and select your Marketplace Installed Pool.

From the Objects and Events dashboard, click Transformations.
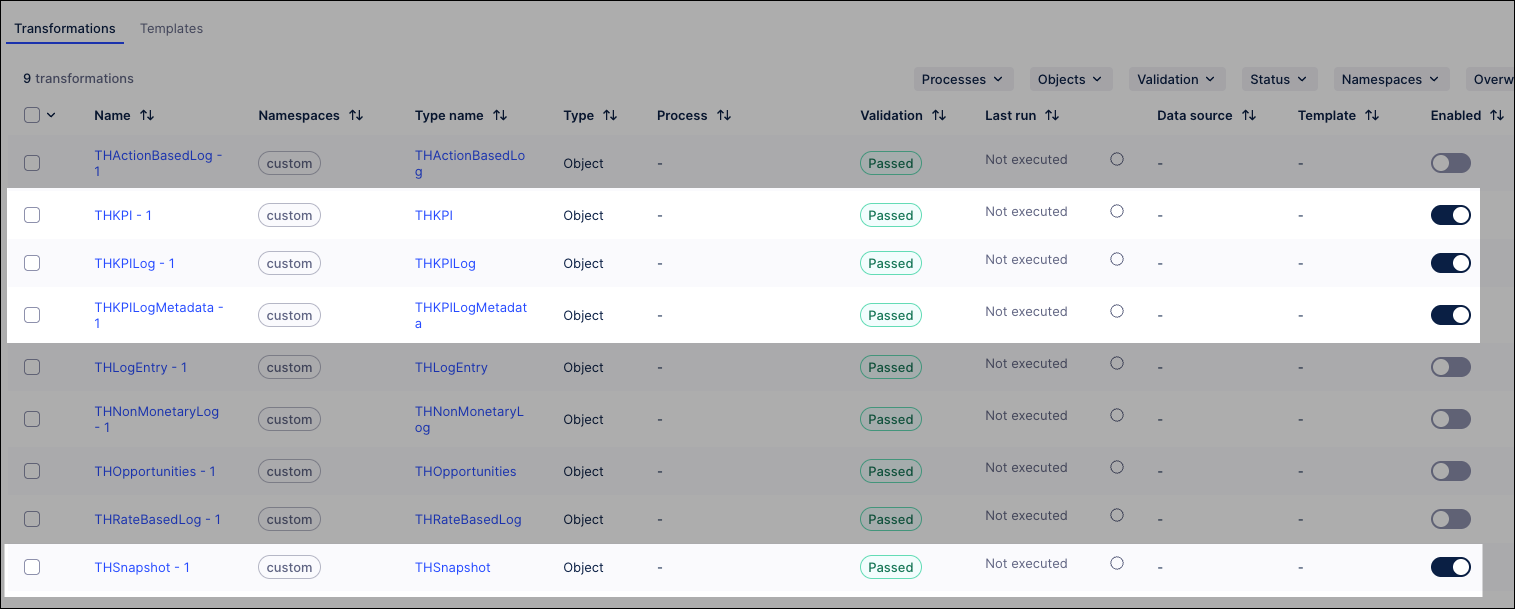
Enable the following transformations, ensuring the other transformations are disabled.
THSnapshot - 1THKPI - 1THKPILog - 1THKPIlogMetadata - 1
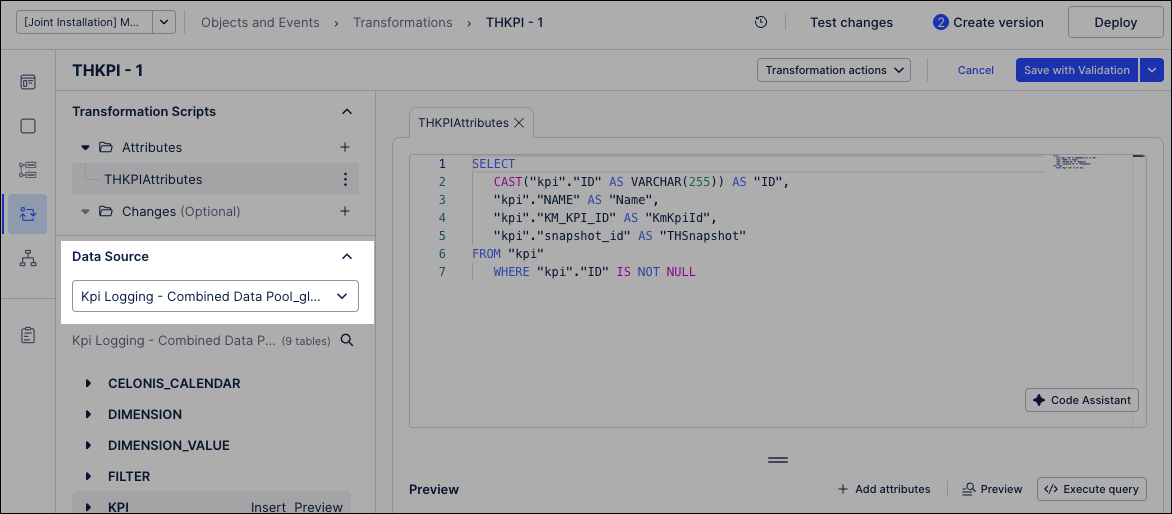
For each of the four enabled objects, click the object and then select KPI Logging Combined Data Pool as the data source.
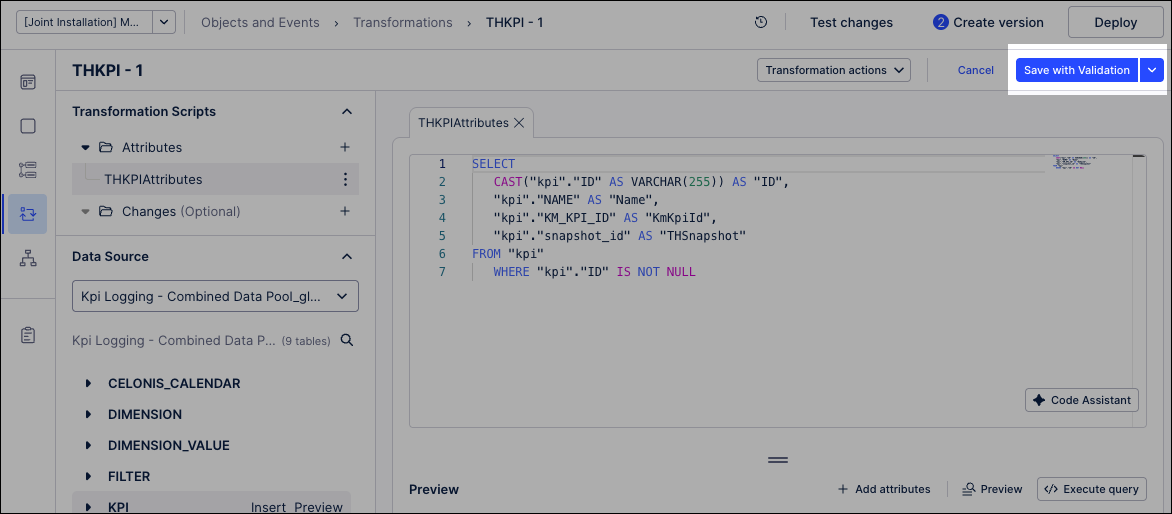
Click Save with Validation.
With your OCDM transformations validated, you are ready to Step 4: Deploying and loading.
You now need to create a data model version, deploy that version to a development enviroment, and then load your data jobs:
From your Objects and Events dashboard, click Create version.
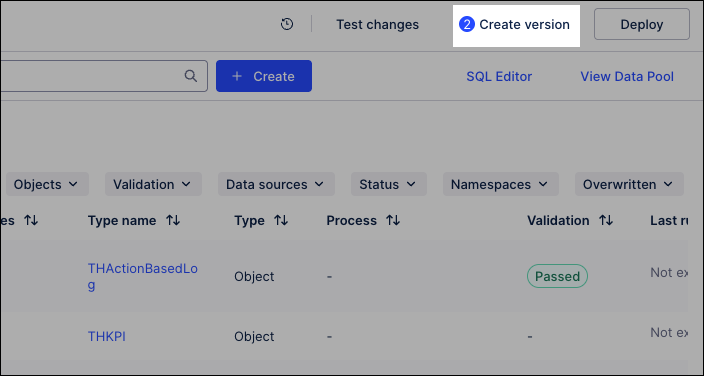
Select Open deployment after creating the version and click Create Version.
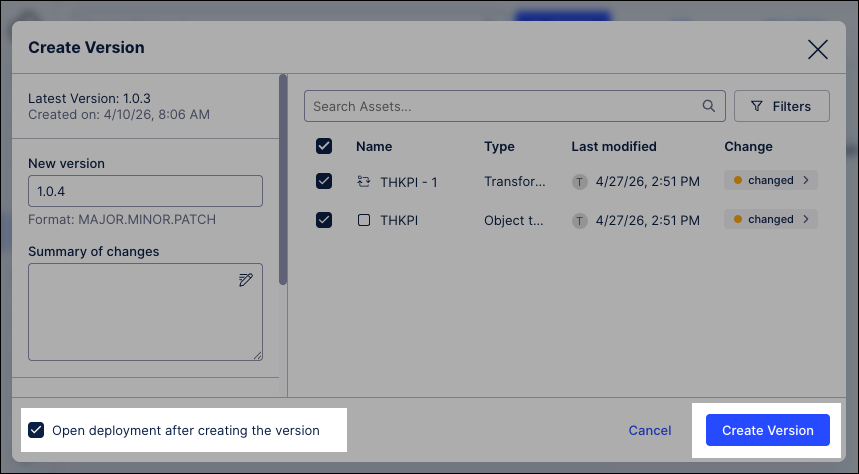
The data model version is created and the deployment window opens.
Select the deployed version of the data model, choose the Development environment, and then click Deploy.
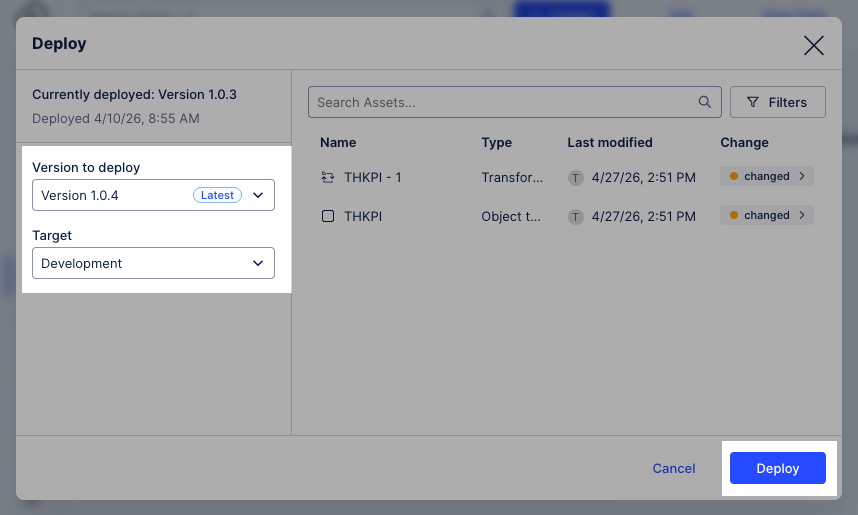
The data model is now deployed to the data pool.
Click View Data Pool, opening your
Marketplace Installed Pool.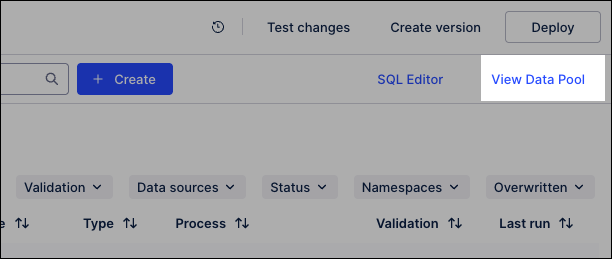
Click Data Jobs.
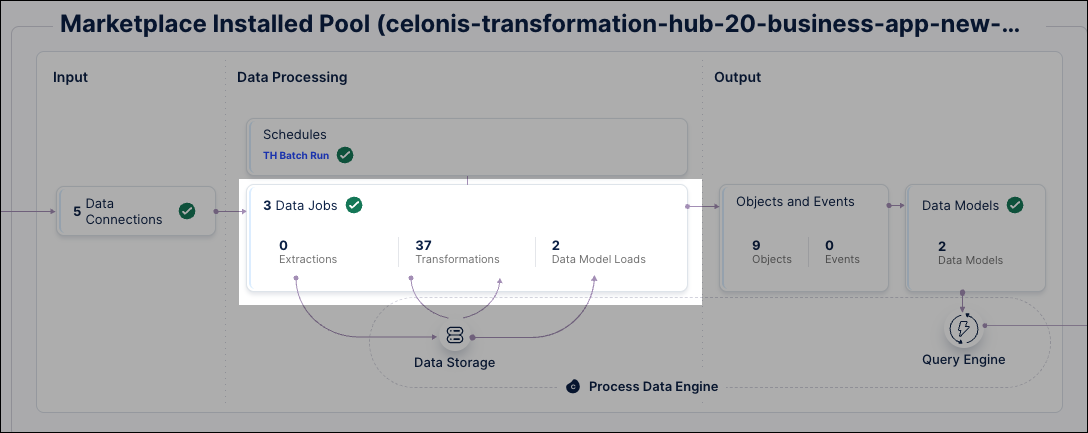
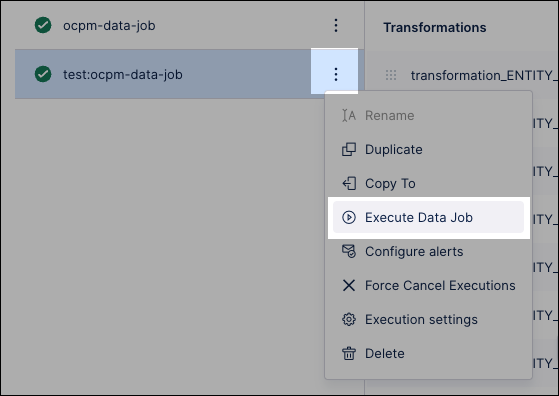
Locate the test data jobs and click Options - Execute Data Job.
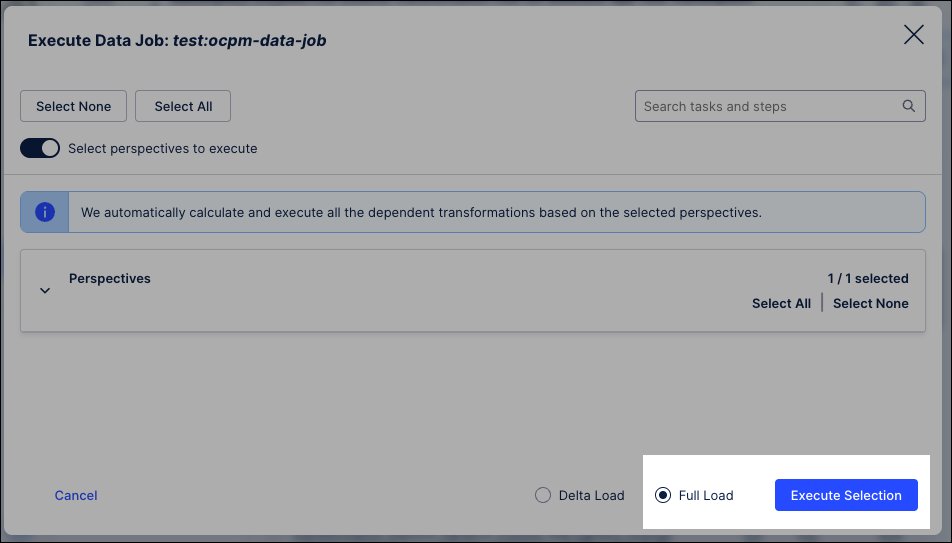
Select Full load and click Execute Selection.
The data jobs execute, updating the data available.
From the data pool diagram, click Data Models and select your perspective.

Click Data loads and then Load Data Model.
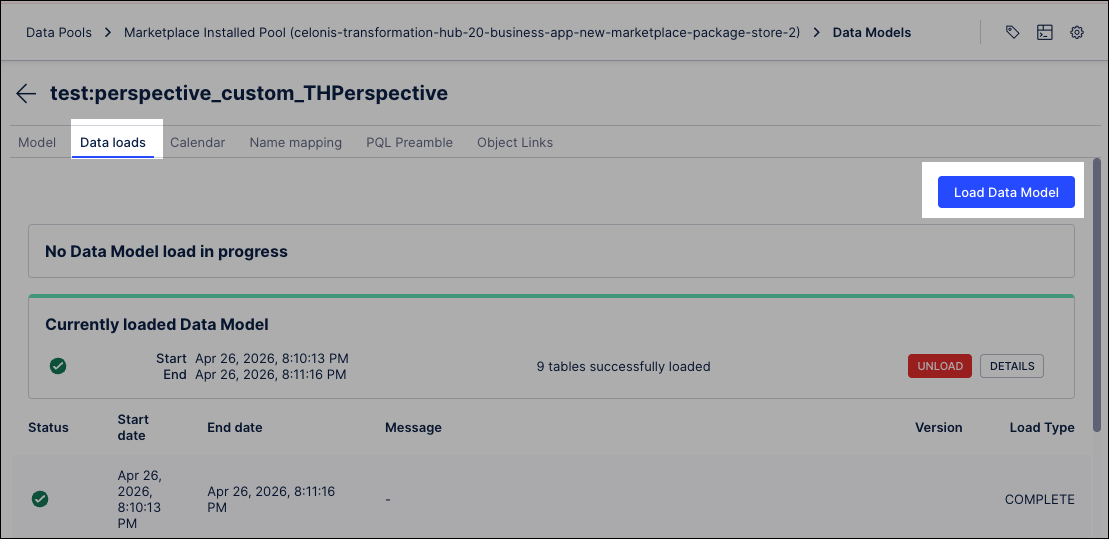
Select Standard Query Engine and click Load data model.
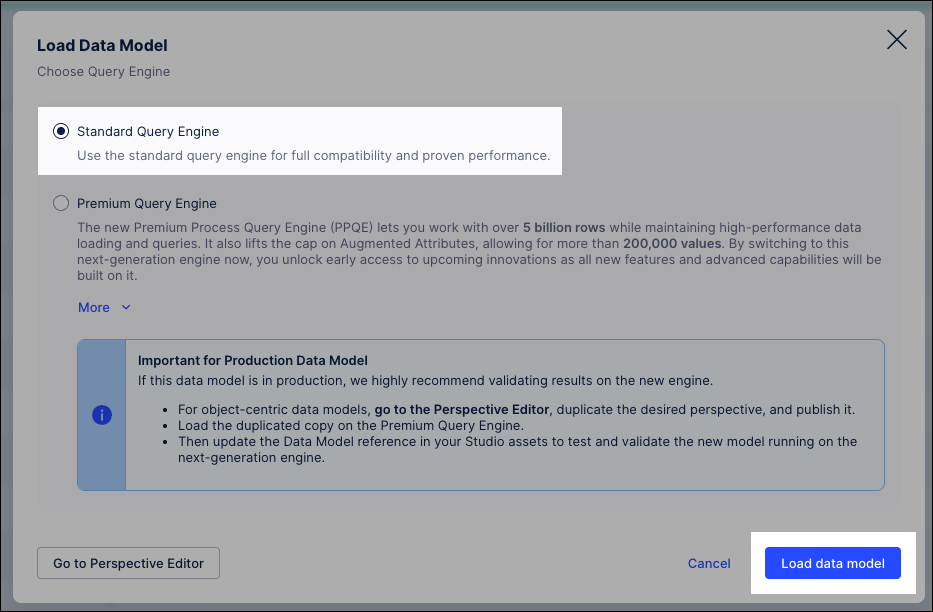
Verify the load: Wait for the status to change to a green checkmark. This ensures the 4 primary objects can now be queried by the Studio app.
Once your Data Model is loaded, follow the steps to Step 5: Assign Studio variables.
Now that your data is successfully processed in the backend, you need to tell the Studio app which specific perspective to use for its visualizations.
Click Studio and select the space and package where you installed the Transformation Hub in Views app.
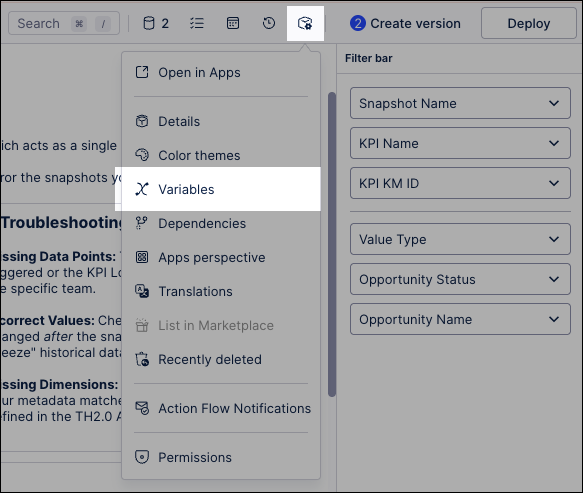
Click Package Settings and select Variables.
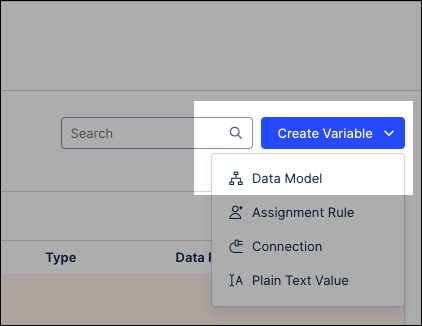
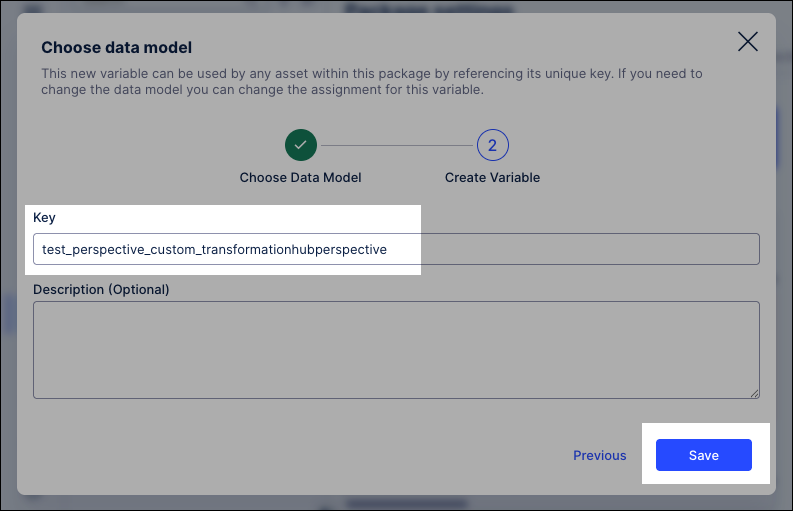
Click Create Variable - Data Model.
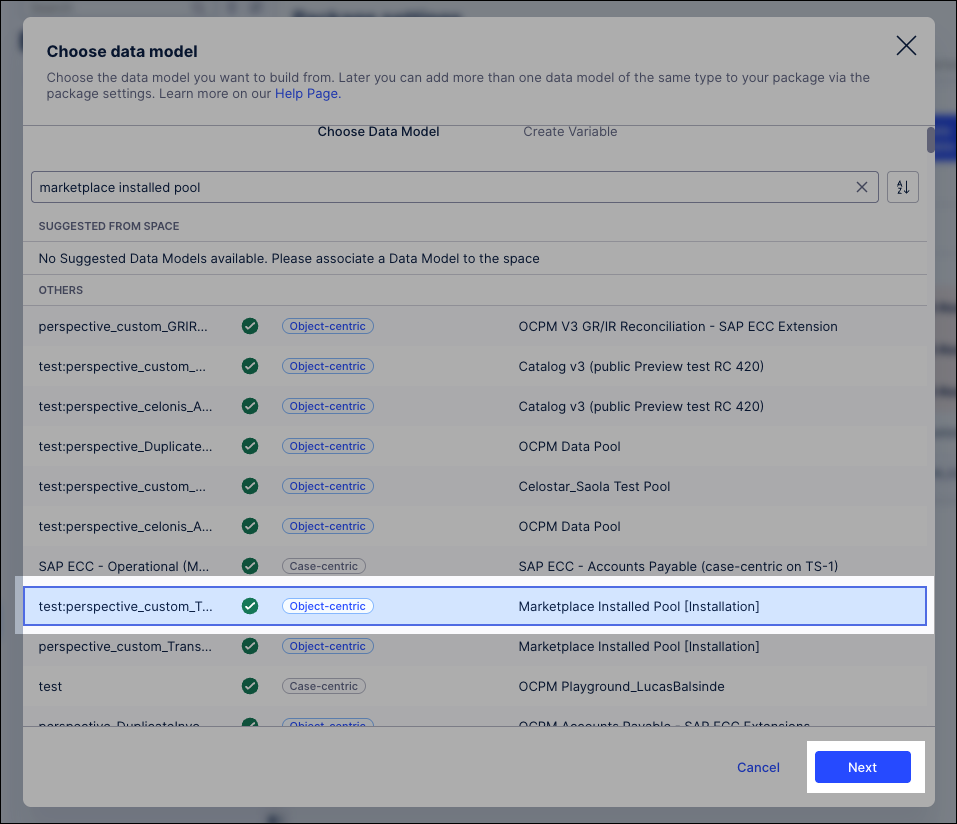
Choose the Marketplace Installed Pool perspective and click Next.
Add an key name and click Save.
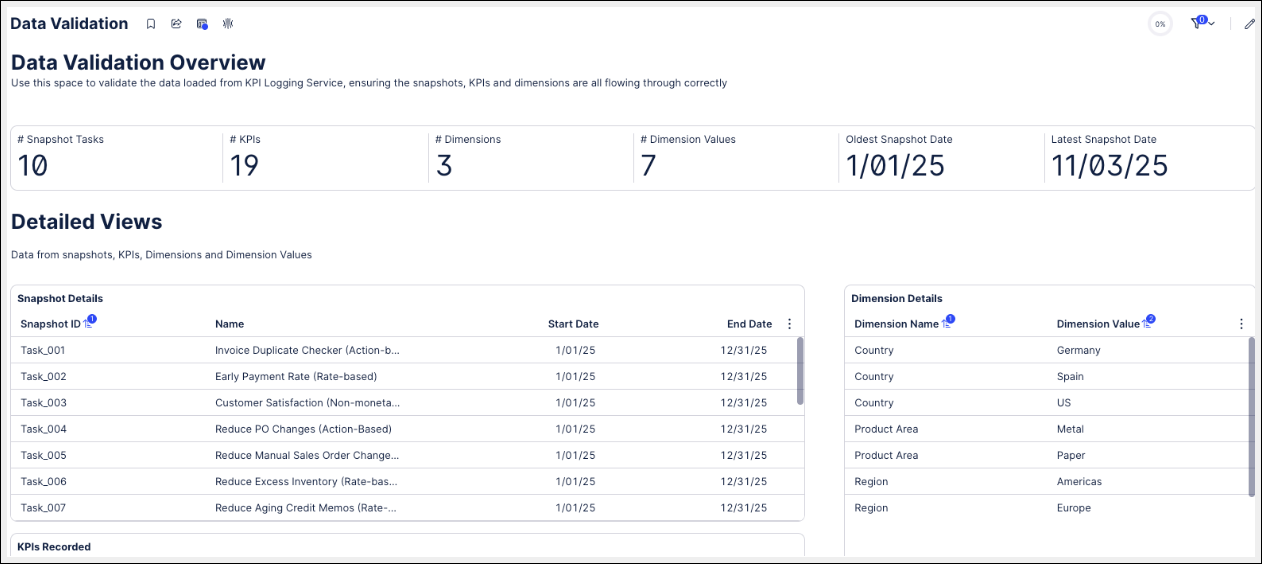
At this point, you should be able to view the data recorded from the snapshots in the ‘Data Validation’ view in the installed app.
You now need to create a version of the app and deploy it.
Click Create Version, select Open deployment after creating the version, and click Create Version.
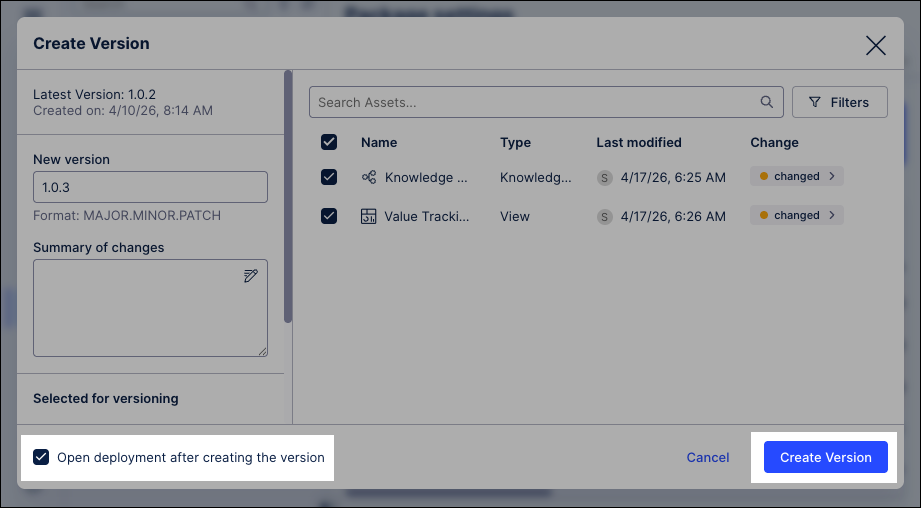
Verify the version and then click Deploy.
The final step is to create an app key for the application and assign it the necessary permissions to the Studio Package and the Data Pool:
Click Admin & Settings and select Applications.
Click Add New Application - Application Key.
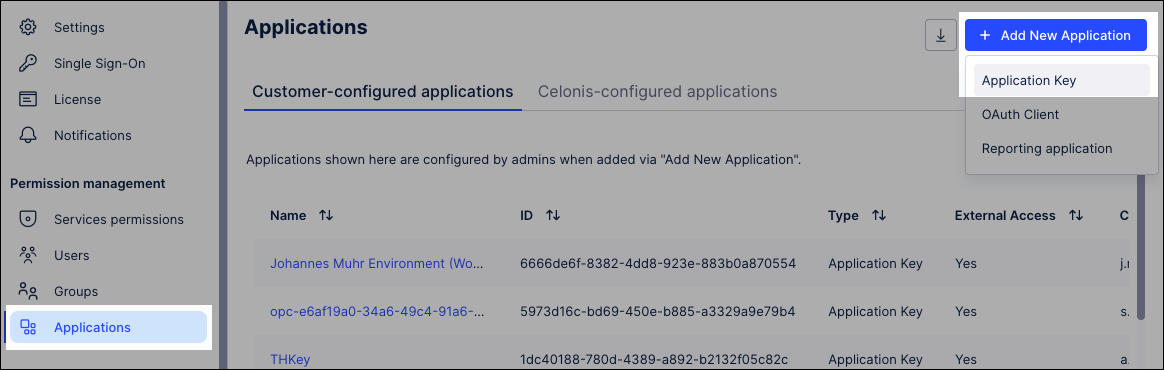
Add a key name and click Save.
Copy and save the App Key code immediately, as you cannot view it again later.
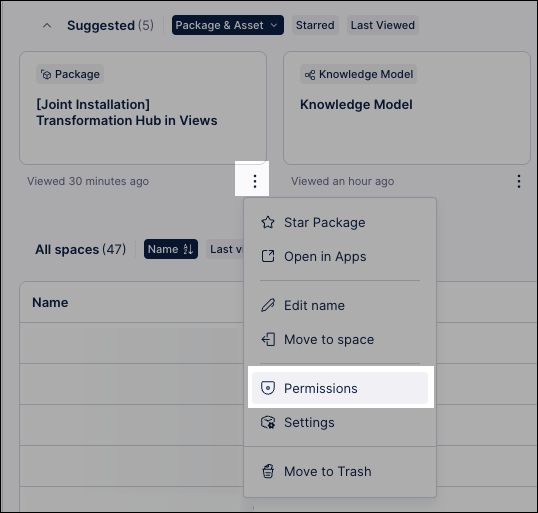
Go back to your Studio Package and click Settings - Permissions.
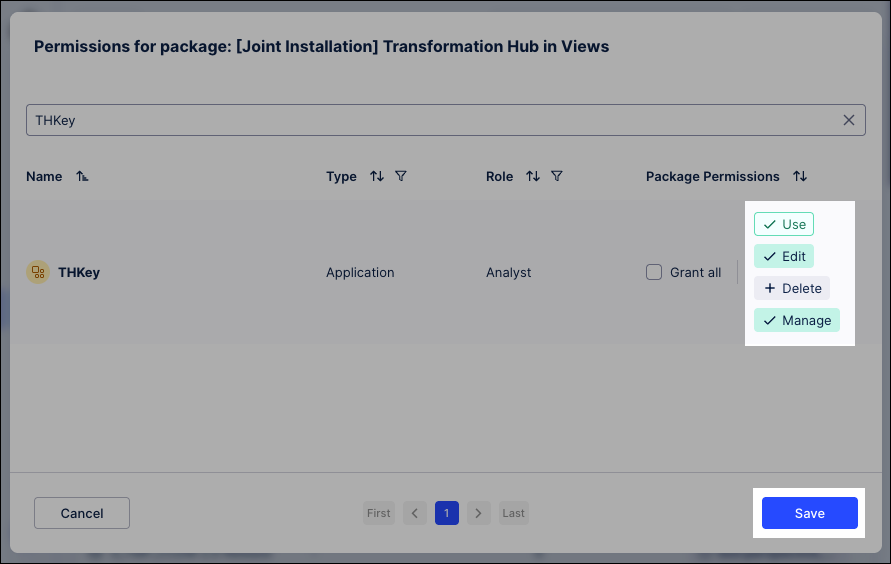
Search for the application key you created, select Use , Edit, and Delete permissions, and click Save.
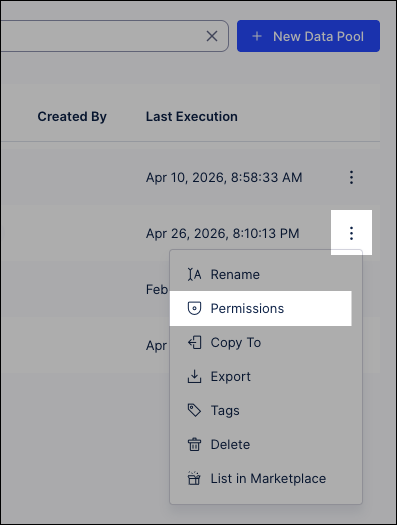
You now need to assign permissions to the data pool - click Data - Data Integration and locate your Marketplace Installed Pool data pool.
Click Options - Permissions.
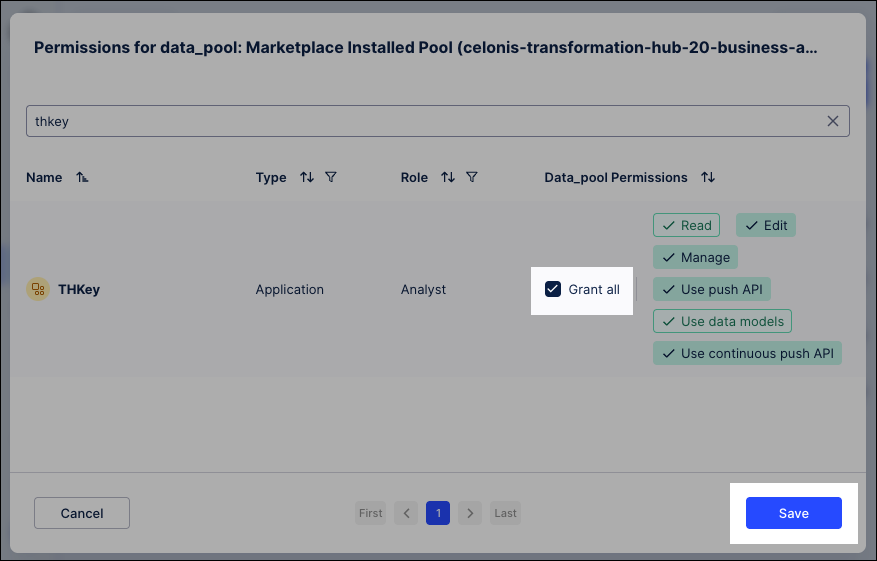
Search for the application key you created, select Grant all, and click Save.
Once the permissions are saved, your App Key is fully authenticated, ensuring secure data communication between your Data Pool and the Studio app.
Next steps
Now that your core data is loaded, you must set up Action Flows and the writeback connection to enable the Admin Workbench features. This step allows the app to write data back to your pool and finalize the mapping of your opportunities and KPIs.