Validating KPIs for the object-centric Shipped Not Invoiced app
The Setup and Validation view is the best way to validate and adjust the KPIs in the Shipped Not Invoiced app’s Knowledge Model. If you’ve worked through your use case there but something is still not the way you want it, you can make further adjustments directly in the Knowledge Model in Studio.
You’ll need Analyst permissions on Studio and the Knowledge Model to update it. Each KPI contains a PQL (Process Query Language) formula which you can change in our editor to change how the KPI behaves. Your changes are applied when you publish a new version of the app.
The Knowledge Model also includes calculated attributes that contain the business logic to classify and provide metadata about objects. You can use them in PQL queries as if they were another column in the database table for the object type. They appear in the Knowledge Model as attributes of relevant records. If you make any edits to view components that involve the calculated attributes from the Knowledge Model, we’ll automatically update the calculated attributes in the Knowledge Model to match your edits. You can also adjust them directly in the Knowledge Model before or after editing the views.
Calculated attributes and PQL formulas might be reused in the calculations for several KPIs across the Knowledge Model. If you change the business logic in one location and save your change, all of the KPIs that reuse the calculated attribute or PQL formula will reflect your changes.
Here’s how to work with the KPIs and calculated attributes in the app’s Knowledge Model. If you need training, check out the training track “Build Knowledge Models and Views” on the Celonis Academy.
In the Celonis navigation menu, select Studio.
In the Studio overview, find the Shipped Not Invoiced app in the space where you installed it, and click its tile.
Select the Knowledge Model from the app navigation.
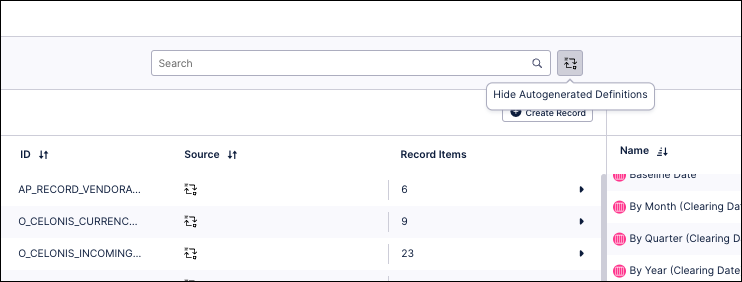
Select the KPIs section of the Knowledge Model to work with KPIs, or the Records section to work with calculated attributes. To see only the records with calculated attributes, and see only the calculated attributes on those records, click the Hide Autogenerated Definitions icon by the search bar.
To see and edit the full PQL formula and other settings for a KPI, click its row to open an editor. The editor automatically validates any changes that you make in the PQL formula.
If you want a fuller-featured PQL editor that lets you select from the tables and columns in your data, click on the pen icon next to the PQL formula.
If you need to disable a KPI or formula, click the three vertical dots at the top of the editor, and select Disable Scope, then click Disable to confirm. When you do this, the object can't be accessed or used anywhere in the package, including by other apps that depend on it.
When you’ve made changes to the KPIs, use the Publish button at the top of the screen in your Studio space to publish a new version of the app.
For the Shipped Not Invoiced app, you can manage the settings for all of the important KPIs using the Setup and Validation view and the Settings view. In the Knowledge Model, check that the following calculated attributes are right for your organization’s needs:
"o_celonis_DeliveryItem"."UnbilledItemPrioritization"
"o_celonis_DeliveryItem"."UnbilledPrioritizationScore"
These calculated attributes define how items are prioritized in the Action View. With the default settings, prioritization for items is based on the value impact. For aged items, this is the item's full value. For past due items, the prioritization score is based on the annualized working capital impact of not invoicing the item for an additional day. A priority icon is assigned according to whether the value exceeds the first quartile (low), second quartile (medium), or third quartile (high) of the realizable value.