Celonis Actions
Celonis Process Automation can connect to other applications within the Celonis Platform, such as Data Integration.
Actions
What it does: Updates your data pool by writing data in a specific column of a table or creating a new table/column for it.
Connection (Celonis User) (required): Add your Celonis User connection. The user should have permissions to use the Data Push API of the Data Pool you would want to push data to.
Data pool (required): Select the Data Pool you want to push data to.
Table name (required): Define the name of the table you want to push data to. If a table with this name already exists, the data will be pushed to the existing table, otherwise, the workflow will create a new table with this name. Table names cannot have spaces.
Column name and value (required): Define the columns of the table you want to push data to. If this table already exists, ensure the column names and data types match and all columns are configured in the right order.
You can use these operators to cast values: toString(), toDate(), toInt(), toFloat()
Additional information
If you're using the Data Push API version, you need an Application Key not an API key for the connection.
We recommend using the action that uses the Data Push API.
We highly recommend using the operators toString(), toDate(), toInt(), toFloat() for all inputs to prevent data type mismatches.
The current limit of the Write Data to Table (Data Push API) action is 2,000 characters per push.
Data jobs are collected and processed in a combined fashion in regular intervals. It can take up to 20 minutes for the data to be present in event collection.
All tables contain timestamp information in a column named
_CELONIS_CHANGE_DATE. If you create a custom table that doesn’t contain this column, the Celonis Platform will automatically create and add_CELONIS_CHANGE_DATEto your table.
Troubleshooting Actions
Switch to the Data Push API action.
This action can push data back using the Data Push API. For more context on this, please check the corresponding documentation.
If you're using the Data Push API, there are two potential sources:
Data jobs are collected and processed in a combined fashion in regular intervals. It might take up to 20 minutes for the data to be present in event collection.
Even though the action is shown as successful, the processing of the data fails to insert data. The reason for this can be a datatype mismatch between the insert and the existing table. Check all columns are present in the configuration, are always in the same order (also when used in different actions) and are cast to the right data types.
Note
You can use toString(), toDate(), toInt() and toFloat() to force data types.
Data is showing up, but some columns seem to be mixed up and the data doesn't look as expected.
If you notice that the result pushed to the data pool doesn't look as expected, for example, your number doesn't appear correctly, this could be due to the data type. You can use toString(), toDate(), toInt() and toFloat() to force data types. You should also ensure columns are included in the same order (if using in various skills).
Note
We recommend generating PDF reports of your Studio analysis using Action Flows. See Create PDF report.
What it does: Creates a PDF report of an analysis.
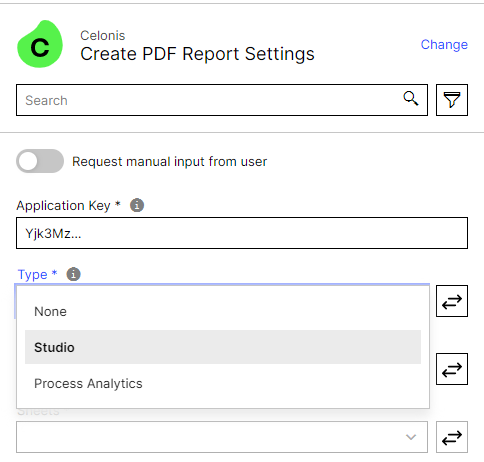
Application Key (required): Create an Application Key in the team settings and grant it permissions to USE the analysis you want to create the report from.
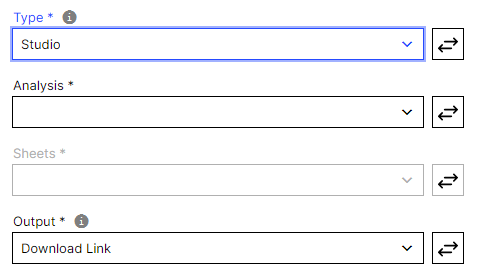
Type (required): Choose if you want to create a PDF report from an analysis in Studio.
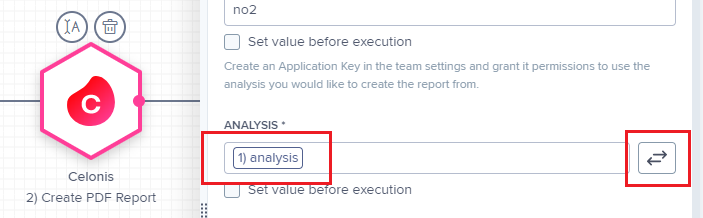
Analysis (required): Select the analysis you would like to create the report from.
Sheets (required): Select and order the sheets you would like to include in the report.
Output (required): Choose the output type of the report. Select "Download Link" to create a publicly available link. Choose "Base64 String" to create Base64 encoded content. Base64 encoded content is, for example, needed for email attachments.
Tip
There are multiple tools that will allow you to encrypt your text using Baed64 encoding, for example, base64.guru.
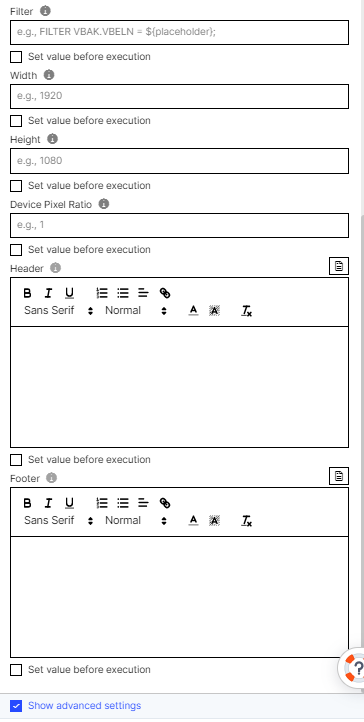
Filter (optional): Define the PQL filter that will be passed to the analysis.
Width (optional): Adjust the width of the PDF based on the sheet width. Default: 1920.
Height (optional): Adjust the height of the PDF based on the sheet height. Default: 1080.
Device Pixel Ratio (optional): The ratio of the resolution in physical pixels to the resolution in CSS pixels. Default: 1.
Header (optional): Define a header (as HTML content) that will be shown on each page.
Footer (optional): Define a footer (as HTML content) that will be shown on each page.
Download link
If you choose "Download Link" as the output of this action, the linke created will be publicly available using a non-guessable URL. Everyone with access to this URL will be able to view the PDF. Permissions that users have in Celonis Platform will not be applied.
 |
 |
Note
Select the "Show advanced settings" checkbox:
Switch to manual input:
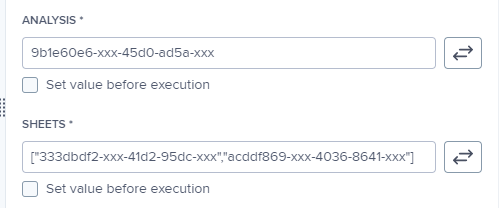
If you don't want to select an analysis or sheet from the dropdown, you can switch to manual input. This allows you to either manually type in the field or use an input.
The fields expect the analysis ID/ sheet IDs. These IDs can be found in the URL of the analysis.
You can also forward the current filter from your analysis to the skill using Constant Variables.
 |
 |
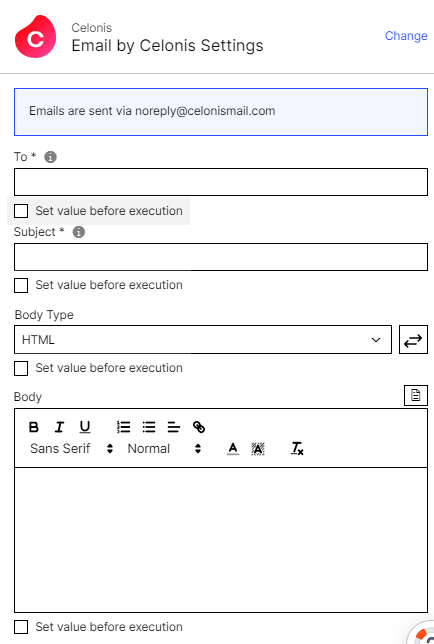
What it does: Sends an email via noreply@celonismail.com
To (required): Define who this email will be sent to. You can add multiple email addresses by separating them with a comma.
Subject (required): Define a subject for the email.
Body type (optional): Choose a body type for your email e.g. Plain or HTML. If you choose the HTML option, you can format the email using HTML tags.
Body (required): Define the body for the email.
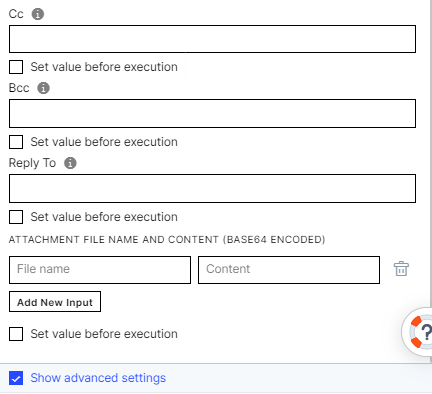
CC (optional): Define who will receive a copy of this email. You can add multiple email addresses by separating them with a comma.
BCC (optional): Define who will receive a blind copy of this email. You can add multiple email addresses by separating them with a comma.
Reply to (optional): Define an email address the recipient can reply to (if different from your default email address).
Attachment file name and content (optional): Add attachments to your email. Make sure the file name has an extension (e.g. Report.pdf) and attachments content encoded in Base64.
Email by Celonis Limit
This action is intended for testing purposes only and is limited to 100 emails per day. For productive use cases, we recommend switching to the generic email action which allows you to connect your own SMTP server. This will provide you with full access and flexibility when sending emails. For more information, see Email (SMTP).
Using inputs in links
If you want to use inputs from previous actions in your links, use a single quote '.
Example:
 |
Images
If you want to insert images in your body, use PNG or JPG images.
Code editor example:
<img src="https://example.png" width="320" />
Attachments
Choose an attachment file name with less than 40 characters and without special characters like ë,ü,á.
Note
Select the "Show advanced settings" checkbox: