Studio App Building Guidelines - Data validation
A data validation view is used to check that you have everything in the Data Model you need to analyze a specific use case or set of use cases. This view will be used once only, so even though it provides much value to the app implementer, it is recommended only if the process or application you are building will be used by multiple companies. For example, if this application will be distributed through an application marketplace.
The target user persona for this view is the App implementer, the Analyst, and a business user or IT clerk. The analyst will know what the app needs, whereas the business users and IT clerks will know if the data shown in the view is valid.
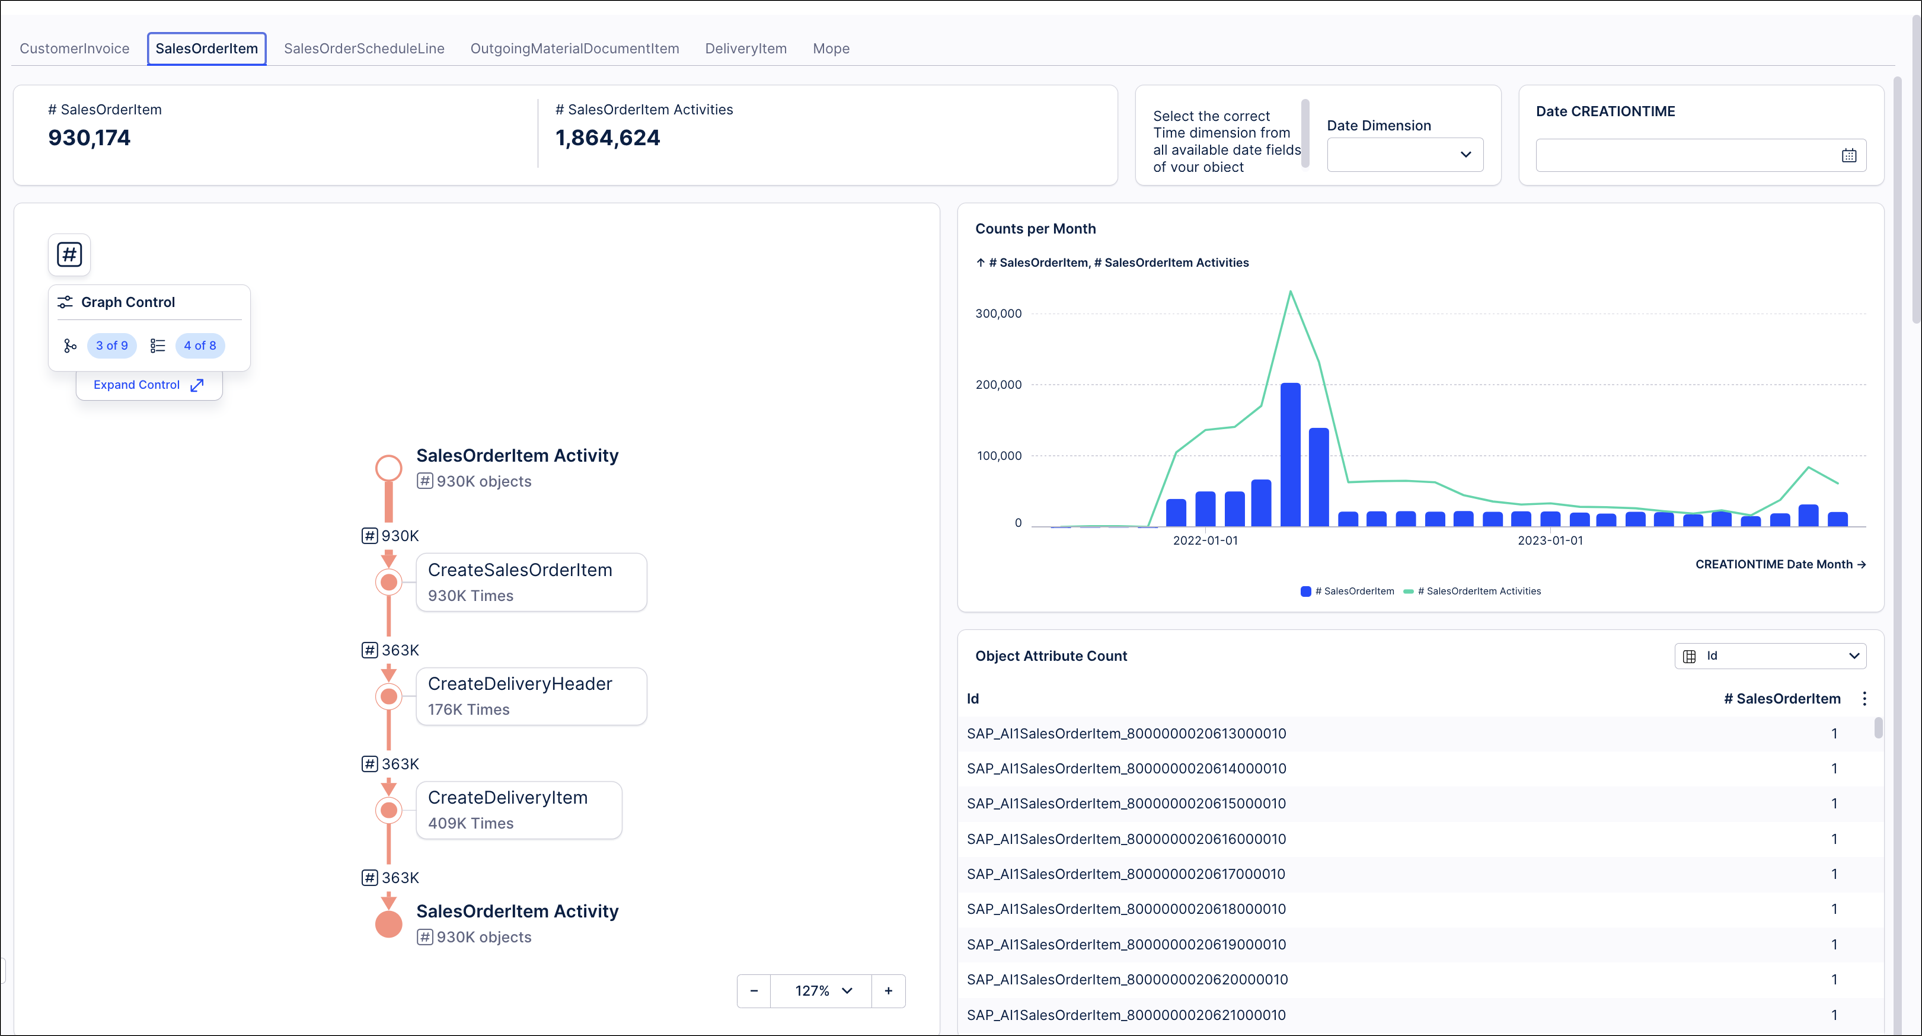
The following is an example of a data validation View:

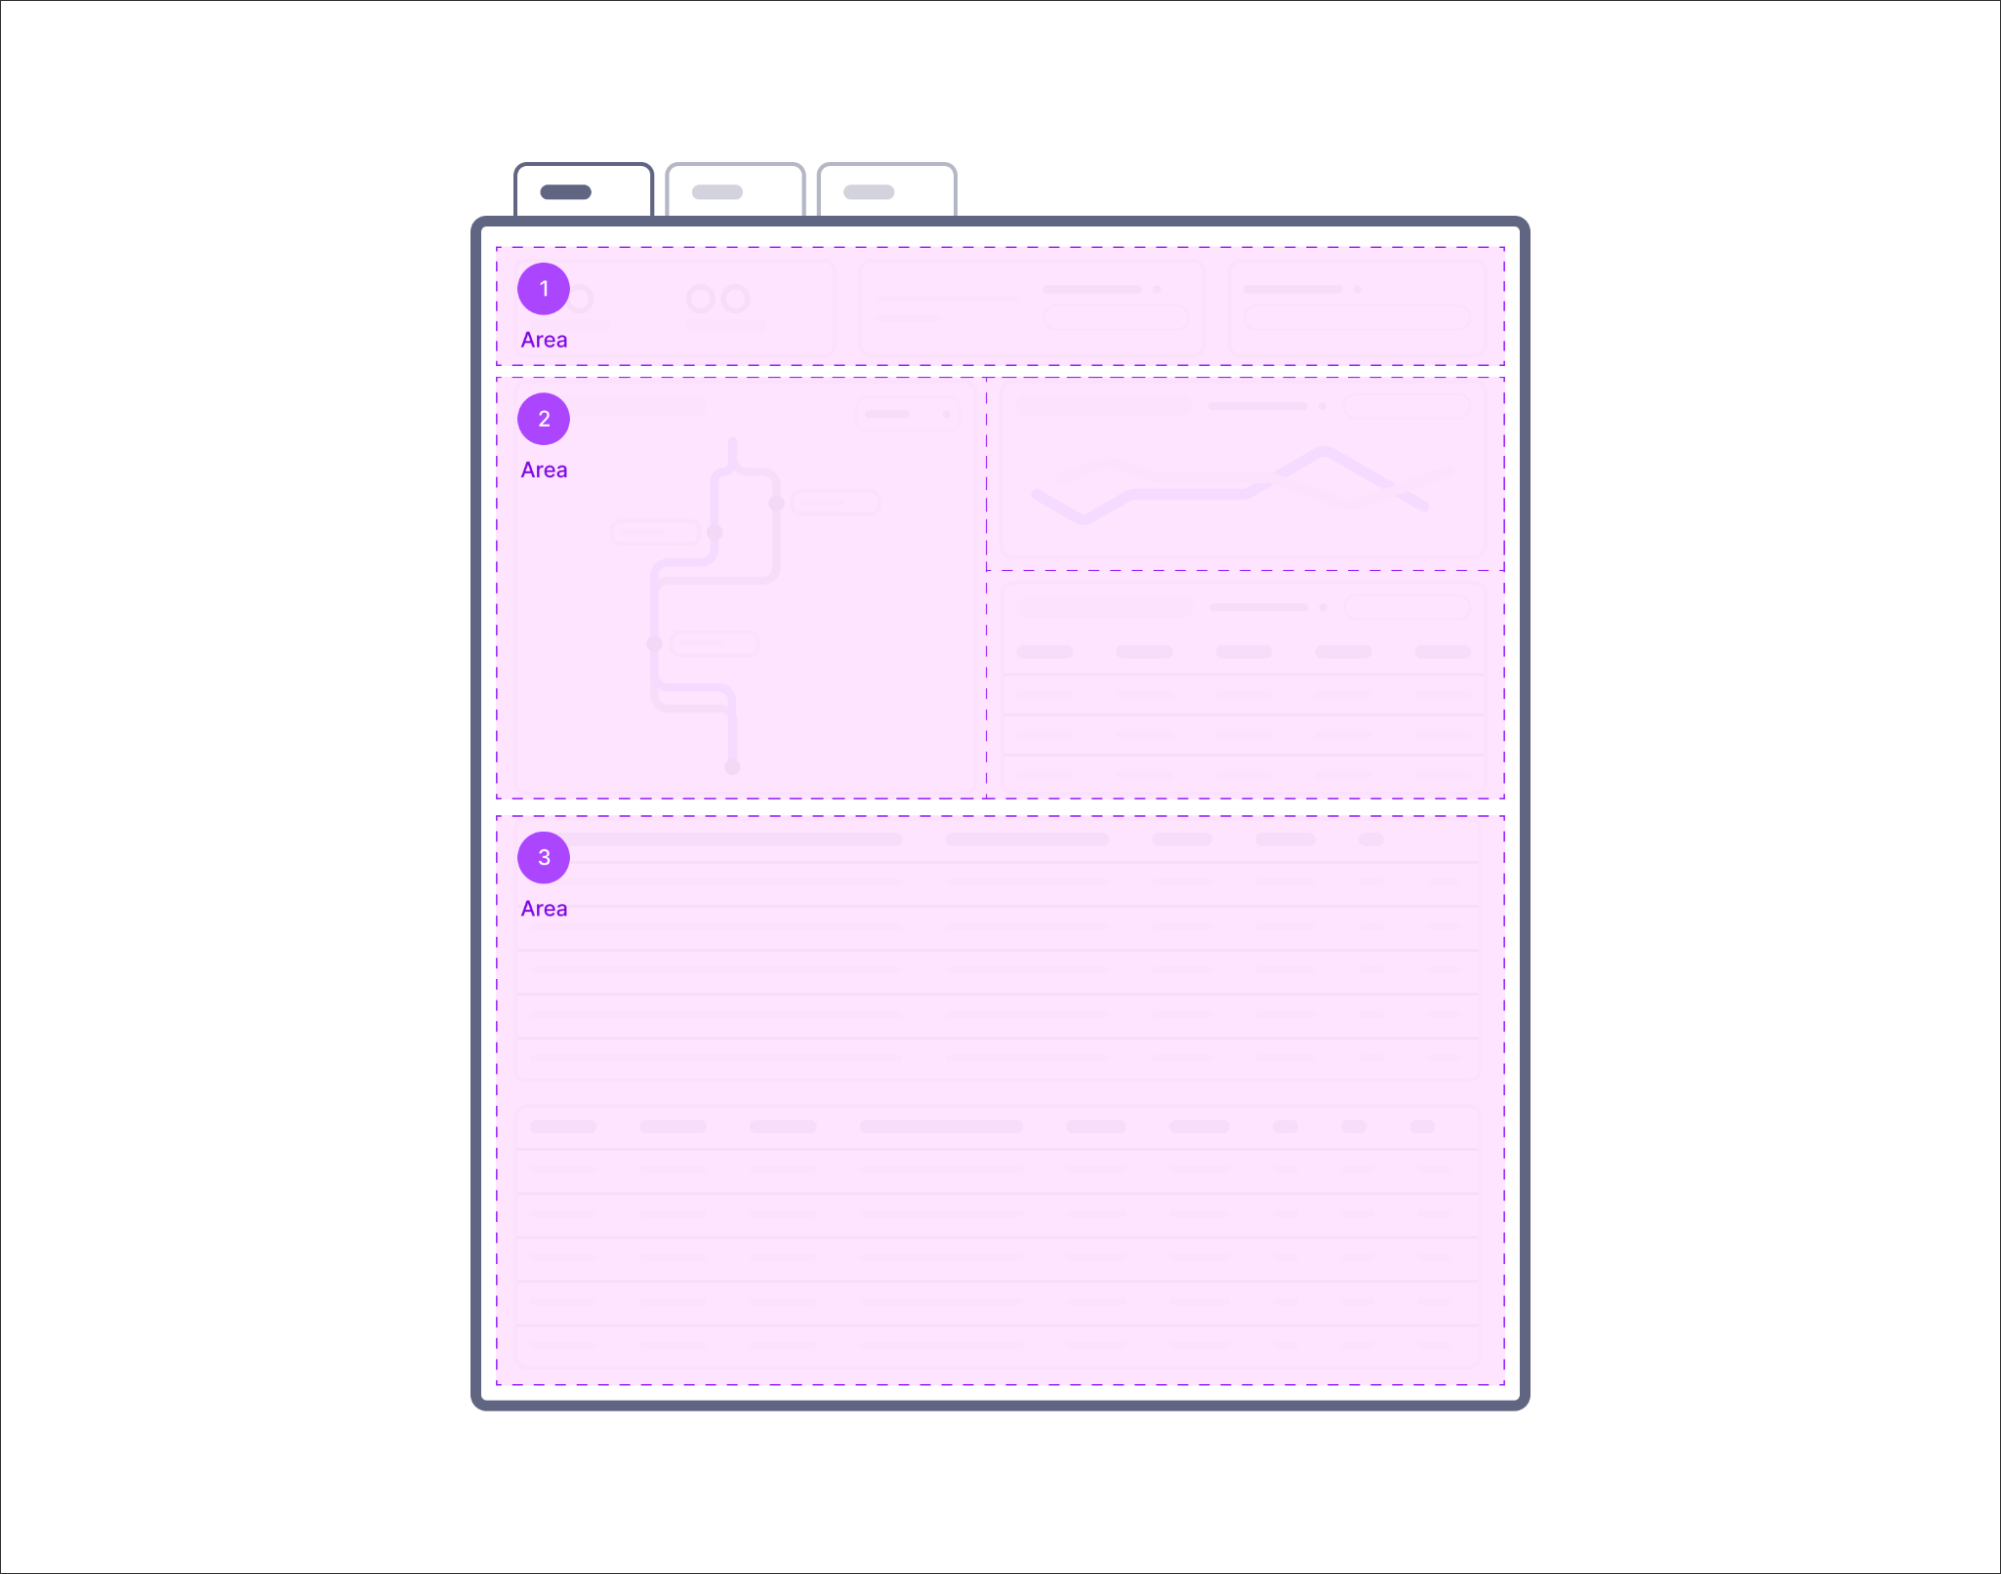
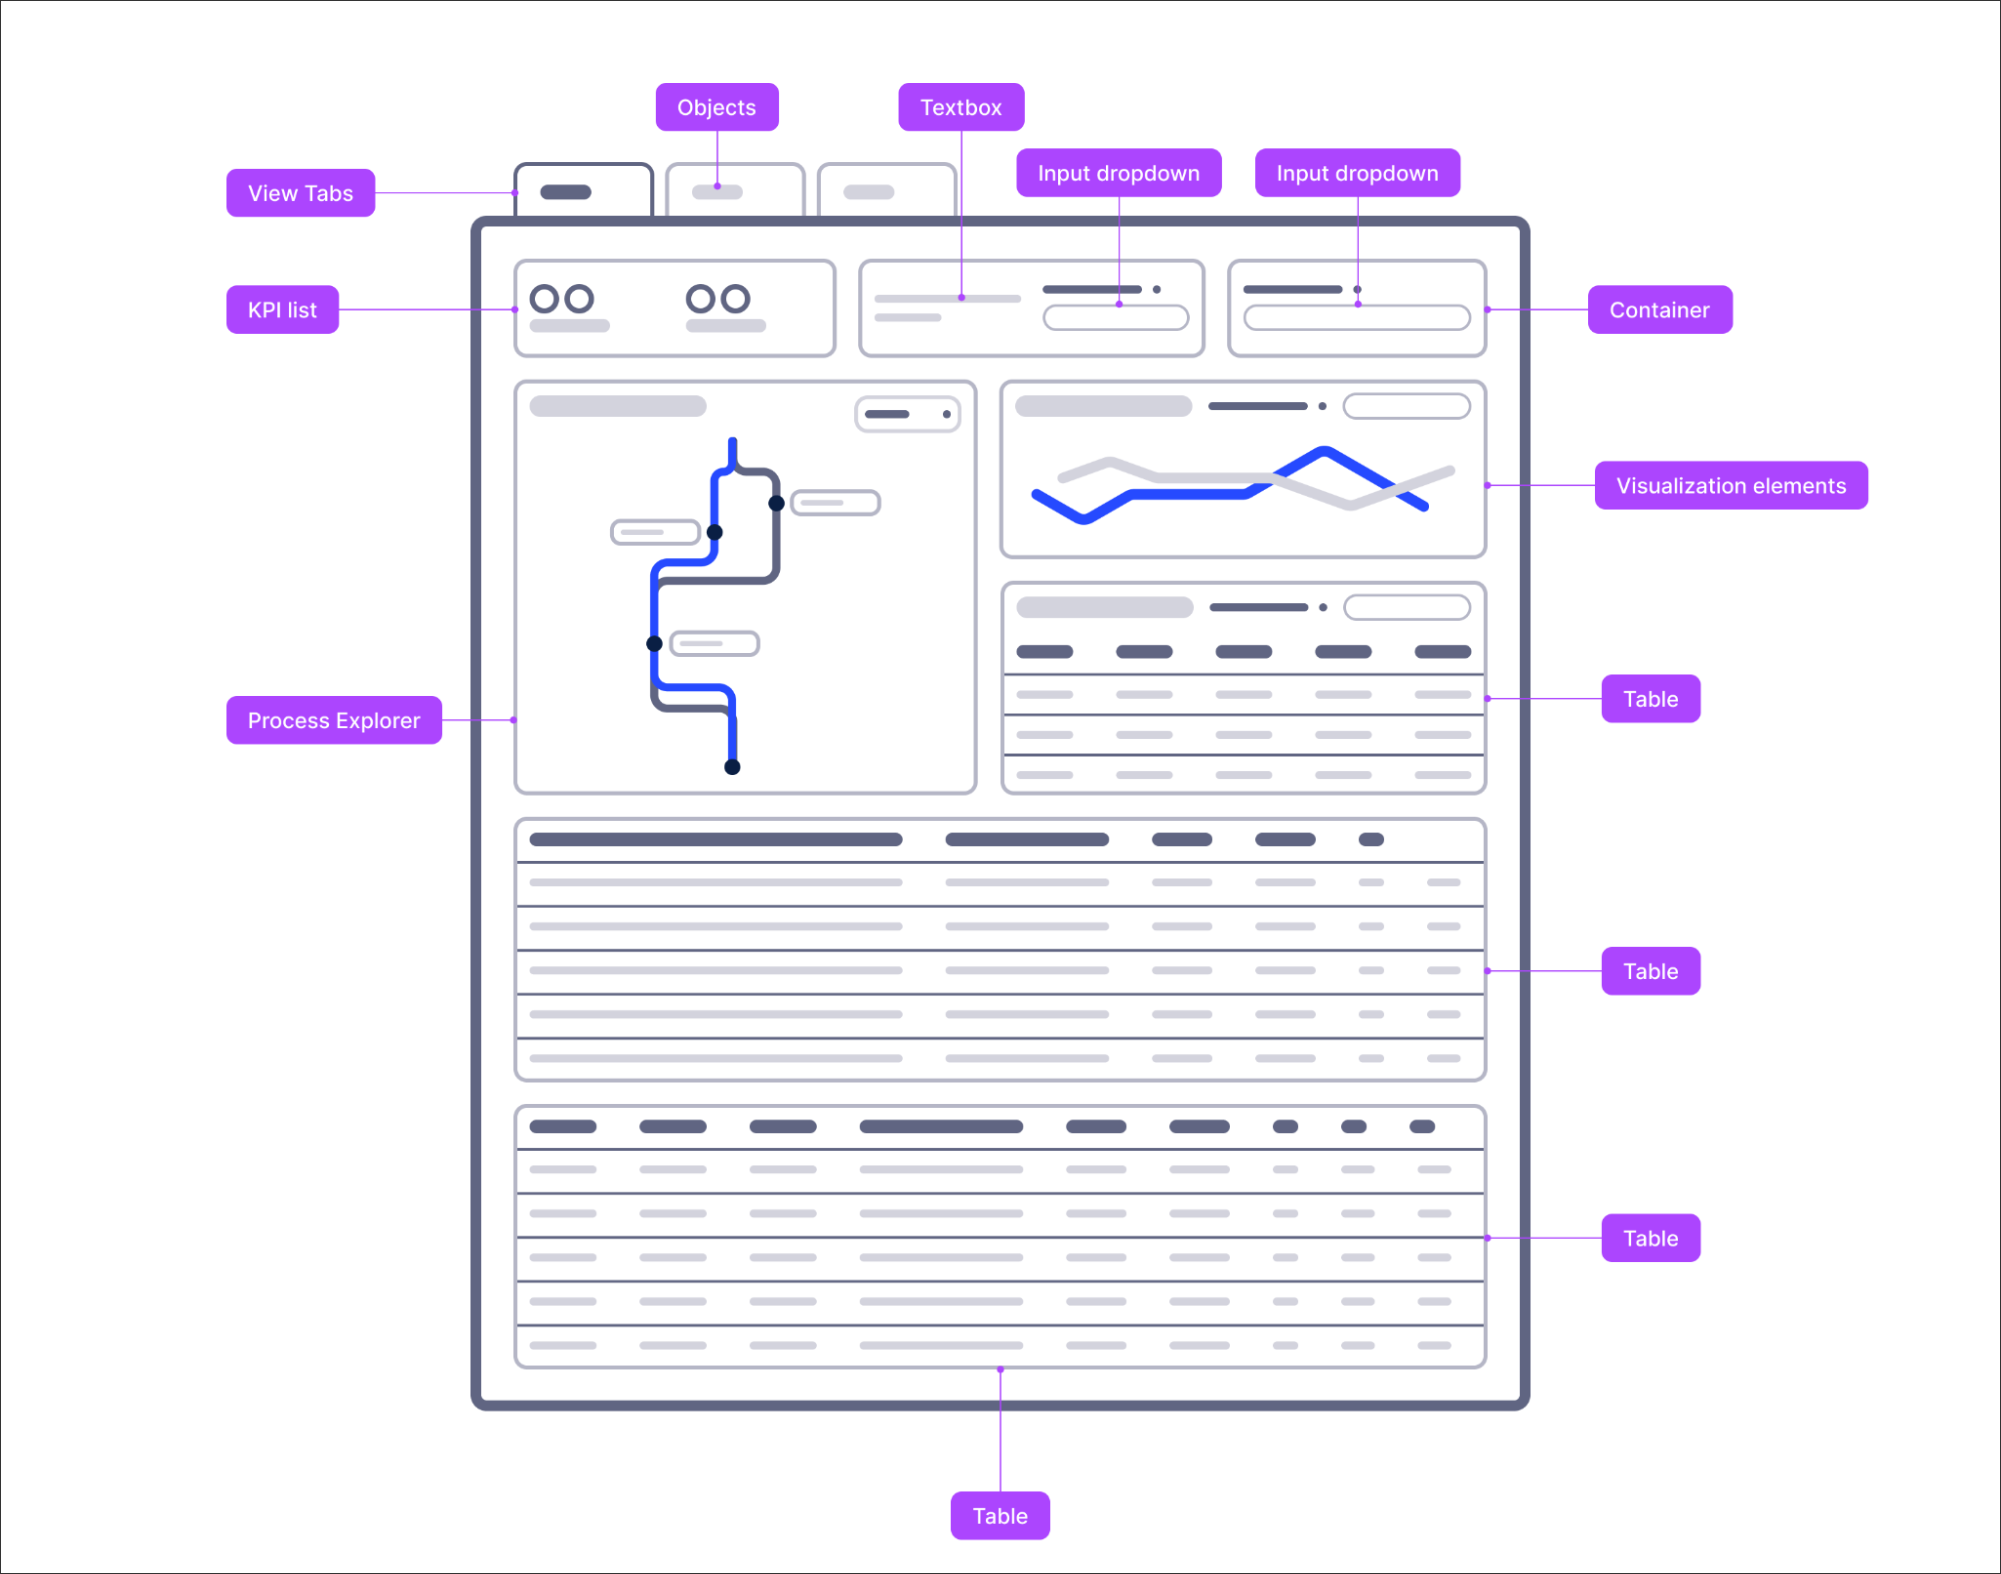
A data validation view is divided into tabs, with one tab per object to validate. Each tab is divided into three areas: a scope area (area 1 on the diagram), a dimension aggregation area (area 2), and an object table area (area 3).
 |
Scope (area 1)
The scope area is used to identify and analyze potential issues on the highest aggregation level. When creating your scope area, you can use a KPI list and a date filtering component:
KPI list: Use the KPI list component to display a count of the table and ideally a sum of the monetary value if one is available for that object.
To learn more about configuring KPI lists, see: KPI cards and KPI lists.
Date filter: Use a date filter dropdown to allow the user to filter the object and then a date filter that uses the value of the dropdown filter, too.
To learn more about configuring filters, see: Filter components
This view should always be filtered on the latest dates to make it easier for the business user who will be validating to compare the information in Celonis to their source system.
Dimension aggregation (area 2)
The dimension aggregation area is used to validate the most critical dimensions of the object. When creating your dimension aggregation area, you can use table, process explorer, and chart components:
Table: The table should be configured with the dimension dropdown with many (if not all) text-type dimensions in the object table. This will allow the user to check for null values or other issues in the data.
For more about configuring table components, see: Tables.
Process explorer: The process explorer should occupy at least half of the horizontal dimension of the view and be big enough to allow for analysis.
You can read more about the process explorer component here: Process Explorer.
Chart: The chart should contain a count of the object table plotted against the date dimension. This will allow for a more visual representation of the data. Big changes between months or continuous increases or decreases over time might indicate an issue with the data.
You'll find more about configuring chart components here: Charts.
Object table (area 3)
You can use an object table area to select individual cases to compare 1:1 with the source system. The purpose of this area is to show every detail of the object table. The user will get to this table after filtering the components above so that the dimension will be reduced significantly. The next thing for the user is to select some (2-5) cases to compare side-by-side with the data seen in the source system.
If the object table is the case table, you can add a case explorer to replace the table. It will allow the user to check the activities related to that specific case.
To learn more about the case explorer, see: Case Explorer.
 |
When creating your data validation, Views, we recommend the following:
Focusing the data validation on the use case you will analyze with the app.
Ensuring that the process explorer component is well-sized, giving enough space for it to be easily navigated.
Using either a full-width table or a case explorer to show the details of the object table data.
Adding aggregation components like charts and drill-down tables to the validation view. They will greatly improve the validation experience.
 |
We'd also discourage the following:
Only adding up to 10 objects to the validation. Having a balance between the accuracy of the validation and the effort needed for the validation is important. Using too many components or having a cluttered view will require more effort for the user.