Custom ML Sensor
Description
Custom Machine Learning Sensor allows you to use your own ml models and advanced algorithms as sensor in an automation skill. You can easily configure any machine learning usecase with the help of our Machine Learning Workbench as a sensor and produce signals as well as configure automation skills accordingly.
This adds flexibility to bring your own machine learning models closer to automation in a productive space with only a few clicks. This section will help you understand how can you achieve that with a step by step guide.
Configure Custom Machine Learning Sensor
After selecting Machine Learning Sensor as a Sensor in the Skill (you will find it under Celonis Sensors), select the relevant knowledge model and then Custom in the Use Case Dropdown.
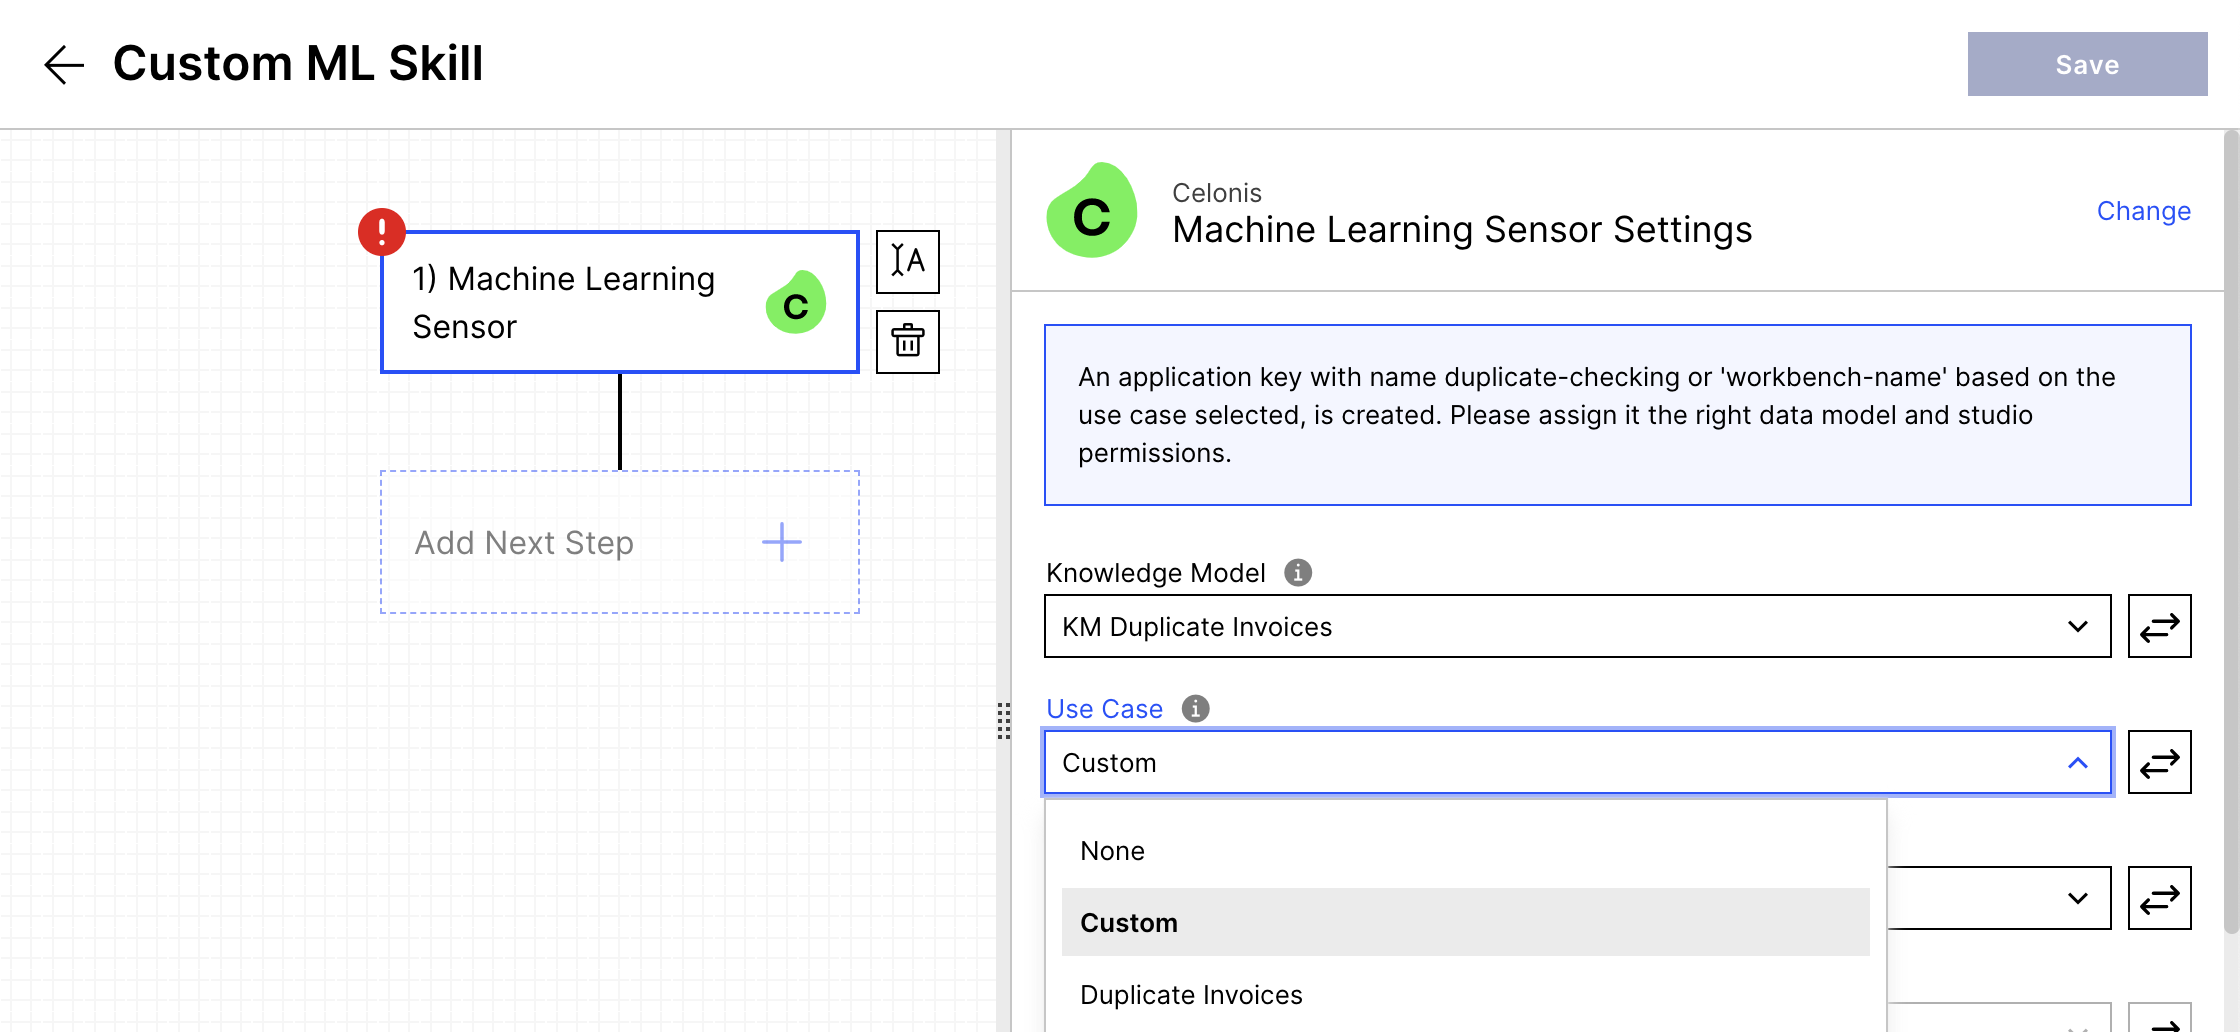
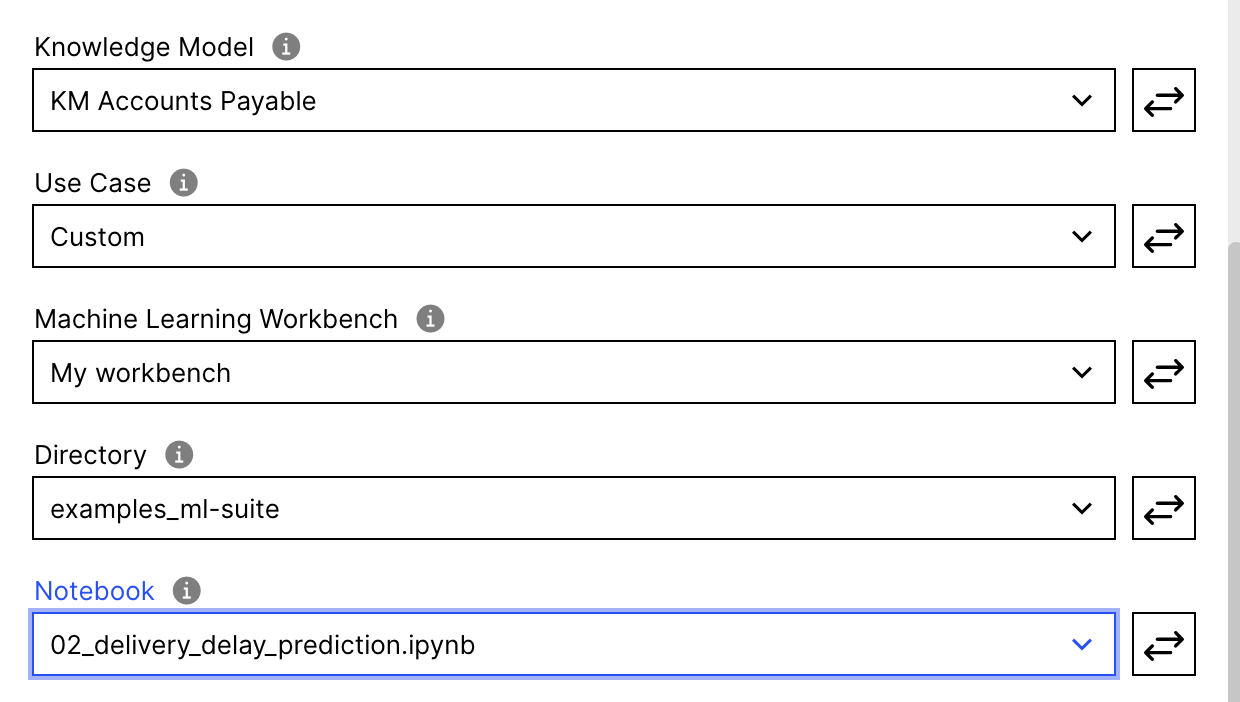
Now Select you Machine Learning Workbench where you have your ML Model or Script Stored.
Select the Directory. If the script is not in any directory, you can select '\' as the directory.
And finally select the python notebook that contains the solution that you developed.
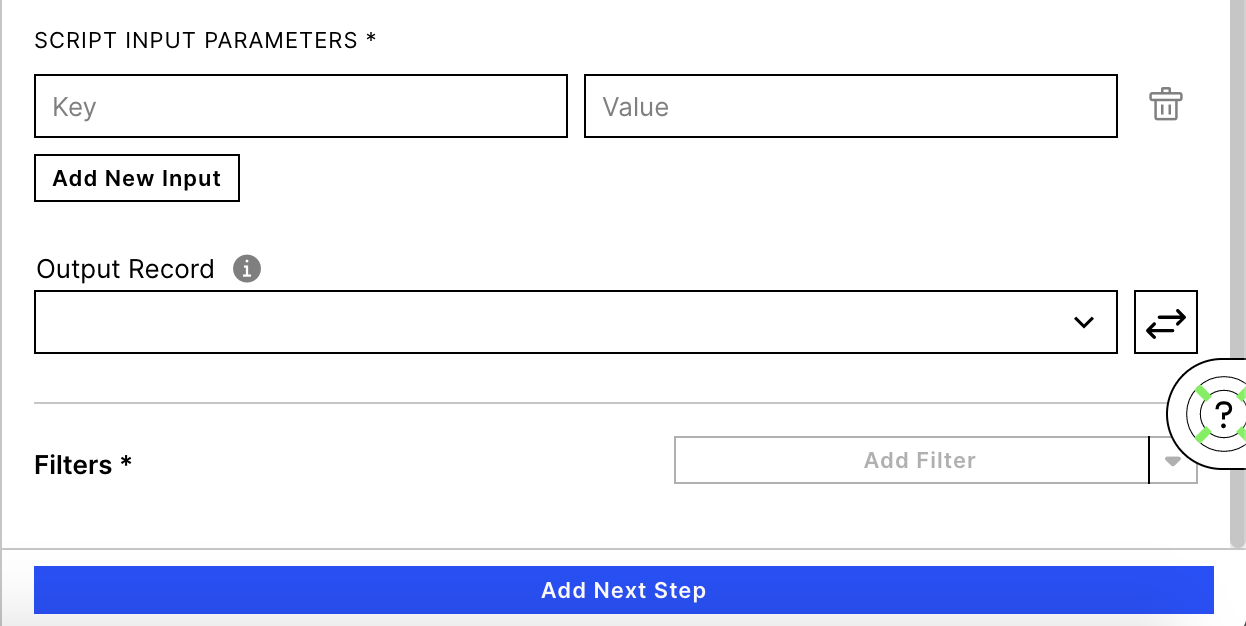
Add any input parameters you need to pass to the script. You can add multiple parameters and their values. You can utilize them in the ML Workbench by adding a tag to the cell called 'parameters' and use the exact same name of the variables in the scripts as the keys defined here.
The output record field lets you select the record that you wanna use for generating signals after the script has finished execution and pushed back the results.
Add filters to define your signals (what data incidents should produce the signals).
After you save and publish it, this will now be run productively after every new data reload, knowledge model change or skill change.