Microsoft Power Automate (Action Flow)
Important
Any references to third-party products or services do not constitute Celonis Product Documentation nor do they create any contractual obligations. This material is for informational purposes only and is subject to change without notice.
Celonis does not warrant the availability, accuracy, reliability, completeness, or usefulness of any information regarding the subject of third-party services or systems.
Desktop flows extend the existing robotic process automation (RPA) capabilities in Power Automate and enable you to automate all repetitive desktop processes.
It’s quicker and easier than ever to automate with the new, intuitive Power Automate desktop flow designer using the prebuilt drag-and-drop actions or recording your own desktop flows to run later.
In Power Automate, you can create flows, interact with everyday tools such as email and Excel or work with modern and legacy applications. Some of the simple and complex tasks you can automate are:
organize the documents using dedicated files and folders actions in less time
extract data from websites accurately and store them in excel files using Web and Excel automation
Apply desktop automation capabilities to put your work on autopilot
To get started with Microsoft Power Automate, you need:
Microsoft Power Automate account
An Azure account to create custom apps
Connect Microsoft Power Automate to Celonis platform
You can connect to Microsoft Power Automate in two ways:
To connect to Microsoft Power Automate:
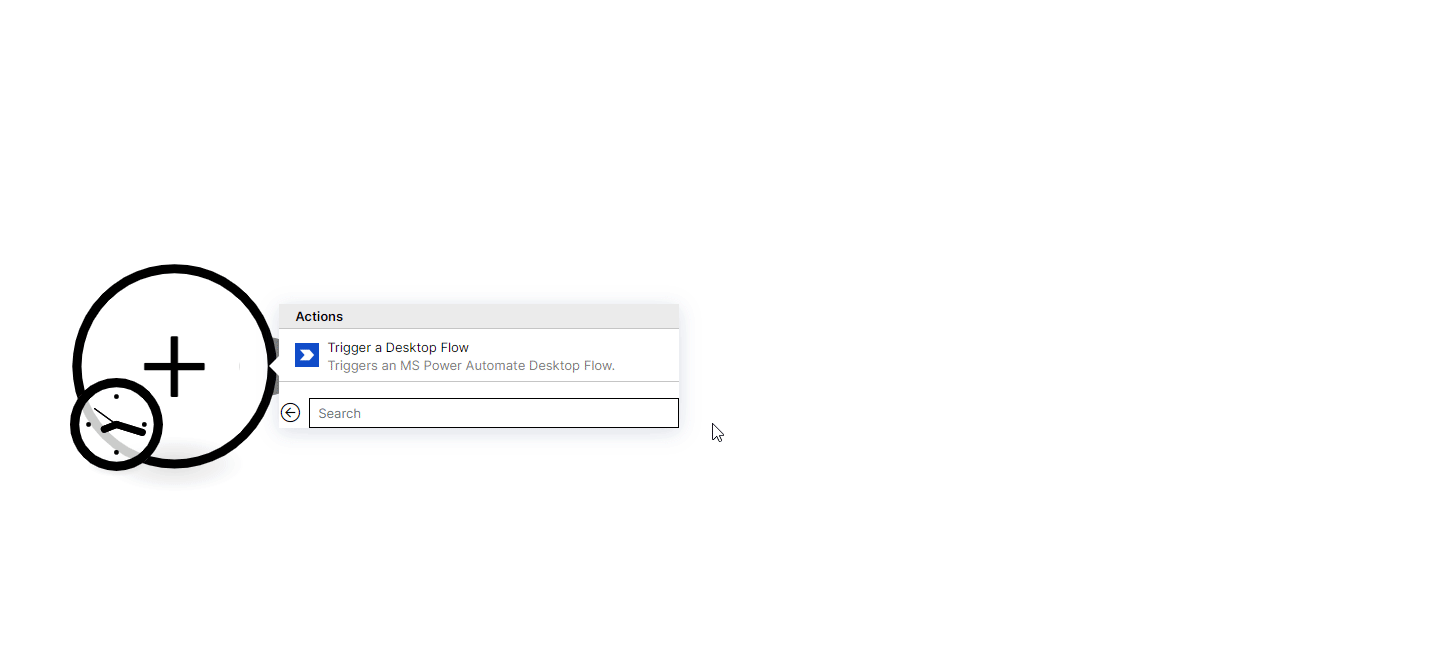
Log in to your Celonis platform , and open the Microsoft Power Automate module Action Flow .
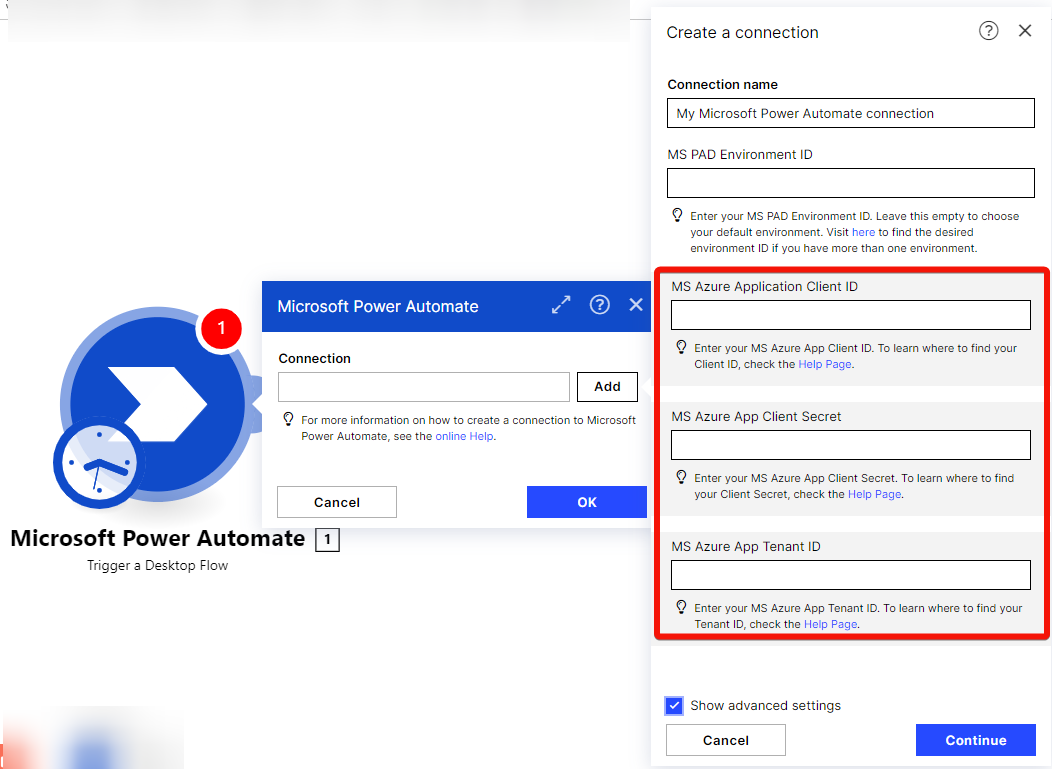
In the Connection name field, enter a name for the connection.
In the Connection name field, enter a name for the connection.
Optional: In the MS PAD Environment ID field, enter your environment ID from your Power Automate account to which you want to connect.
Leave this field empty to choose your default environment. If you have multiple environments, go to the Power Automate admin portal to copy the desired environment ID.
Click Continue.
In the pop-up window, enter your account details to sign in and authorize access by clicking Accept.
You have successfully connected the Microsoft Power Automate app and can now build Action Flows .
To connect to Power Automate with your own credentials, you need to create a custom app in your Azure account and obtain the client credentials of the app.
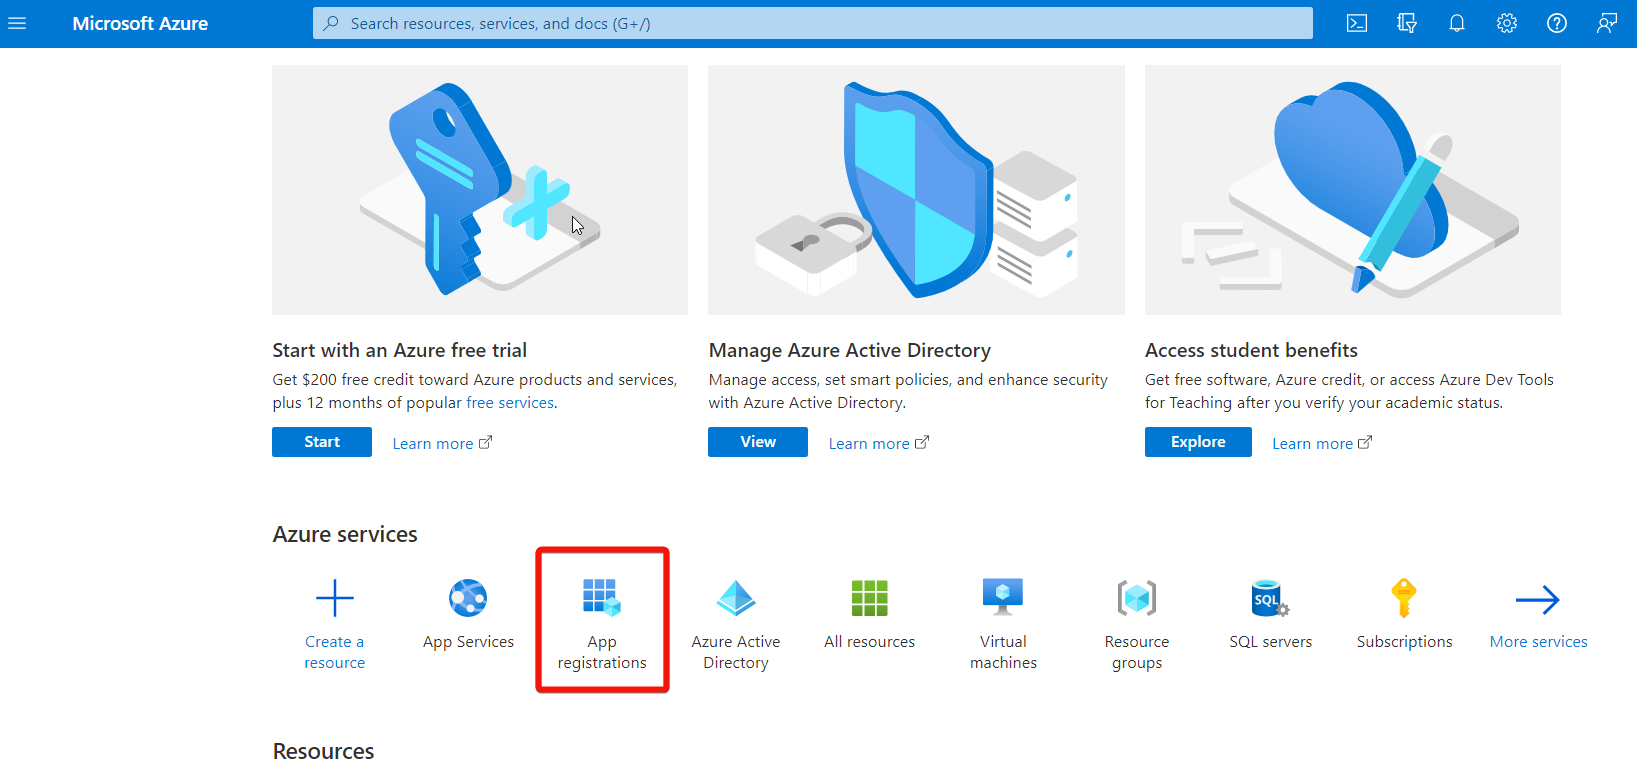
Log in to azure.portal.com.
Click App Registrations.
Click New Registration.
Enter the details as provided in the table below and click Register.

Name
Enter the app's name that you want to connect.
Supported account types
Select the option, Accounts in any organizational directory (Any Azure AD Directory - Multitenant).
Redirect URI (Optional)
Select the following options:
Platform: Web
Redirect URI:
https://auth.redirect.celonis.cloud/oauth/cb/microsoft-power-automatehttps://auth.redirect.celonis.cloud/oauth/cb/microsoft-smtp-imap”
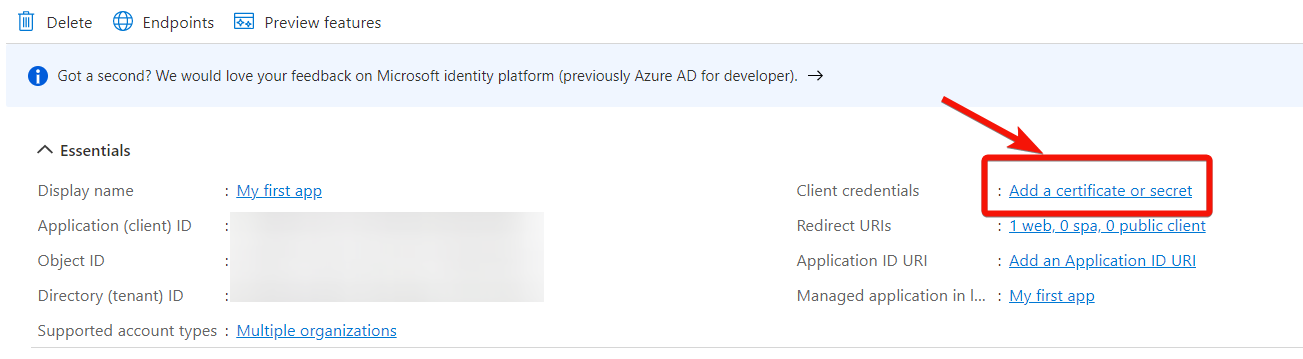
You can find the Client ID and Tenant ID details on the app screen. To add a client secret, click Add a certificate or secret.
Click New client secret. Enter a description and select the expiry period for the client secret. Click Add.
Copy the Client Secret to a safe place.
In the Manifest section, change the
allowPublicClientvalue totrue, and click Save.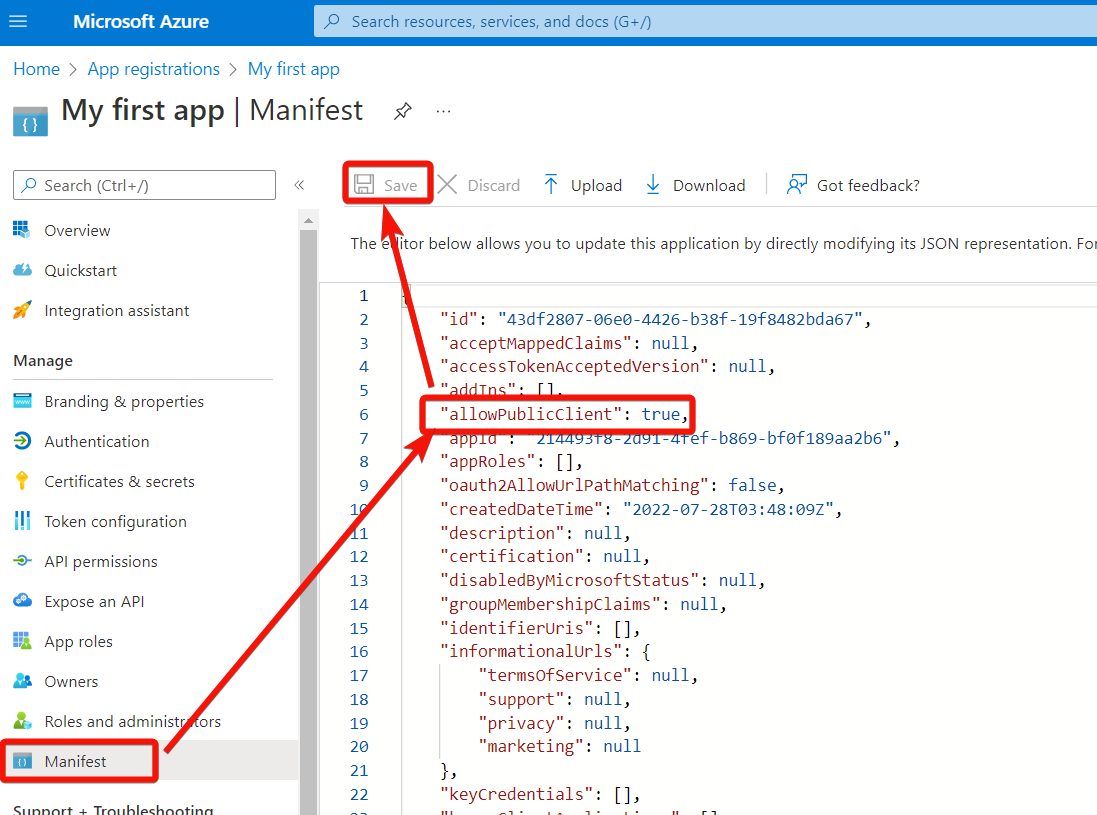
Log in to your Celonis platform account and open the Microsoft Power Automate Action Flow , select the Advanced Settings checkbox.
In the Connection name field, enter a name for the connection.
Leave this field empty to choose your default environment. If you have multiple environments, go to the Power Automate admin portal to copy the desired environment ID.
Optional: In the MS PAD Environment ID field, enter your environment ID from your Power Automate account to which you want to connect.
In the Client ID, Client Secret, and Tenant ID fields, enter the values copied in step 5 and step 7 respectively.
Click Continue.
In the pop-up window, enter your account details to sign in and authorize access by clicking Accept.
You have all the details to connect your custom app with Celonis platform , and can now build Action Flows .
You can run desktop flows using the following module.
Run Desktop Flow
Set up a desktop flow connection if you use the on-premises data gateway to trigger desktop flows.
Connection | Establish a connection to your Microsoft Power Automate account. |
Select MS PAD Flow Connection | Enter the connection flow ID of the desktop flow you want to run. To create a flow connection, see connections. You can get the Connection ID in your Power Automate account at Data > Connections > Select the connection > URL. In the URL address, find a part which says, 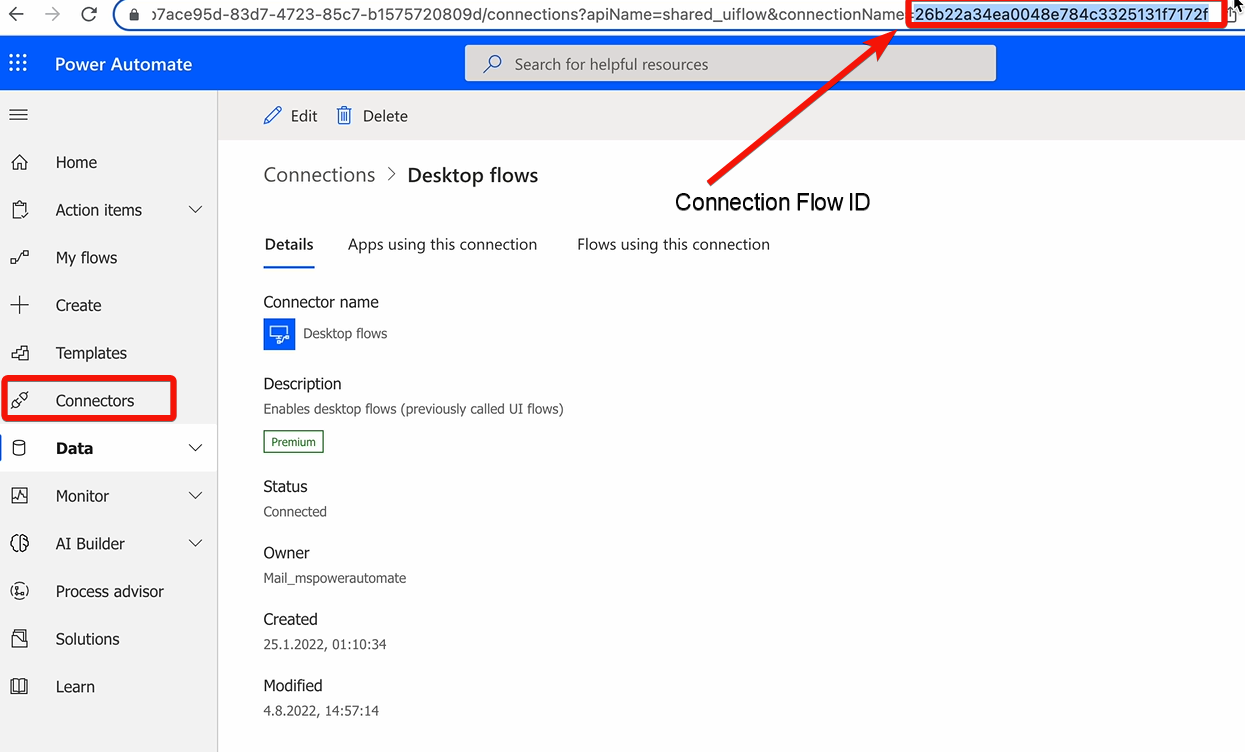 |
Select MS PAD Desktop Flow | Select or map the flow you want to run. Only the Desktop Flows created in your Microsoft Power Automate account are displayed here. The map function allows a user to map a value from one of the previous modules instead of selecting a Bot from the dropdown list. To create a desktop flow, see UI flows. |
Flow Input fields | Add the input variables for the flow. These variables are passed to and from desktop flows, allowing you to create sophisticated flows. To create variables, see input variables. |
Select Run Mode | Select the run mode for the desktop flow depending on your settings.
To learn more about run modes, see desktop flow modes. |
For more information on desktop flows, see Microsoft Power Automate documentation.