Inbox navigation
Navigating the Inbox
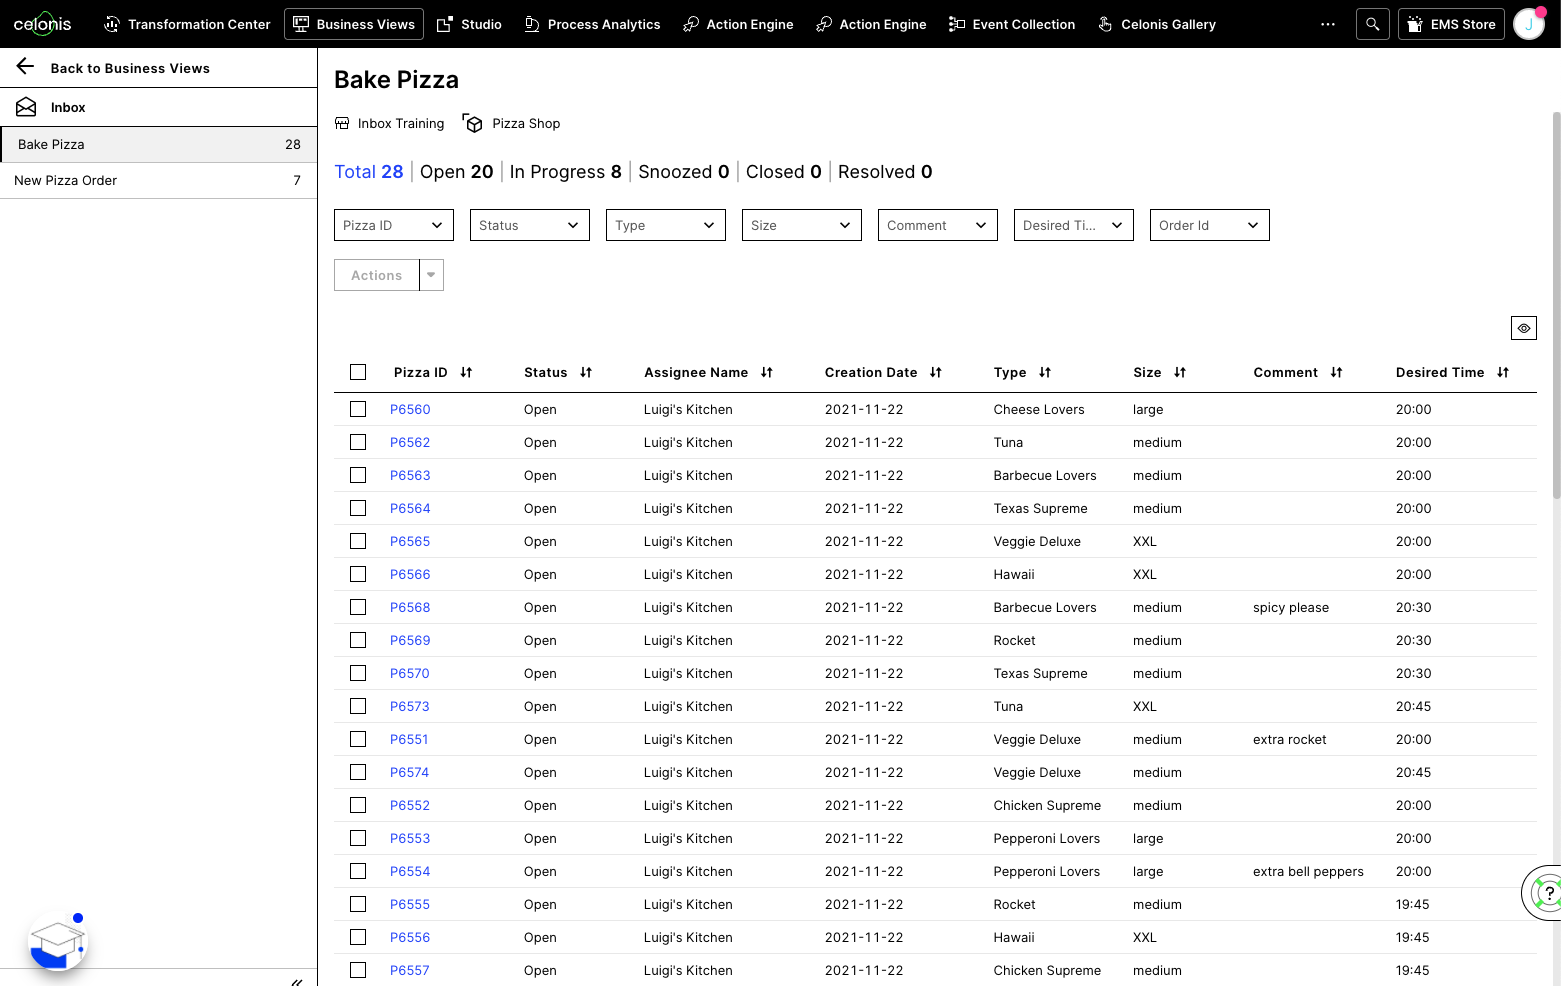
Upon entering the Inbox you will see all Task Types that currently hold unresolved Tasks assigned to you directly or to a group of which you are a member. To the right of the name of each Task type, you find the number of currently active Tasks.
To view individual Tasks click on the Task type of your interest. This will load all Tasks of that type in the view to the right.
When viewing individual Tasks you can make use of filters to granularity select which Tasks you want to see. These filters can be found right above the Task table.
Viewing Task Details
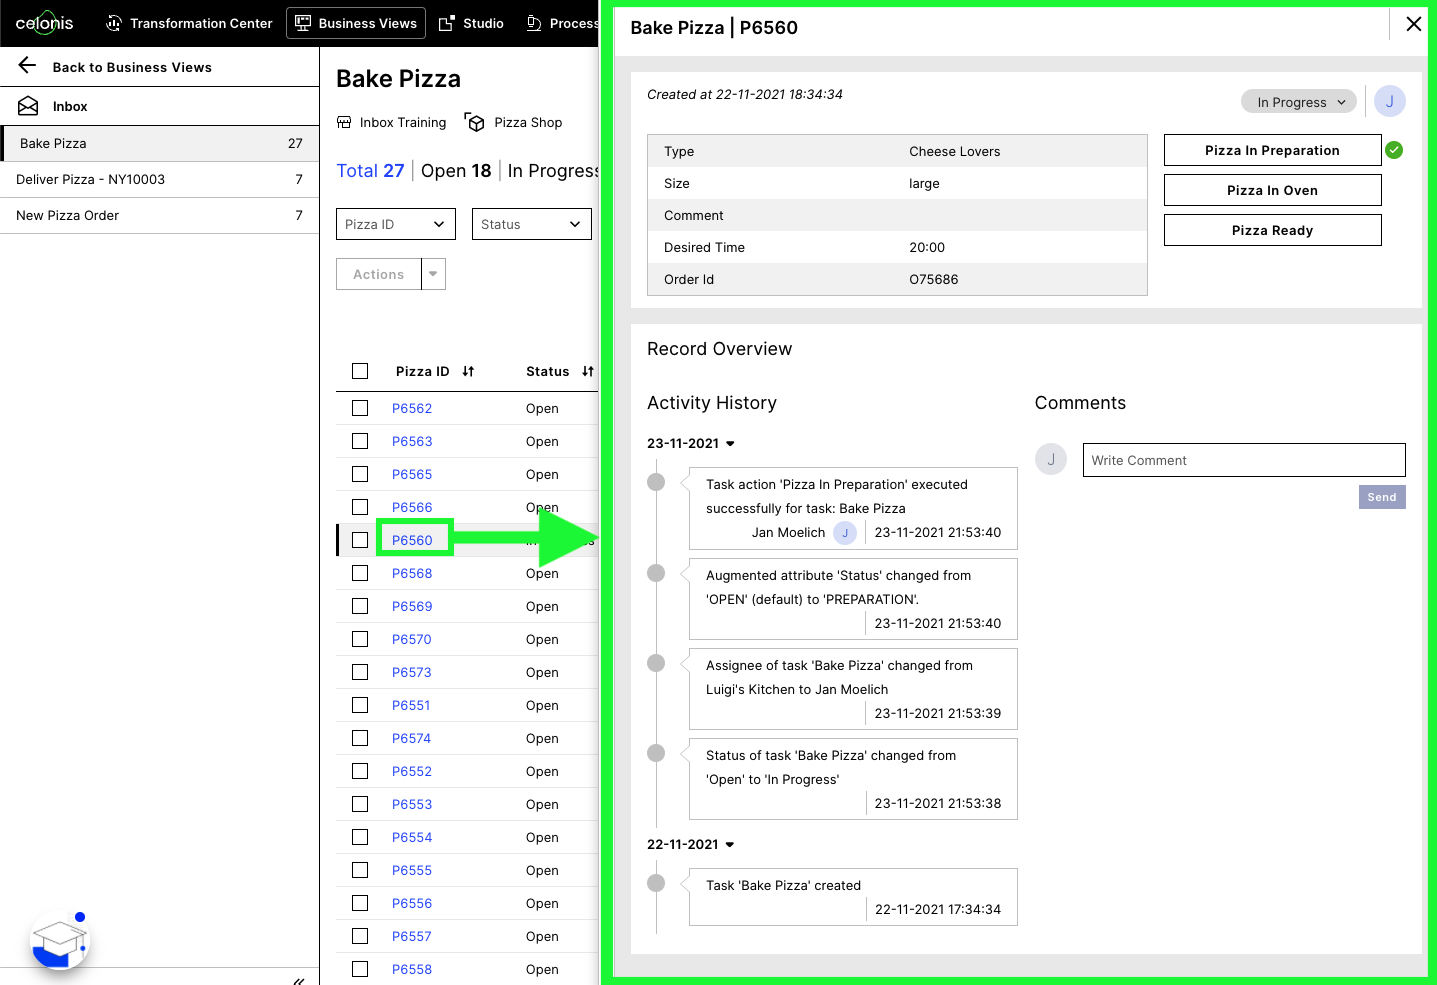
To open a detail view for an individual Task, click on the respective Record Identifier (highlighted in blue). This will open a modal on the right side of your screen, displaying all available information for this specific Task.
On the top of the resulting modal, you find Tasks attributes, description, status, assignee as well as action buttons. Clicking on the Status allows you to switch it, while the Task buttons allow you to execute predefined Task Actions.
Below this modal, you find an overview of the record's Activity History (on the left), and Comments on the right.
Task Status
Each Task can take on five different statuses: Open, In Progress, Snoozed, Closed, and Resolved.
By default, the Inbox will display all Tasks. You can however make use of the Status filter to only display Tasks of a certain status (e.g. only those Tasks currently in progress).
Those Tasks that were created through a manual sensor can be manually removed from the Inbox by giving them the status resolved. Those Tasks created through a smart sensor automatically switch to status resolved as soon as the smart sensor filter condition is not met anymore.

Task Archiving
To make sure only those Tasks relevant to you are displayed and stored in the Inbox all Tasks with the status 'Resolved' will be archived every night.
Archived Tasks will be stored in an autogenerated table containing all columns of the original table. The archived information will be pushed into the Data Pool and there it can be transformed or be directly used in the Data Model. Once archived in this table, you can make use of the various Celonis data analytic and visualization tools to gain insights into your completed Tasks.
Adding a Task Archive Table to your Data Model
Note
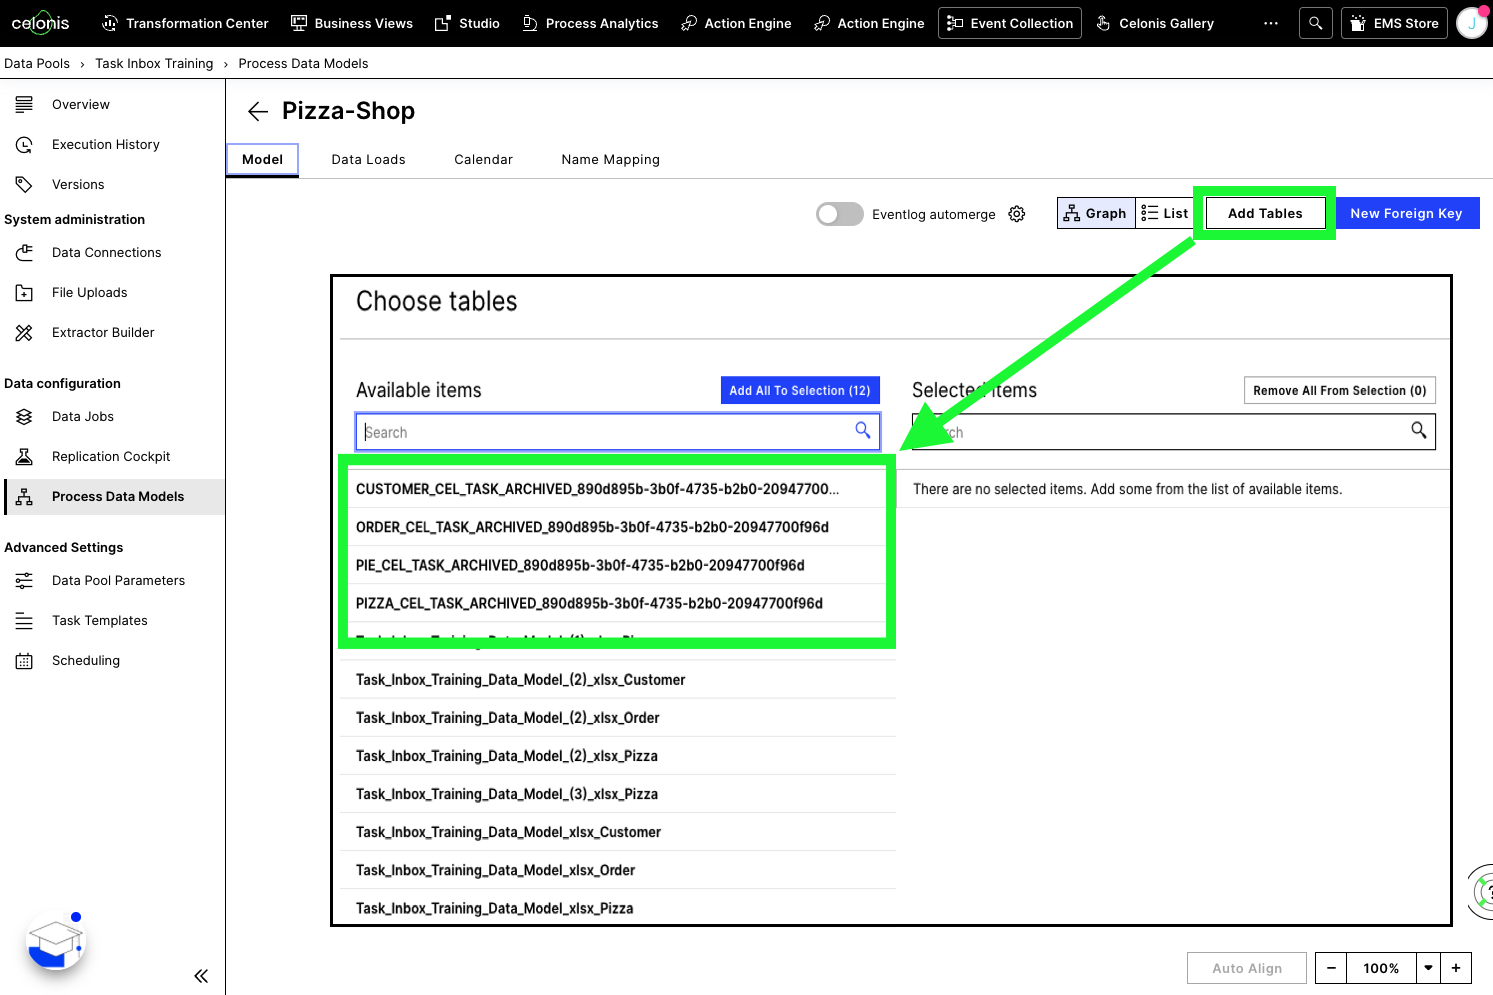
By default, the Task Archive table is not added to your Data and Knowledge Model. To query and display these archived Tasks, you have to first add them to your Data Model using the following steps:
Go to the Data integration tab.
Select your respective data pool.
In the overview, select the respective Process Data Model.
Click the Add Tables button.
Select those _CEL_TASK_ARCHIVED_xxx tables that are prefixed with the record of your interest, e.g. PIZZA_CEL_TASK_ARCHIVED_xxx. (xxx represents the Data Model ID of the Data Model from which the archived data originates)
Frequently Asked Questions
Why is the "Resolved" status not available for all tasks?
The Resolved status can only be manually edited for those Tasks that are created by a manual sensor. Tasks created through a Smart Sensor will automatically move to the resolved status as soon as the sensor filter condition is no longer met.