Assignment Rules
Assignment Rules provide an easy way to find and assign the proper assignee within Celonis Studio. These rules are required to set up the data permissions of the Data Model and allow users to see only their scope. For example, requisitions from Atlanta should not be checked by the team based in Hamburg.
Create a Group on Celonis Studio
Creating groups on Studio is only available to Admins.
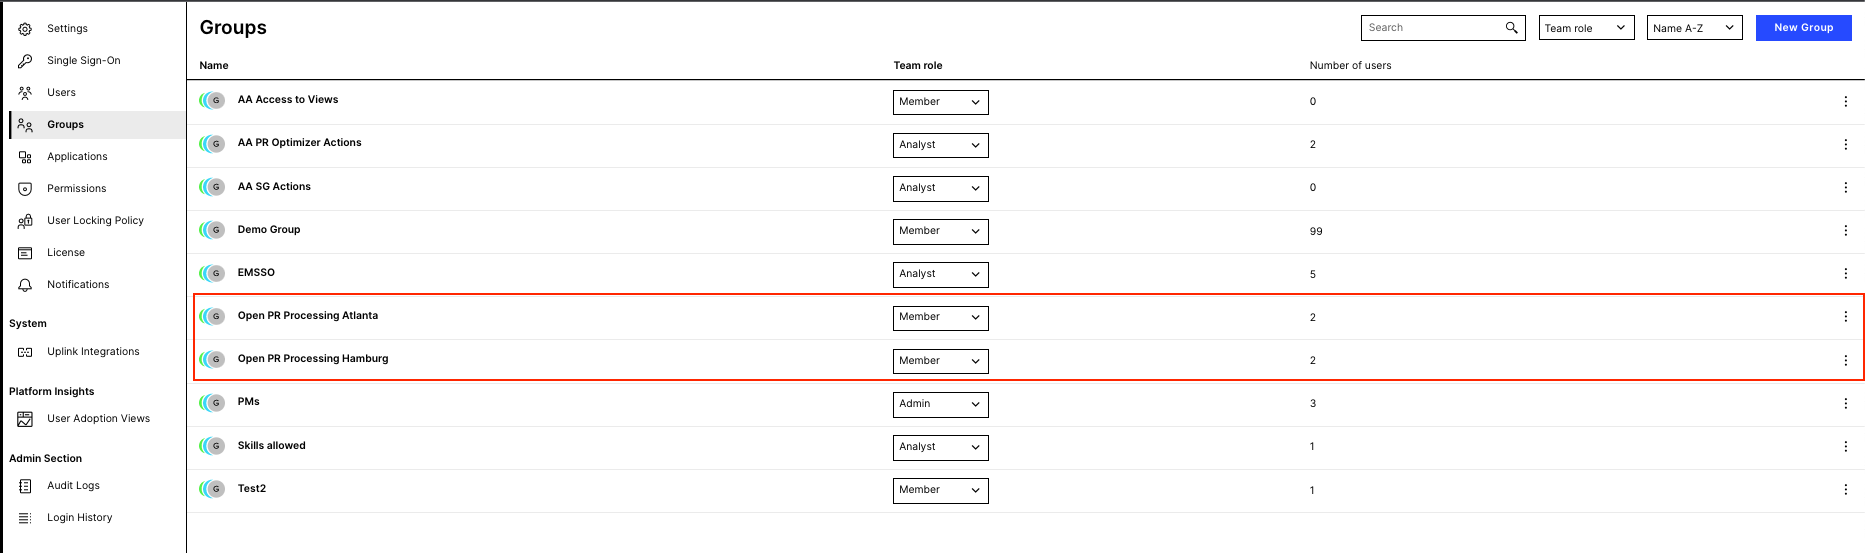
As Admin, go to Admin & Settings → Groups → New Group, then name the group and add team members to it.
In our example, we created two groups, one per plant, Hamburg and Atlanta. These groups should have member permissions to see the Open PR Processing App on the Apps section.
 |
Create An Assignment Rule
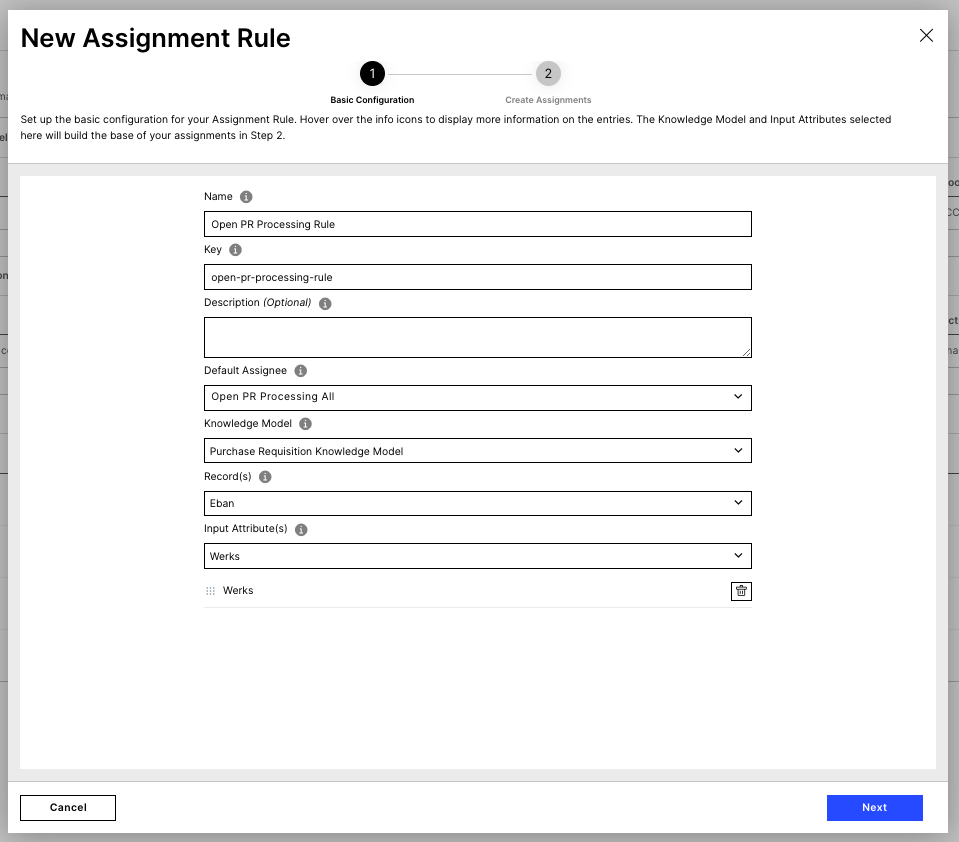
Go to variables of the package → Create New Variable → New Assignment Rule as shown below:
 |
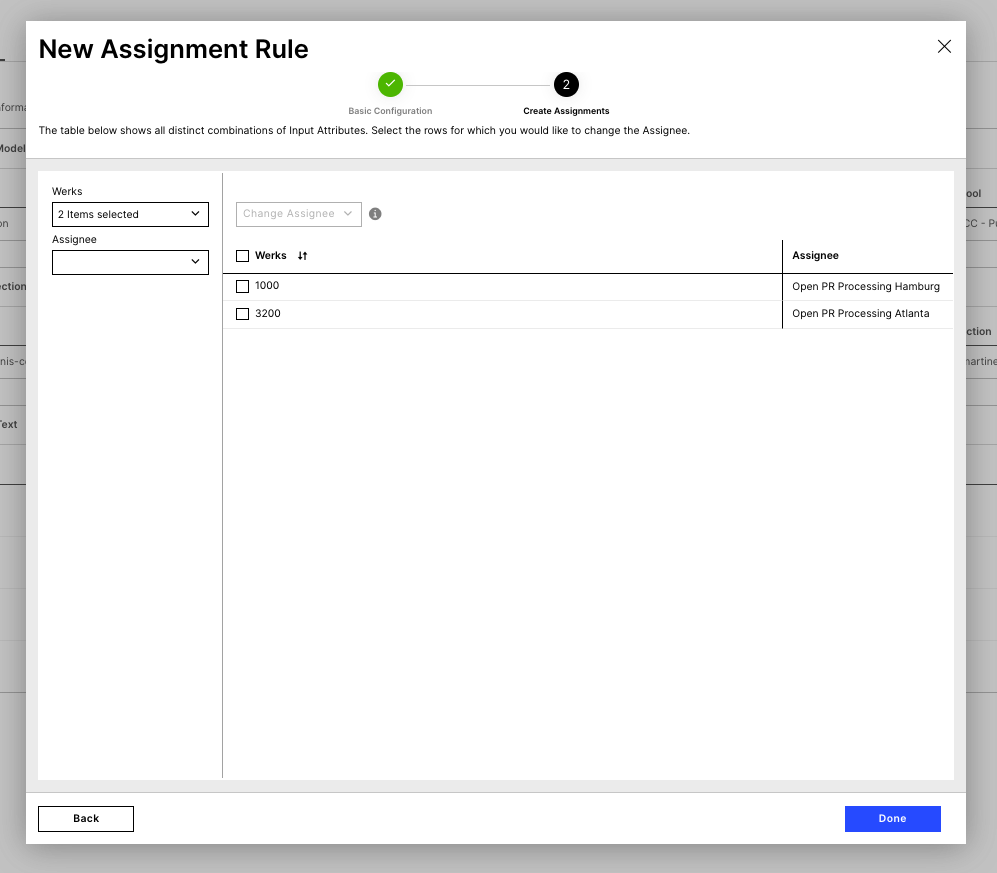
Click Next and assign the rules based on your preferences. Use the Filter sidebar to select the dimension and the Change Assignee dropdown to look for the created groups. Once it is completed, click Done.
 |
To learn more about assignment rules, please visit this link.
Smart Sensor
Note
By default Step 7 is not included on the app. This step would need to be included on the implementation if the customer has the requirement of Assignment Rules.
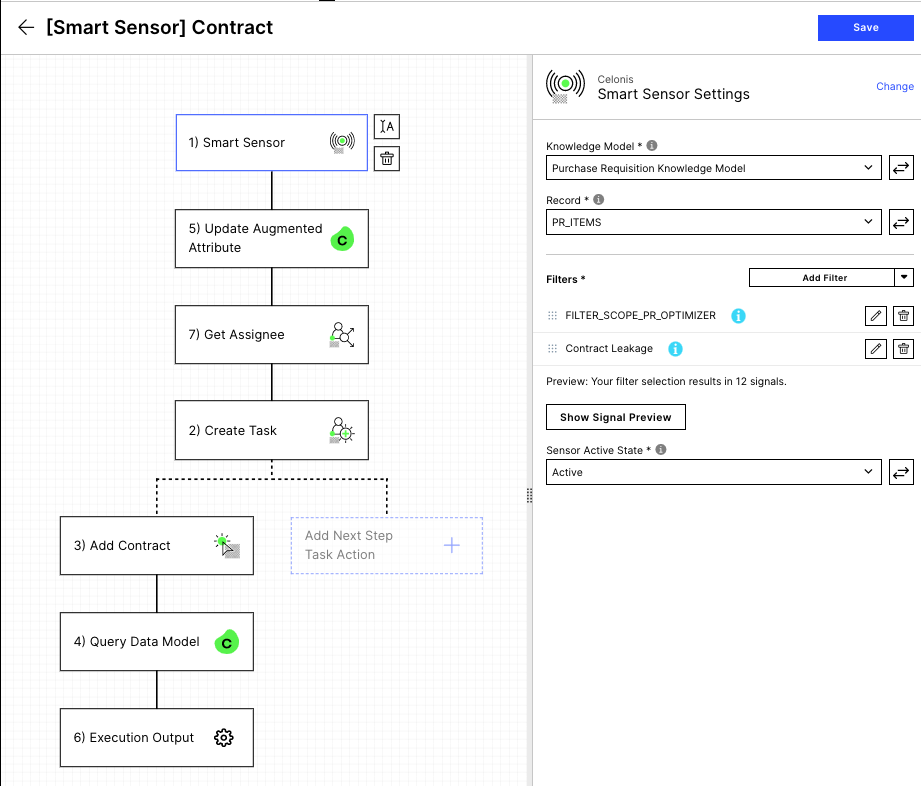
Taking the Contract Leakage use case, let’s see how it should be configured.
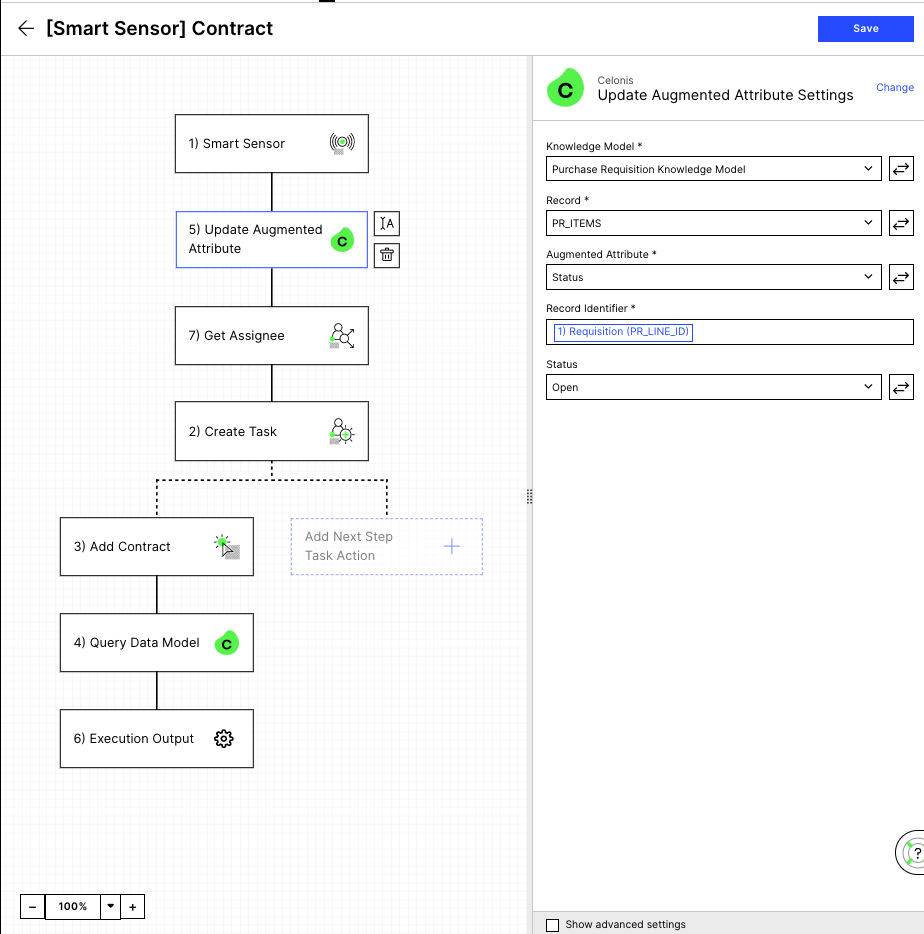
Smart Sensor. This automatically detects inefficiency. Select the KM and the PR_ITCelonis Platform record since the inefficiencies happened on the item level.
As a filter, use the FILTER_SCOPE_PR_OPTIMIZER since it has been validated and contains all the requisition on the scope. This filter needs to be selected in all the smart sensors of the app.
Set the augmented attributes as Open. This will set the purchase requisition item as open. Configure it as per screenshot below:
Set up of the Assignee (Optional). The defined assignment rules will be assigned to the created groups. In this case, we have an assignment rule that contains WERKS and EKORg (Plant and Purchasing Organization)

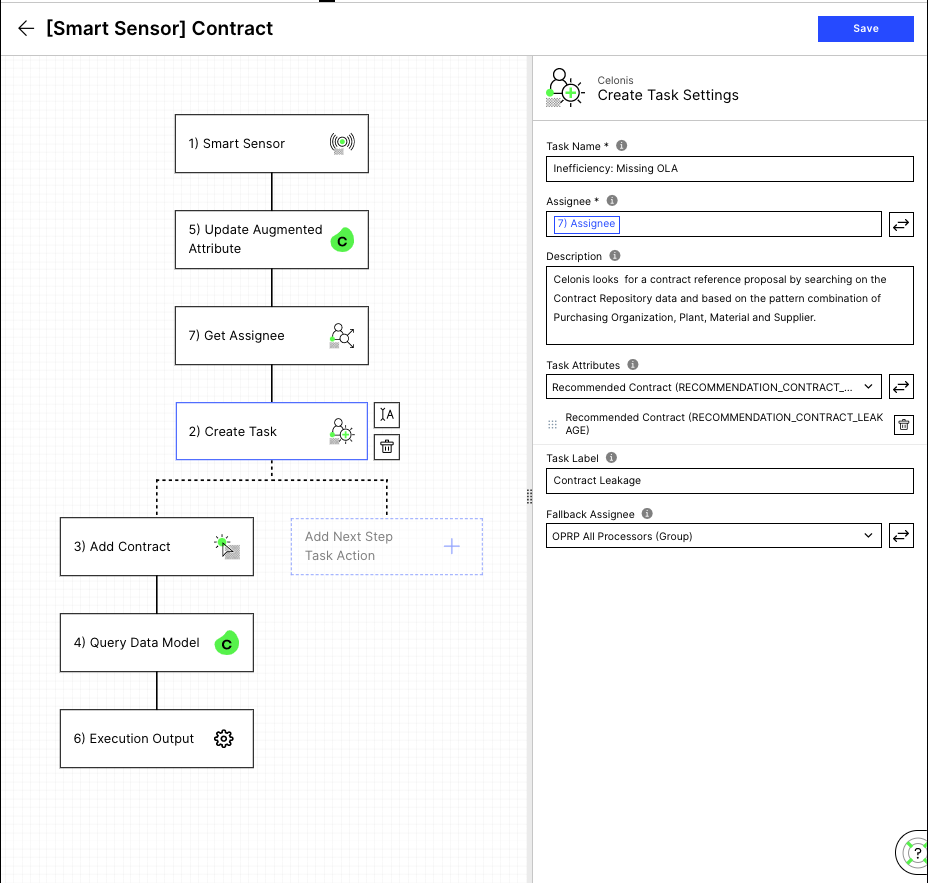
Create the Task: The task will be appearing on the profile view of the app, under the execution gap list component. The task name will define the need to contain %OLA% to be considered as Contract Leakage. Please see this section for more information.
Assign: The output from the previous block.
Task Attributes: This contains the recommendation that will appear on the execution gap list component.
Fallback Assignee: This is the user or the group where the requisition will be assigned in case of an error on the Assign field.
Be aware that until the tasks are created, the app will show some errors as this feature is creating the augmented table called PR_ITCelonis Platform_CEL_TASK.
Create a Button to link to a Skill/Action View.
Query Data Model: This is a simple query to the data model to retrieve all the necessary fields into the next steps.
Action Flows: Refer to the next chapter of this documentation.