Setting up value tracking
Legacy content
You are currently viewing legacy Transformation Hub content. We recommend using the updated Transformation Hub in Views app, which offers enhanced capabilities for tracking your transformation program and quantifying business impact.
You need to set up value tracking so that Transformation Hub understands how to quantify the value realized from your value opportunities. For common types of value opportunities, Transformation Hub provides recommended value tracking formulas to help you quantify value based on KPI improvements (such as in the first approach below).
Common approaches to quantifying value are:
Tracking how a KPI improved from its baseline, then converting that improvement into actual value realized.
For example, if you wish to realize more cash discounts offered by vendors from paying invoices earlier, you can change the payment policy to pay invoices with cash discounts earlier. Then implement a Celonis app that highlights invoices with cash discounts that should be paid earlier.
You can record your current baseline of 15% cash discounts realized from the last fiscal year and start tracking the improved cash discounts realization rate after the change.
If you improve this rate to 60% in the current fiscal year, that’s a 45% improvement.
To understand how much actual value this represents, multiply this improvement by the available cash discounts in this fiscal year, which in this example is $10,000.
This means that you have realized (45% * $10,000) = $4,500 of P&L value due to the solutions implemented to improve cash discounts realization.
Track usage of implemented solutions and their associated value.
For example, if you want to prevent duplicate invoice payments.
In the app, review invoices marked as duplicate, verify if they are real duplicates, and then prevent payments for any invoices verified as duplicates.
You can quantify how much working capital value this frees up by aggregating the total value of the duplicate payments prevented.
You can also understand how many hours of productivity are saved by multiplying the number of prevented duplicate payments by the estimated effort required to retrieve each duplicate payment.
Before you begin, ensure you have completed the following steps or meet the requirements listed below:
You must have Admin permissions to use Transformation Hub.
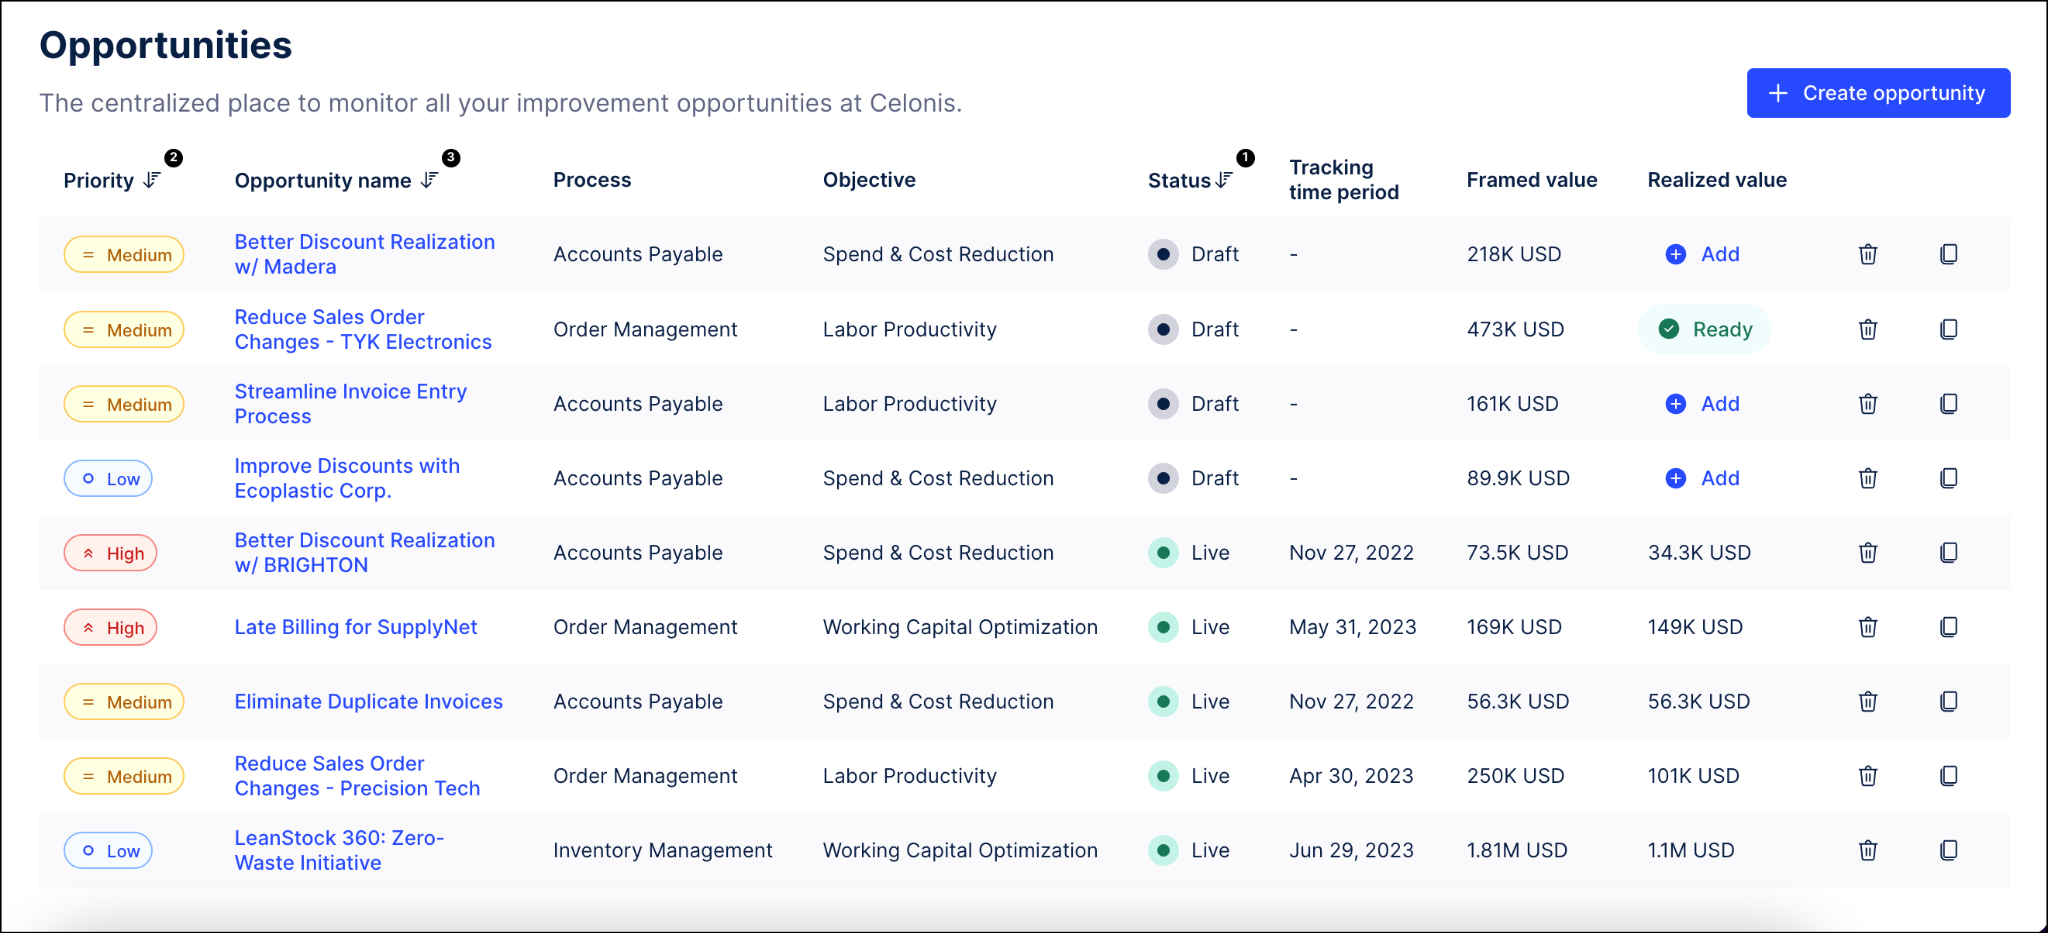
Locate your value opportunity on the Opportunities screen and click the name link in the Opportunity name column.
Note
You can also add the realized value by clicking the “Add” link in the Realized value column.
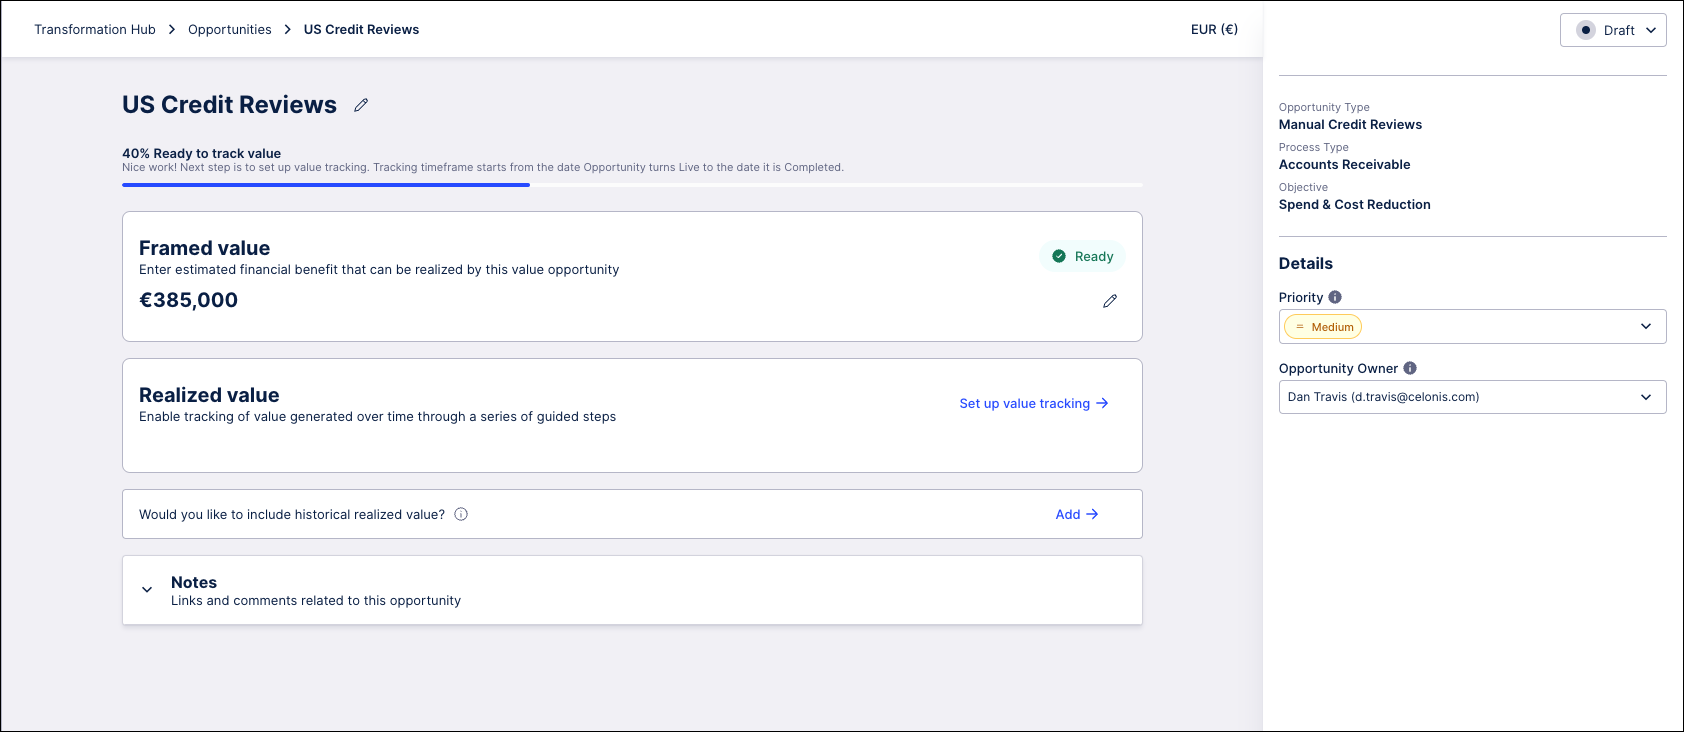
On the value opportunity details screen, click the Set up value tracking link.
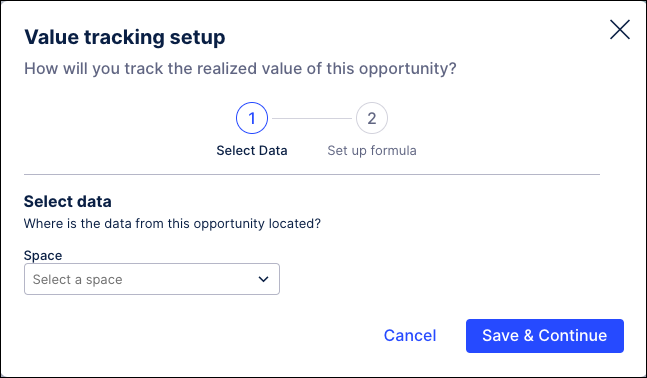
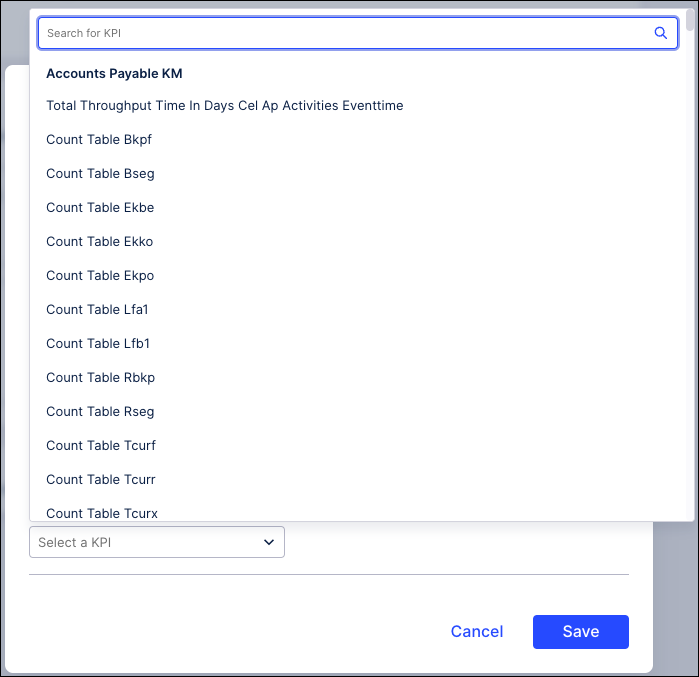
Select the Space and Knowledge Model containing the KPIs that you want to use to track value for this value opportunity.
Note
If you are on Object Centric Process Mining and don’t have a Knowledge Model, you can create a Knowledge Model for this step.
On the Value tracking setup screen, use the dropdown to select the Space containing the KPIs you want to use.
Note
If you are unable to access the Value tracking setup screen, verify with your team admin that you have the correct permissions assigned or creating a value opportunity.
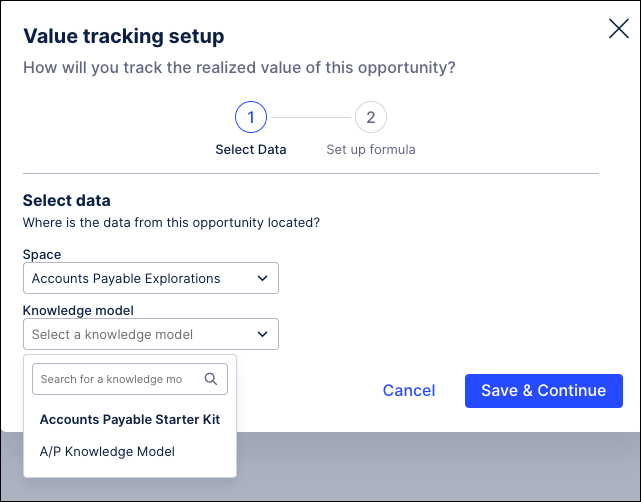
Once the space has been selected, use the Knowledge model dropdown to select the model you want to use to track value for this value opportunity.
Click Save & Continue to finish.
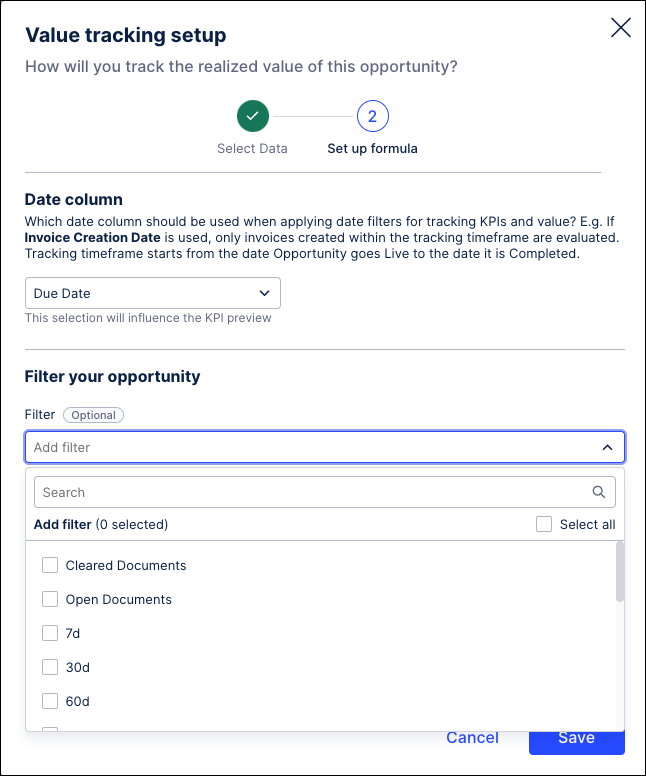
In the Set up formula step, you can scope the value opportunity by choosing a date column to use in your filters and then by selecting one or more applicable filters from your Knowledge Model, such as filtering by company code or vendor. You then use this filtered data to create your value tracking formula by selecting KPIs or creating a custom statement using PQL.
Use the Date column dropdown to select a date column from your Knowledge Model to use for time filters.

For example, if “Creation Date” is selected as the Date column, then only invoices with a date value in the “Creation Date” column that falls between <Tracking start date> to <Latest date> will be used when calculating value realized and KPIs.
In the Filter your opportunity section, use the dropdown to select one or more filters from your Knowledge Model to apply. (optional)
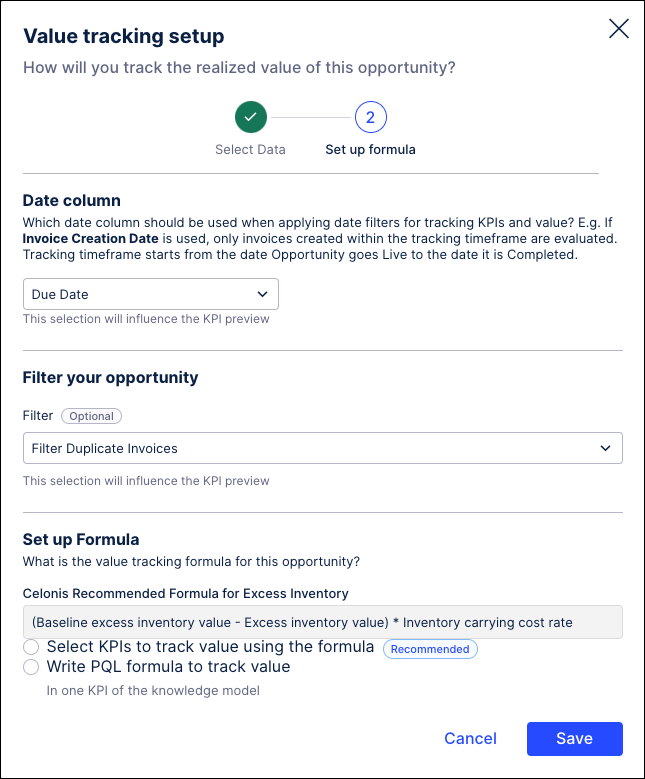
In the Set up Formula section, choose one of the two options for setting up your value tracking formula: "Select KPIs to track value using the formula" or "Write PQL formula to track value".
Choose "Select KPIs to track value using the formula" to use the recommended option, which provides a formula in business terms and then asks you to select the KPIs or constants to use in that formula.
Baselines: Provide a baseline value for the KPI that you are trying to improve. This baseline can be from the last fiscal year, the last 12 months, or another value. You may want 12 months of data for your baseline if your data is cyclical. If your data is relatively consistent, then you may feel that 6 months of data better represents your baseline.
Note
We strongly recommend that the same KPI be used for calculating your baseline and for monitoring KPI improvements after implementing solutions.
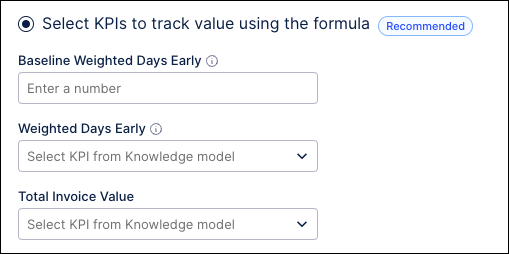
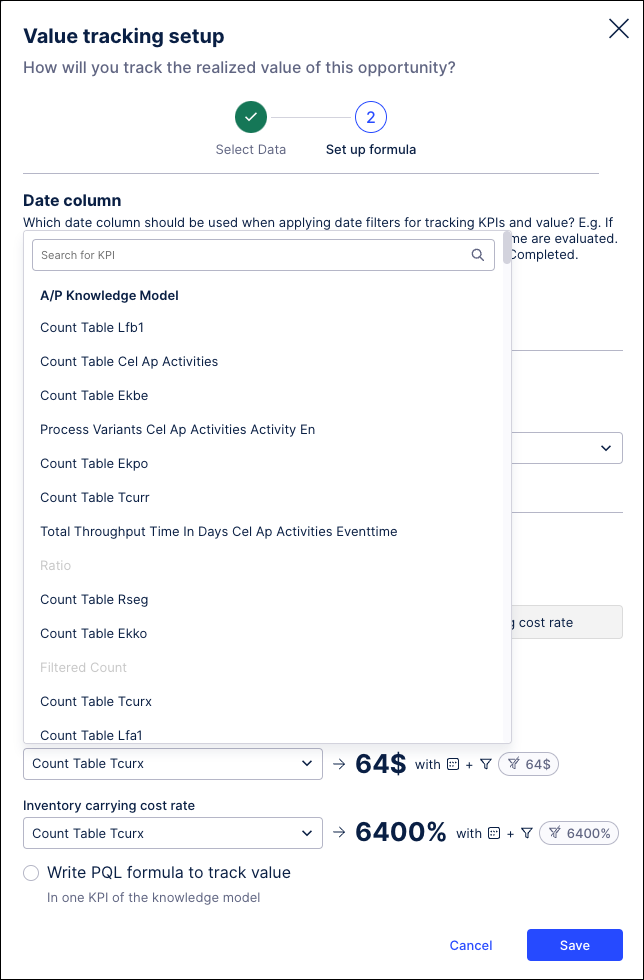
KPIs: Use the dropdown to select the KPI you are trying to improve, as well as any other associated KPIs needed for quantifying value.
Estimates: Some formulas require you to provide estimates to quantify value, such as the estimated effort per manual activity or the estimated cost per minute to manually carry out an activity.
Select "Write PQL formula to track value" to use a custom formula, which requires you to reference a KPI containing the complete formula.
Click Save. You can now add historical realized value or review and finalize your setup.
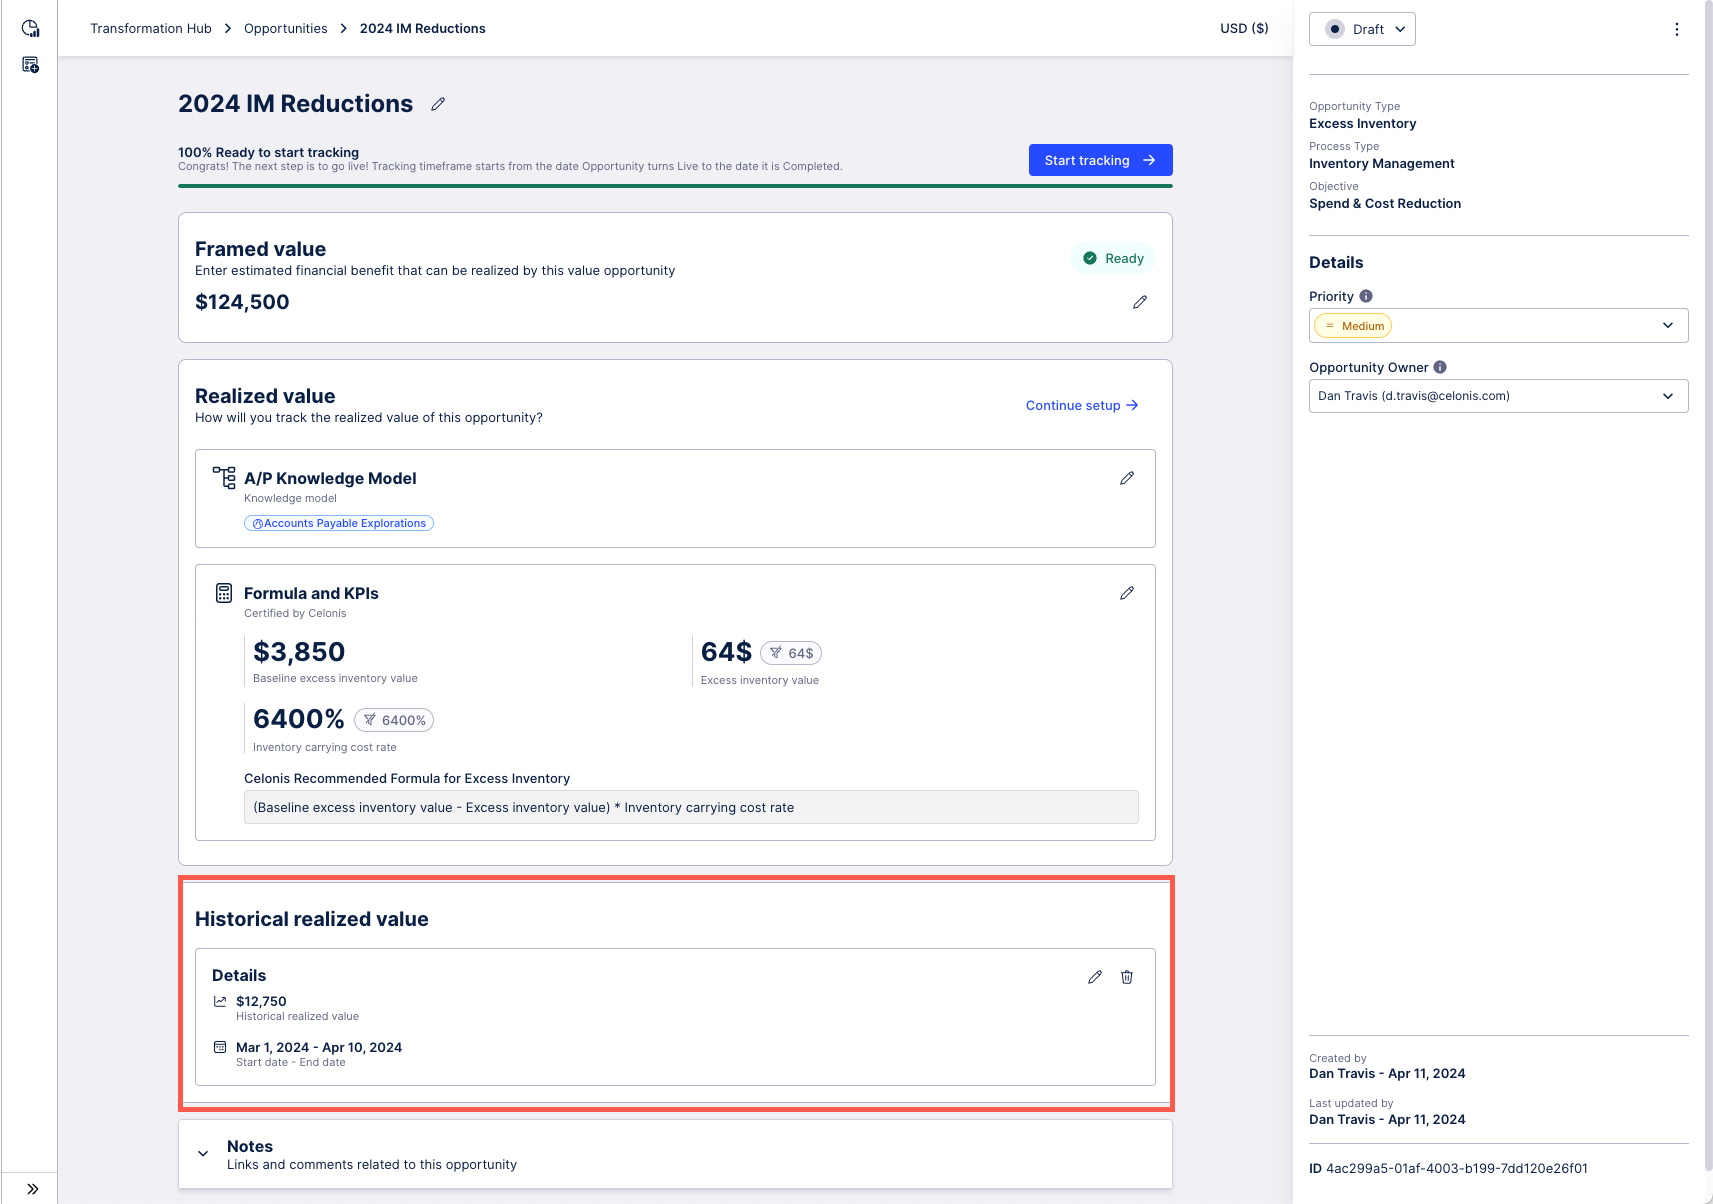
Historical value can be added to an opportunity to account for value that was realized prior to the opportunity being set to Live. You can add, edit, or remove historical value for an opportunity at anytime when the opportunity is in Draft or Live status.
An opportunity's historical value is then displayed on the opportunity details page which shows both the historical value and tracked value. This historical value will also be shown on the Value Report page for this opportunity.
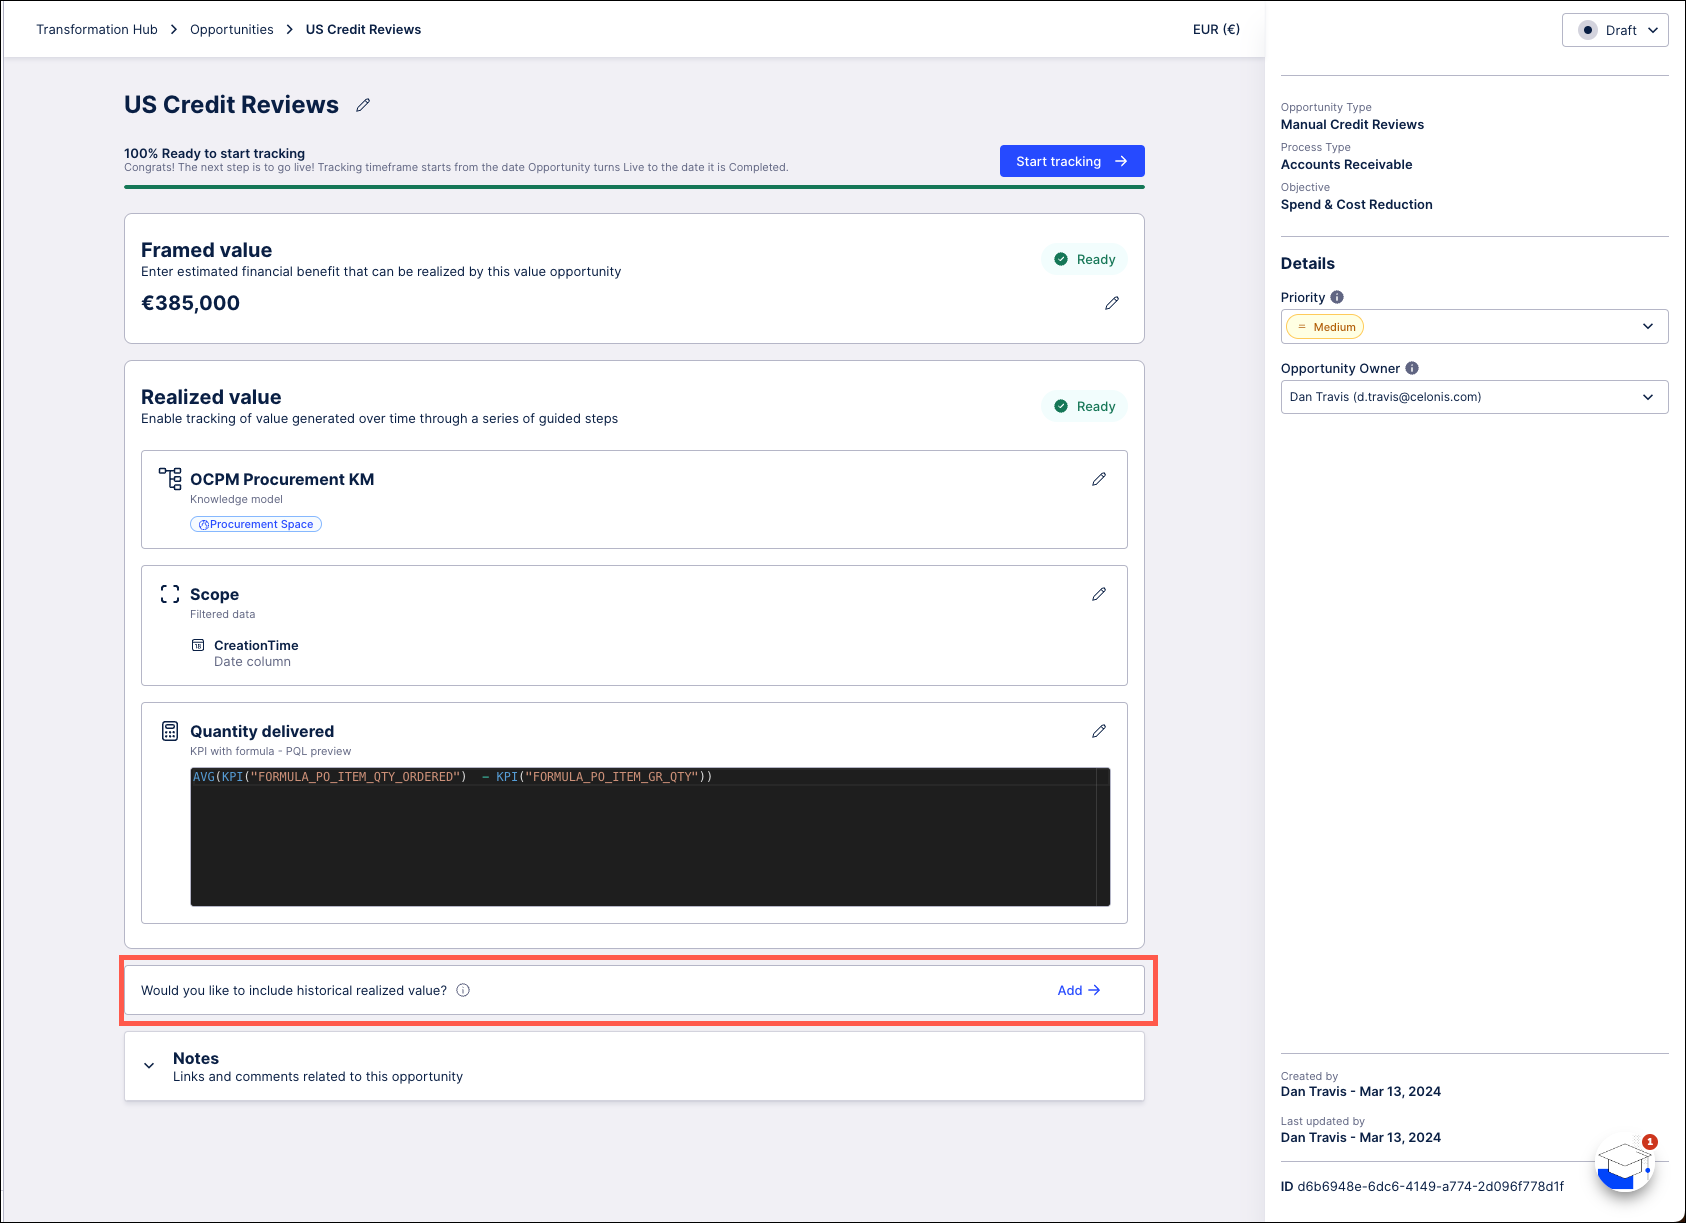
On the value opportunity details page, click the Add link in the "Would you like to include historical realized value?" panel.
In the Historical realized value window, enter the value that this opportunity realized prior to being turned Live.
Note
The currency is set to the default value for this opportunity and cannot be changed.
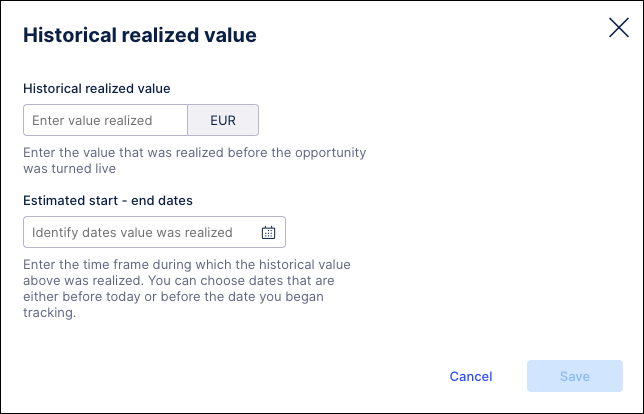
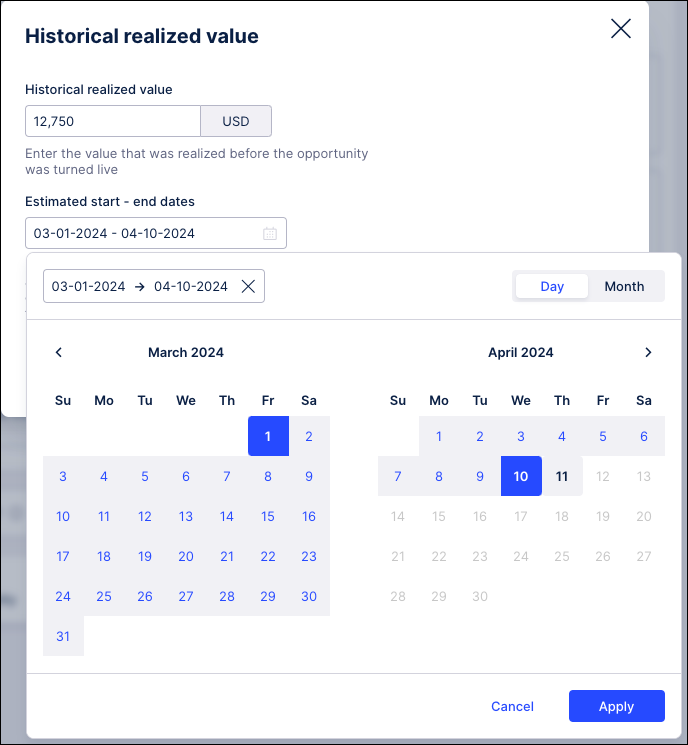
Use the date field to select the estimated time frame during which this historical value was realized. Select both a start and end date to indicate the full time frame and then click Apply.
On the Historical realized value window, click Save. The Historical realized value is now displayed on your value opportunity details page.
Next, you need to review and finalize your setup.
Your value opportunity is now “100% Ready to start tracking” but is still in Draft status. Review your framed value and realized value setups before you begin tracking. Click the Edit (pencil) icon to make changes to any of your setup configurations.
 |
Use the Notes field at the bottom of the page to enter any additional information regarding this value opportunity or add any relevant links.
Once a value opportunity turns Live, Transformation Hub will take the KPIs linked in your value tracking formula, apply the filters you have selected, and then calculate the value realized and the KPIs between <Tracking Start Date> to <Latest date>. This data will be shown on a Live value opportunity’s details page with the date column you selected during tracking setup as the applied time filter.
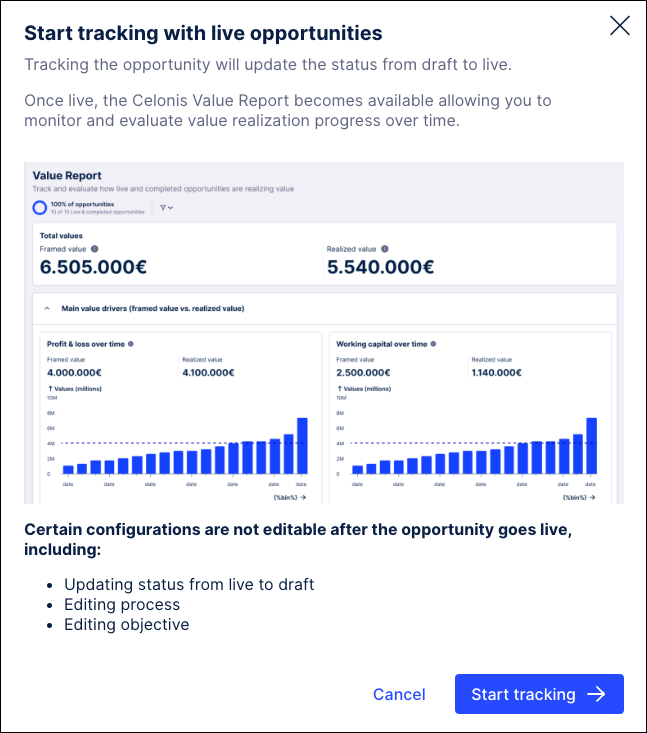
Once your value opportunity is “100% ready to start tracking”, you can click the blue Start tracking button to turn this value opportunity Live and begin tracking value.
Warning
You cannot convert a value opportunity back to Draft once it is Live.
|
On the Start tracking with live opportunities screen, confirm that you are ready by clicking the Start tracking button.
 |
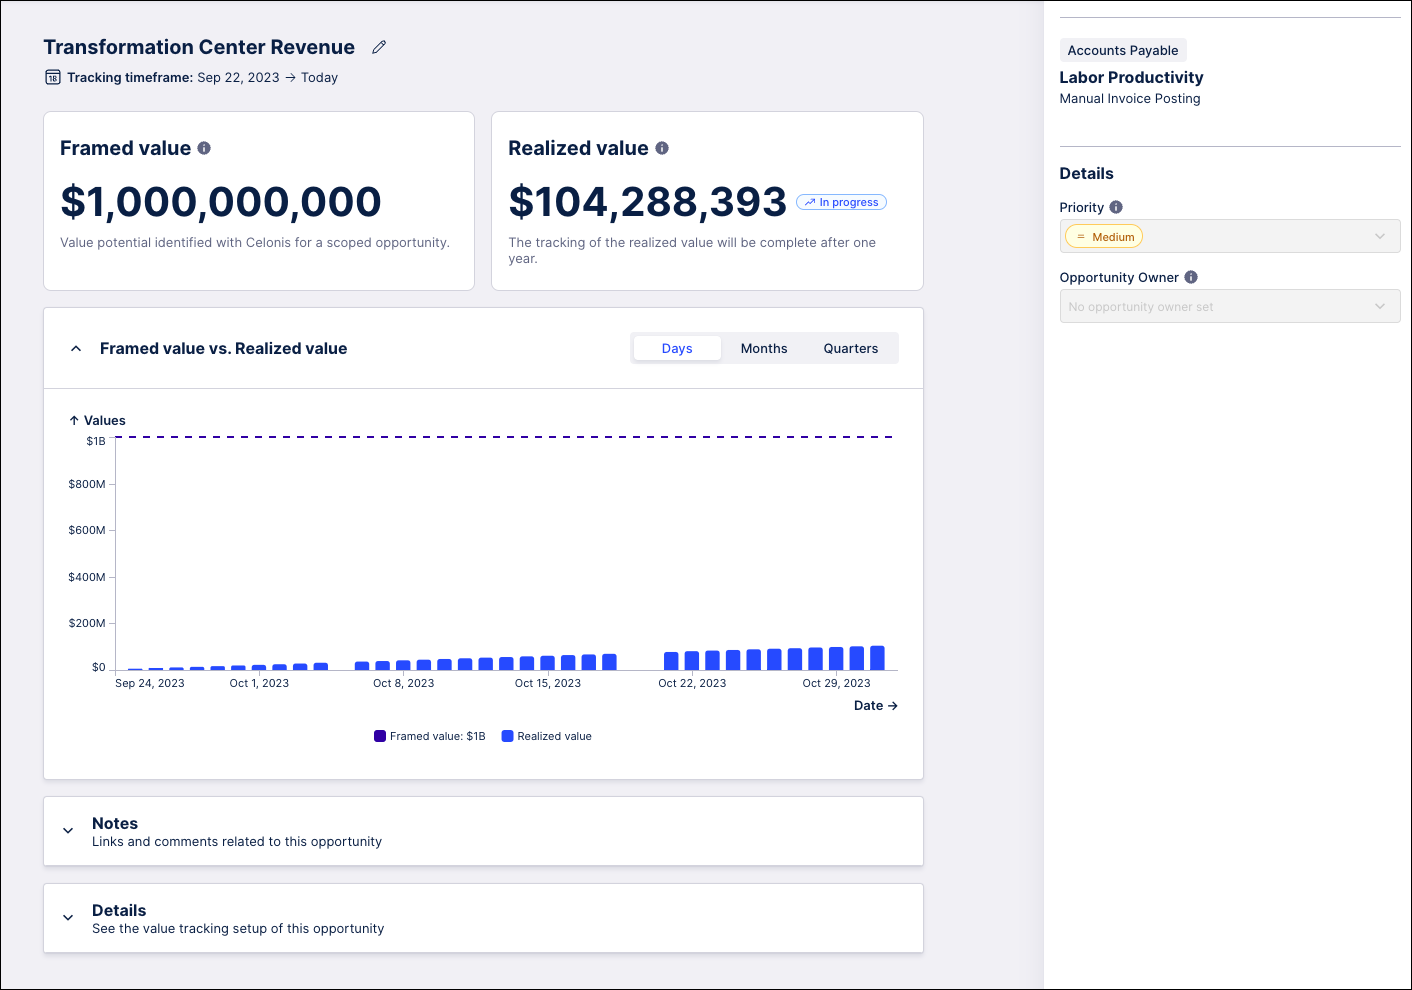
Value tracking for this value opportunity is now enabled and the status in the upper right corner is updated to Live. The Tracking timeframe is now displayed as the current date to indicate when tracking began.
Note
Initially there will not be any data displayed since value has not yet been realized.
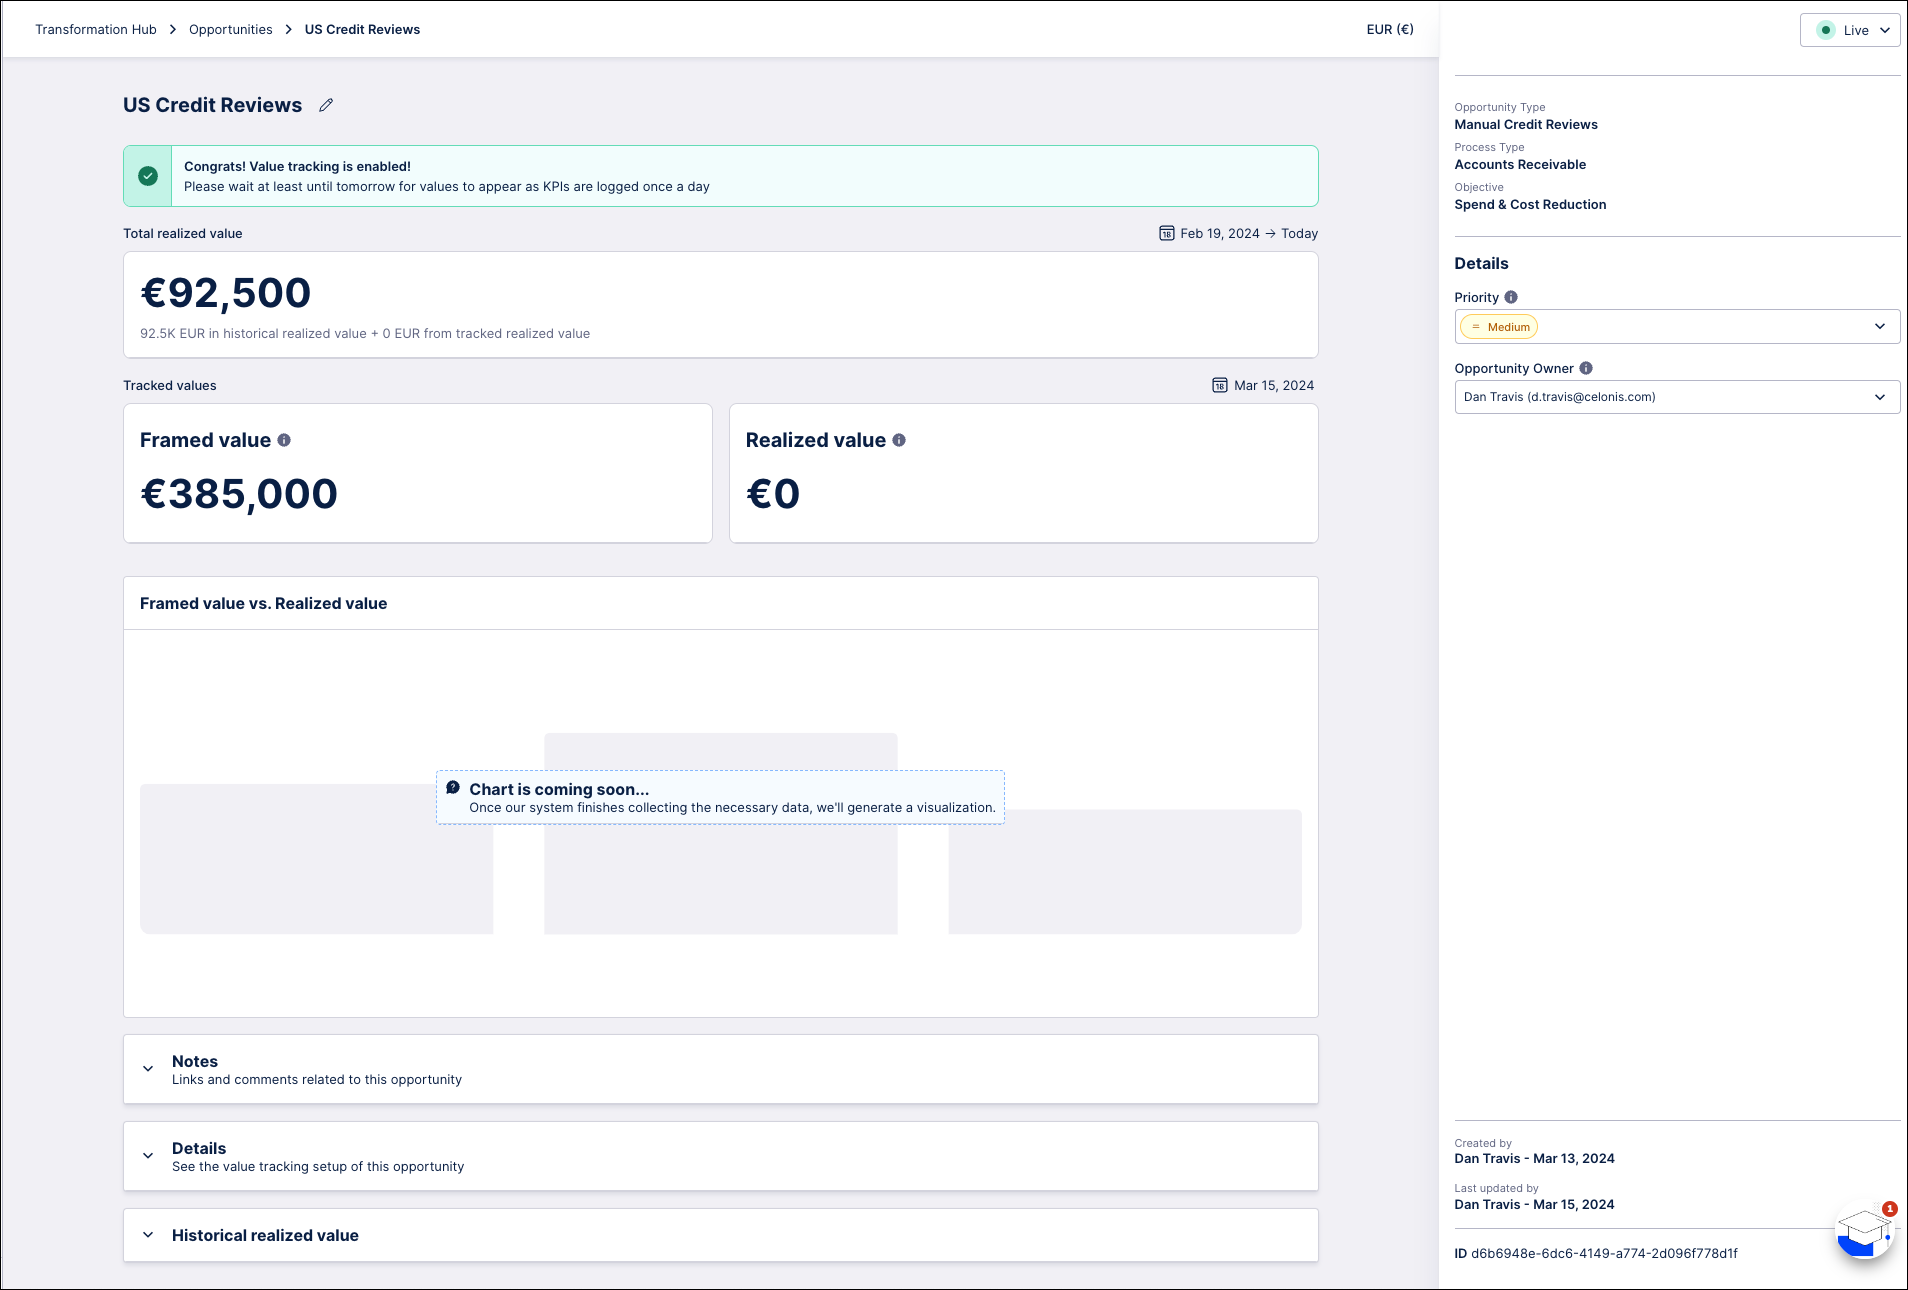 |
When you view the value opportunity, the time filter applied to the KPIs and values displayed are from <Start date> to <Today’s date>. For example, if you turned the value opportunity Live on September 22, 2023 and returned on October 31, 2023, you would see Transformation Hub KPIs and value for the time filter September 22, 2023 to October 31, 2023. These values are logged in and will persist if source data for this timeframe is removed from Celonis Platform. The value chart displays how value trends over time.
 |
Value tracking can be ended at any time by updating the value opportunity status to Completed. The value opportunity tracking end date is recorded as the date the value opportunity is marked completed.
Warning
You cannot turn a value opportunity to Draft or Live once it is Completed.
Once Completed, the value realized for this value opportunity is finalized and Transformation Hub stops tracking the KPIs and value. When you return to the value opportunity details page, you will see KPIs and value displayed for the value opportunity tracking start date to tracking end date.
Value opportunities have a maximum duration of one year. If a value opportunity is not manually set to Completed within a year of the start date, it will automatically be updated to Completed after one year. This prevents inaccurate data from being logged if the data is retained on a rolling basis.
Deleting a value opportunity
Value opportunities can be deleted. Be careful when deleting a value opportunity as it can not be recovered. Deleting a Live or Completed value opportunity with value will mean that you lose the tracked KPIs and value permanently.
Copying a value opportunity
When you copy a value opportunity, the details, framed value and value tracking setup are copied over to a new value opportunity. Regardless of the original value opportunity’s status, the copied value opportunity will always have a status of Draft.