Importing custom object types from a table
Import custom object types from source system tables to construct your object-centric data model. This configuration establishes a standardized, business-focused data layer across your organization by mapping relational source data directly to real-world objects and events.
For example, you can map an SAP sales header table (VBAK) to a Sales Order object, or an inventory table (MSEG) to a Material Movement event to scale your process insights.
During the import, Celonis automates data modeling by mapping table columns to object attributes, utilizing foreign keys to suggest object-to-object relationships, and generating the underlying transformation scripts.
To import your objects and events, the data source must be accessible via a data connection in your data pool.
To share data between your data pools, see: Sharing data between data pools.
To import custom object types from a table:
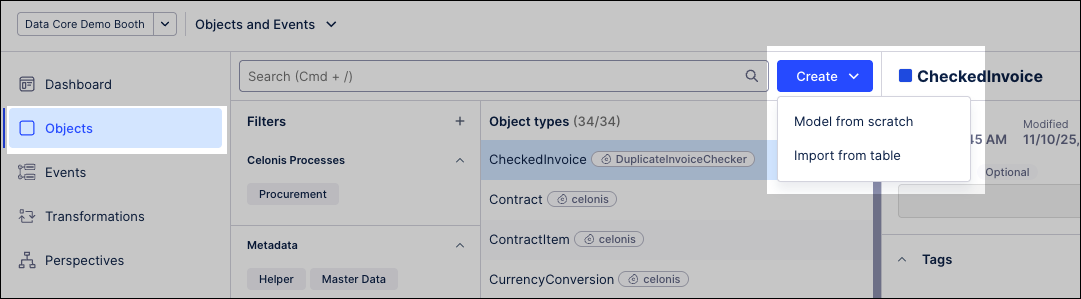
Click Objects.
Click Create - Import from table.
SSelect your data source, and then select the tables from that data source to import.
For example, to set up a procurement workflow, select your ERP's purchasing document header (EKKO) and item (EKPO) tables.
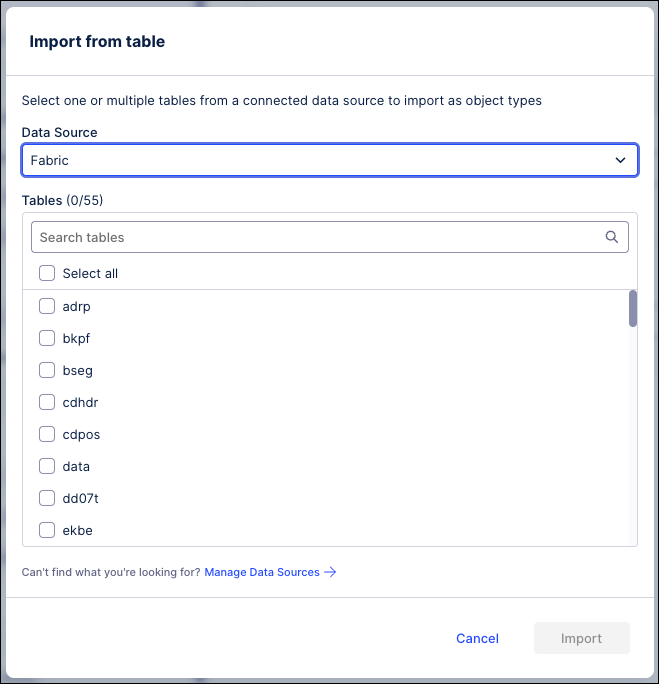
Click Import to load your source tables directly into the data model editor.
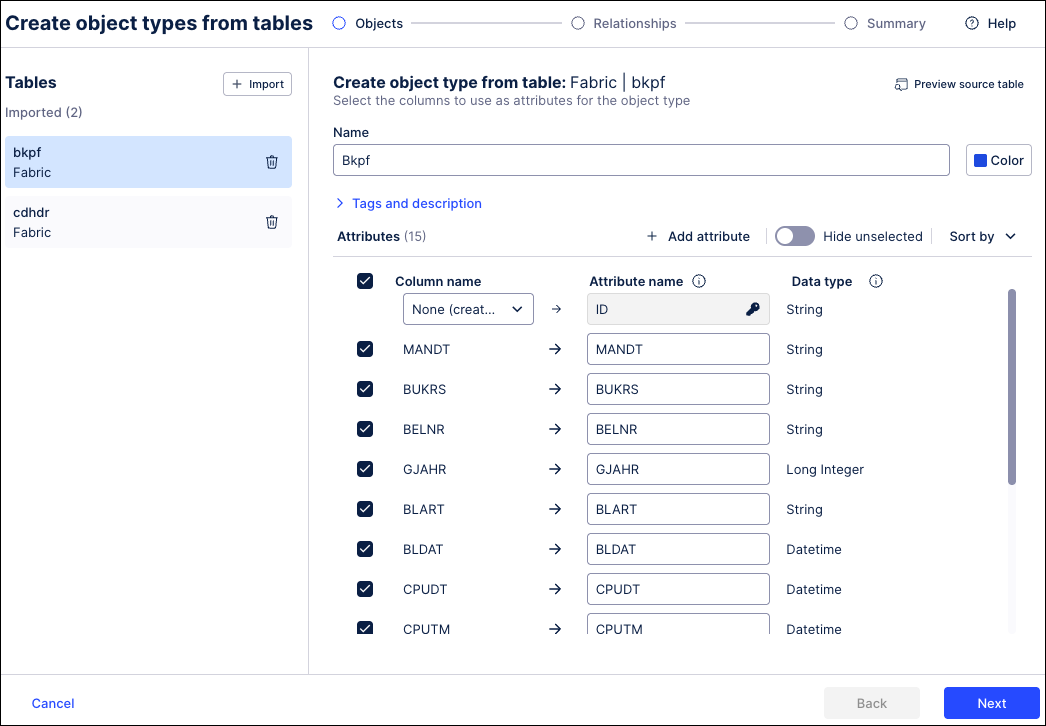
The data model editor displays the imported tables in edit mode.
Review your imported tables inside the editor interface and configure the following parameters to refine your object type definitions:
Object type ID: Select the unique identifier attribute from the dropdown list. For example, select the purchasing document number column
EBELNfor a Purchase Order object.Columns: Select the checkboxes for the specific columns you need to capture (such as vendor keys or net price) and clear unneeded fields to optimize downstream data model performance.
Add attributes: Click Add attribute to create additional attributes populated from data outside the selected table.
Rename attributes: Rename existing attributes (defaults to the column name).
Color: Set the object type’s display color in the object-centric data model.
Tags and descriptions: Apply existing Celonis tags (such as
Procurement) to categorize your object types for downstream analyst filtering.
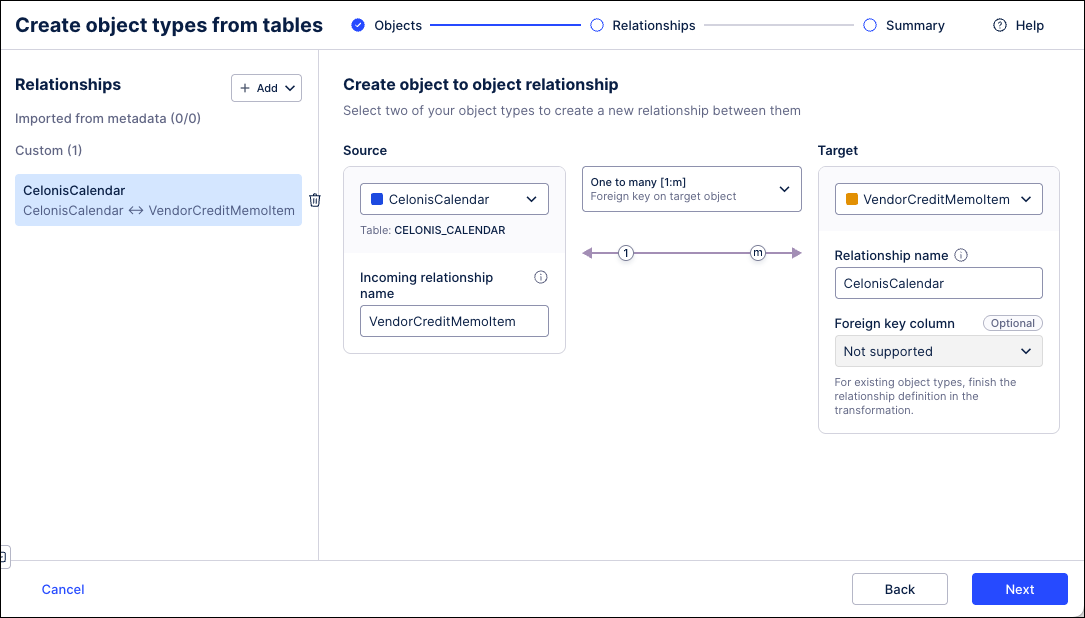
Define the structural relationships between your imported tables based on your process scope:
If you imported a single table, click Skip relationships to bypass this configuration.
If you imported multiple tables, click Create new or Import to link your structural assets. For example, link your header table
EKKOto your item tableEKPOusing the purchasing document numberEBELN.
Click Next, verify your custom object type configurations, and click Create.
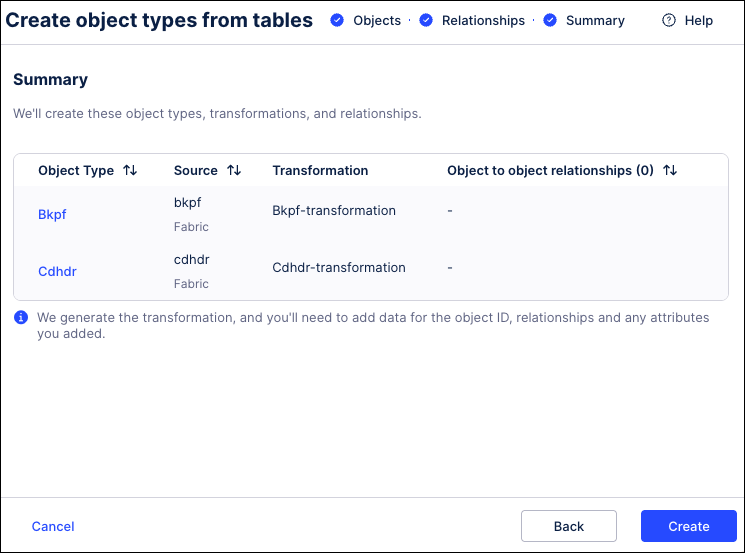
Celonis creates the object types and adds them to your data model overview dashboard.
Review the generated data transformations immediately, or click Go to object types to edit your custom definitions later.
Custom object types and event types can be extended over time by adding attributes and relationships, including links to existing Celonis objects and events. Object and event extensions are available after publishing in the current environment. A production deployment is only required if the analysis runs in production.
To extend or edit an existing object or event:
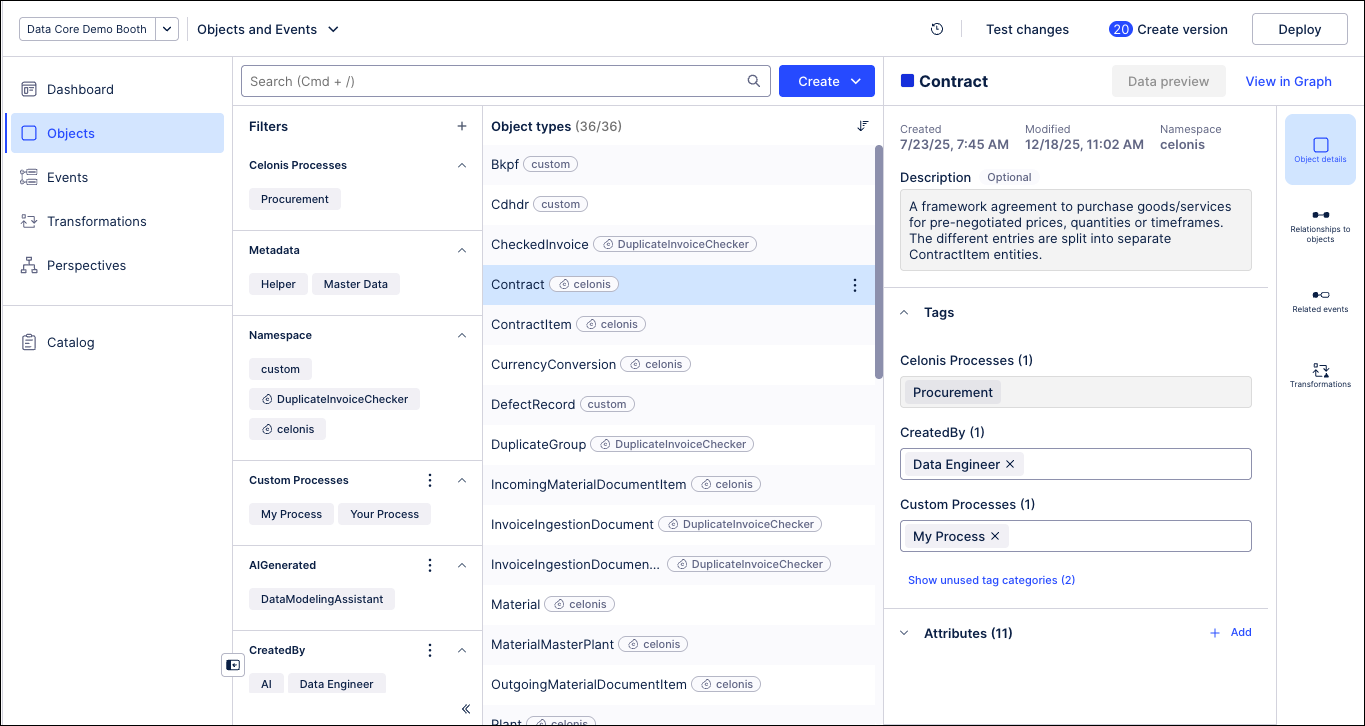
From the dashboard, click Objects / Events.
Select the object or event you want to extend, opening the configuration panel.
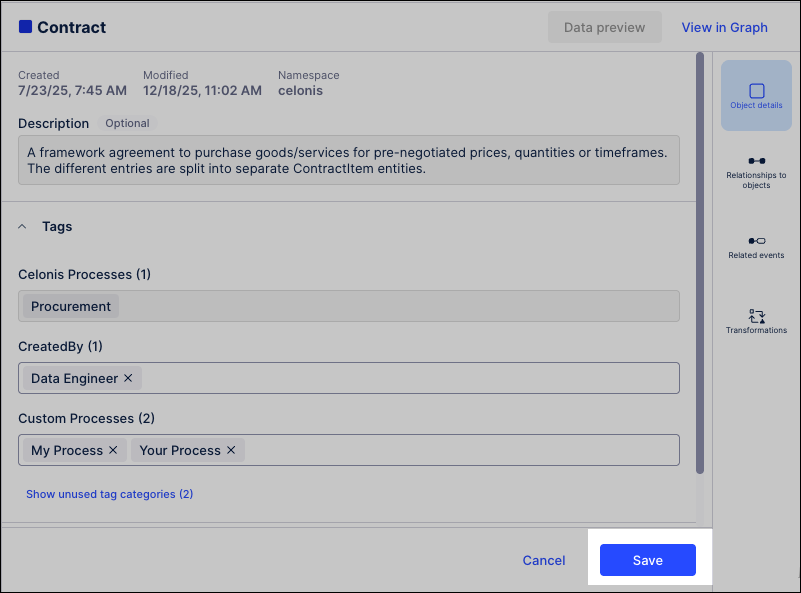
Make the necessary updates to the object or event, using the information provided in the above procedures.
Click Save.
Optional: If the object or event extension is required in your production environment, click Deploy.
For more information about versioning and deployment, see: Versioning and deploying OCDM.