Configure an Insight Explorer
Warning
It is possible for multiple users to configure an Insight Explorer simultaneously. We recommend coordinating with your team to avoid changes made by one user being overwritten by another.
Once your Insight Explorer is created, you will be taken to the Configuration screen to choose the metrics and attributes you want your Insight Explorer to analyze.
You can make changes to the selected metrics in your Insight Explorer by clicking on the Configuration icon (gear icon) at the top of the screen.

Adding metrics to your Insight Explorer
On the Configuration screen, click the blue Add metric button.
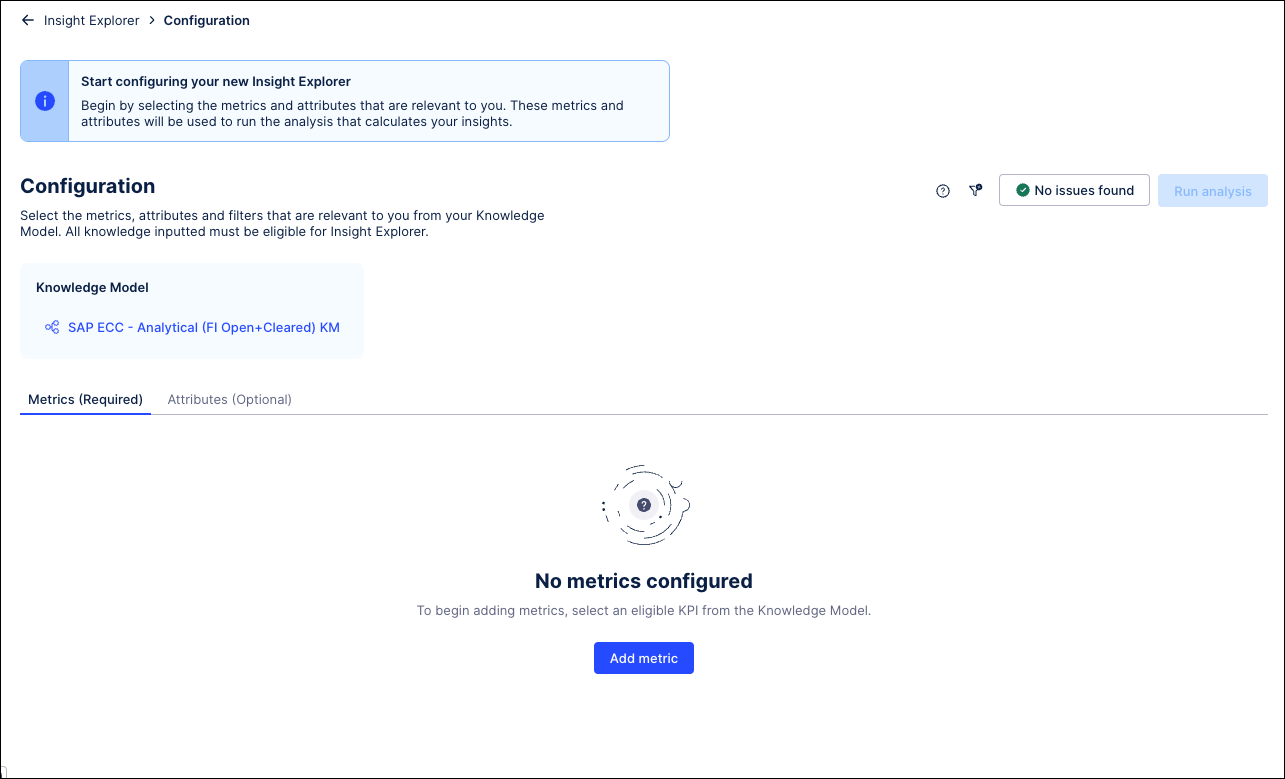
Select a KPI you want to analyze from the list of metrics available in the Knowledge Model.
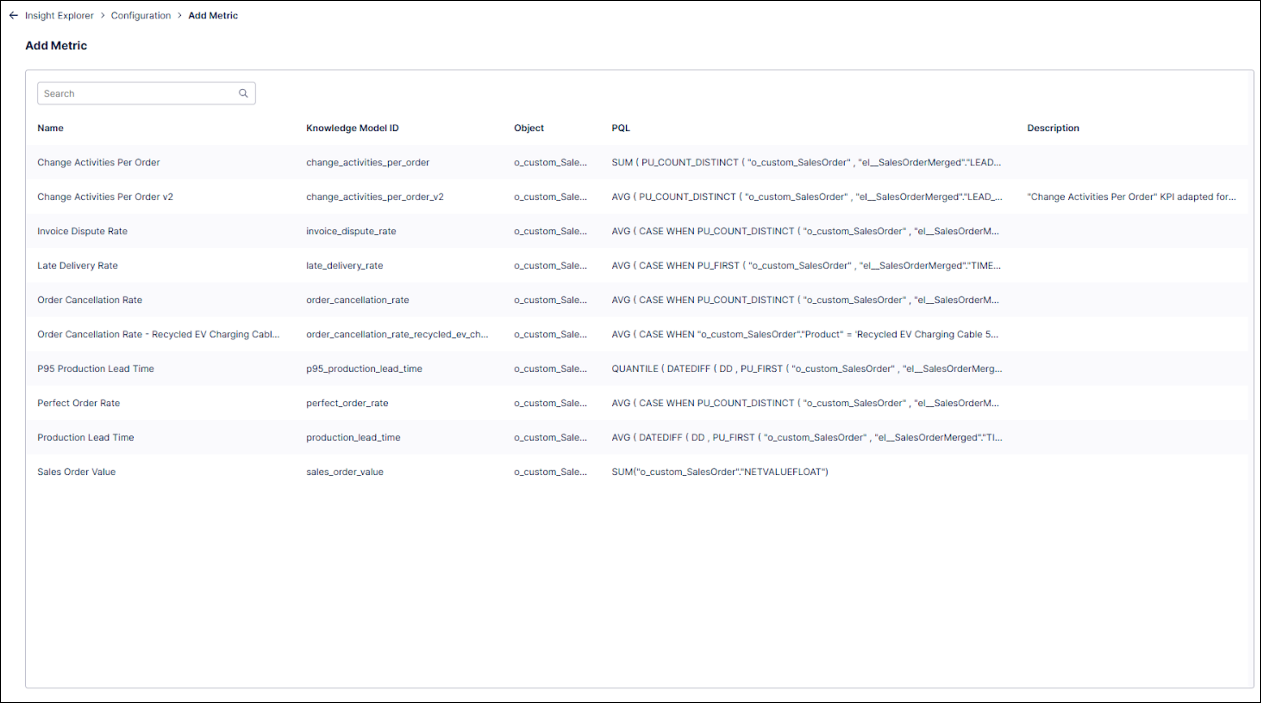
Insight Explorer will check the selected metric to make sure it meets the configuration requirements.
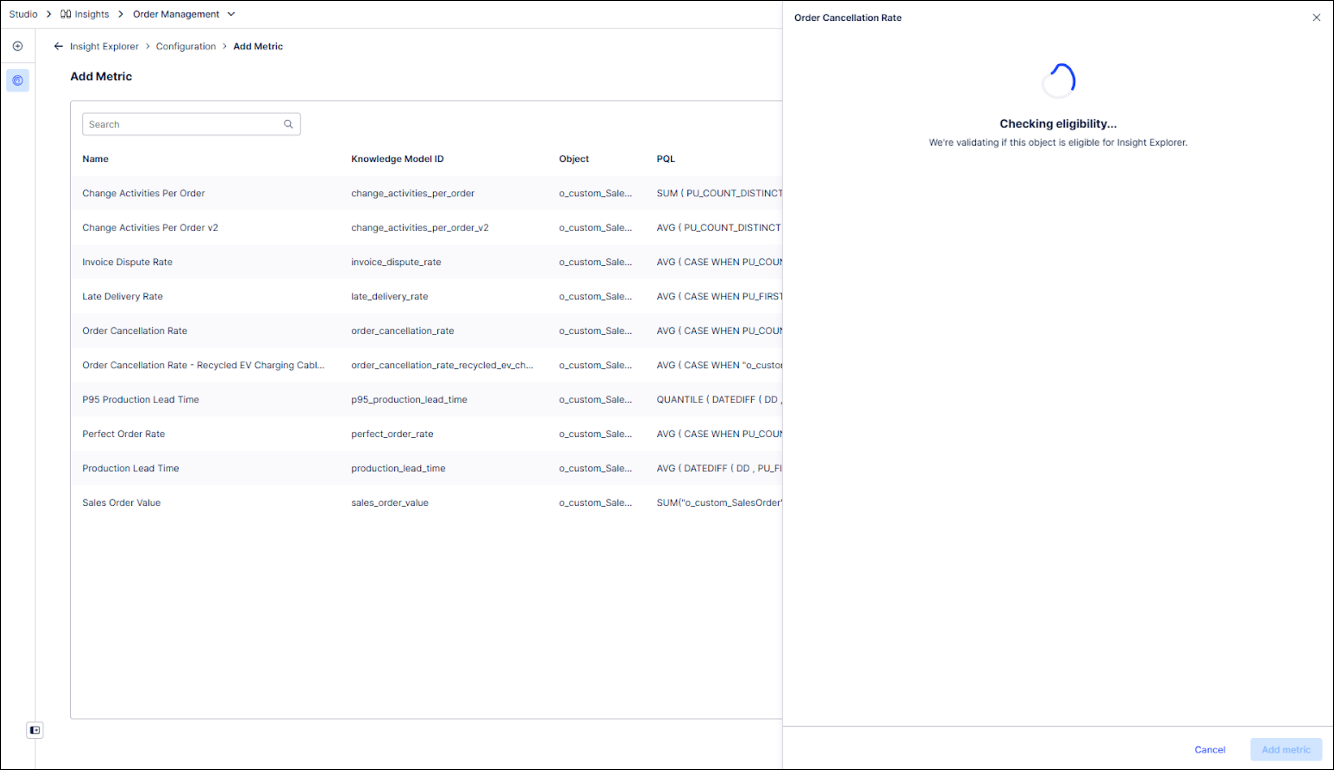
If the metric does not meet the configuration requirements, an error message displays in the panel on the right explaining why it is not compatible. Refer to the Knowledge Requirements for more information on the error and suggestions on how to resolve the issue.
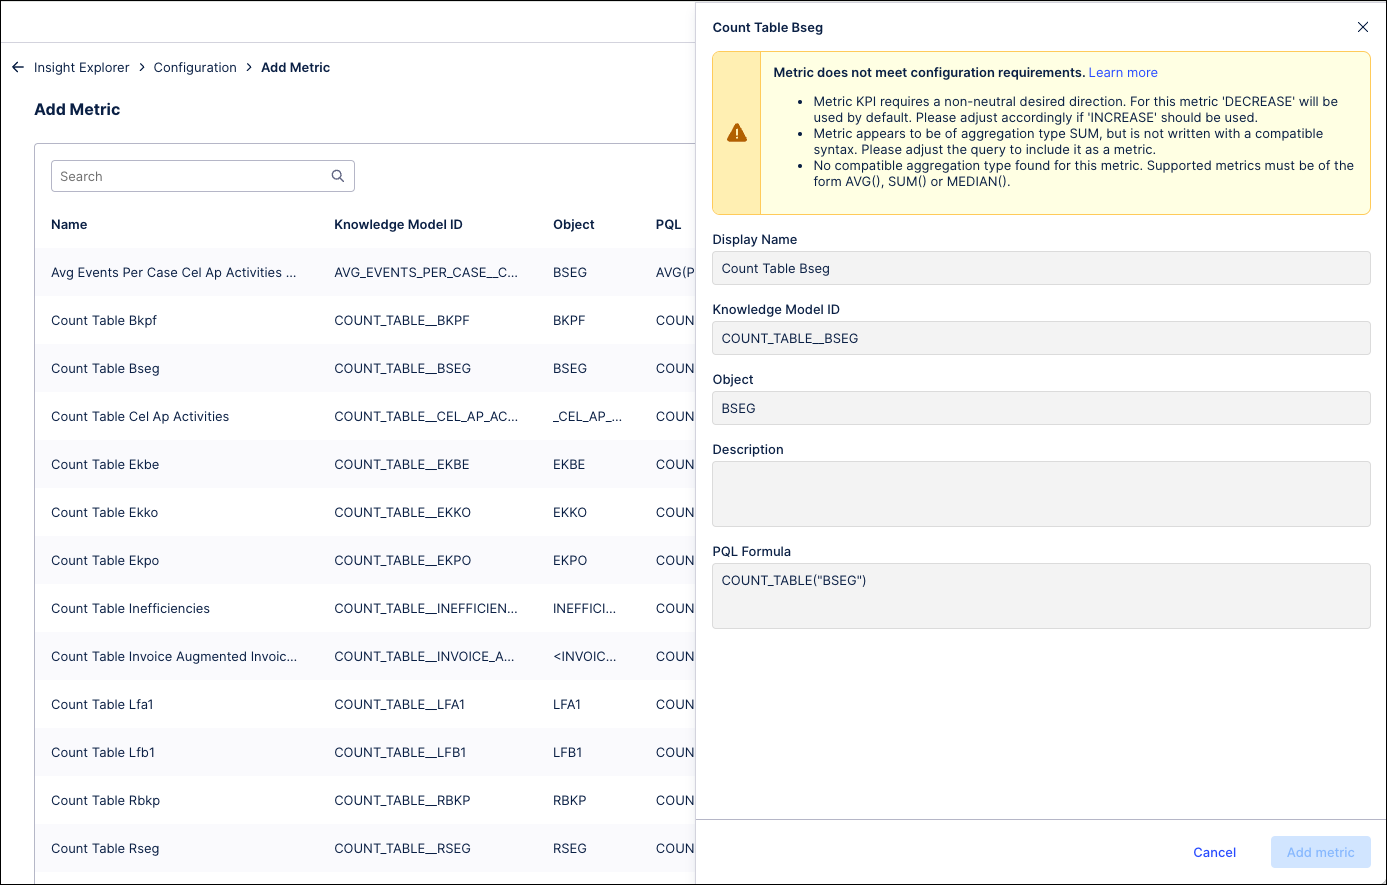
Select a different metric to check if it meets the configuration requirements.
If the metric does meet the configuration requirements, click the Add metric button at the bottom of the screen.
The metric is added and displays on the Metrics tab of the Configuration screen.
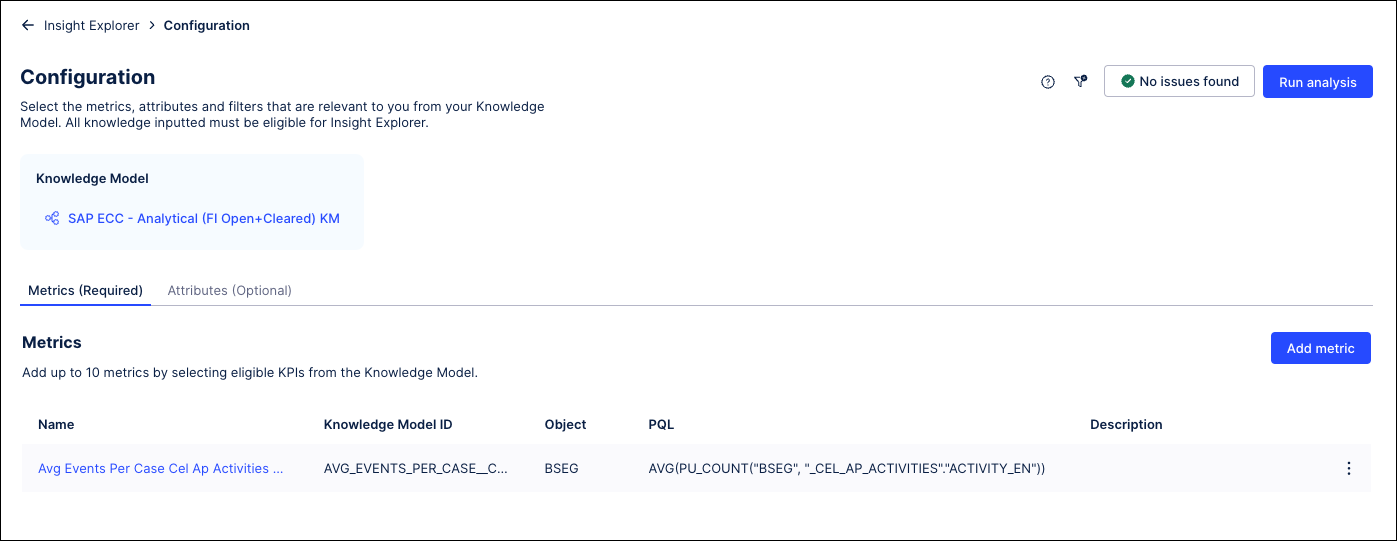
Repeat these steps to add additional metrics.
Once all metrics have been added, you can either add attributes to this Insight Explorer or click the Run analysis button in the upper right to generate insights.
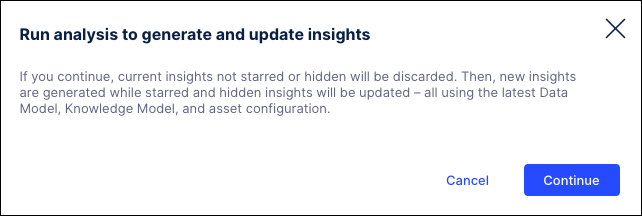
If you choose to run the analysis, click Continue in the pop-up window to confirm that you are ready to generate new insights.
Adding attributes to your Insight Explorer (Optional)
Note
Insight Explorer looks across all native attributes from the Knowledge Model and performs attribute recommendations, so this step is optional. You can still add any attributes that you think may have an influence on your metrics. Your selected attributes will be weighted higher in the analysis and available in the insight details.
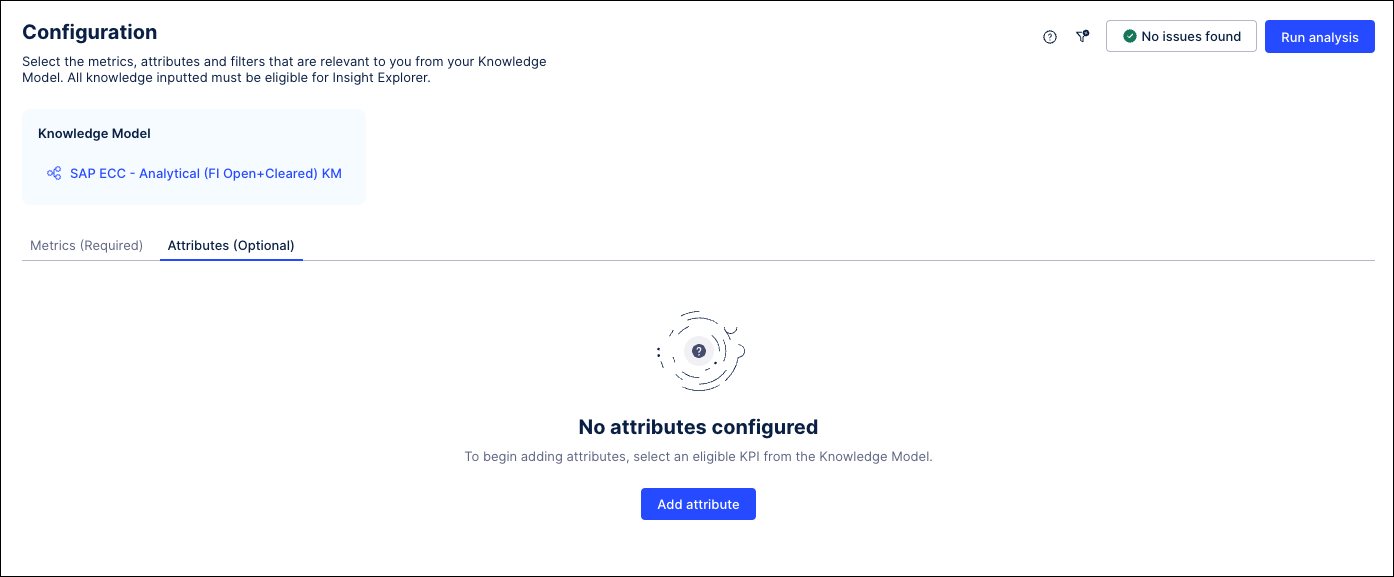
To add attributes, click the Attributes tab on the Configuration screen and then click the blue Add attribute button.
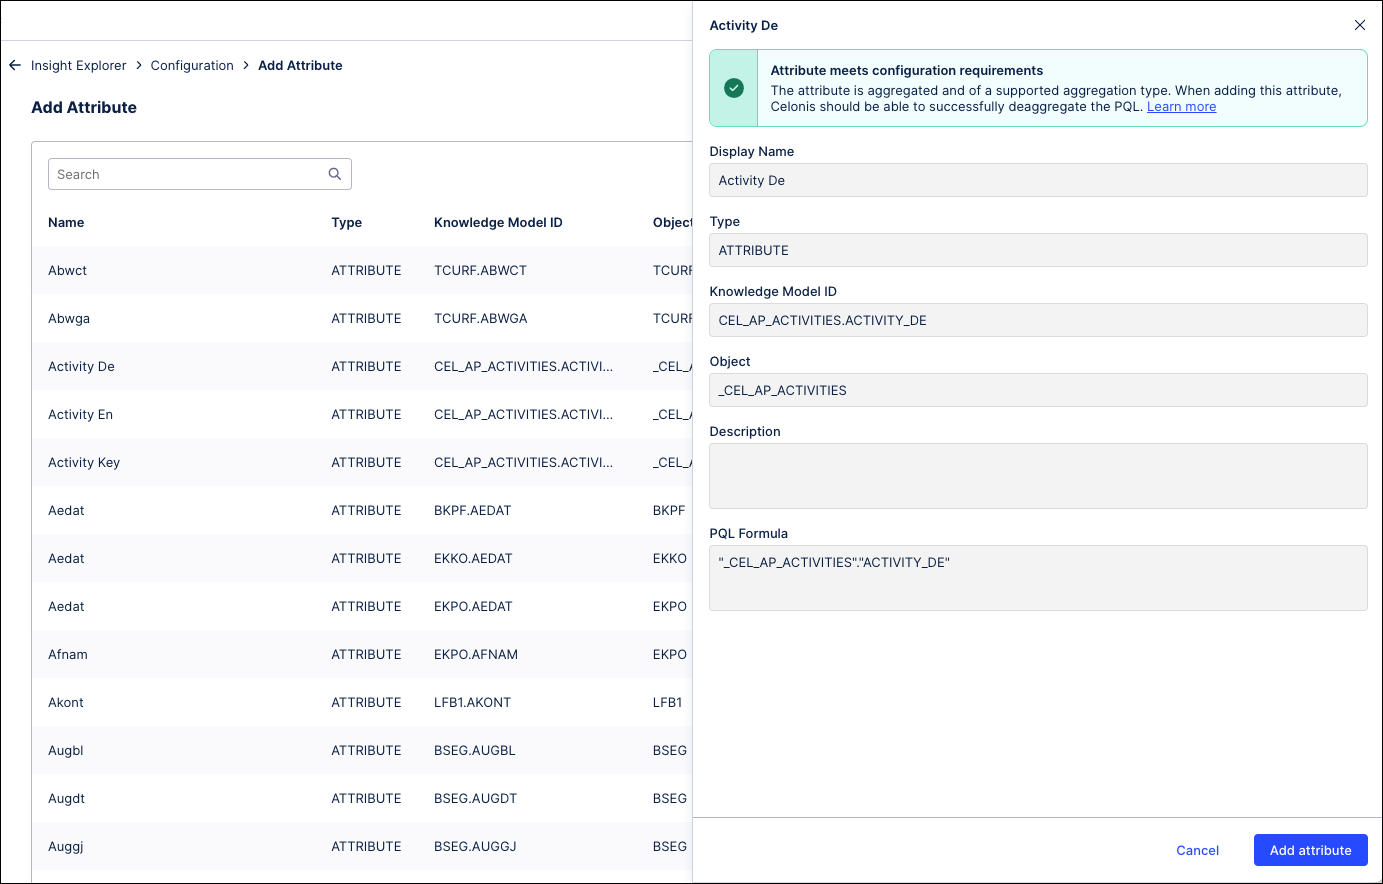
Select an attribute you want to analyze from the list of attributes available in the Knowledge Model.
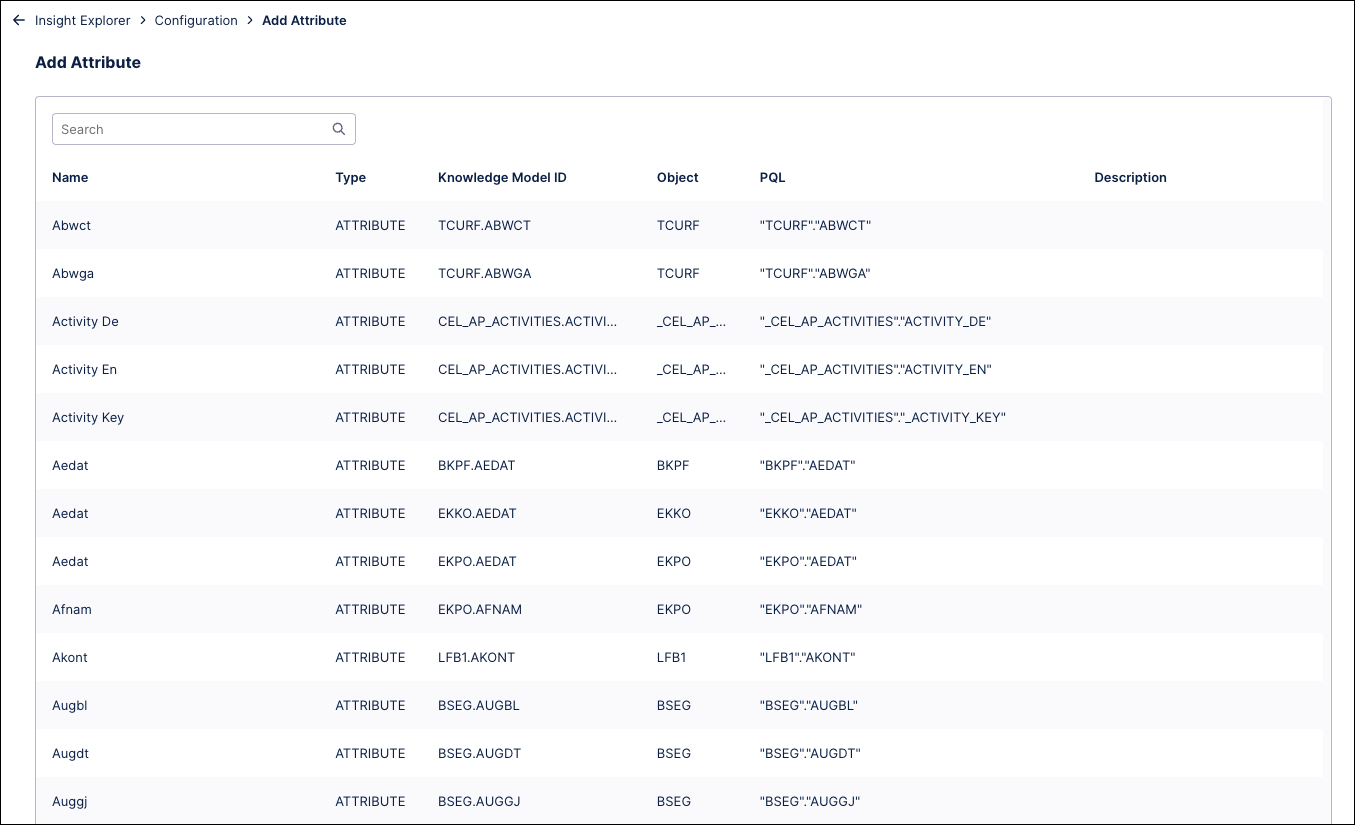
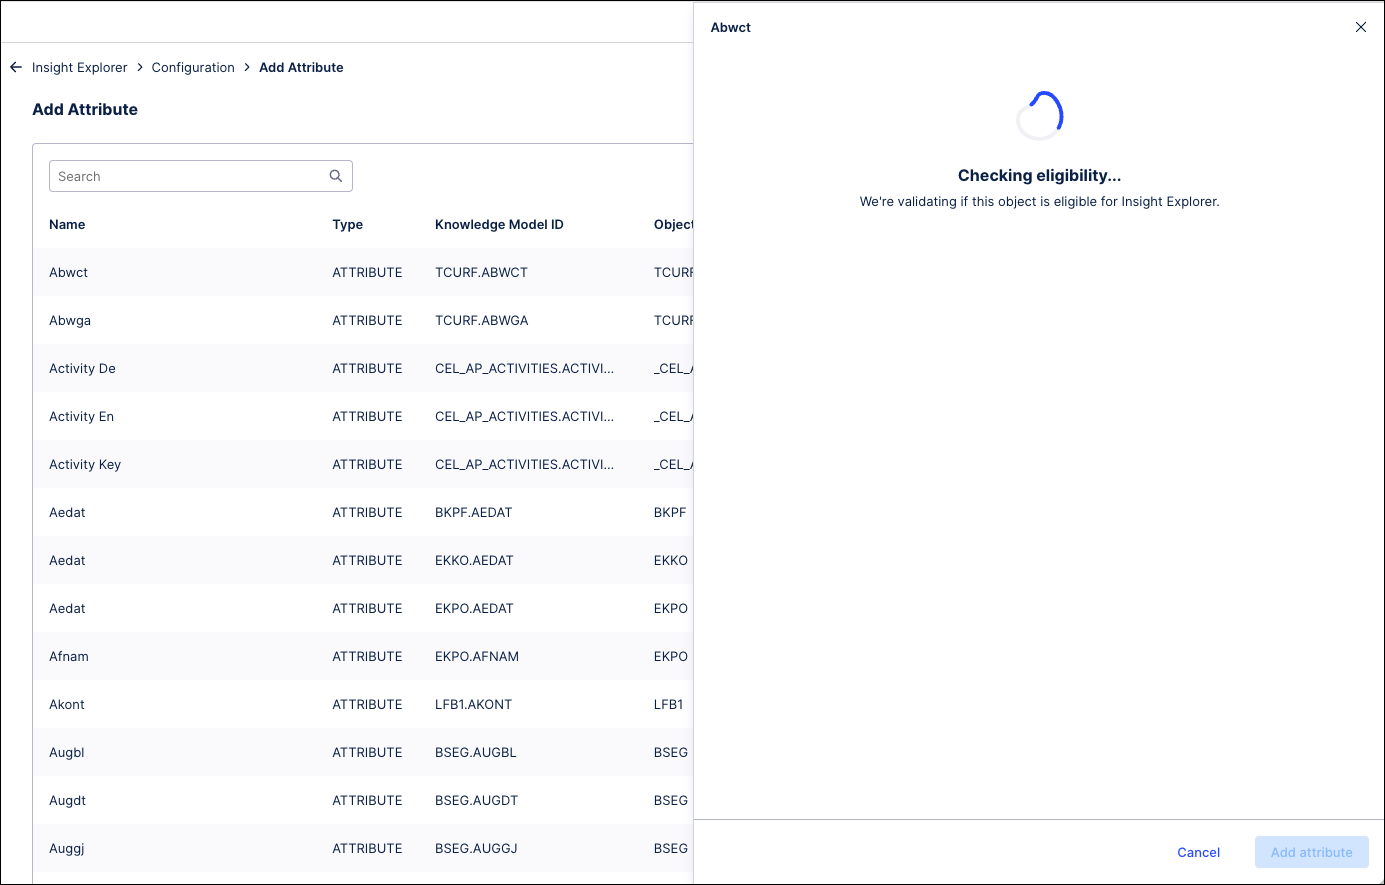
Insight Explorer will check the selected attribute to make sure it meets the configuration requirements.
If the attribute does not meet the configuration requirements, an error message is displayed explaining why it is not compatible. Refer to the Knowledge Requirements for more information on the error and suggestions on how to resolve the issue.
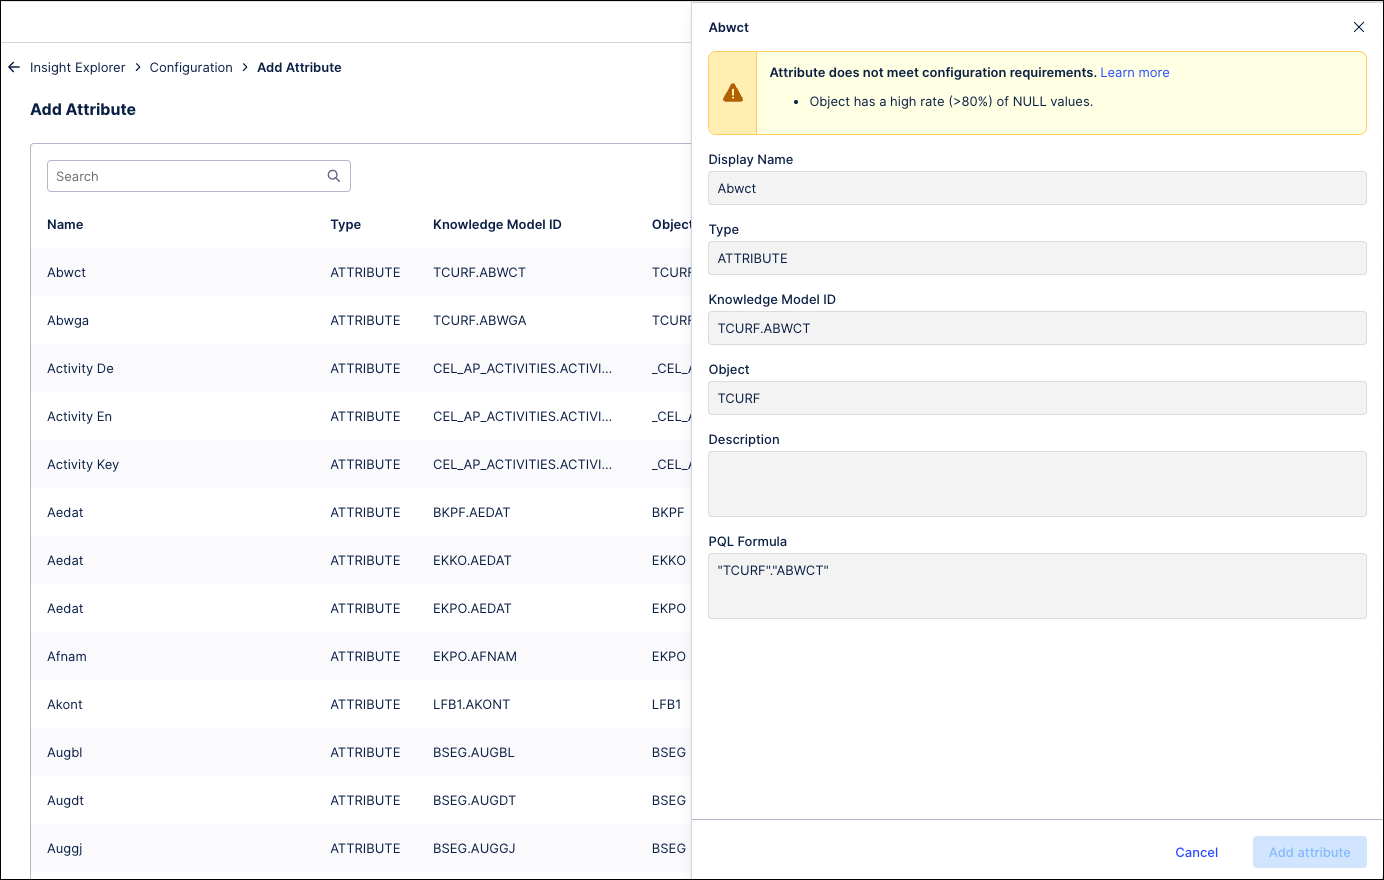
Select a different attribute to check if it meets the configuration requirements.
If the attribute does meet the configuration requirements, click the Add Attribute button at the bottom of the screen.
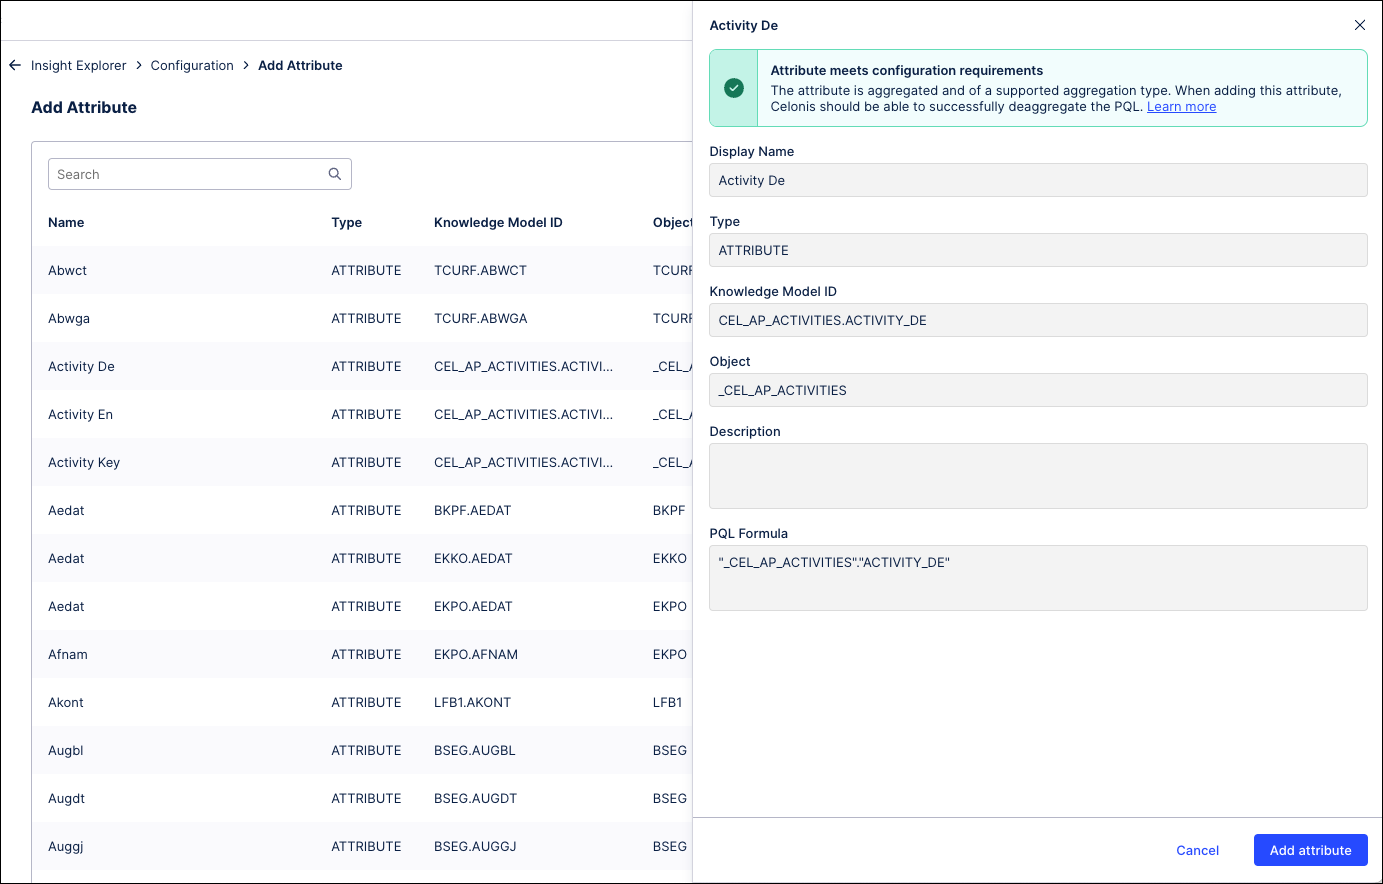
The attribute is added and displays on the Attributes tab of the Configuration screen.
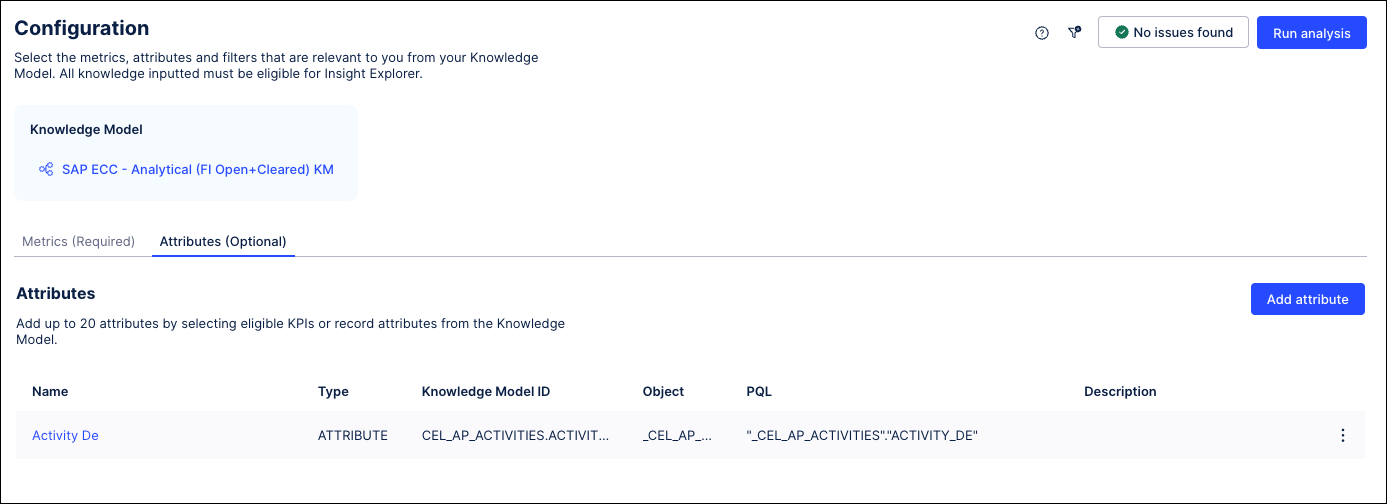
Repeat these steps to add additional attributes.
Generate insights
Once you have added all metrics or attributes to your Insight Explorer, you are ready to start generating insights. You can also change the scope of data that will be analyzed by clicking the filter icon at the top right of the page and adding a filter.
Once your data has been added, click the Run analysis button in the upper right to generate insights.
Click Continue in the pop-up window to confirm that you are ready to generate new insights.

Once your insights have been generated, you can review your insights to see which ones you want to pursue.