Creating and managing enhanced View and Knowledge Model variables
Enhanced variables allow you to centrally create and manage information that is referenced and reused across components and assets in Studio. They act as placeholders for information, either based on dynamically inserted context (such as company names, countries, and sales orders) or with manual input by the app user (such as entering the cost of an item).
Enhanced variables add value to your Studio content in a number of ways, including:
Allowing app users to change the data based on their input (such as using dropdowns, input boxes, and buttons).
Enabling you to build interactivity between View components (such as changing a chart from a bar to a line mark).
Helping you to build Views or apps that can be efficiently reused based on different contexts (such as region or process specific apps).
For an example use case using an input box, see: Enhanced variable use case example using an input box.
 |
Within Studio, there are enhanced variables and legacy variables and their use depends on the type of View that you're creating
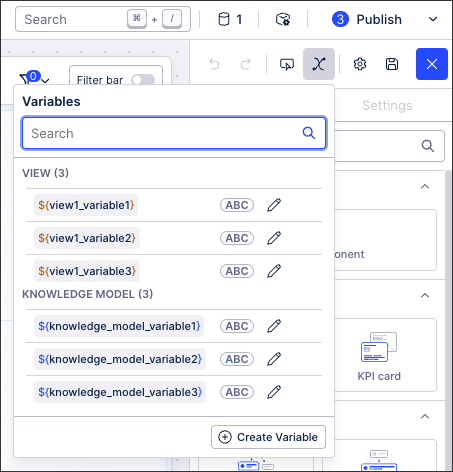
Enhanced variables: These can be used in the new Studio experience and are available for both Views and Knowledge Models.
Enhanced View variables: These are specific to individual Views and can't be reused across Views in the same package. To learn how to create and manage enhanced View variables, see: Creating and managing enhanced View variables.
Enhanced Knowledge Model variables: These can be used wherever the Knowledge Model is being used, as such can be reused across Views, Packages, and Spaces. To learn how to create and manage Knowledge Model variables, see: Creating and managing enhanced Knowledge Model variables.
Legacy variables: These are used for legacy Views only and are stored and used in Knowledge Model YAML. They have a limited scope and only string values are supported.
For more information about legacy variables, see: Legacy view variables.
Enhanced View variables allow you to centrally create and manage information that is referenced and reused across components within the same View. You can use enhanced View variables in buttons, KPI lists, tables, and input dropdowns.
To create enhanced View variables when editing your View:
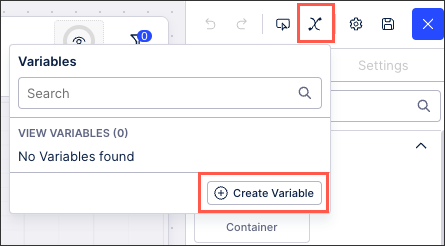
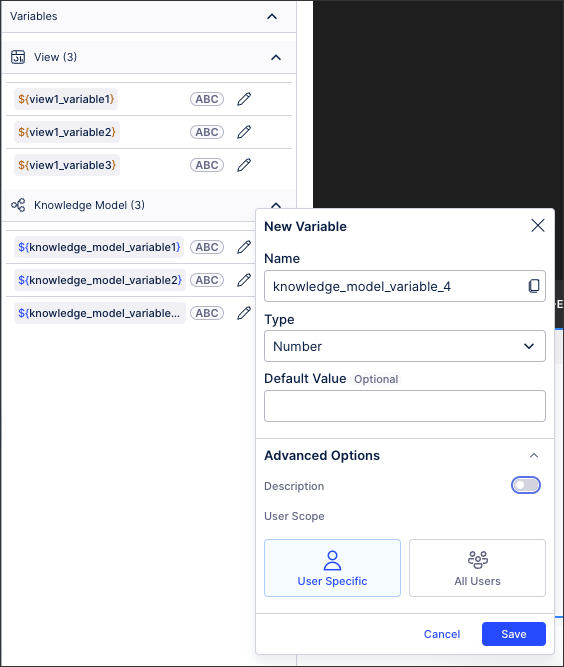
Click Variables - Create Variable:
Enter a variable name, select a variable type, and optionally enter a description.
Key: This should be a unique ID, allowing for the variable to be referenced across components. Avoid using special characters here.
Your variable key can then be referenced in your View as:
${KEY}Type: Choose between string (text), number (#), boolean (true /false), and object.
For object variables, see: Using object variables
Default Value (optional): This is the value that will be referenced unless otherwise stated.
Optional: Enable Advanced Options and enter a variable description and choose the variable and user scope.
Description: Provide further information here, giving your team added context where needed.
Variable Scope: Choose whether this variable is saved at a View level only, within the knowledge model (which can be referenced by all Views created using that model), or for all assets within the existing package.
User Scope: Choose whether this variable is specific to your account or is available for all users within your team.
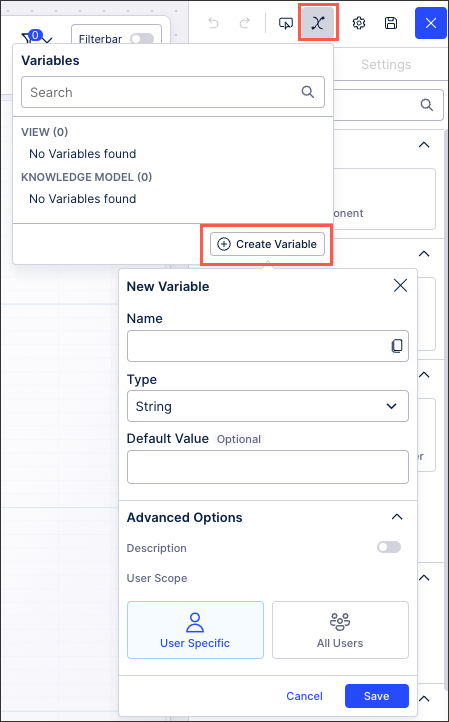
Click Save.
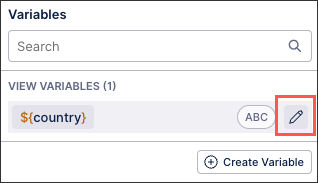
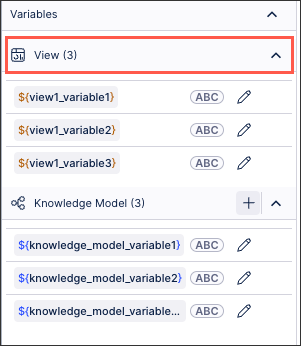
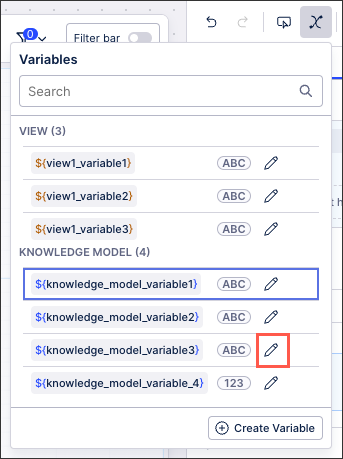
Once saved, your enhanced View variables are then displayed in the variables menu within that View only.
To edit or delete an existing variable, click Edit:
 |
Enhanced view variables can also be seen in the PQL editor, accessed when editing View components that use data:
 |
Enhanced Knowledge Model variables allow you to centrally create and manage information that is referenced and reused across Views where that Knowledge Model is in use. Like with enhanced View variables, you can use enhanced Knowledge Model variables in buttons, KPI lists, tables, and input dropdowns.
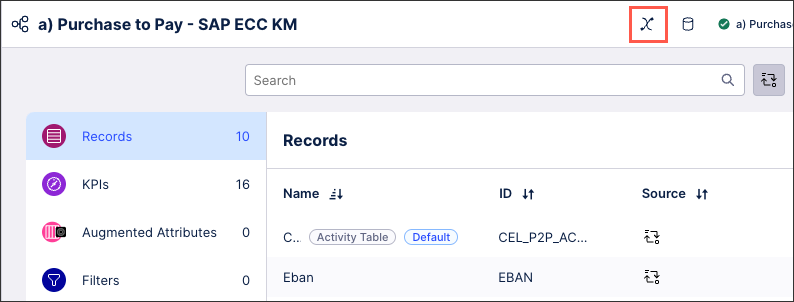
Enhanced Knowledge Model variables can be created either directly in the Knowledge Model:
 |
Or by using the PQL editor. To access the PQL editor and create enhanced Knowledge Model variables from within a View:
Open the PQL editor using View components where data fields can be selected:
Either: Click the PQL editor button directly.
Or: Add data to a setting (such as a table column)
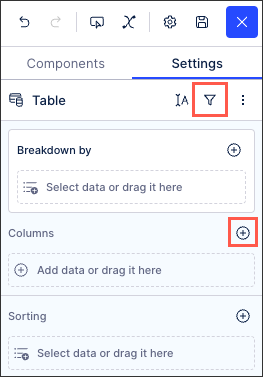
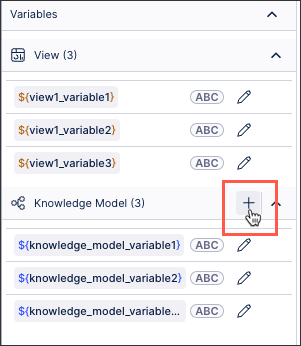
Locate the Knowledge Model variable section and click Add:
Enter a variable name, select a variable type, and optionally enter a description.
Key: This should be a unique ID, allowing for the variable to be referenced across components. Avoid using special characters here.
Your variable key can then be referenced in your View as:
${KEY}Type: Choose between string (text), number (#), boolean (true /false), and object.
For object variables, see: Using object variables
Default Value (optional): This is the value that will be referenced unless otherwise stated.
Optional: Enable Advanced Options and enter a variable description and choose the variable and user scope.
Description: Provide further information here, giving your team added context where needed.
Variable Scope: Choose whether this variable is saved at a View level only, within the knowledge model (which can be referenced by all Views created using that model), or for all assets within the existing package.
User Scope: Choose whether this variable is specific to your account or is available for all users within your team.
Click Save.
Once saved, your enhanced Knowledge Model variables are then displayed in the variables menu for all Studio assets that use this Knowledge Model.
To edit or delete an existing variable, click Edit:
 |
Once created, you can reference enhanced variables in the following View components: buttons, KPI lists, tables, and input dropdowns.
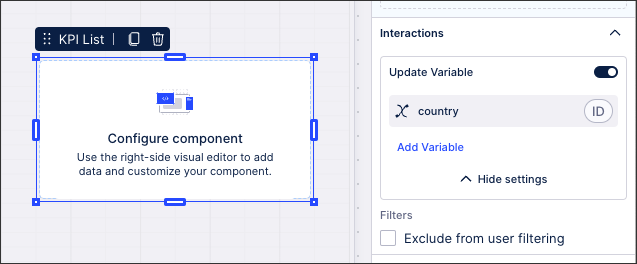
Enhanced variables can either be added through the Interaction settings for components, such as with a KPI list:
 |
Alternatively, enhanced variables can be referenced in PQL expressions using the following format:
${KEY}Input boxes allow you to record a manually entered value from users and then use that value throughout your View. This saves the input as either a View variable or a Knowledge Model variable. This variable can then be used in other components to adjust the View based on the manual value entered by the user.
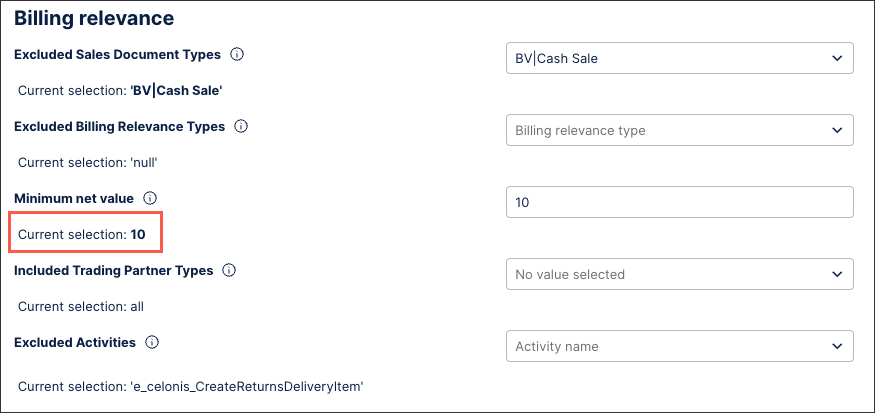
In this example, the input box allows users to enter the minimum net value:
 |
This input box example is configured by saving the user input as a Knowledge Model variable. In this case, the variable is a number type:
${minimum_value_threshold_unbilledcurrency)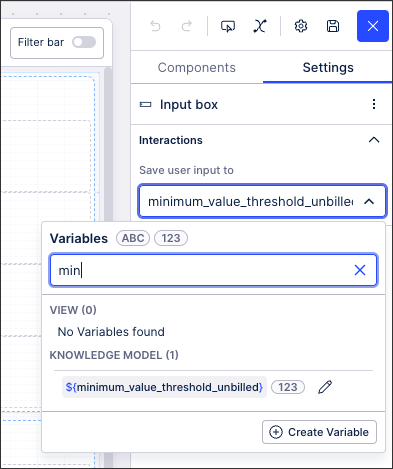
This variable can then be used in other components, such as a text box:
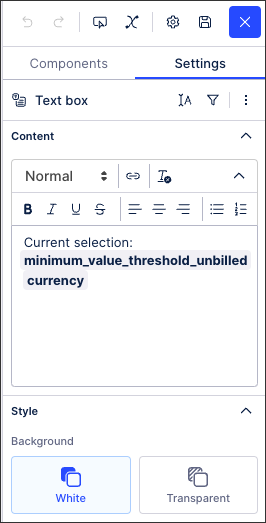
With the published version of the app showing the value entered (10):
 |
Object variables allow you to store the metadata of a particular metric or attribute in one single variable. This object variable can then be reference in View components such as input dropdowns, text boxes, and component fields.
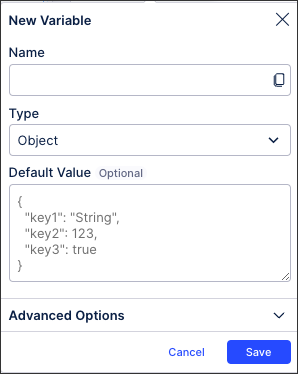
The schema (i.e structure) for object variables is generated when a default value or a current value is set and follows the JSON syntax. As such, you need to define key-value pairs.
For example:
{
"key1": "String",
"key2":123,
"key3":true
}
This is then added to the Default Value field when creating or editing the object variable:
 |
Object variables are then referenced in the following ways:
PQL editor:
${object_one.value}Component fields:
${object_one.name}