Pushing data to the Celonis Platform using Standard Data Ingestion API
Limited availability
This functionality is currently in limited availability. If you’re interested in trying it out, get in touch with us at Celopeers.
The Standard Data Ingestion API allows you to push real-time data to the Celonis Platform using your existing IT systems. This AWS S3 compatible API operates on events/notifications that get triggered whenever a new file reaches the API and automatically picks it up and processes it to a data pool.
For an overview of this API, see: Standard Data Ingestion API.
When using the Data Ingestion API, the following apply:
File formats: Uncompressed parquet files only, so alternative file formats must be converted to parquet before being ingested.
Extractions: The Standard Data Ingestion API always performs delta loads when primary keys are defined.
File uploads: Single files and multiple files simultaneously (using a first in, first out or FIFO manner).
Data types: Flat and nested.
For a video overview of this method:
Using the Standard Data Ingestion API
To push data to the Celonis Platform using the Standard Data Ingestion API, you'll need to either create a data pool or use an existing data pool. For more information about data pools, see: Creating and managing data pools.
With access to a data pool:
From your data pool diagram, click Data Connections.
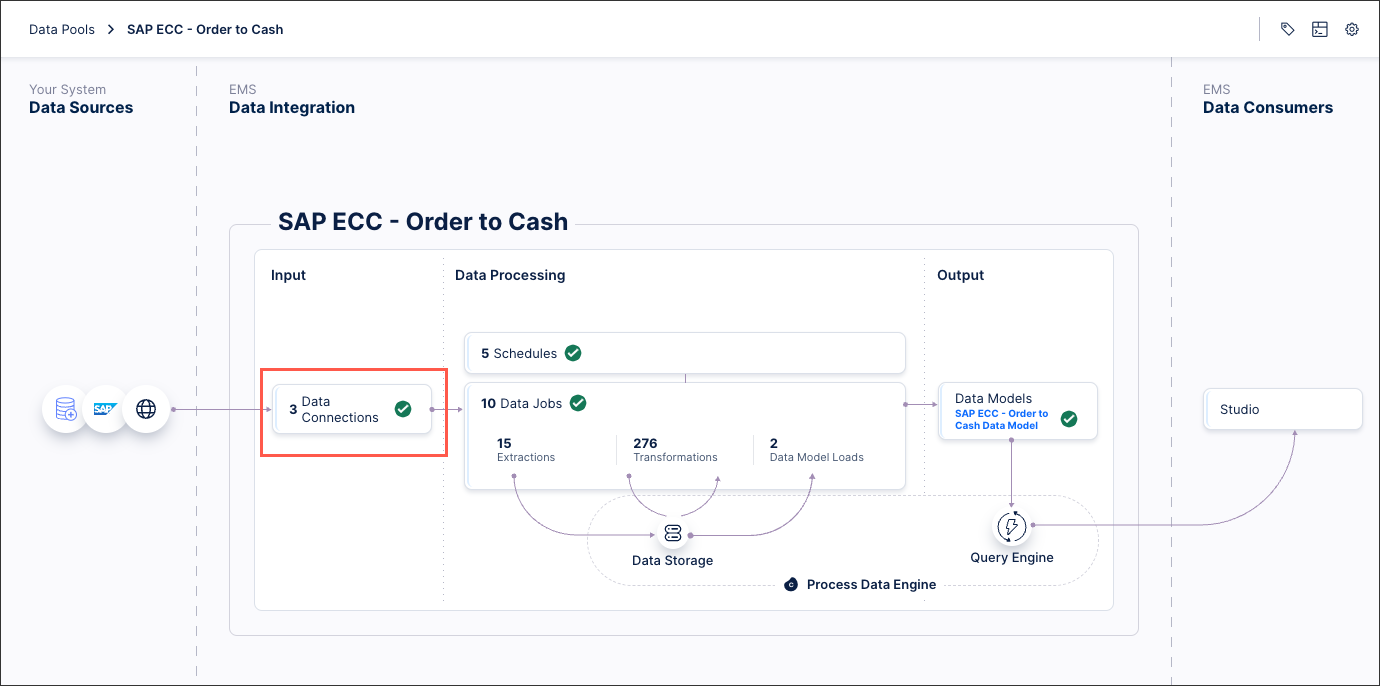
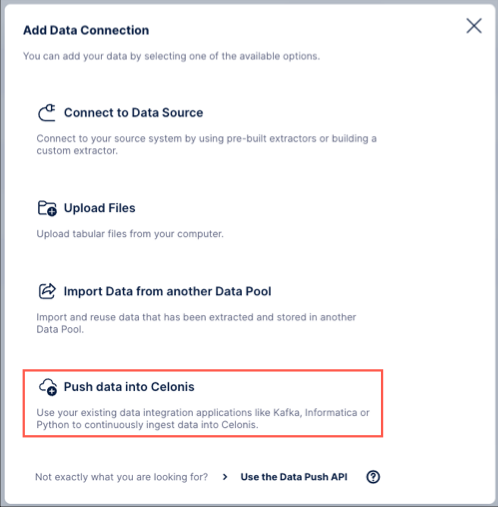
Click Add Data Connection and select Push data into Celonis.
Define a connection name and the target table names you want to push data into.
When using multiple tables: Add these into the connection configuration. In the same steps, you then need to define the data structure to use. There are two types:
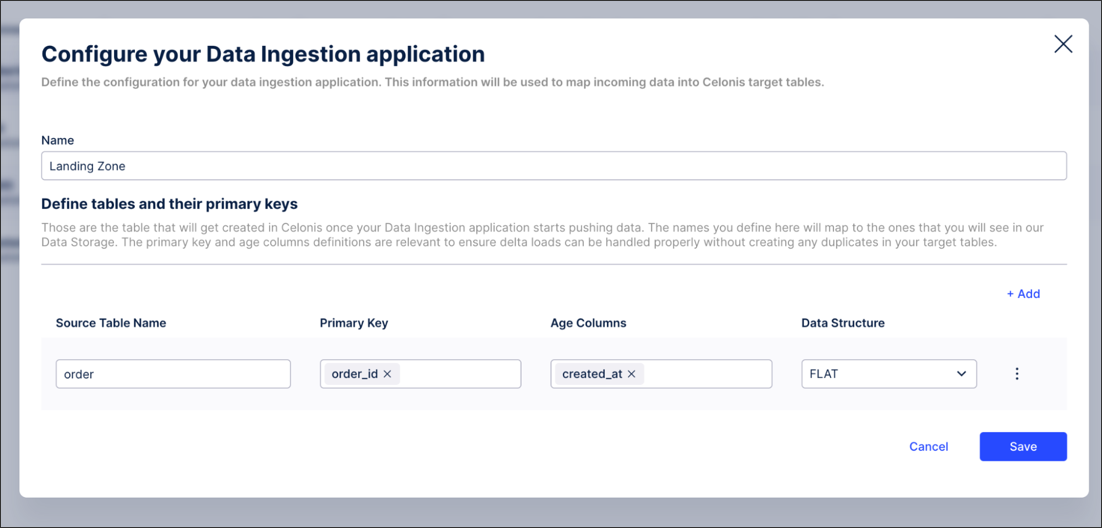
Flat - Select this option if the data you're pushing is in a flat format. If you proceed with the Flat type, the only additional thing you need to do is to define:
Primary key: This is used to properly handle delta loads and is similar to defining a primary key in a regular extraction. This primary key must also be part of the pushed data at all times or the delivery will fail.
Age column: This column is used to guarantee that the most recent version of a record (identified by its primary key) is stored in Celonis. Usually this is a date column and if a record with a value smaller than the existing value gets inserted, the update won’t be applied. However, values with equal or larger values will be applied accordingly.
For a case where you are pushing data into one target table called order, which has order_id as primary key and a timestamp reflecting when the record has been created (created_at), your final configuration would look like this:
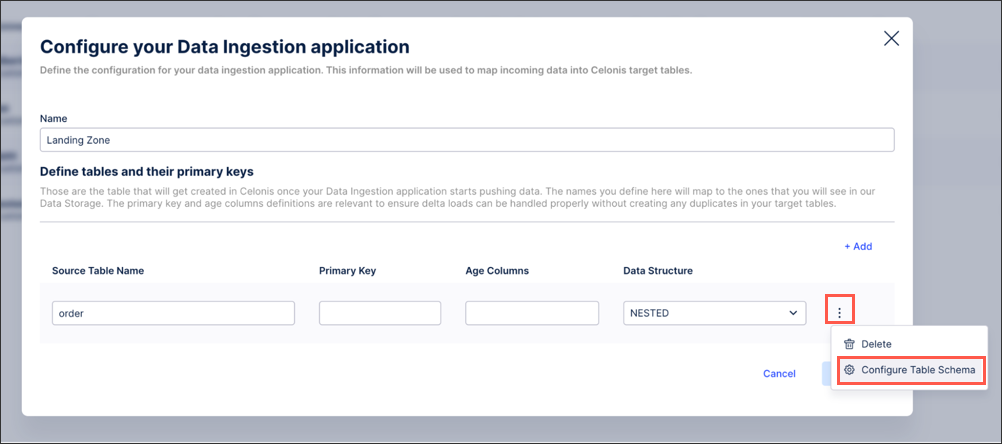
Nested - This option needs to be selected when the data you want to push is in a nested format (e.g. JSON). In this case, you need to configure the table schema so that the nested tables can be constructed and the appropriate primary keys can be retrieved. To do this, click Options - Configure Table Schema:
To define the schema, we suggest to use one exemplary record from your data and copy-paste it into the window on the left side.
In this example, we're using an order with some information such as id, date, price info, and one nested table with regards to shipments. Once the example record gets pasted into the left side of the window, we automatically derive the target table structure with the corresponding column names on the right side of the window:
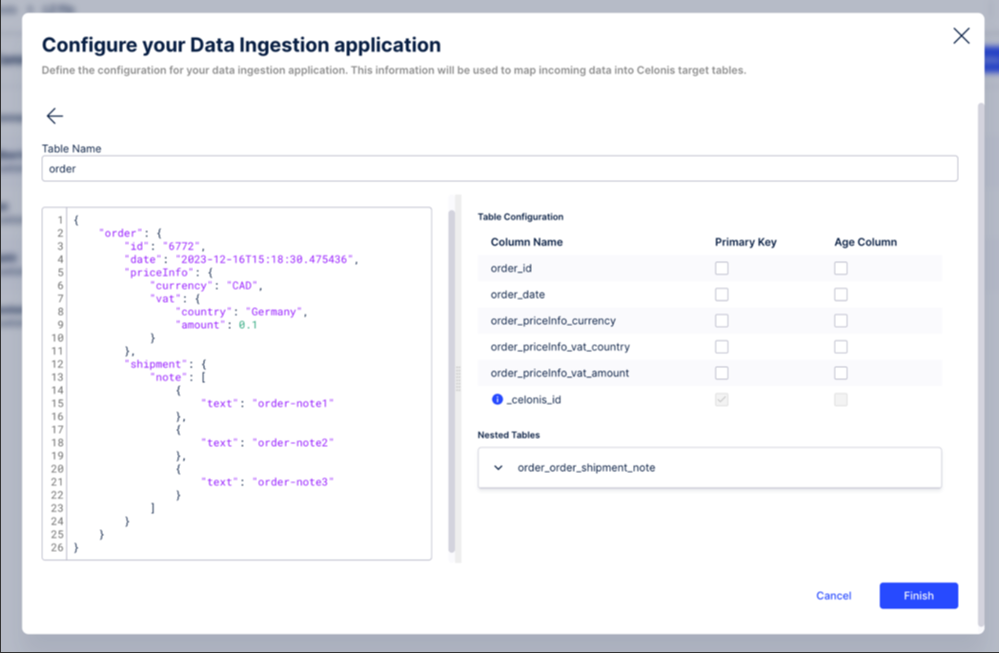
By default, a column is added called _celonis_id (indicated by a tooltip) in case no primary key has been configured. However, in this example we define:
The order_id to be the primary key by selecting the relevant checkbox. Once selected, two things will happen automatically:
The autogenerated _celonis_id will disappear from the configuration.
The order_id gets created as a foreign key on the child table so users can join these two tables later on.
The order_date column as the age column.
As a result, the configuration will look like this:
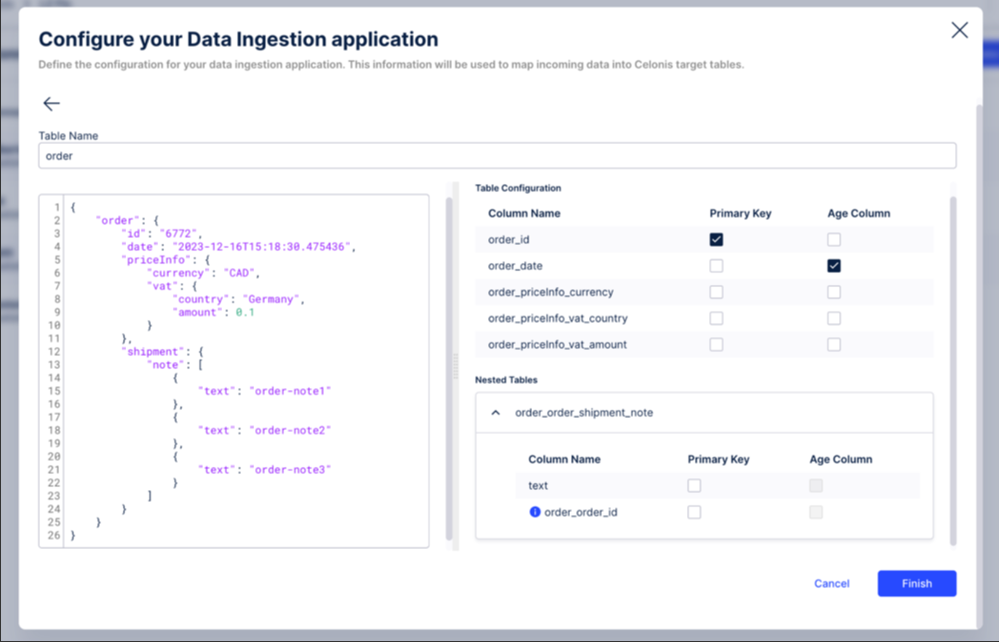
If you click Finish, the Primary Key and Age column defined as part of the schema configuration will automatically be applied.
Save the configuration and note down the Access Key and Access Secret. Those are the credentials that you’ll need for the API request to authenticate to Celonis when pushing data.
Go to your console and create an AWS profile via the following command:
aws configure --profile profileName
You will need:
To insert the Access Key and Secret retrieved in the previous step.
The AWS region. This depends on the cluster your Celonis tenant is running on, e.g, in the case of eu-1, this would be eu-central-1.
To add the default data format, which is always parquet.

To push data, you can then call the AWS S3 API via the copy (cp) command and provide the file(s) you want to push.
A sample API call for pushing a single file called shipment.parquet into a target table called shipment would look like this:
aws s3 cp shipment.parquet --endpoint-url https://dev.eu-1.celonis.cloud/api/data-ingestion s3://continuous/connection/9c92424b-829d-4beb-a65c-411873b268f8/shipment/ --profile profileName
This comprises:
aws s3 cp: This is the standard AWS API call to copy objects/ files to a S3 bucket.
shipment.parquet: This is the name of the parquet file that gets copied to the bucket.
--endpoint-url https://dev.eu-1.celonis.cloud/api/data-ingestion: The S3 bucket is behind a Celonis specific url to relate it to the Celonis team and cluster. In this case the team name is dev and it’s on the eu-1 cluster. More generically the call looks like this:
--endpoint-url https://teamName.cluster.celonis.cloud/api/data-ingestion
s3://continuous/connection/9c92424b-829d-4beb-a65c-411873b268f8/order/: This is the S3 bucket where data gets pushed to, where:
The 32-digit id is the connection ID that can be found in the url of the Data Connection you’ve created in step 1.
Order relates to the target table that data should get pushed to. If you’ve configured multiple tables in step 2 you need to have different API calls to reference the respective target table.
--profile profileName: This is the AWS profile you’ve configured as part of step 4.
After executing the API call, the AWS API will return the response code indicating whether the upload was successful or not. In case it has been successful, the response will look like this for the sample file:
upload: ./shipment.parquet to s3://continuous/connection/9c92424b-829d-4beb-a65c-411873b268f8/shipment/shipment.parquet