AR Process Connector Installation
Before you begin, install the Accounts Receivable Process Connector from the Marketplace. If you already have the connector installed, make sure that it is up-to-date with the required transformations, extractions and data model structure.
If you have not yet downloaded the Process Connector from the Marketplace, please follow the steps below:
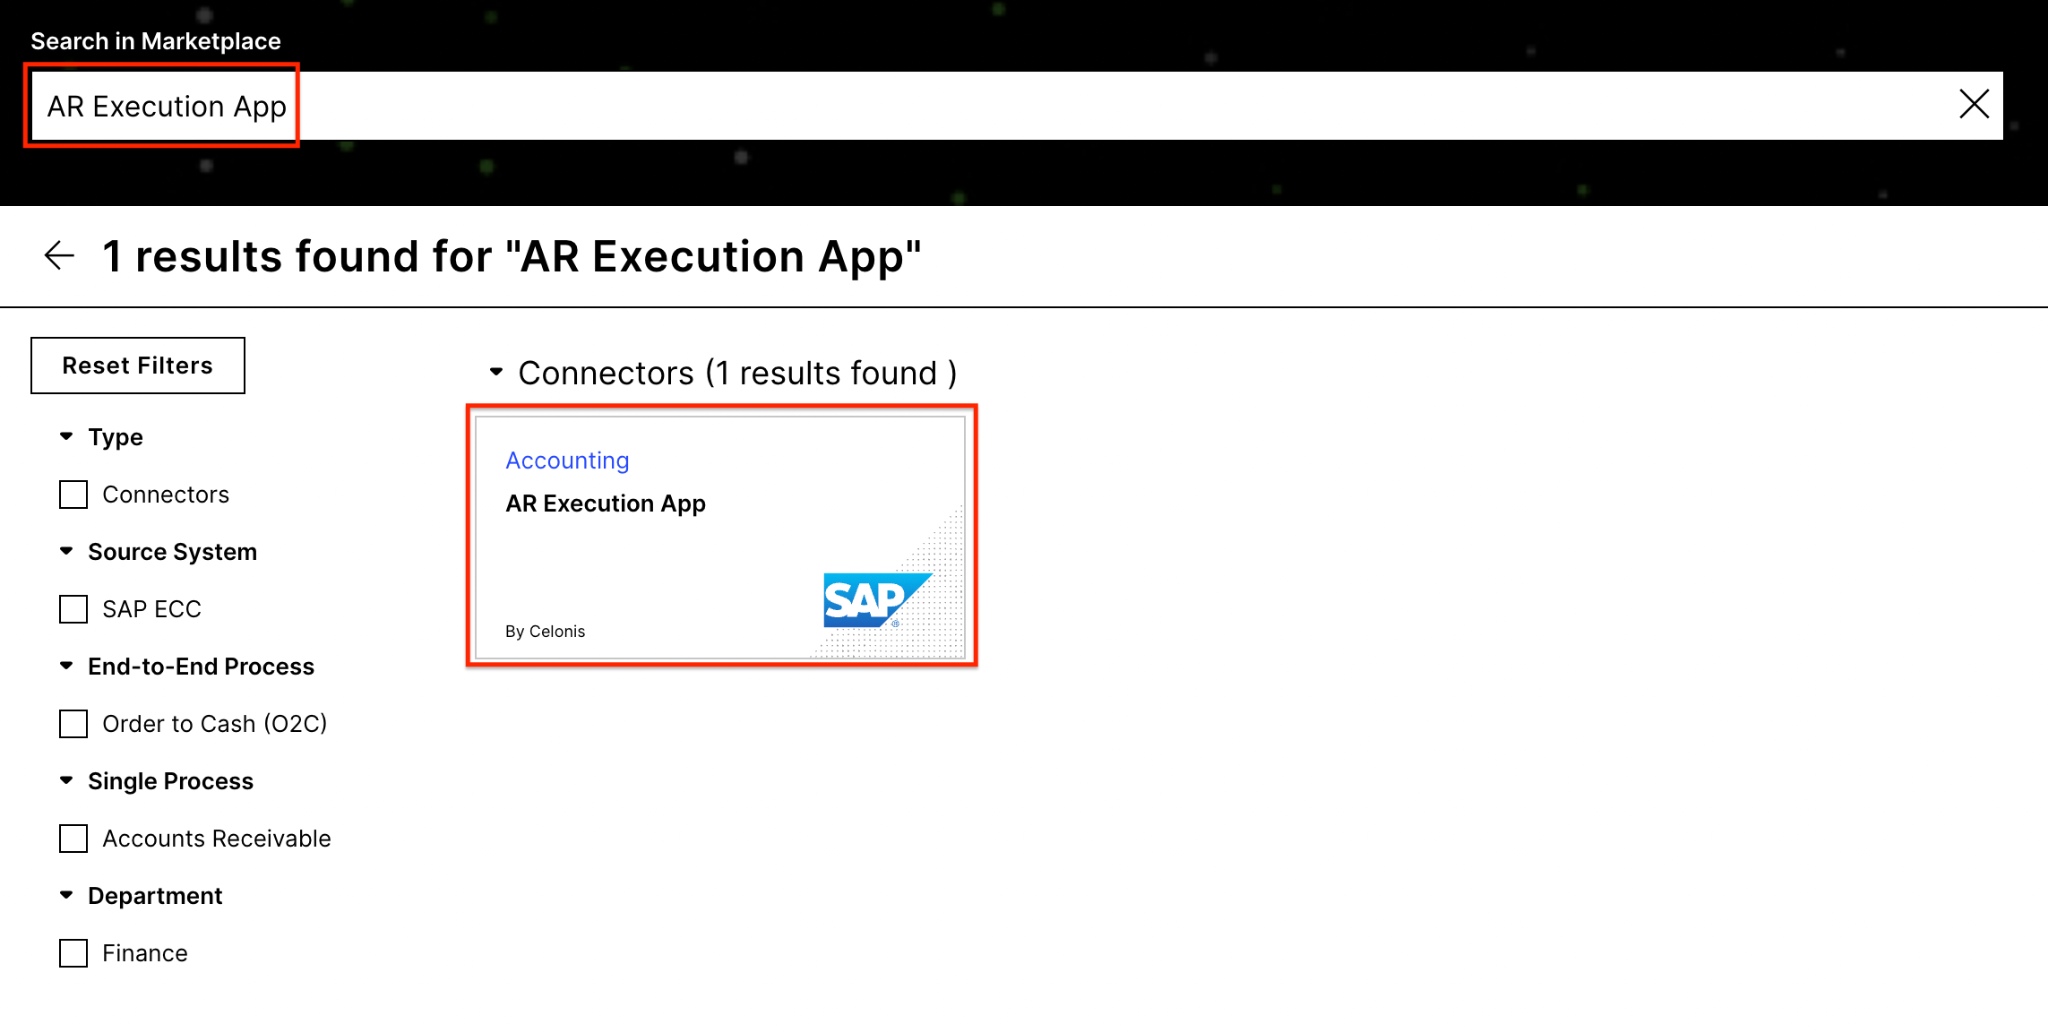
Go to the Marketplace and search for “AR Execution App” under the Connector. Pick a connector for SAP which is not real time.
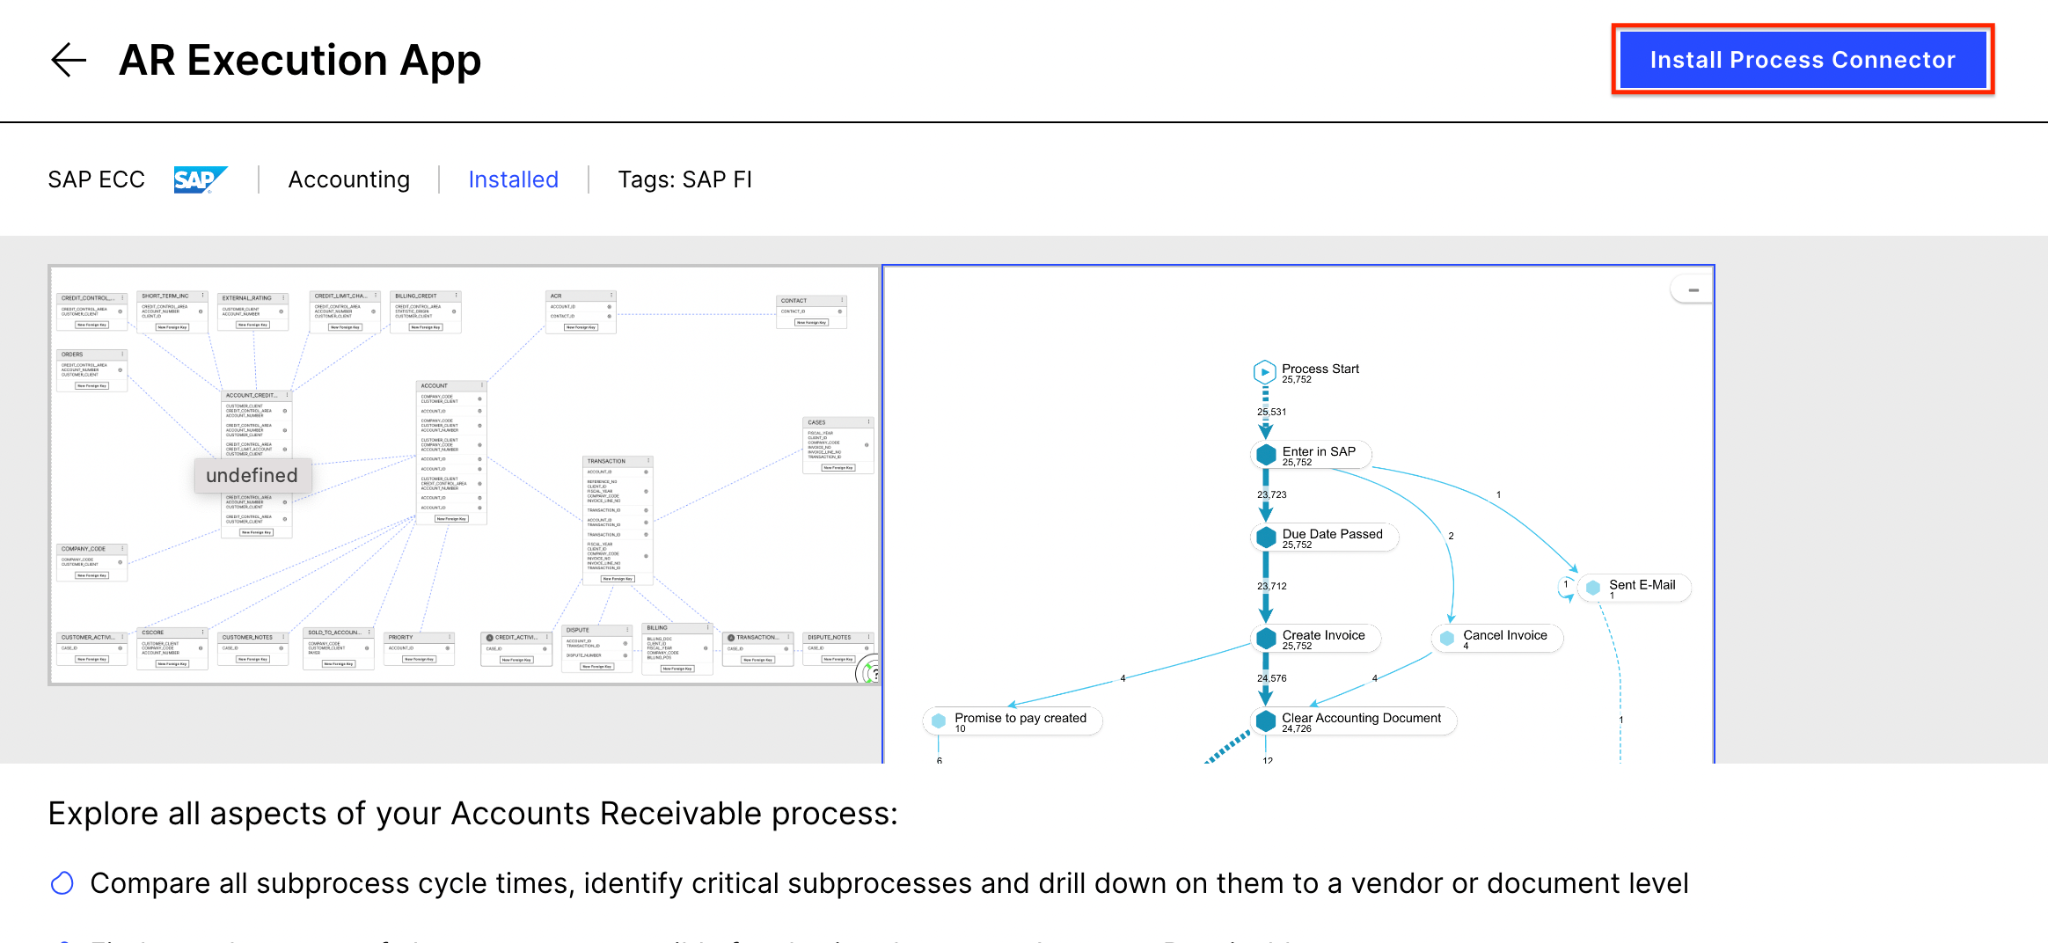
Click the Install Process Connector button.
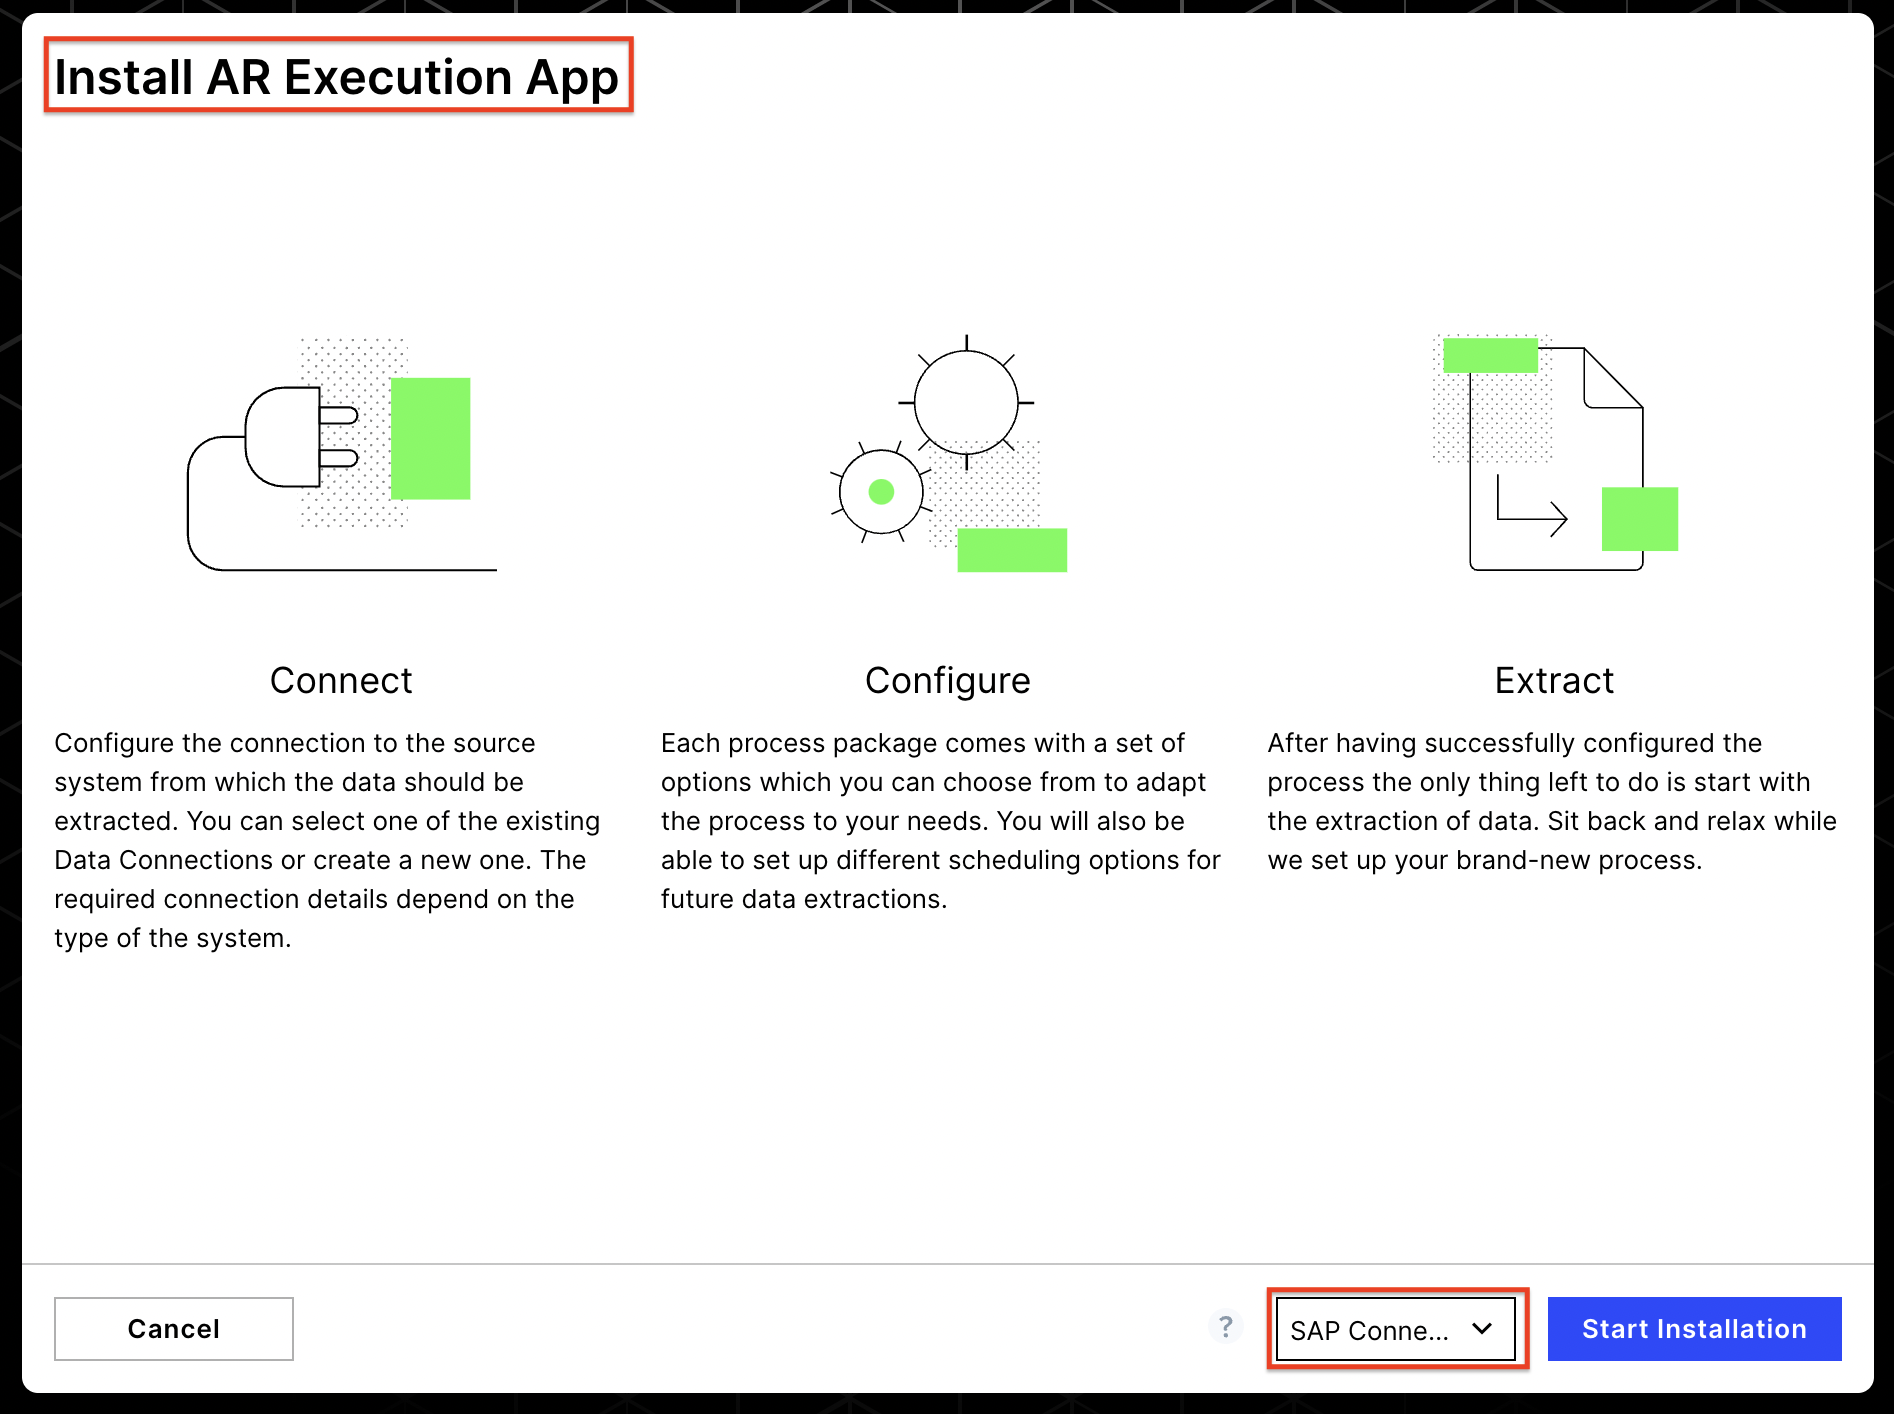
Select “SAP Connection” (if available) from the dropdown. If this option is not available, select “without connection”. Then click the Start installation button.
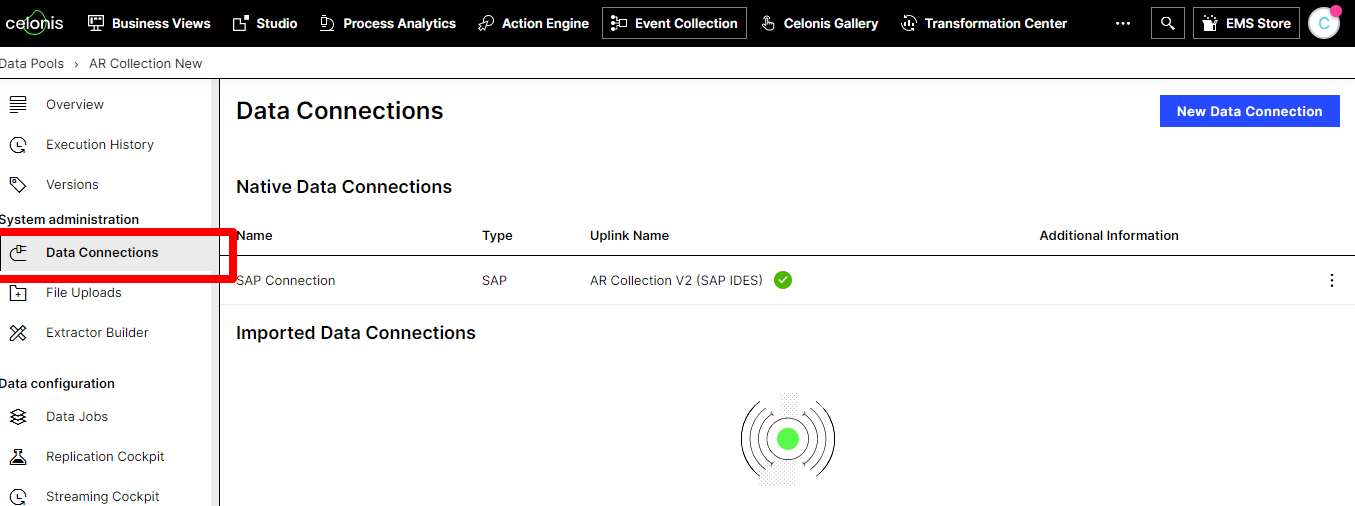
(Optional) Once installation has completed, you will be redirected to the Data Connections page, which shows the list of active connections. If you do not have an active connection, click the New Data Connection button. You must have an SAP user with appropriate roles and permissions to create a new connection.
Note
If you already have another data pool/connector installed and it contains all the SAP tables needed for AR Execution app, then use your existing Data Connection into the AR Execution app Data Pool. Be sure to disable all extraction in the AR Execution app Data Pool since we will be using data extracted from your existing pool. Follow the steps in this video for more information on extracted data from the existing pool (extracted data from existing pool).
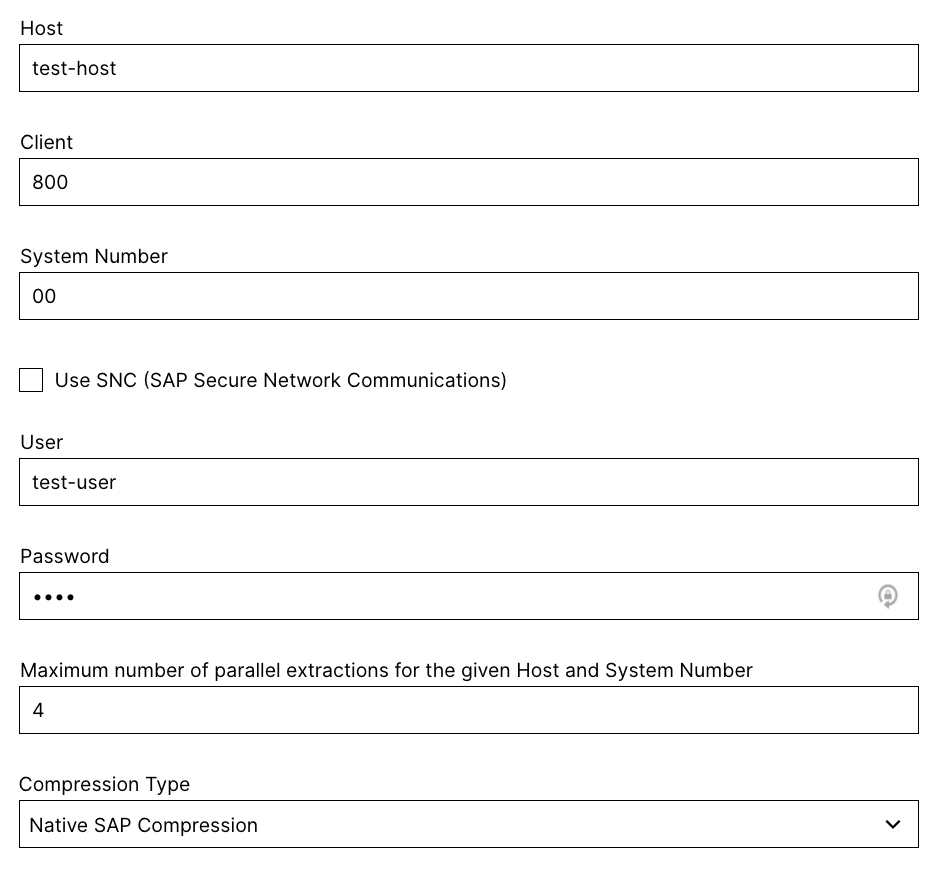
The following details are required to create a new SAP connection:
Note
To experience the operational capabilities of the Accounts Receivable Execution app, we recommend importing no more than 1 year of data. Also, when creating a Task on any table, there is a 30 million row limit. (See more details in the Getting started guide for Task Augmentation document.)