Invoice Action Flows
Contact Customer:
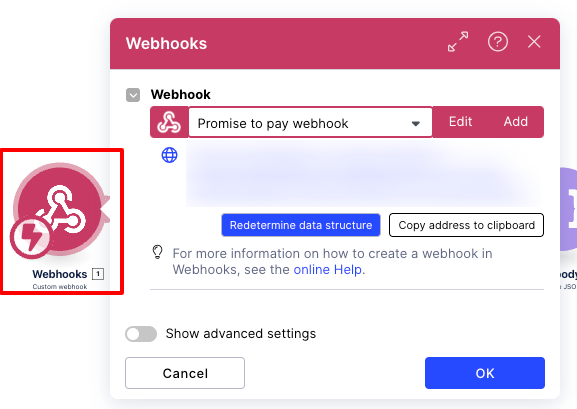
Step 1: Add Webhooks (1):
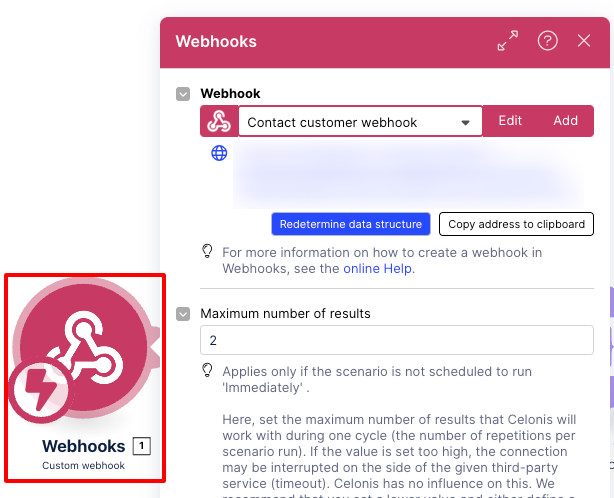
Step 2: Set variables (34):
Click on the set variables (34).

Enter the Team domain name in item 1 field.
Enter the env name in item 2 field.
Enter the App key in item 3 field.
Enter the update account augmented URL in the item 4 field (Open update account augmented attribute action flow Copy webhooks URL and paste ).
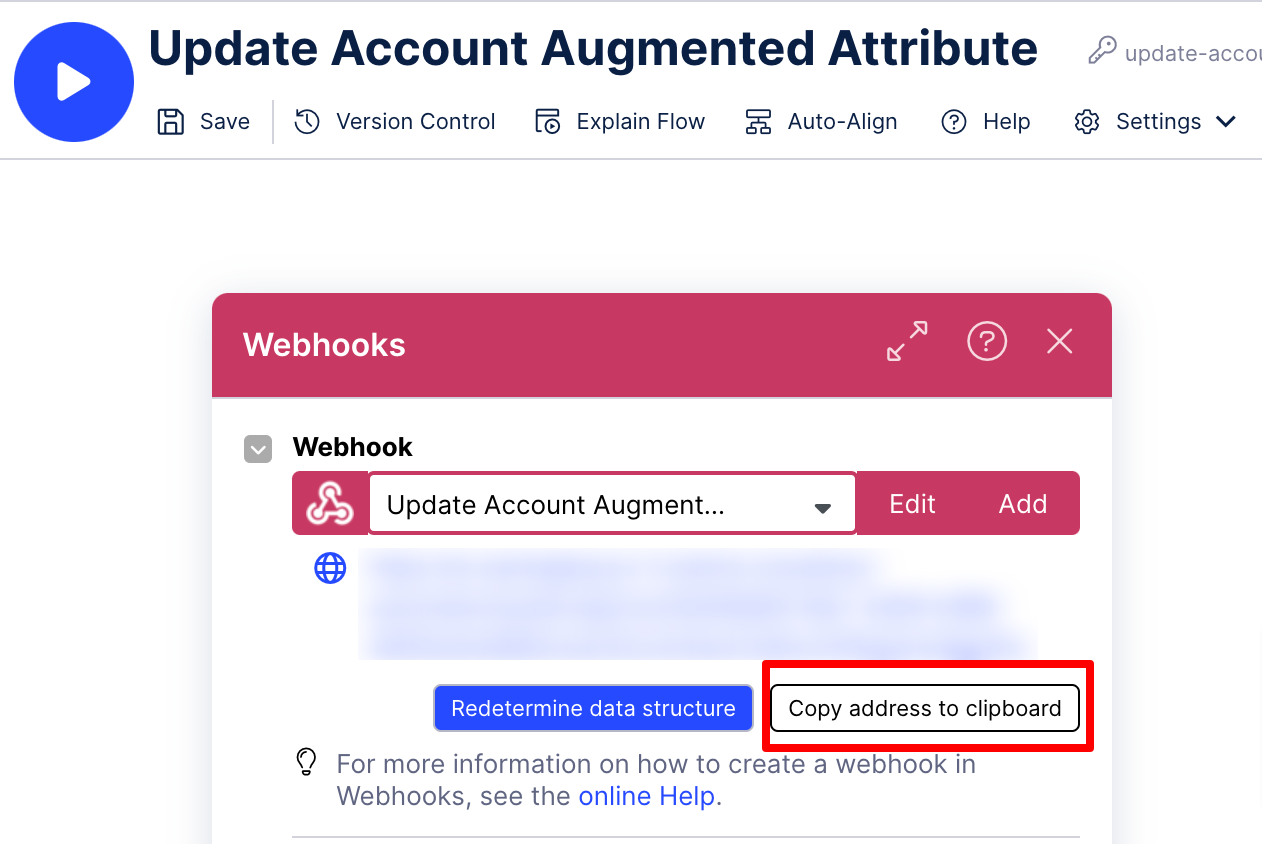
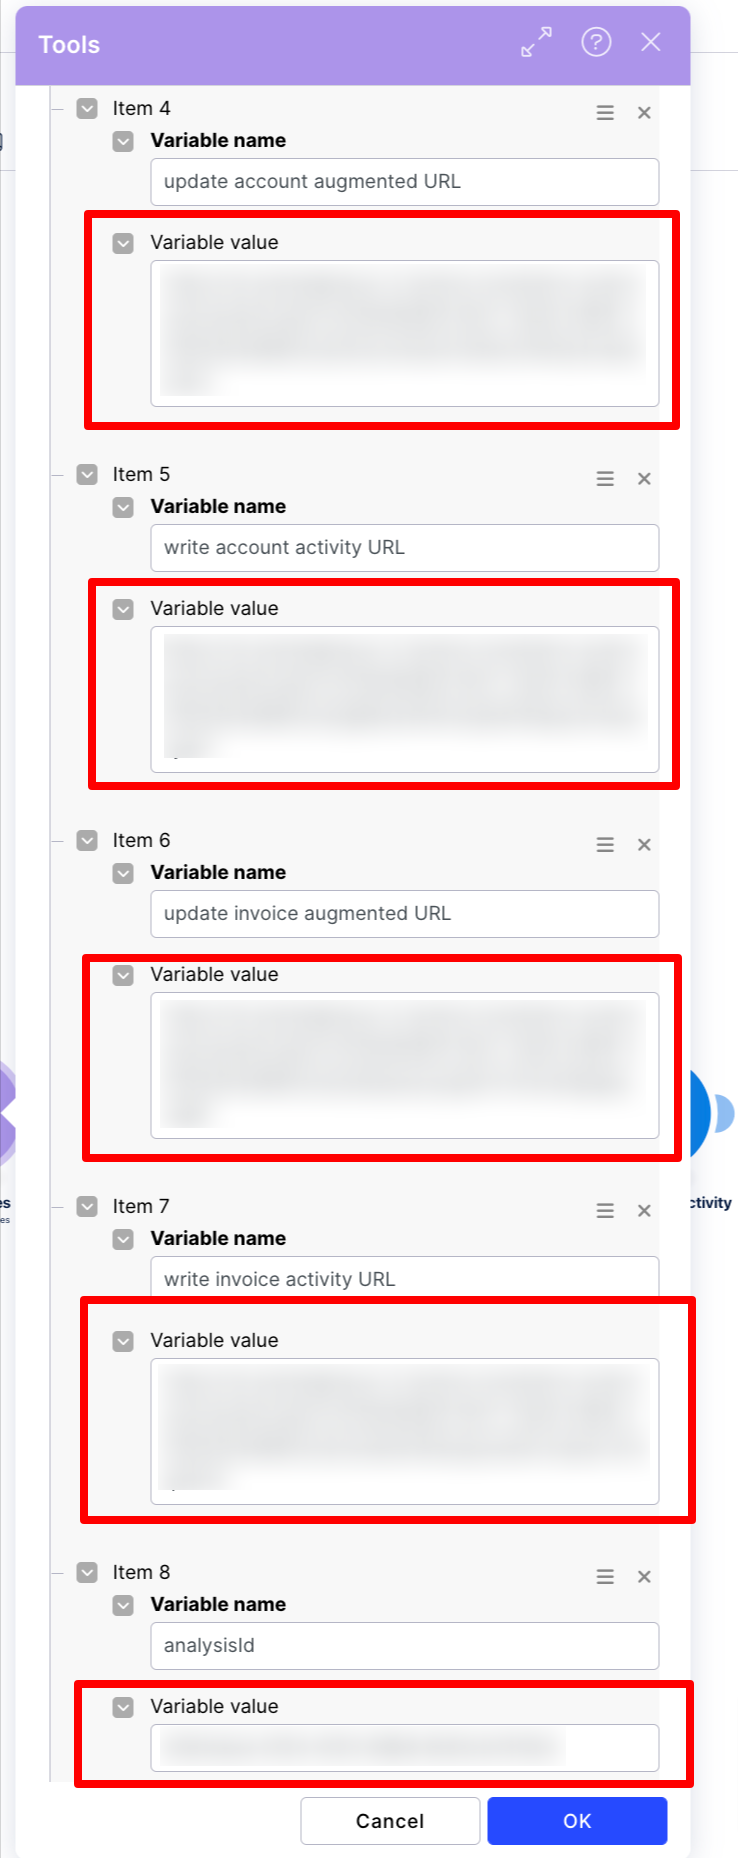
Enter write account activity URL in the item 5 field (Open write account activity action flow, copy webhooks URL and paste).
Enter update invoice augmented URL in the item 6 field (Open update invoice augmented action flow, copy webhooks URL and paste).
Enter write invoice activity URL in item 7 field (Open write invoice activity action flow Copy webhooks URL and paste).
Enter the analysisId in item 8 field.

Click the OK button.
Step 3: Prepare data list for account (35):
Click on Prepare data list for account (35).
Click the Add button.
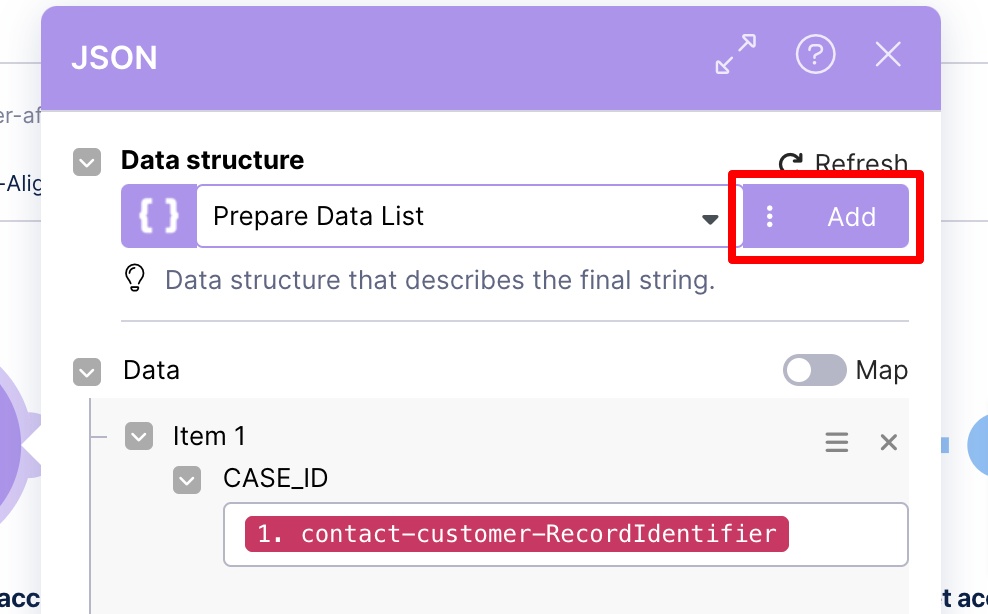
Enter the name (Prepare Data List) in the udts.name field.
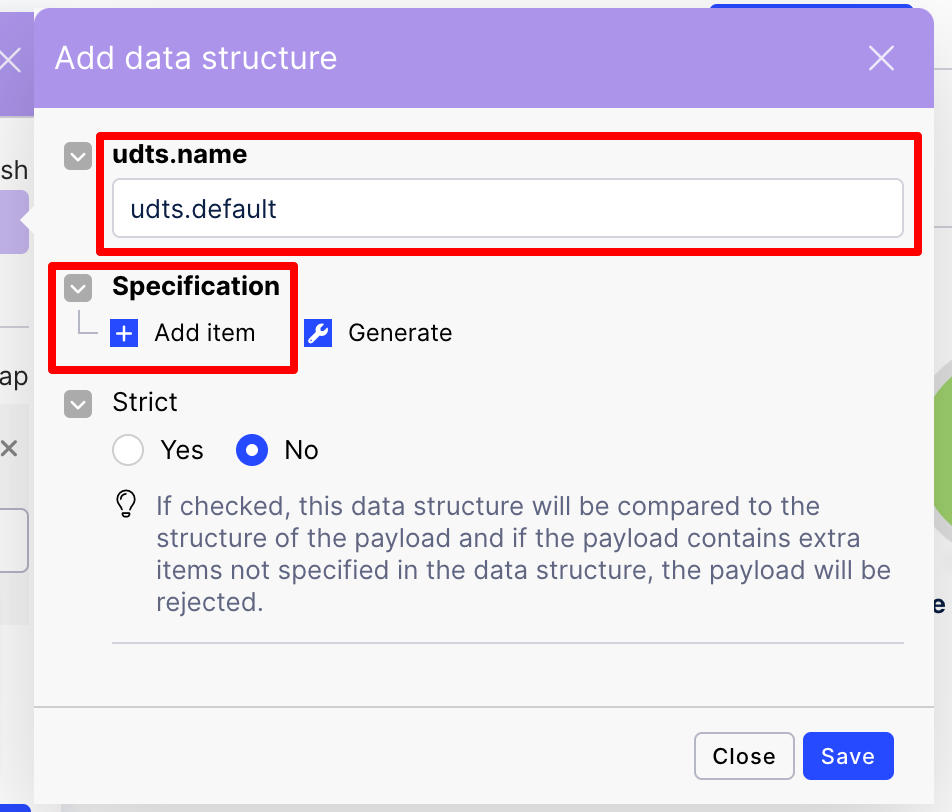
Click the Add item button.
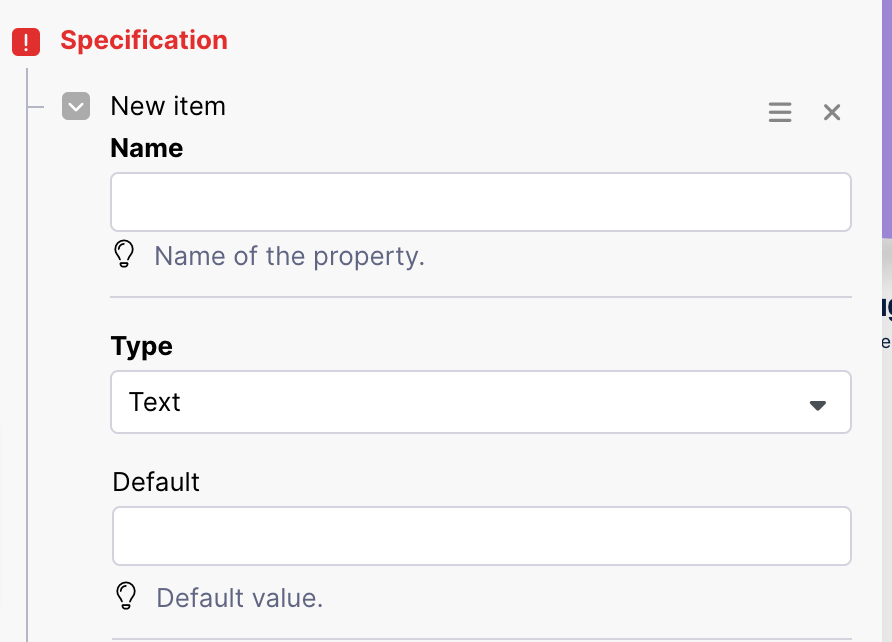
Enter the Name from the table below in the Name field and select the type.
Note
Add all items in the specification one-by-one.
Name
Type
Data
Array(Select Collection type)
Name
Type
CASE_ID
text
Click the Save button.
Click the Ok button.
Step 4: Prepare HTTP body for account (36):
Click on the Prepare HTTP body for account (36).
Enter the name (Prepare HTTP body for account) in the udts.name field.
Click the Generate button.
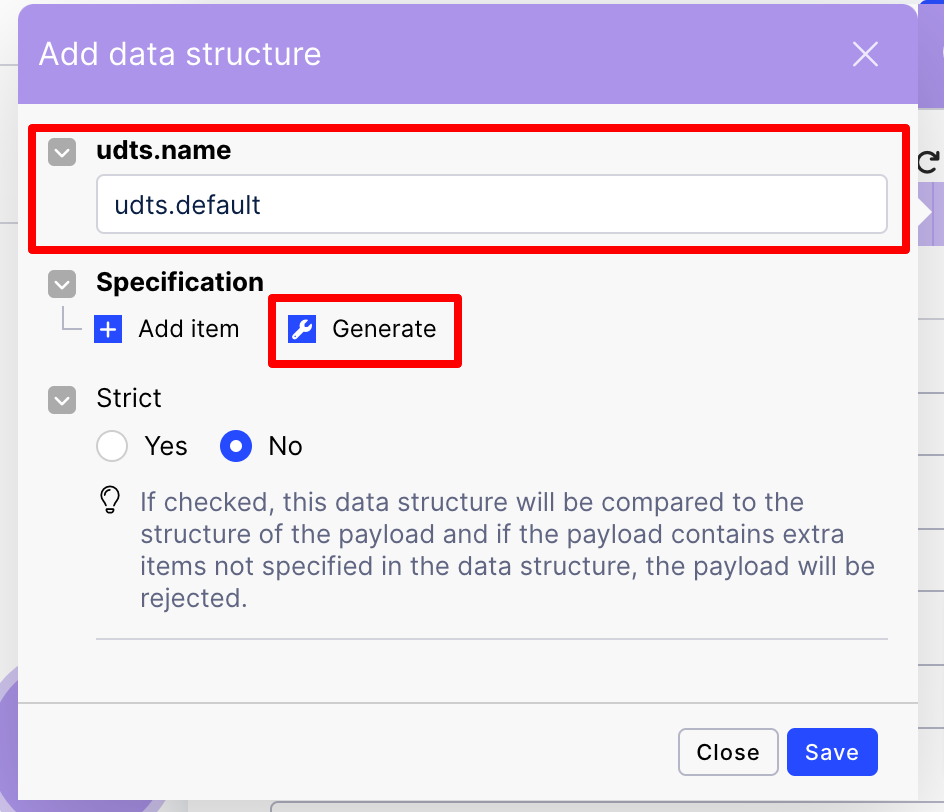
Enter the JSON statement below in the datastores.generator.sample_data field.
Note
Select “boolean type” for insertNote and select “number type” for sorting.
{
"data":"",
"noteId":"",
"note":"",
"sorting":0,
"actionName":"",
"userName":"",
"currentTimeStamp":"",
"insertNote":0
}
Click the Common.generator button.
Click the Save button.
Click the OK button.
Step 5: Prepare Data list for invoice (40):
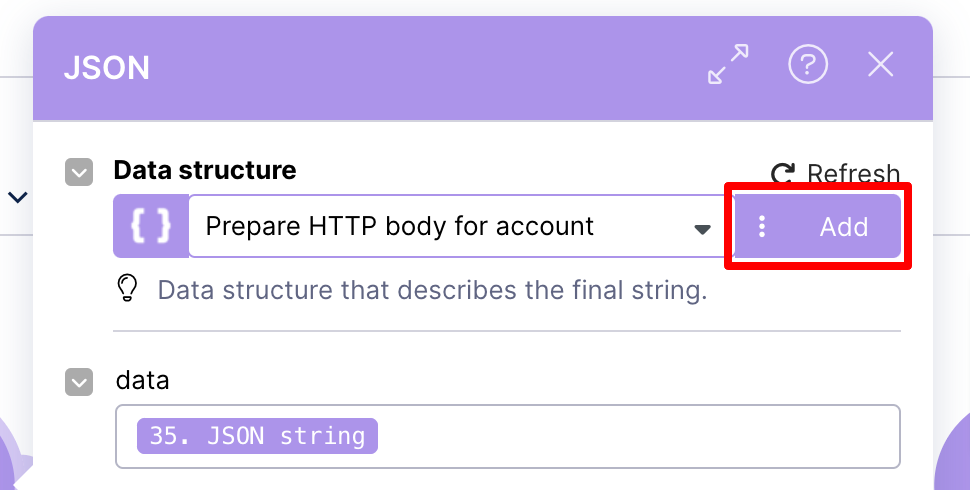
Click on the Prepare Data list for invoice (40).
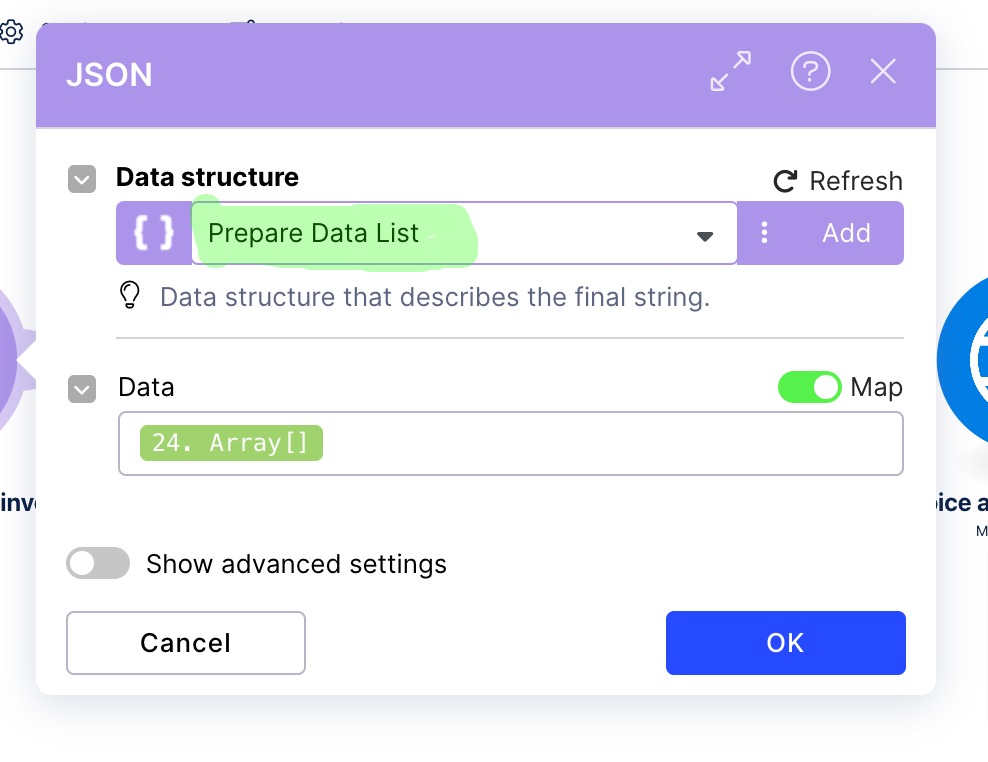
Select “Prepare Data List” in the Data structure field.
Click the OK button.
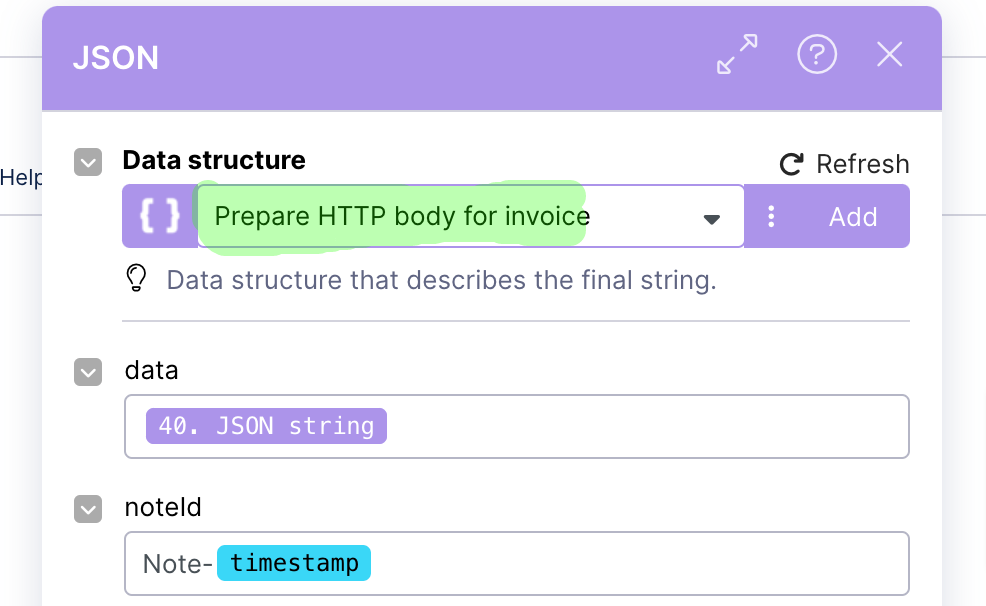
Step 6: Prepare HTTP body for invoice (41):
Click on Prepare HTTP body for invoice (41).
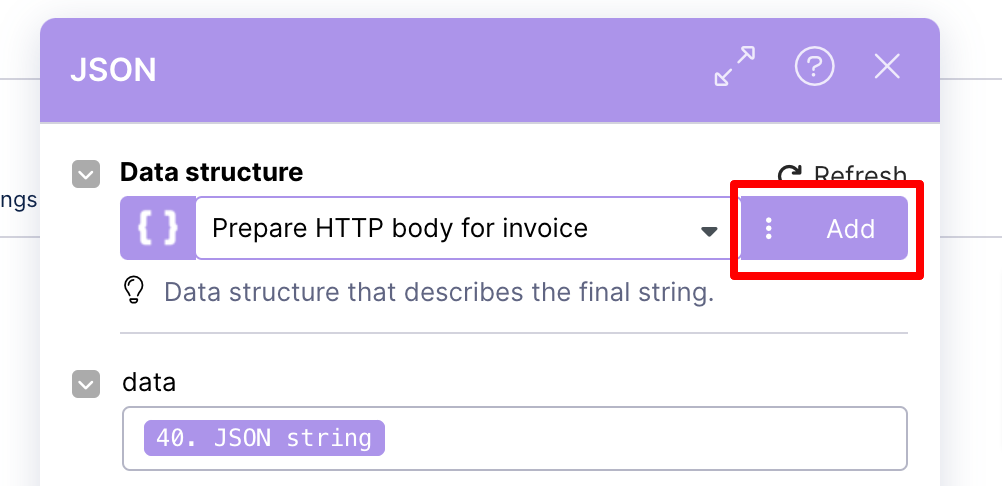
Enter the name (“Prepare HTTP body for invoice”) in the udts.name field.
Click the Generate button.
Enter the JSON statement below in the datastores.generator.sample_data field.
Note
Select “boolean type” for insertNote and select “number type” for sorting.
{
"data":"",
"noteId":"",
"note":"",
"sorting":0,
"actionName":"",
"userName":"",
"currentTimeStamp":"",
"insertNote":0
}
Click the Common.generator button.
Click the Save button.
Click the OK button.
Step 7: Send email to customer (33):
Click on Send email to customer (33).
Click the Add button.
Set connection type.
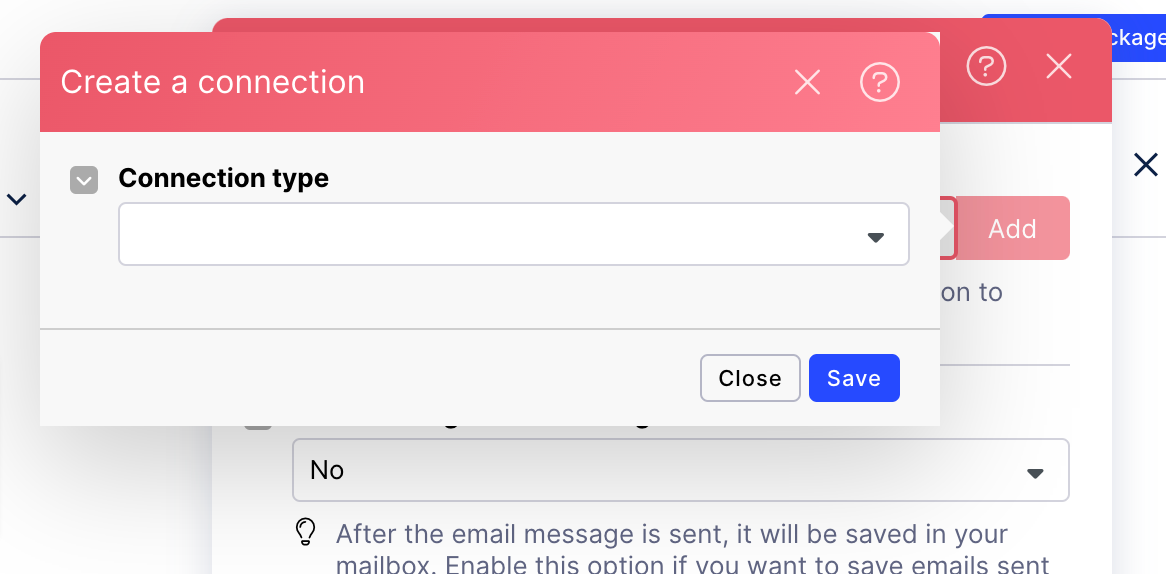
Click the Save button.
Click the OK button.
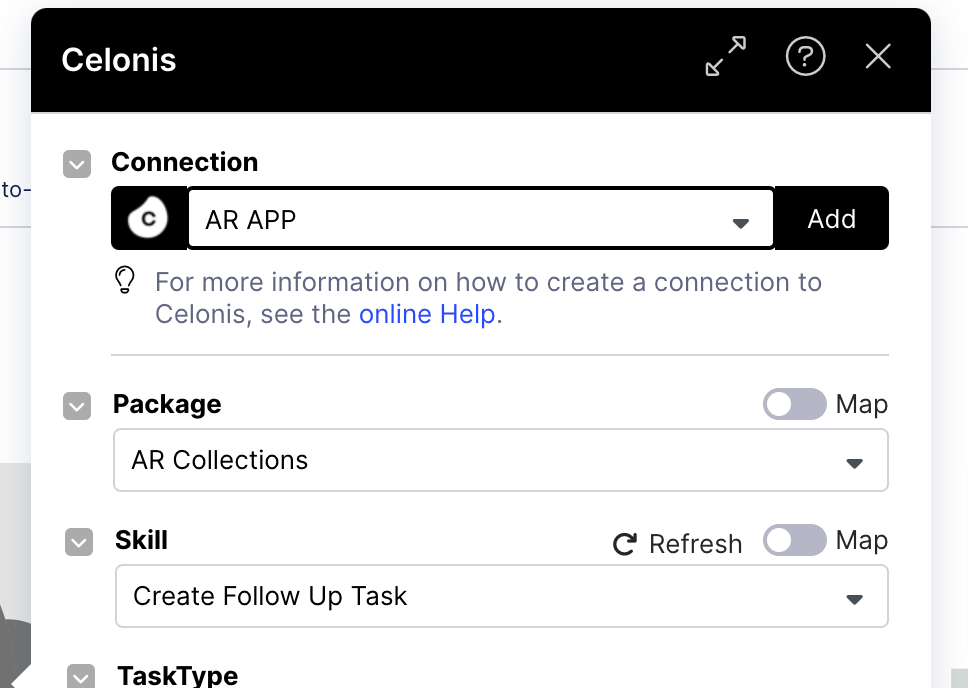
Step 8: Create follow up task (20):
Click on the Create follow up task (20).
Select a Connection.
Select a Package and Skill.
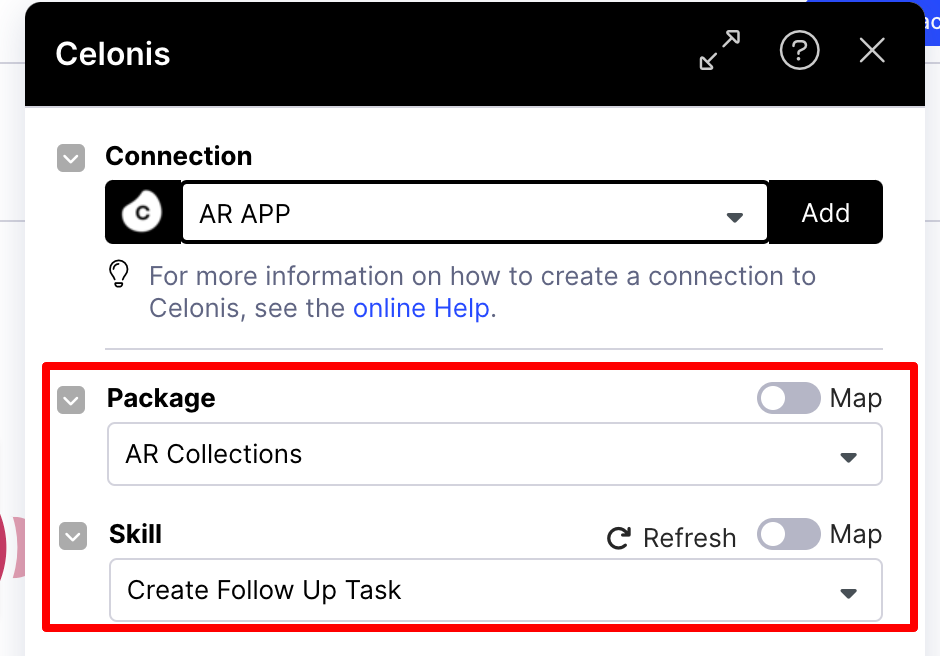
Click the OK button.
Step 9: JSON (27):
Click on JSON (27).

Enter the name (Contact customer excel) in the udts.name field.
Click the Generate button.
Enter the Json statement below in the datastores.generator.sample_data field.
Note
Select “number” for computationId and select “boolean” for isTransient.
{
"exportType": "EXCEL",
"dataCommandRequest": {
"request": {
"commands": [{
"computationId":
0,
"isTransient":
false,
"queries": [""]
}],
"cubeId": ""
},
"variables": [{
"name": "",
"type": "",
"value": ""
}]
}
}
For more details please refer to Export Excel using Analysis.pdf.
Click the Common.generator button.
Click the Save button.
Click the OK button.
Step 10: Save the action flow.
Promise To Pay:
Step 1: Add Webhooks (1):
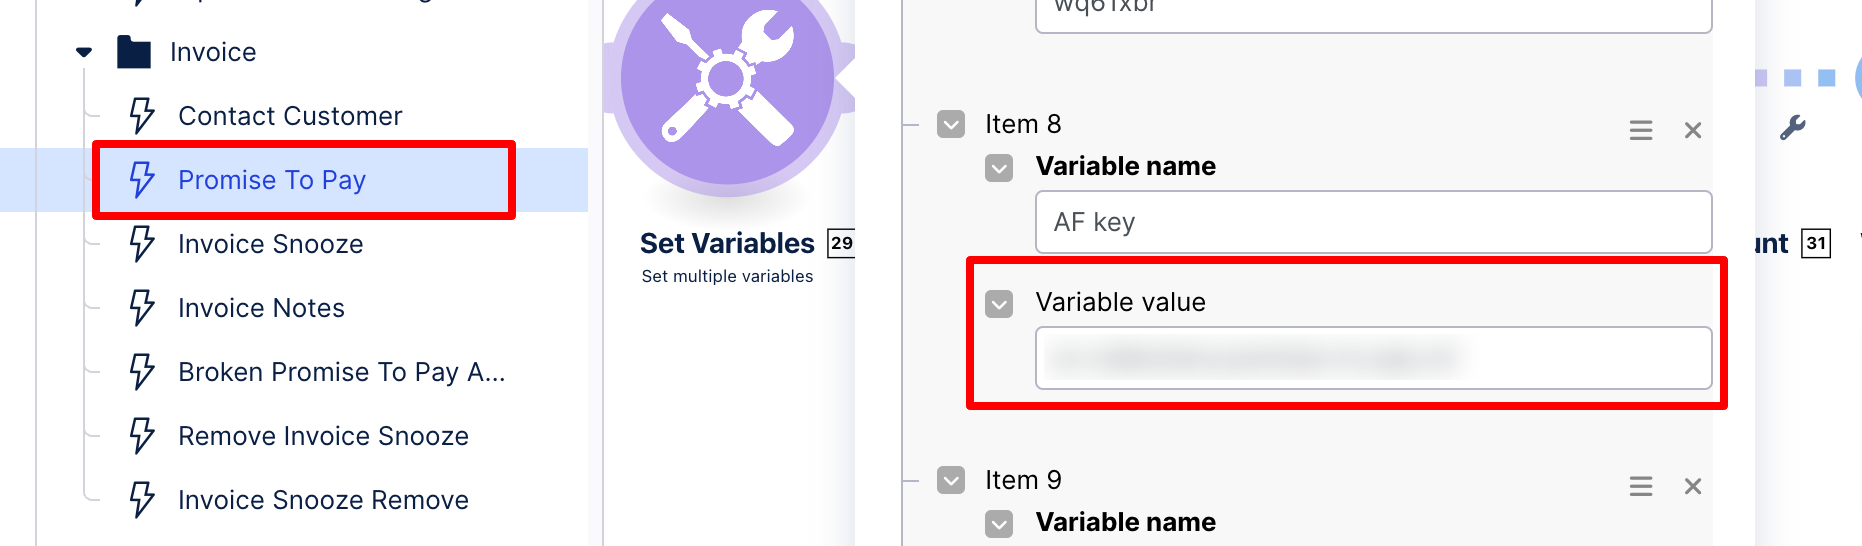
Step 2: Set variables (29):
Click on set variables (29)
Enter the Team domain name in the item 1 field.
Enter the env name in the item 2 field.
Enter the App key in the item 3 field.
Enter the update account augmented URL in the item 4 field (Open update account augmented attribute action flow, copy webhooks URL and paste).
Enter the write account activity URL in the item 5 field (Open write account activity action flow, copy webhooks URL and paste).
Enter the update invoice augmented URL in the item 6 field (Open update invoice augmented action flow, copy webhooks URL and paste).
Enter the write invoice activity URL in the item 7 field (Open write invoice activity action flow, copy webhooks URL and paste).
Enter the AF key in the item 8 field.
Enter the KM key in the item 9 field.
Click the OK button.
Step 3: Prepare data list for account (30):
Click on Prepare data list for account (30).
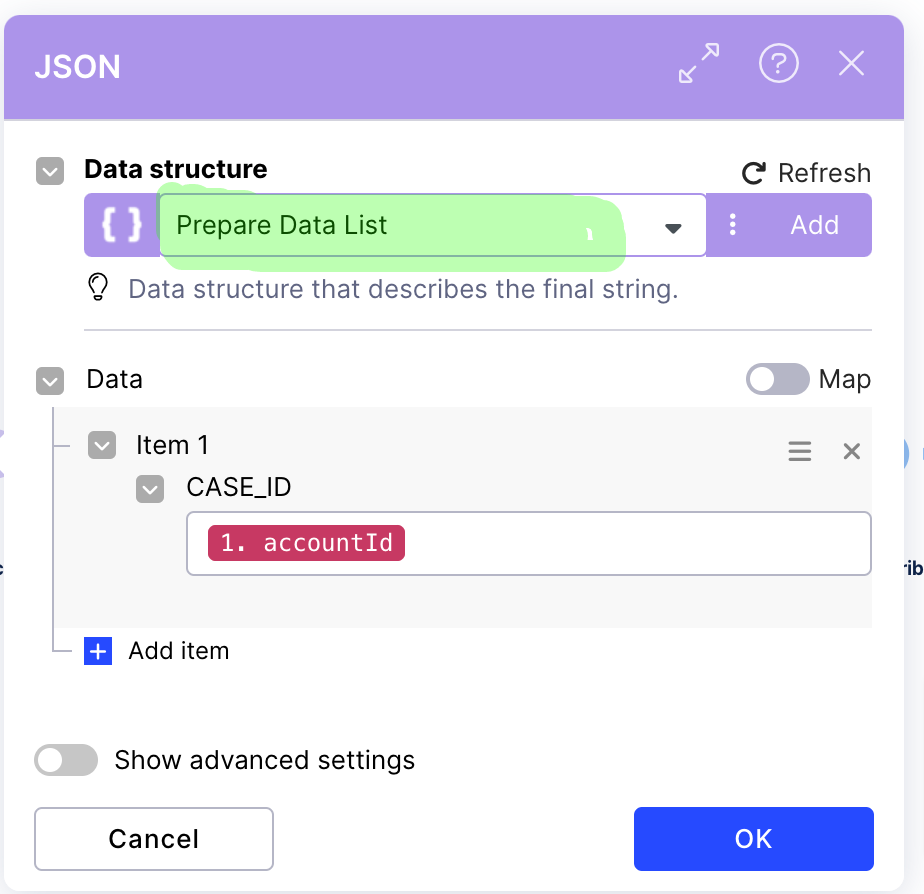
Select “Prepare Data List” in the Data structure field.
Click the OK button.
Step 4: Prepare HTTP body for account (31):
Click on the Prepare HTTP body for account (31).
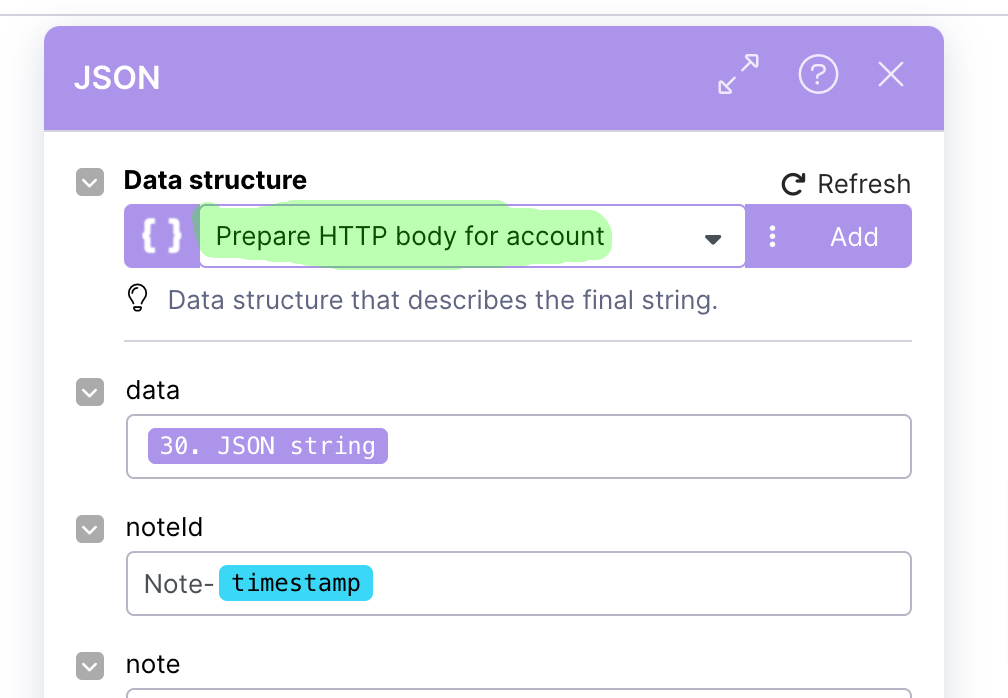
Select “Prepare HTTP body for account” in the Data structure field.
Click the OK button.
Step 5: JSON for update augmented (35):
Click on JSON for update augmented (35).
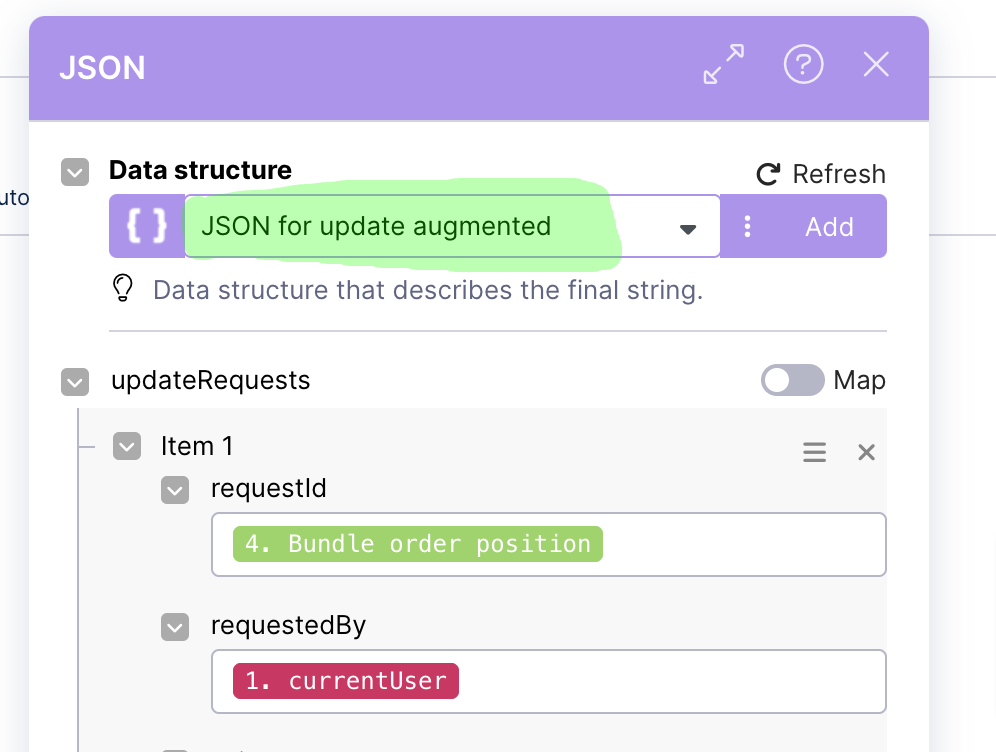
Select “JSON for update augmented” in the Data structure field.
Click the OK button.
Step 6: Follow Up Task (13):
Click on Follow up Task (13).
Select a Package.
Select “Create follow up task” in the Skill field.
Click the OK button.
Step 7: Prepare Data list for invoice (40):
Click on Prepare Data list for invoice (40).
Select “Prepare Data List” in the Data structure field.
Click the OK button.
Step 8: Prepare HTTP body for invoice (41):
Click on Prepare HTTP body for invoice (41).
Select “Prepare HTTP body for invoice” in the Data structure field.
Click the OK button.
Step 9: Notify Customer (21):
Click on Send Notify Customer (33).
Click the Add button.
Set the Connection type.
Click the Save button.
Click the OK button.
Step 10: Save the action flow.
Invoice Snooze:
Step 1: Add Webhooks (1):
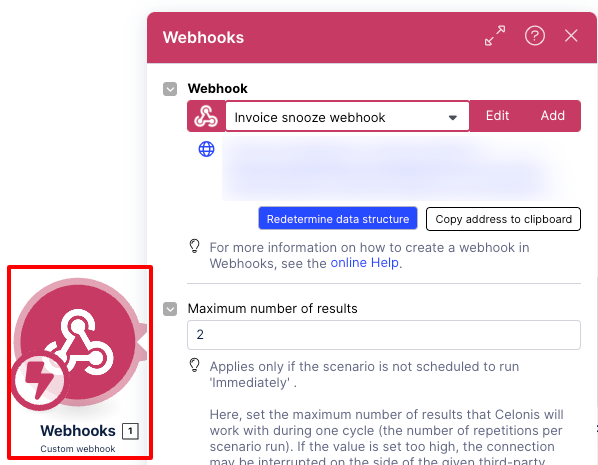
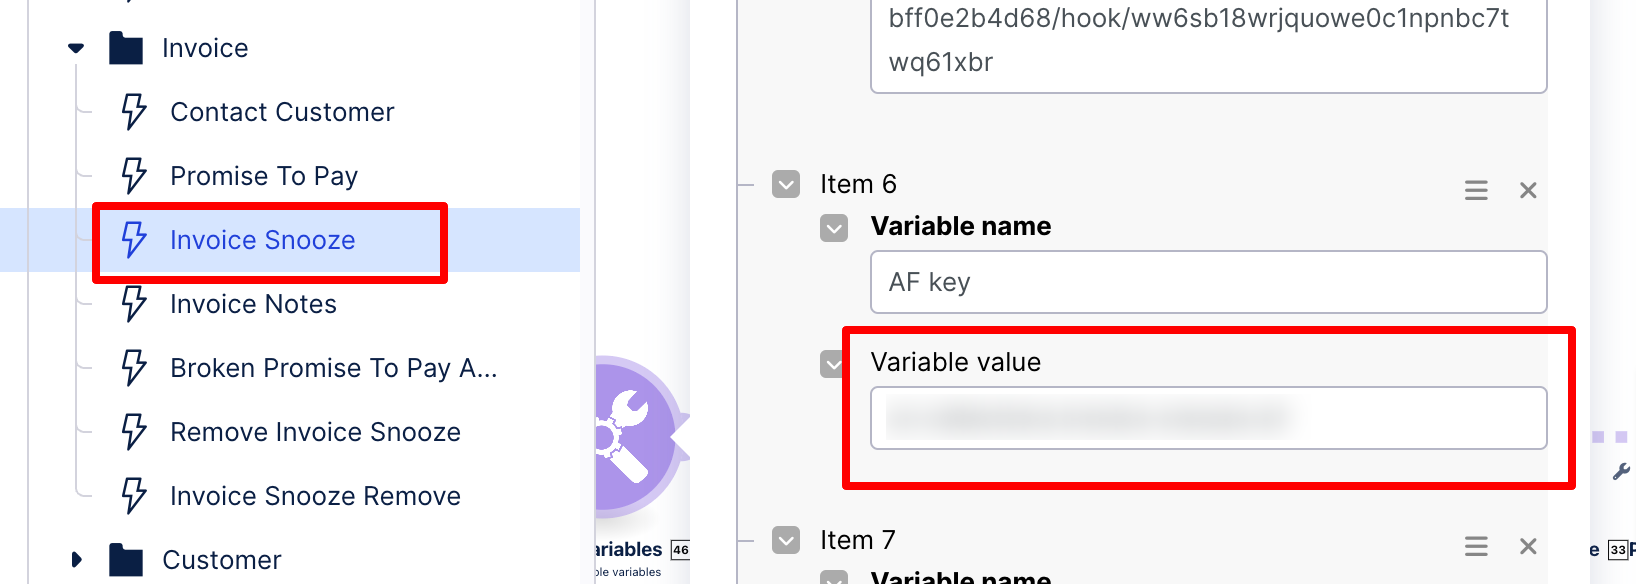
Step 2: Set variables (46):
Click on Set variables (46).
Enter the Team domain name in the item 1 field.
Enter the env name in the item 2 field.
Enter the App key in the item 3 field.
Enter the update invoice augmented URL in the item 4 field (Open update invoice augmented action flow, copy webhooks URL and paste).
Enter the write invoice activity URL in the item 5 field (Open write invoice activity action flow, copy webhooks URL and paste).
Enter the AF key in the item 6 field.
Enter the KM key in the item 7 field.
Click the OK button.
Step 3: Prepare Data list for invoice (33):
Click on Prepare Data list for invoice (33).
Select “Prepare Data List” in the Data structure field.
Click the OK button.
Step 4: Prepare HTTP body for invoice (45):
Click on Prepare HTTP body for invoice (45).
Select “Prepare HTTP body for invoice” in the Data structure field.
Click on the OK button.
Step 5: JSON for update augmented (51):
Click on JSON for update augmented (51).
Select “JSON for update augmented” in the Data structure field.
Click the OK button.
Step 6: Save the action flow.
Invoice Notes:
Step 1: Add Webhooks (1):
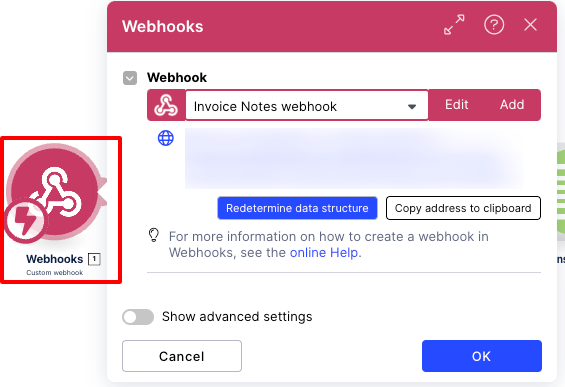
Step 2: Tools (13):
Click on the Tools (13).
Enter the Team domain name in the item 1 field.
Enter the env name in the item 2 field.
Enter the App key in the item 3 field.
Enter update invoice augmented URL in the item 4 field (Open update invoice augmented action flow, copy webhooks URL and paste).
Enter the write invoice activity URL in the item 5 field (Open write invoice activity action flow, copy webhooks URL and paste).
Click on the OK button.
Step 3: Prepare Data list for invoice (14):
Click on Prepare Data list for invoice (14).
Select “Prepare Data List” in the Data structure field.
Click the OK button.
Step 4: Prepare HTTP body for invoice (15):
Click on Prepare HTTP body for invoice (15).
Select “Prepare HTTP body for invoice” in the Data structure field.
Click the OK button.
Step 5: Save the action flow.
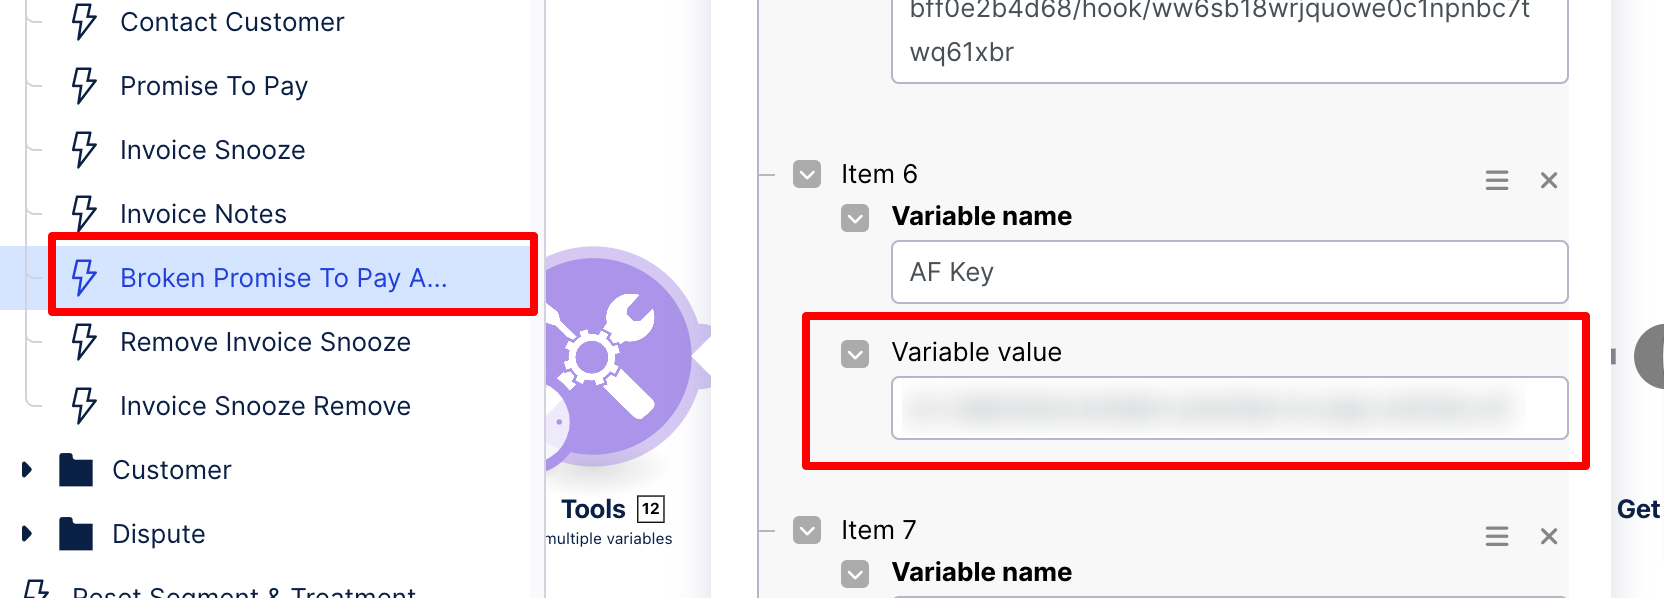
Broken Promise To Pay Activity:
Step 1: Tools (12):
Click on Tools (12).
Enter the Team domain name in the item 1 field.
Enter the env name in the item 2 field.
Enter the App key in the item 3 field.
Enter the update invoice augmented URL in the item 4 field (Open update invoice augmented action flow, copy webhooks URL and paste).
Enter the write invoice activity URL in the item 5 field (Open write invoice activity action flow, copy webhooks URL and paste).
Enter the AF key in the item 6 field.
Enter the KM key in the item 7 field.
Click the OK button.
Step 2: Get All Promised invoice (26):
Click on Get All Promised invoice (26).
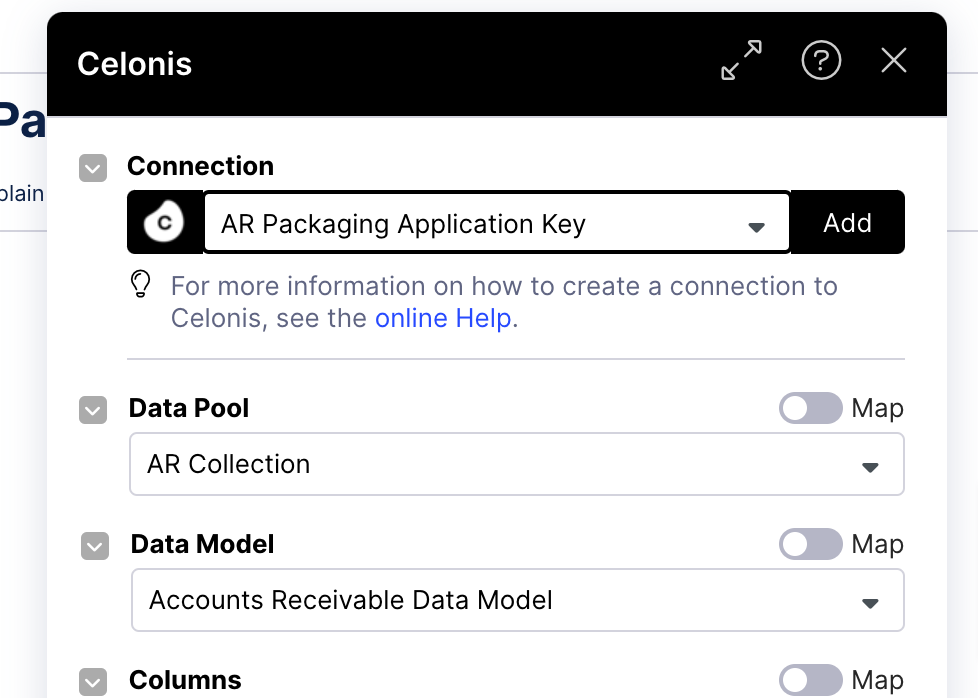
Select a Connection.
Select a Data Pool.
Select the Data Model.
Click the OK button.
Step 3: Get All Promised invoice (1):
Click on Get All Promised invoice (1).
Select a Connection.
Select a Data Pool.
Select the Data Model.
Click the OK button.
Step 4: Prepare data list (14):
Click on Prepare data list (14).
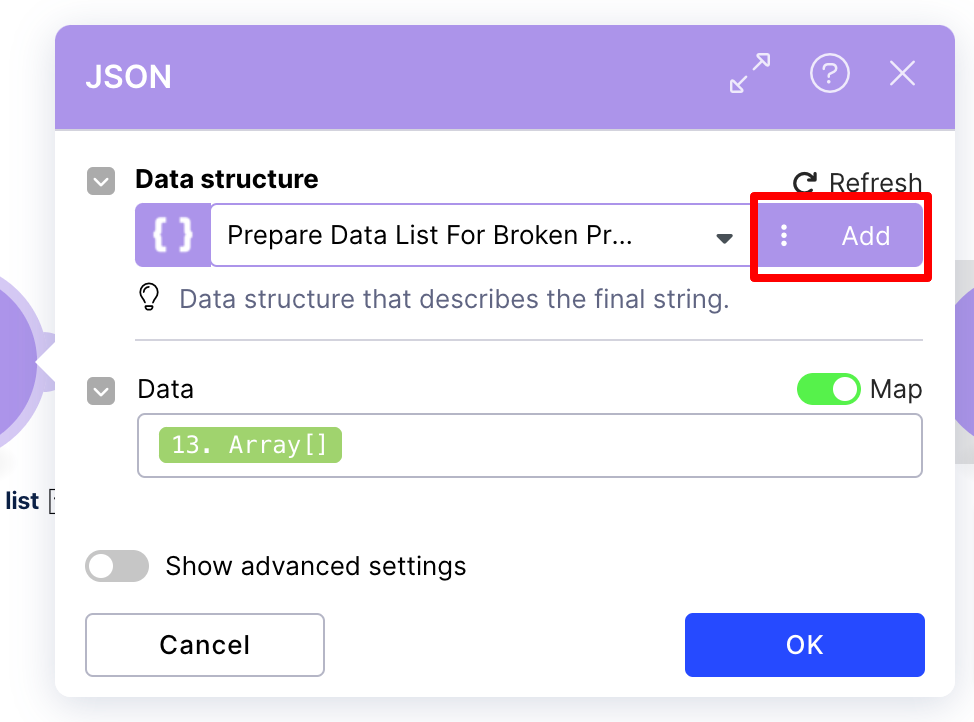
Click the Add button.
Enter the name (Prepare Data List For Broken Promise) in the udts.name field.
Click the Add item button.
Enter the name from the table below in the Name field and select the corresponding type.
Note
Add all items in the specification one by one.
Name
Type
Data
Array(Select Collection type)
Name
Type
CASE_ID
text
PROMISE_AMOUNT
Number
Click the Save button.
Click the OK button.
Step 5: JSON (28):
Click on JSON (28).
Click the Add button.
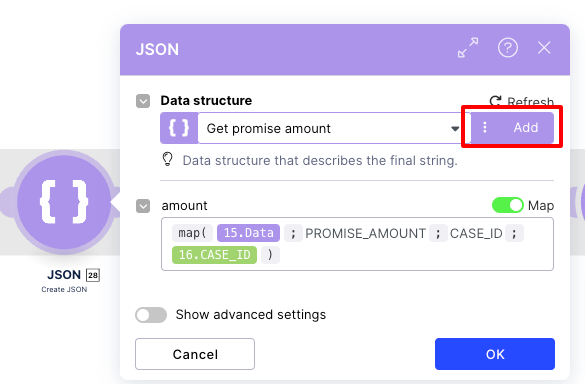
Enter the name (Get promise amount) in the udts.name field.
Click the Add item button.
Enter the name from the table below in the Name field and select the corresponding type.
Name
Type
amount
Array
Type
Default
Number
Click the Save button.
Click the OK button.
Step 6: JSON (17):
Click on JSON (17).
Select “JSON for update augmented” in the Data structure field.
Click the OK button.
Step 7: JSON (21):
Click on JSON (21).
Select “Prepare HTTP body for invoice” in the Data structure field.
Click the OK button.
Step 8: Save the action flow.
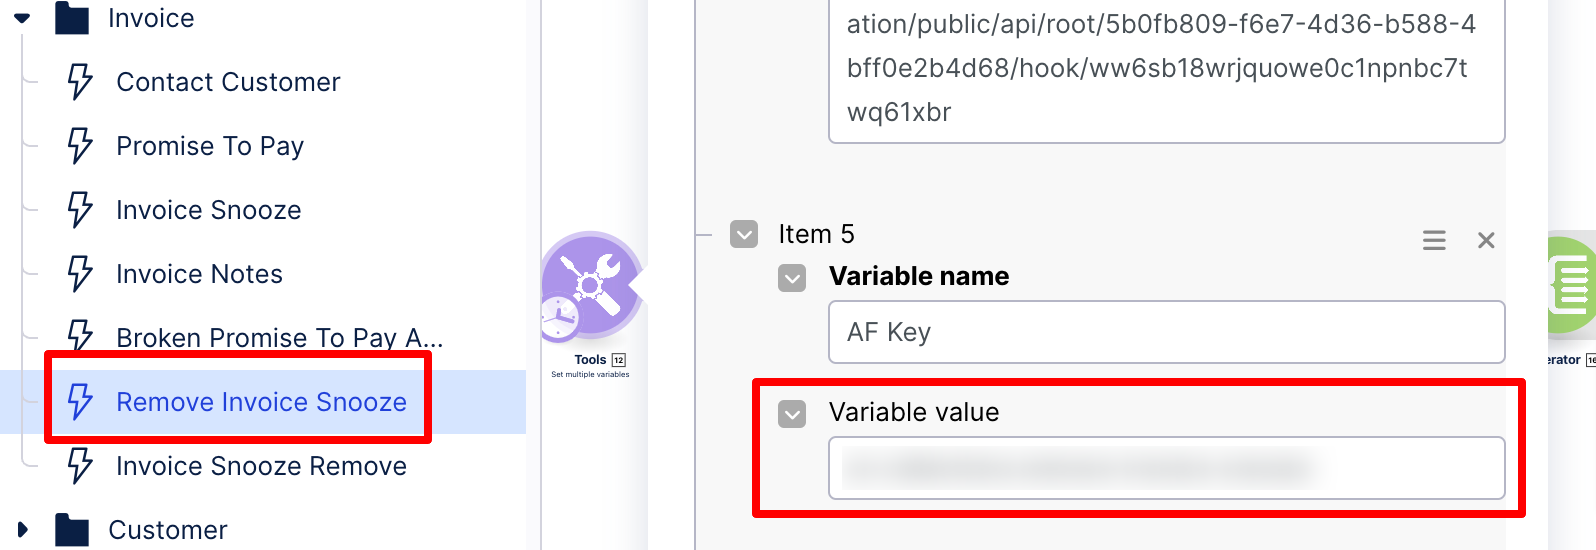
Remove Invoice Snooze:
Step 1: Tools (12):
Click on Tools (12).
Enter the Team domain name in the item 1 field.
Enter the env name in the item 2 field.
Enter the App key in the item 3 field.
Enter the write invoice activity URL in the item 4 field (Open write invoice activity action flow, copy webhooks URL and paste).
Enter the AF key in the item 5 field.
Enter the KM key in the item 6 field.
Click the OK button.
Step 2: Get Invoice With Snooze Reminder Date (1):
Click on Get Invoice With Snooze Reminder Date (1).
Select a Connection.
Select a Data pool.
Select the Data model.
Click the OK button.
Step 3: JSON (14):
Click on JSON (14).
Select “Prepare Data List” in the Data structure field.
Click the OK button.
Step 4: JSON (17):
Click on JSON (17).
Select “JSON for update augmented” in the Data structure field.
Click the OK button.
Step 5: JSON (21):
Click on JSON (21).
Select “Prepare HTTP body for invoice” in the Data structure field.
Click the OK button.
Step 6: Save the action flow.
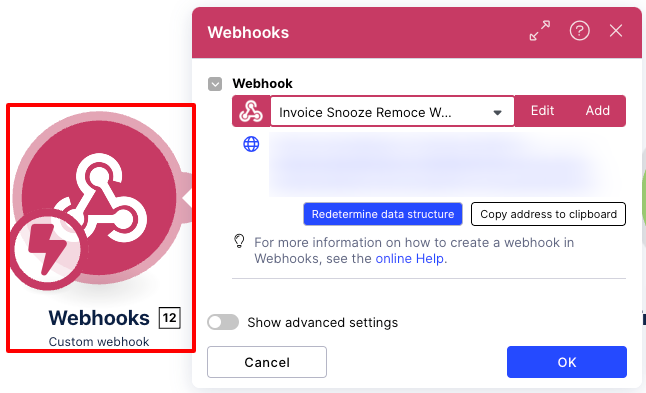
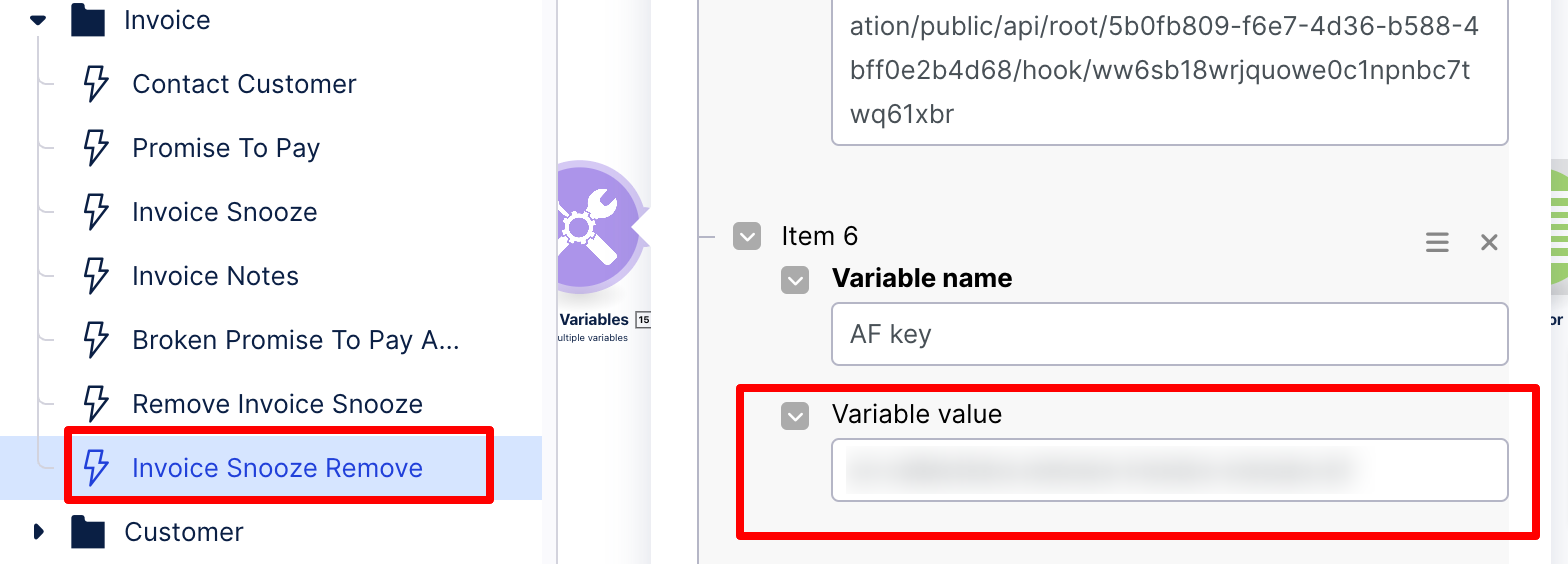
Invoice Snooze Remove:
Step 1: Add Webhooks (12):
Step 2: Set variable (15):
Click on Set variable (15).
Enter the Team domain name in the item 1 field.
Enter the env name in the item 2 field.
Enter the App key in the item 3 field.
Enter the update invoice augmented URL in the item 4 field (Open update invoice augmented action flow, copy webhooks URL and paste).
Enter the write invoice activity URL in the item 5 field (Open write invoice activity action flow, copy webhooks URL and paste).
Enter the AF key in the item 6 field.
Enter the KM key in the item 7 field.
Click the OK button.
Step 3: JSON for update augmented (17):
Click on JSON for update augmented (17).
Select “JSON for update augmented” in the Data structure field.
Click the OK button.
Step 4: Prepare data list for invoice (38):
Click on Prepare data list for invoice (38).
Select “Prepare Data List” in the Data structure field.
Click the OK button.
Step 5: Prepare HTTP body for invoice (39):
Click on Prepare HTTP body for invoice (39).
Select “Prepare HTTP body for invoice” in the Data structure field.
Click the OK button.
Step 6: Save the action flow.