Embedding views in legacy views
Legacy view component
You're currently viewing a topic about a legacy view component in Studio. This component can still be used in legacy Studio views, however we recommend using the visual view editor in the new Studio experience. The updated interface includes drag and drop capabilities, allowing you to easily add components and configure your views.
For more information, see: Views.
Embedded views enable you to display views or filtered versions of views within an existing view, such as embedding a regional or process-specific view. Embedded views are useful for both including more information within a view and for benchmarking data. For a view to be embedded, it must be available within your Celonis Platform team.
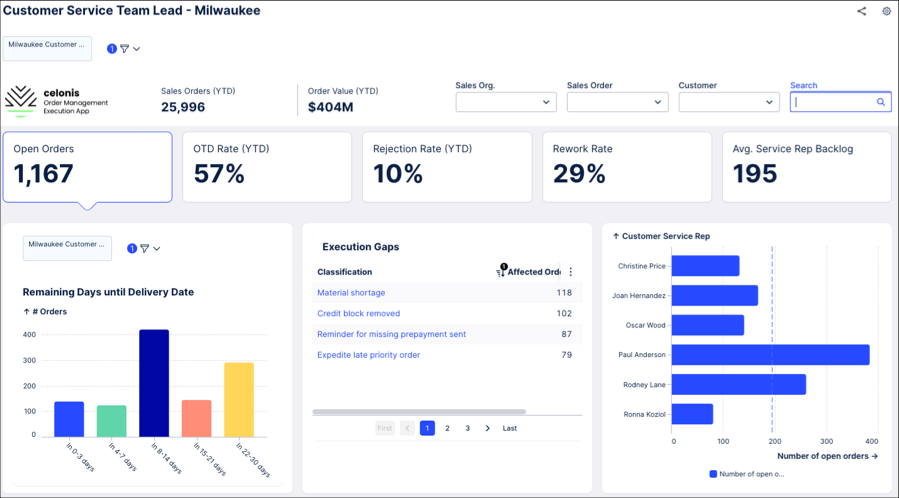
In the example below, the charts have been embedded into an existing view.
 |
Configuring embedded views
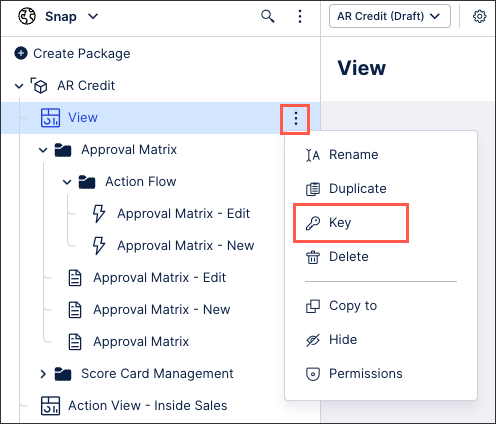
To configure an embedded view, you first need to copy and paste the key from the view you want to embed. You can find the key by clicking the three dots menu for the view and selecting "Key":
Note
When adding new filters such as knowledge model filters to your embedded view, they are inserted at the bottom of any filters already present within that view. If the priority order of your filters is important, we recommend adding these to the view that is being embedded and not after it has been embedded into a new view.
When configuring embedded views, the following attributes are available:
Key | Options | Description (if true ...) |
|---|---|---|
allowHeader | true/false | The title of the embedded view is visible. In case you want to blend the views, it is recommended to set allowHeader to "false". |
allowFilters | true/false | The filter bar is shown in the header of the embedded view. That can be helpful in use cases where you don't share filters with another view, you would like to see the filter bar. |
shareAll | true/false | Default if not set explicitly: All filters, selections and inputs are shared across views. |
shareFilters | true/false | All filters are shared across views. |
shareSelections | true/false | All selections are shared across views. |
shareInputs | true/false | Inputs can be used across views. |