Views (Studio)
Note
You're currently viewing a topic describing a Studio feature using the general availability feature set. This feature is also available in the new Studio experience, however both the design and the way it works may be different to what you see described here.
For more information about the new Studio experience, see: Studio (new experience)
Views are the key user experience component for Apps built in Celonis Studio. A View can be added to a package in Studio and serves as the user interface of an app to your end-users. Views are the evolution of the Analysis UI and offer a more guided user interaction. Views also allow to design of persona-specific user interfaces; e.g. Action Views, Steering Views, etc. A View can be based on one or multiple Knowledge Models meaning that data, insights, tasks from different data models can be visualized and interacted with in the same View. The Views of an app are created in the Studio, and business users can access them in the Apps area of the navigation menu.
Core elements of a View are its metadata, layout, components, tools, and inputs. View configurations are built upon YAML technology to store the configuration in a machine and human-readable way.
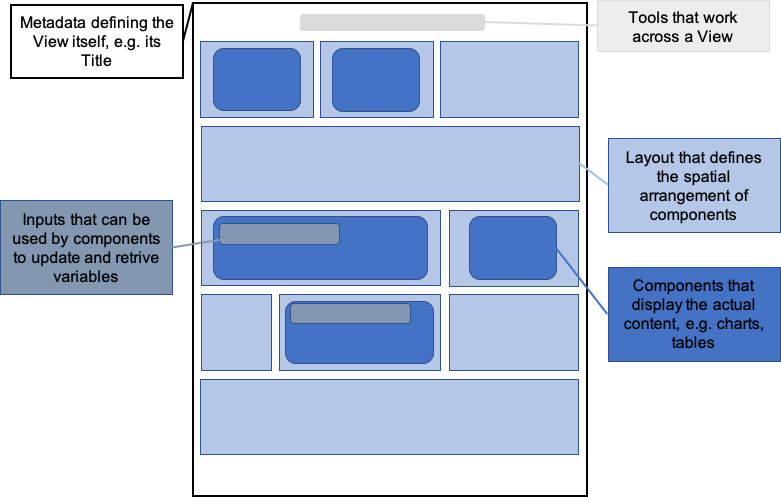
Metadata
The metadata section of a View's YAML configuration groups attributes together that provide information about the View itself. Learn here how to configure metadata.
Layout
Views are displayed as a (responsive) grid of components. The layout defines, where on the View which component is displayed. Learn more about Layout configuration here.
Components
Components are pieces you can add to your View such as tables, charts, KPI lists and many more. Find an overview of all available components and how to configure them here.
Tools
Tools are functional elements that can work across components. See here which you can use for your Views and how to configure them.
Inputs
Inputs allow you to create variables in your View. This allows for more flexibility in creating and using Views. Learn the concept behind inputs and how to configure them here.
Filters
Filters provide a way to select only those data records that match certain criteria. Filters are used in various places and Celonis Platform services. You can store and maintain Filters either in a Knowledge Model or in a View. Learn here how to configure Filters on a View level.
YAML for Views
View configurations are built upon the YAML technology to store the configuration in a machine and human-readable way. A YAML configuration is a written version of the user interface you present your business users with Views. Defining Views with YAML has some advantages over simple visual creator interfaces. It allows you to
Copy and paste parts of a View or a whole View somewhere else.
Search and replace the whole configuration at once without the need to touch every component individually.
Visualize differences between different versions of a configuration.
YAML is a general pattern defined in open source. You can find its original documentation here.
Key-value pairs
Its most basic structure are key-value pairs that are used to define for example Variables, Lists and Objects.
A line of YAML configuration describes an attribute with its content (key: value). For example
name: My fist View
"Name" is the key, which means an attribute that the View can understand. "My first View" is the value of this attribute. As a result, the name of our View is set to "My first View".
Indentation
Another structuring element in YAML is indentation. If a line is indented one more level (to the right so to say), it belongs to the line above.
layout:
  rows:
In this example, rows is indented by two spaces and therefore it is part of the layout.
Lists
You can create lists of key:value pairs using "-".
layout:
  rows:
  - id: row1
  - id: row2
  - id: row3
In this example, we have three rows defined in the "rows" part of the layout. With the "-" we indicate that there is more than one attribute of the same kind.
Permissions for Views
For each View individual permissions to users or user groups can be granted. Those users can be allowed to see or edit the individual Views.
Permissions included embedded Views
Please be aware that if you give access to a View, everything on the View can be seen by the user or user group, including embedded Views, where the user might not have access to each specific View.
How to give access:
 |
Click on the 3-dot-menu for the individual View and select Permissions.
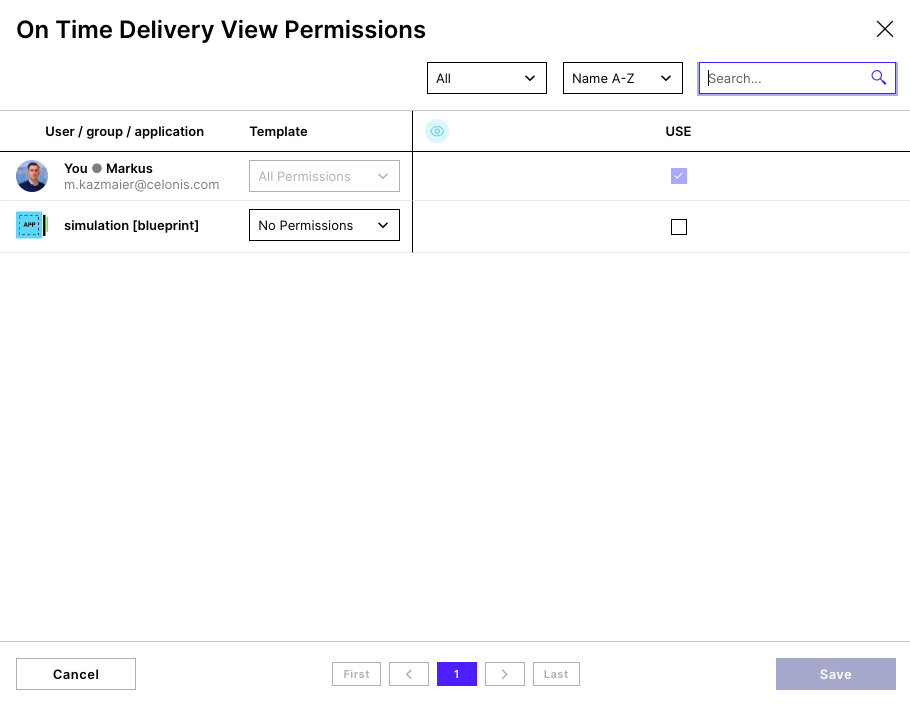 |
In the Permissions settings, select which permissions you want to grant to the user, group or application.
Inheritance of permissions
The permissions are not inherited. If you provide access to a BASE and extend the View, the user will not have access to the extension. If you want the user to have access, you must provide access again to the extension.