Views variables
Note
You're currently viewing a topic describing a Studio feature using the general availability feature set. This feature is also available in the new Studio experience, however both the design and the way it works may be different to what you see described here.
For more information about the new Studio experience, see: Studio (new experience)
View variables allow you to create and use variables in your View. This allows for more flexibility in creating Views. Different View components have the ability to update the state of a variable and other View components are able to take up a variable and change their state accordingly.
View variables are user-specific, that means if User A updates a variable, this will not impact the view of User B.
View variables are persistent, that means if User A updates a variable it will keep the state until it’s changed to something else.
Naming your Variables
Do not use any special characters like - + / * or $%§ in your variable names
Configuring view variables
Variables are defined in the YAML configuration of a View (on the highest level). They follow the format:
metadata: ...
variable:
  - name: variableName
    defaultValue: myDefault # this is optional
layout: ...
To define a variable, just a name needs to be configured. Variables can automatically choose their type. Defining a default value is optional.
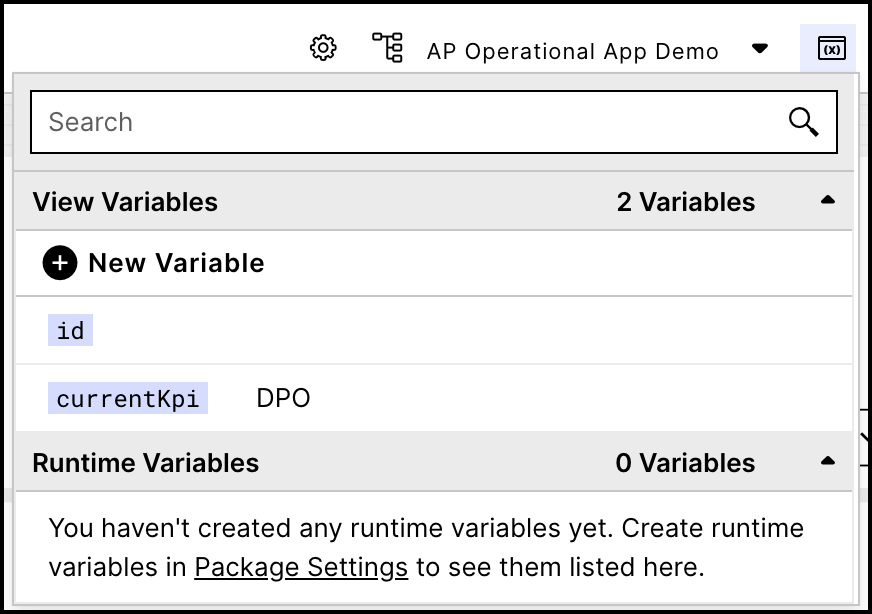
We also offer a visual editor for variables on the top of a view in the edit mode. From there you can add new view variables. Runtime variables are also listed there, however, they need to be created in the package settings.
 |
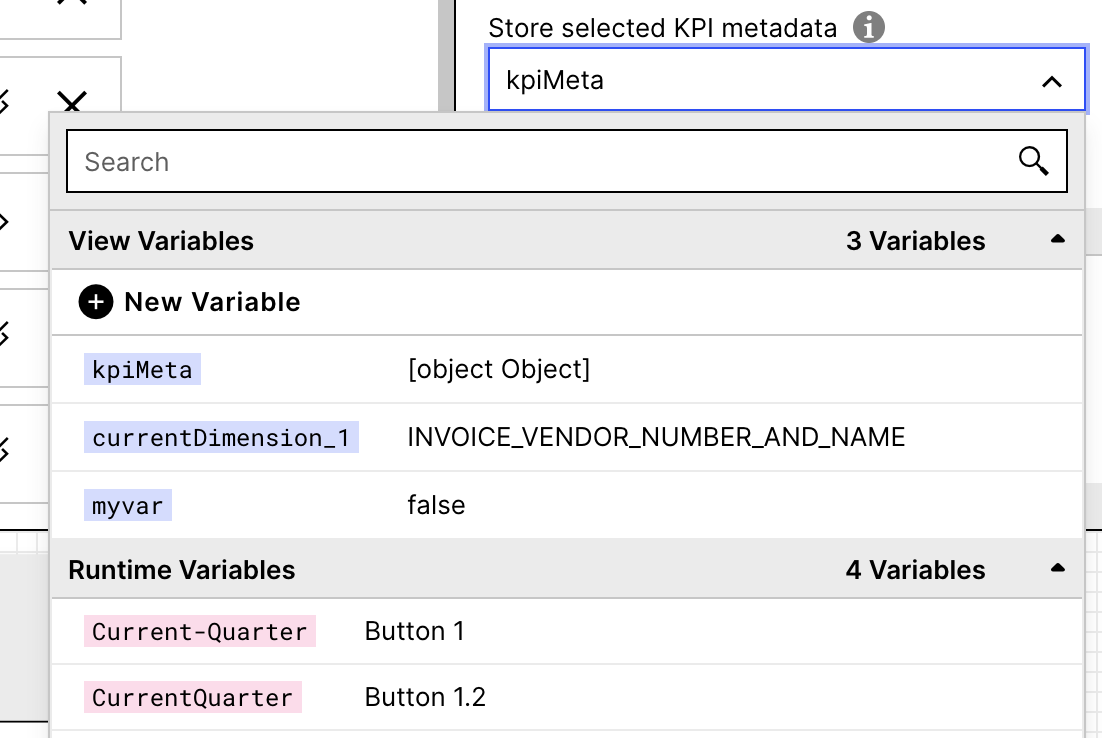
Different visual editors of components also offer the same visual variable list to create dynamic components. Below you can see an excerpt of the KPI List visual editor as an example.
 |
View variables use cases
There is almost an endless number of use cases for variables. In general, there is always a component that updates the variable, another component or part of the view that uses the variable and a javascript expression combining the two.
Components that can update variables:
Button
Checkbox
KPI List
Input box
Table
Dropdown
Time filter
These variables can be used in multiple places of a view:
Filters
Conditional filters can be created using javascript and variables. These filters are active once a specific action has been performed, such as selecting an KPI or interacting with a row in a table.
In the following example, the Knowledge Model is being filtered based on variables.
id: ${ (VARIABLE === 'EXPECTED_VARIABLE_VALUE' && 'KM_FILTER_ID')}

or

id: ${(VARIABLE === 'EXPECTED_VARIABLE_VALUE1' && 'KM_FILTER_ID1')  ||
      (VARIABLE ===   'EXPECTED_VARIABLE_VALUE2' && 'KM_FILTER_ID2') ||
      (VARIABLE === 'EXPECTED_VARIABLE_VALUE3' && 'KM_FILTER_ID3')  ||
      (VARIABLE === 'EXPECTED_VARIABLE_VALUE4' && 'KM_FILTER_ID4')  ||
      'KM_FILTER_FALLBACK'}
or

id: ${(VARIABLE == 'EXPECTED_VARIABLE_VALUE1'?'KM_FILTER_ID1'):
      'KM_FILTER_FALLBACK'}
Component configurations
Please note that this only applies to the metadata of the component and not to the id of a component. There is no way to display one or another component in a layout based on the state of a variable. To achieve a flexible layout that adapts the shown components, an embedded view needs to be used. All other component configurations can be adapted by javascript and variables. An example use case could be showing different columns of a table depending on the value of a variable.
data:
  columns:
    - id: INVOICE.NOT_AMOUNT
      hide: ${(currentCustomerSelection === 'Amount' && true) ||
(currentCustomerSelection === 'Documents' && false) ||
(currentCustomerSelection === 'Lines' && false)}
Key for embedded views
Javascript and variables can be used to show dynamically one or another embedded view based on a variable value. An example is provided in the collection of use cases below.
Generally speaking, the following operations can be achieved with javascript:
Printing a variable
You can easily print a variable by using ${variable} in YAML or select the variable in the visual editor. The example below is printing a selected variable value in a text box.
id: text-box-123
type: text-box
settings:
  title: ""
content: The status of the invoice is ${invoiceStatus}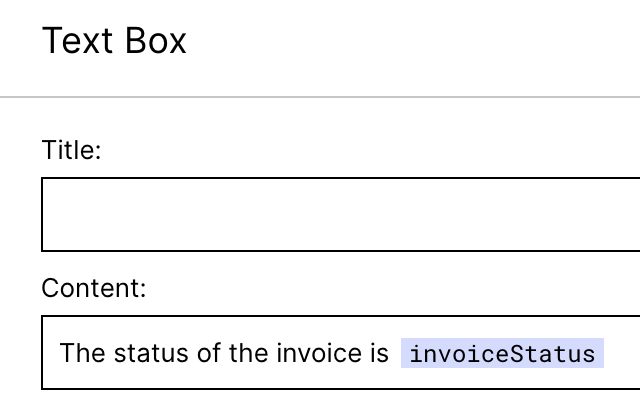 |
if/else statements
To achieve dynamic views, if/else statements can be used to display content dynamically based on a selected variable value. The general structure has a condition statement, and an outcome if the condition is met as well as an alternative outcome if the condition is not met.
${CONDITION?THEN:ELSE}An example could include adding filters based on conditions.
filters:
pql: ${(Dimension == 'Organization'?'FILTER_COMPANY_CODE'):
      'KM_FILTER_FALLBACK'}
Date function
You can print the current date and choose the date formatting with the following code snippet
${dateTime.format('YYYY-MM-DD')}Mathematical operations
You can perform mathematical operations within the ${} scope.
Below you can see an example of two variables "one" (with a default value 1) and "two" (with a default value 2).
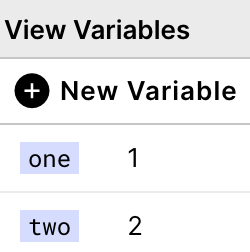 |
These can be substracted and printed resulting in -1.
 |
Comparing parts of a string with indexOf() method
With the indexOf() method you can compare parts of a string with an expected value and build conditional statements on top of that. In the example below, the value of the variable currentKPI is tested to contain "DAYS". If it contains true, the KPI "DPO" (Days Payable Outstanding) is printed, otherwise another KPI (OTP_RATE) is printed.
content: ${currentKpi.indexOf("DAYS")!=-1?"DPO":"OTP_RATE"}Warning
It's important to note that our javascript interpreter does not support ECMAScript methods, examples include match() or include().
Below we present you with some use cases we considered useful in the past to get started.
Showing different chart dimensions based on a selected KPI in a KPI List
Change configurations of a chart such as the name or dimensions based on a selected KPI. Whenever another KPI is selected, the chart updates to show insights for the selected KPI.
1. Define Variable | 2. Set Values with KPI List | 3. Read the Variable with Chart |
|---|---|---|
metadata: ...
variable:
  - name: currentKpi
    defaultValue: # this is optional
    type: string
  - name: currentKpiName
    defaultValue: # this is optional
    type: string
layout: ... | id: kpi-list
type: kpi-list
data:
type: tile
selectedKpi: FIRST_KPI
onClick:
update:
variables:
id: currentKpi
name: currentKpiName
kpis:
- kpi: FIRST_KPI
show: true
id: kpi1
order: 100
- kpi: SECOND_KPI
show: true
id: kpi2
order: 200 | id: chart
type: chart
settings:
name: ${currentKpiName}
encodings:
x:
field: ENTRY_MONTH
type: ordinal
format: "%m/%y"
axis:
title: " "
y:
field: ${currentKpi}
format: $.3s
axis:
ticks: 5
padding:
end: 20 |
Using a checkbox to decide if filters of an Embedded View should be shared
Let your business users choose whether they want to share filters between an Embedded View and the View it is embedded in (or other Embedded Views on the same View). The input checkbox allows for updating the setting of the Embedded View without the need to change any YAML configuration.
Component updating the input: Input Checkbox
Component retrieving the input: Embedded View
Updating the Variable with Checkbox | Retrieving the Variable with Embedded View |
|---|---|
- id: input-checkbox
  type: input-checkbox
  settings:
    label: activate
    onChange:
      update:
        variables:
          - name: checkboxValue
            deactivated: "unchecked"
activated: "checked" | - id: embeddedView
type: view
settings:
key: your-view-key
shareFilters: ${ ({'checked': 'true', 'unchecked': 'false'})[checkboxValue] }
|
Using if-else statements with variables to show - example with embedded view
Using javascript and variables you can show different embedded views below a KPI list depending on which KPI has been selected.
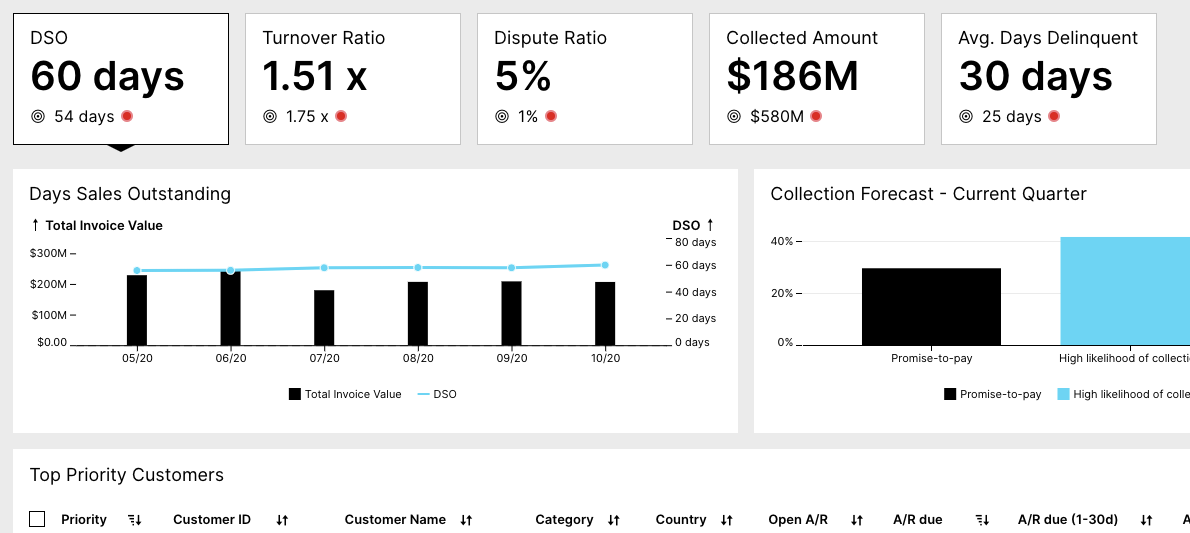 |
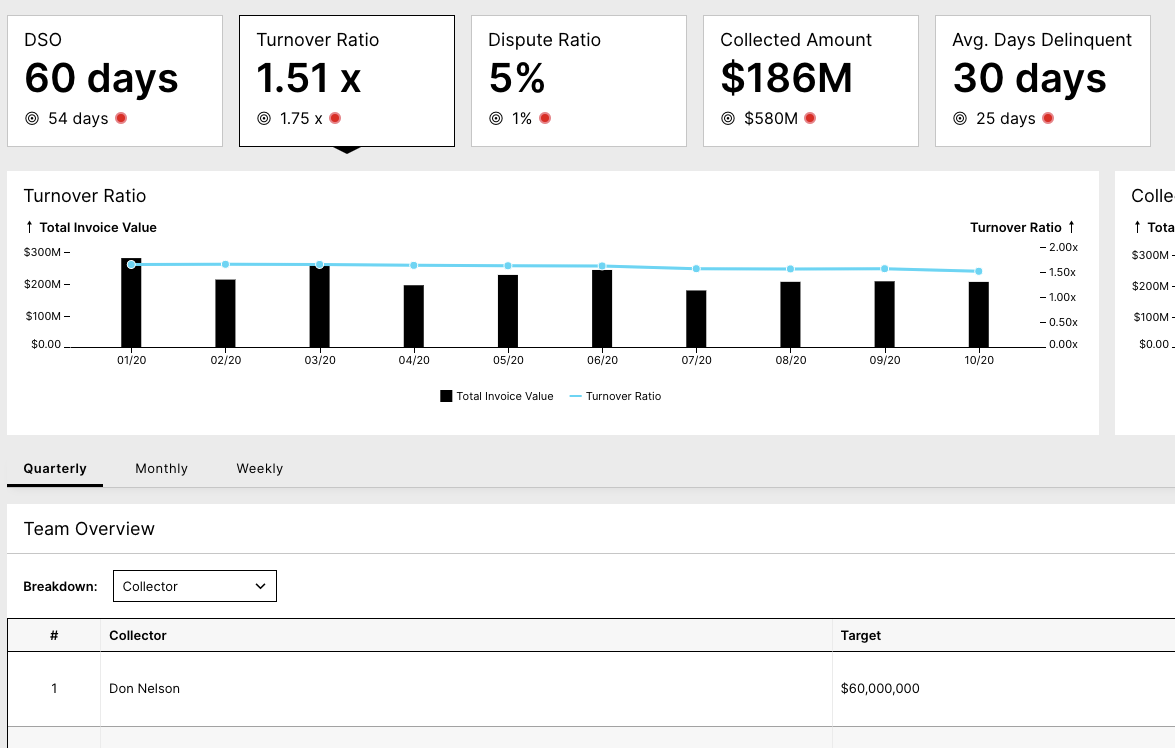 |
YAML Configuration
variables:
  - name: currentKpi
    defaultValue: KPI_DAYS_SALES_OUTSTANDING_TITLE
    type: STRING
[...]components:
  - id: dispute_view
    type: view
    settings:
      key: ${ ({'KPI_DISPUTE_RATIO': 'Disputes',
         'KPI_DAYS_SALES_OUTSTANDING_TITLE': 'Days-Sales-Outstanding',
         'KPI_COLLECTED_AMOUNT_ROUNDED': 'Daily-Management-View',
         'KPI_TURNOVER_RATIO_FINAL': 'Turnover-Ratio',
         'KPI_DAYS_DELINQUENT_TITLE':
         'Average-Days-Delinquent'})[currentKpi] ||  'Days-Sales-Outstanding' }
      allowHeader: false
      allowFilters: false
      shareAll: true
      shareFilters: true
      shareSelections: true
      shareVariables: true
Using a input box to transfer input to a skill execution
Let your business enter values that can be further used in skill execution. This is a great way to combine the expertise of your business users and the automation capabilities of Celonis. In the example below, a numeric value can be entered by your user and is transferred to skill execution via a button component.
Updating the Variable with Input Box | Retrieving the Variable with Button |
|---|---|
- id: input-box
  type: input-box
  settings:
    name: Numeric Input
    value: ${numInput}
    type: number
    onChange:
      update:
        variables:
- name: numInput | - id: button
type: button-list
settings:
buttons:
- label: Execute Skill
onClick:
executeSkill:
skillKey: main-package.my-skill
variables:
- name: numInput
value: ${numInput} |
Opening Profile Views
Creating a variable for a selected record that allows opening the right Profile View to show specific details of a specific record, e.g. a specific invoice. See full documentation here.