Creating digital processes
This page shows you how to create and edit digital processes.
Creating a new digital process
To create a new digital process:
In the Management Dashboard, go to Orchestration Engine and choose Create digital process.
Enter a name for your new digital process.
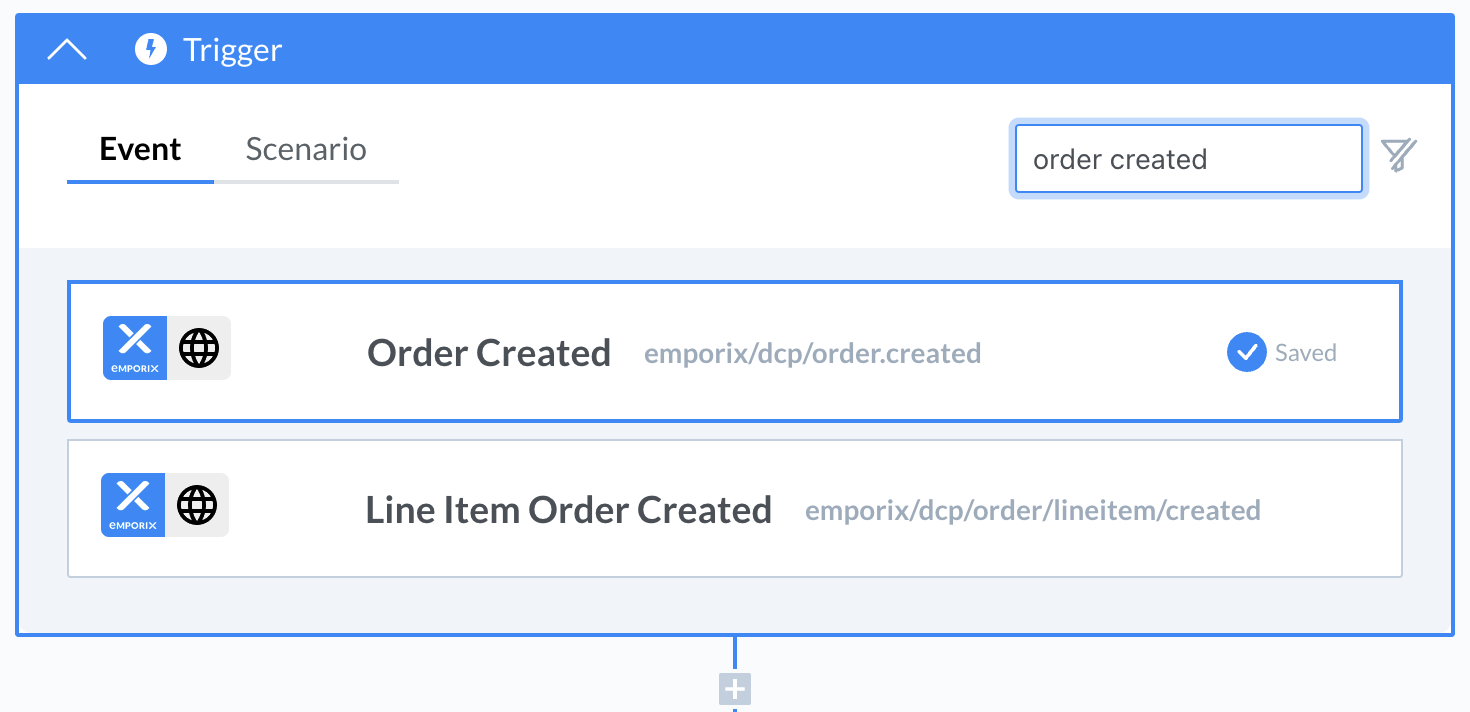
Select the trigger that you want to use in the digital process. You can choose an event or a Make scenario:
Event: choose an event from the list of events in your tenant. If you have a large number of events, you can search by event name.
Scenario: choose an existing Make scenario, use Create New Scenario to create a new trigger scenario, or Go to Scenarios to check for processes that are prepared to be used publicly or available for your team only. The Create New Scenarios and Go to Digital Processes actions open a new tab within the Make application.
When you select a trigger, you'll see confirmation that the selection was saved. You can collapse the section using the caret icon in the step's heading line, or simply go to the next step by choosing the plus icon.
After choosing the trigger, select the process step that you want to perform. Each process step is made of a single or multiple Make scenarios. Every Make scenario that should be used in a process step must start with a Trigger Event and have the Completion Event module.
To learn more, check out the Make Scenarios documentation.
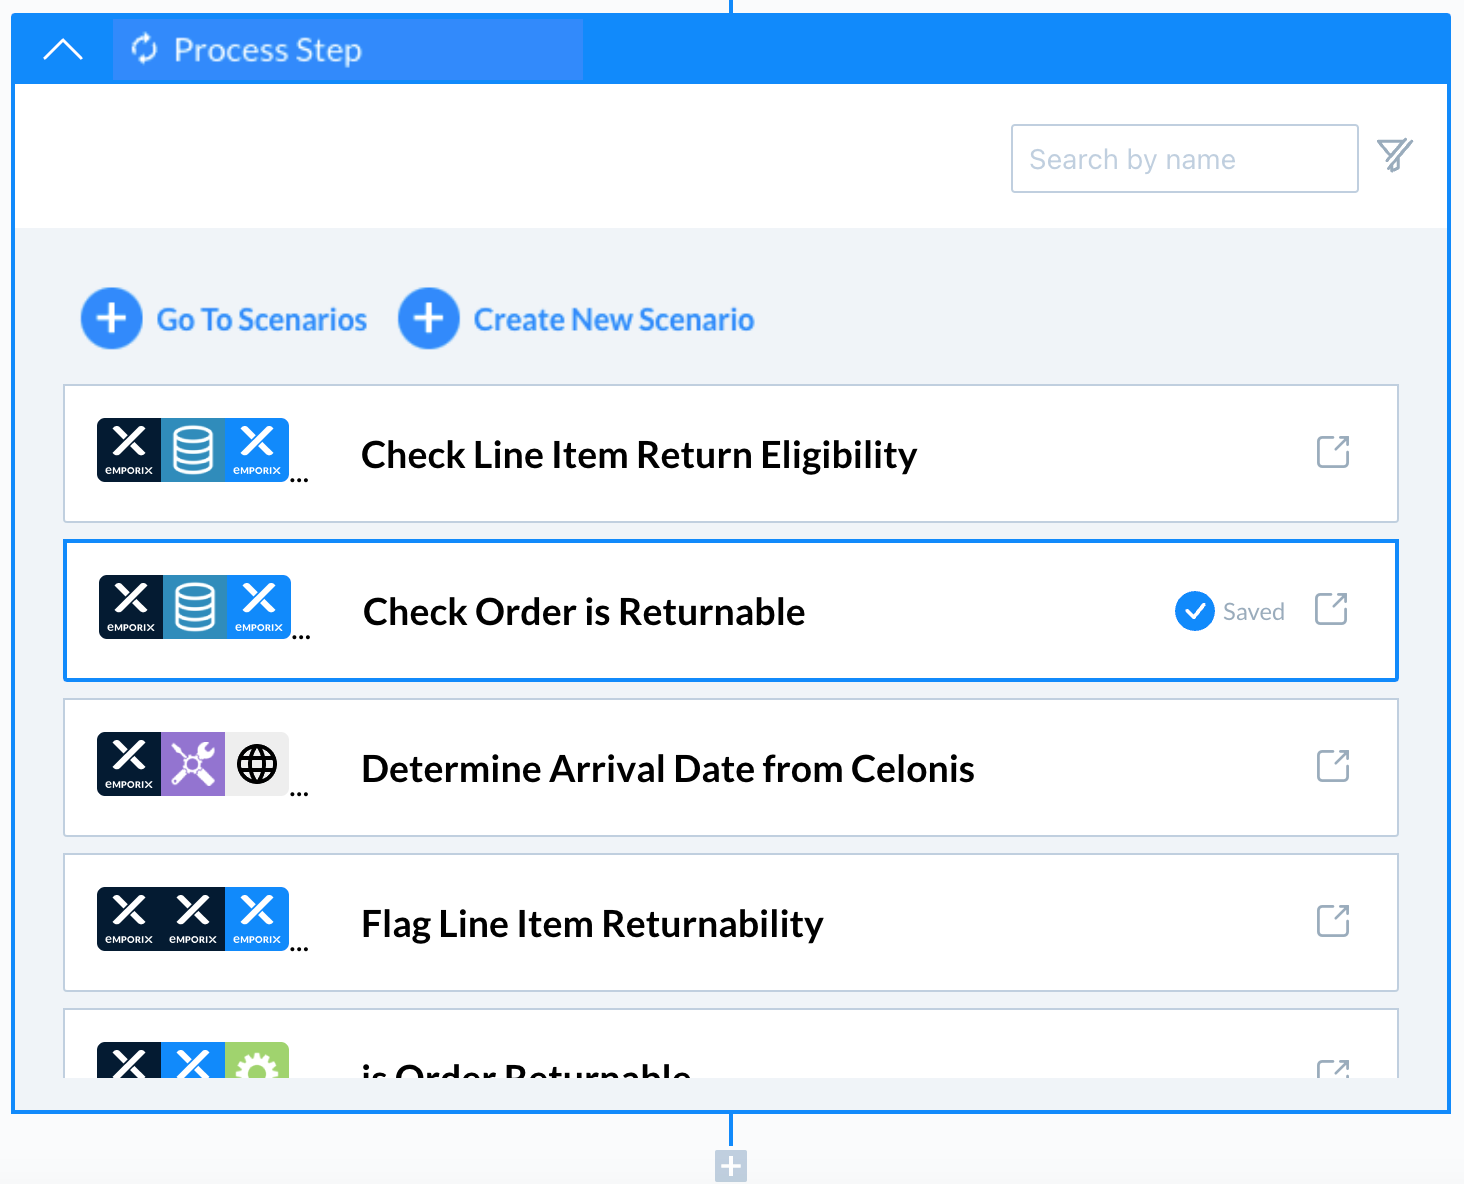
When you select a process step, you can see that the User Interface provides confirmation that the selection was saved, the same as for triggers. You can collapse the section, go to the next step, or simply finish creating the scenarios with those two steps. You can create digital processes using many combinations, for example:
A trigger with one process step
A trigger with many process steps
A trigger followed by an process step, another trigger, and more steps
Important
If you use a Make scenario as a mid trigger, make sure it ends with a "notify event" module that is configured to send notifications about the completed scenario to Orchestration Engine. You need to use the Orchestration Engine Instance ID, cxp-instanceid, to wake up an digital process. For details, see Setting a trigger to wake a paused digital process.

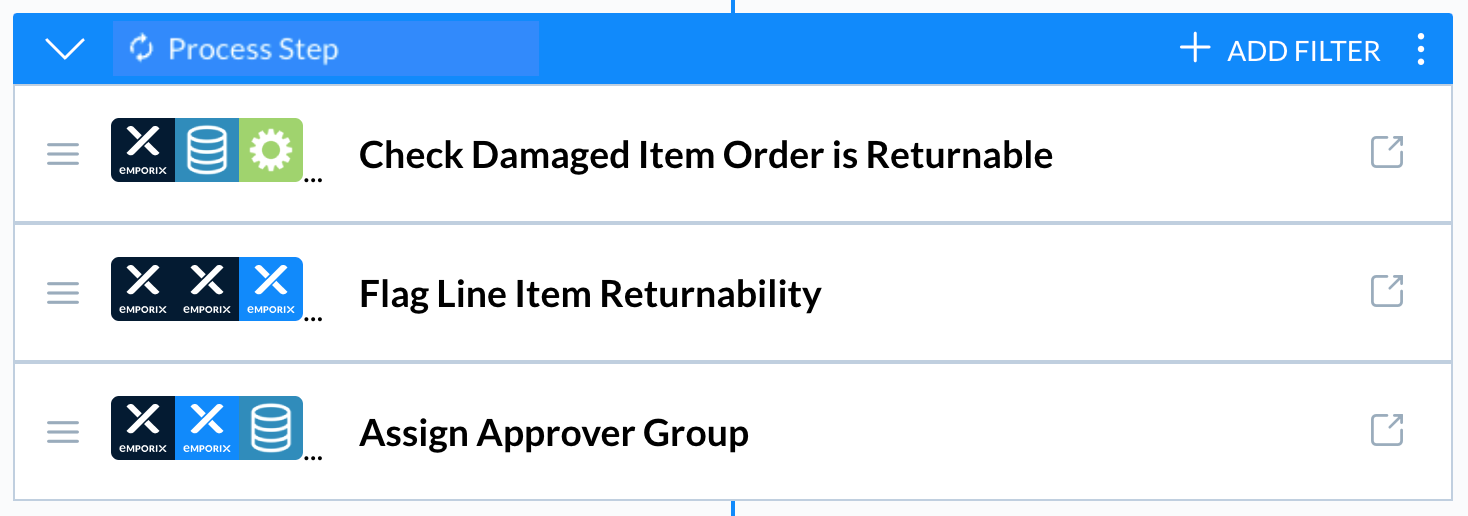
Additionally, every digital process step can be made of multiple Make scenarios that can be rearranged at any time using the drag and drop functionality (the hamburger icon).
When your digital process is ready, choose Publish to save your configuration.
Your digital process has been created but it is not active.
To activate the digital process you need to use the toggle that changes the inactive state to active. You can do that straight away in the edit mode, or from the executions list.

Editing digital process
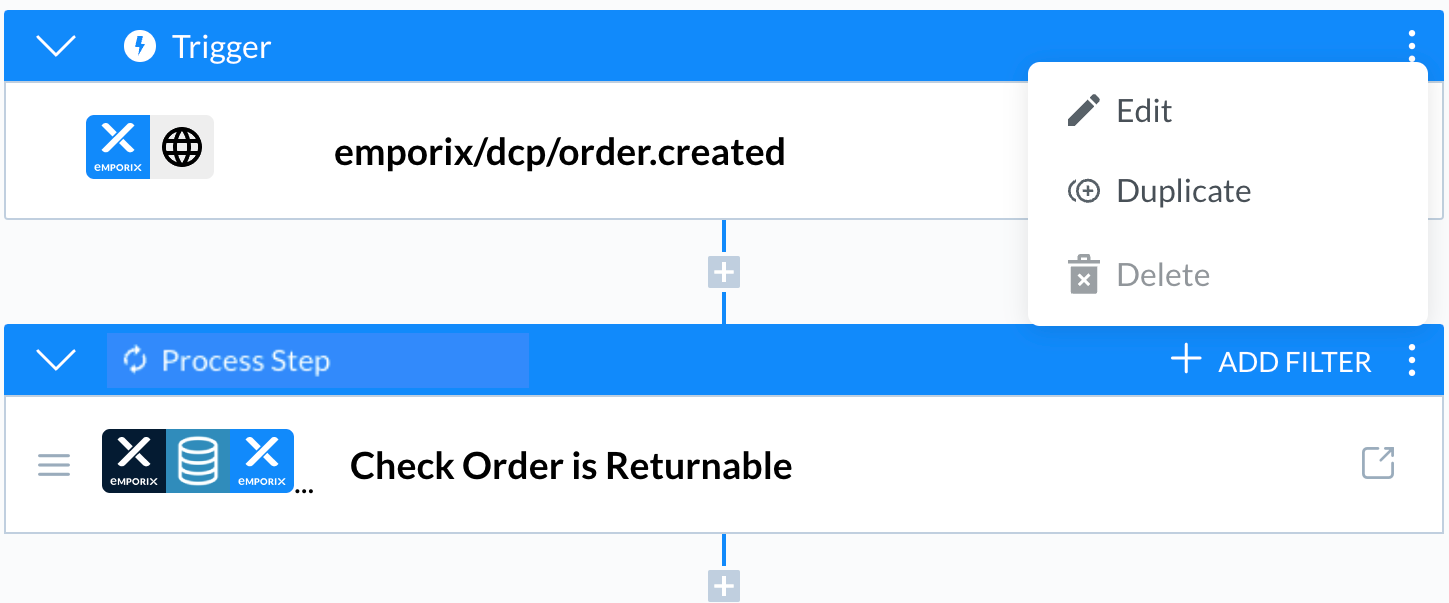
You can edit any step in an digital process. For triggers you can:
Choose Edit to select a different scenario or event from the list.
Duplicate to copy the trigger, the duplication automatically creates the next step which is exactly the same.
Delete to remove a trigger. However, it is not possible to remove the first trigger because it’s a mandatory step to start an execution.
For process steps you can:
Use the drag and drop (the hamburger icon) to reorder. Make scenarios in your process steps.
Choose Edit Scenario to apply changes to the scenario in Make.
Choose Edit to select a different scenario from the list.
Choose Duplicate to copy the step, the duplication automatically creates the next step in the digital process which is exactly the same as the original one.
Choose Delete to remove a step.
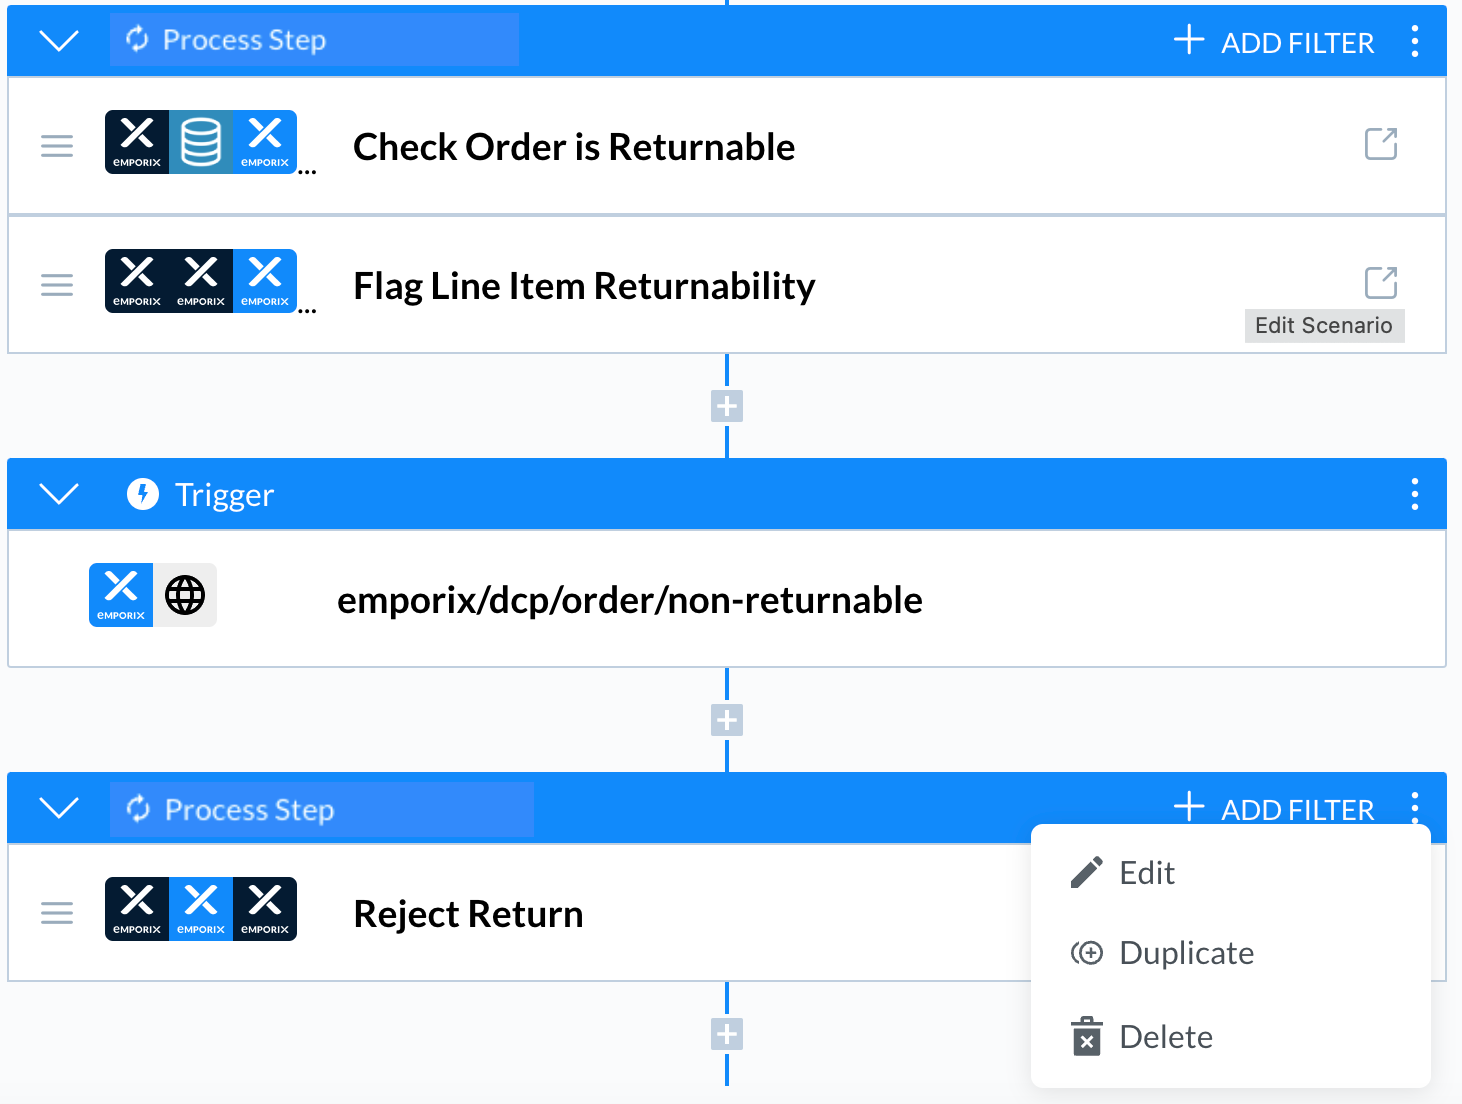
It is also possible to add more filtering options for the steps. Filters allow a step to act on a selected event type only. It is possible to add more than one filter for the same step. If you set filters for specific event types within a step, that process step will run only if the conditions of the filter are met. If they are not met, the process step is skipped.
To open the filter settings window, choose Add Filter.
Choose an Event Type from the drop-down list.
The list shows event types that are configured for the tenant and available for the scenario context. You can select multiple event types at one time.
Conditional process runs
For every process step, you can add a condition that would be used by a digital process context to decide whether the particular step should be processed or not. For each step of your digital process, you can set up a filter or a rule that serves as a condition for the step.
Note
You have to create a process step created before you can set a filter or a decision. You'll see the +Add logic button appears when filters are available.
Filters
Filters allow a step to act only on a selected event type. You can add more than one filter for the same step. If you set filters for specific event types within a step, it means that the digital process step will run only if the conditions of the filter are met. If they are not met, the digital process is skipped. Filters use the event types that are configured for your Orchestration Enginetenant.
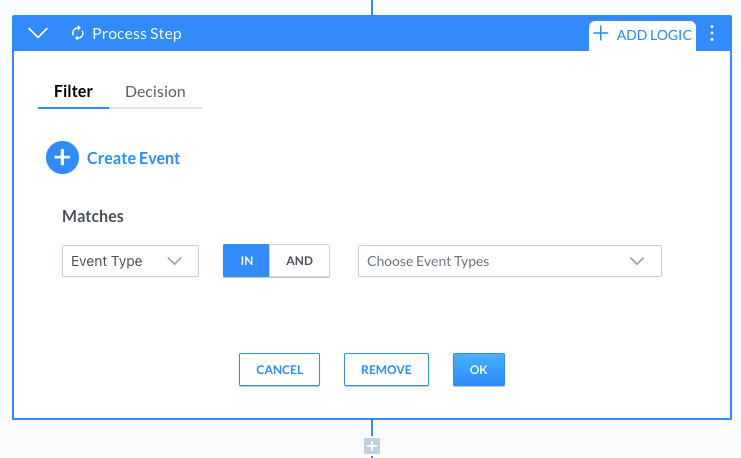
To open the filter settings window:
Choose Add Logic in a chosen process step.
it opens a window with a Filter tab.
Choose an Event Type from the drop-down list. The list shows event types that are configured for the tenant and available for the scenario context. It's possible to select multiple event types at one time.
Decisions
Decisions evaluate whether an action should be taken or not. They allow you to set up a condition for the step that is based on a true/false condition.
To open the decision window, choose Add Logic in a chosen process step and go to the Decision tab.

JSON logic
For the decisions, we use the JSON logic language and extend it with custom operators. The decisions can also include logic based on business rules created in Rulestore.
Custom operators
businessRule
Applies a rule defined in the rulestore.
The first expected value is the ID for the rule that you want to use, and the others are the variables that should be available for the referenced business rule.
These variables are expressed as key-value pairs.
Rulestore
// ID: "01ARZ3NDEKTSV4RRFFQ69G5FAV"
{"==": [{"var": "a"}, {"var": "b"}]}
Logic
{"businessRule": ["01ARZ3NDEKTSV4RRFFQ69G5FAV", ["a", 1], ["b", {"var": "n"}]]}Data
{"n": 1}Result
true
context
Used to access a value inside the process in a way similar to the var operator.
If you need to access a dotted key, enclose it in backquotes (`). For example:
{"context": "`key.with.dots`.boolean"}Extended behavior
var
Inside a digital process the data is the context with the parent key context. For example if the process context is:
{"event": {"key": "value"}}then the data for the JSON logic expression would be:
{"context": {"event": {"key": "value"}}}Logic
{"var": "context.`key.with.dots`.boolean"}Digital context
{"key.with.dots": {"boolean": true}}Result
true