Set Up the Machine Learning Workspace
In the Accounts Receivable app, we are performing two calculations using a Python script (mentioned below). For these scripts we need to set up an ML Workbench.
Customer Priority Calculation: We calculate Customer Priority based on Open AR, AR Due, Disputed Invoices, and Invoices with Broken Promise to Pay. We also assign a priority between 0 to 100 with the higher number having more priority. Based on priority, collectors can contact customers for their Due Invoices.
Data Importer: If a customer wants to send data in Celonis in CSV files on FTP then Data Importer will help you to download and load the files in Data Pool tables.
To set up ML workbench, follow the steps below:
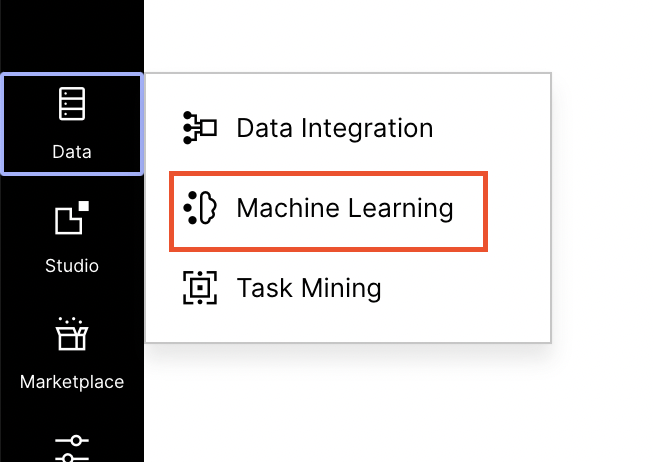
Open the Machine Learning tab from the lefthand menu.
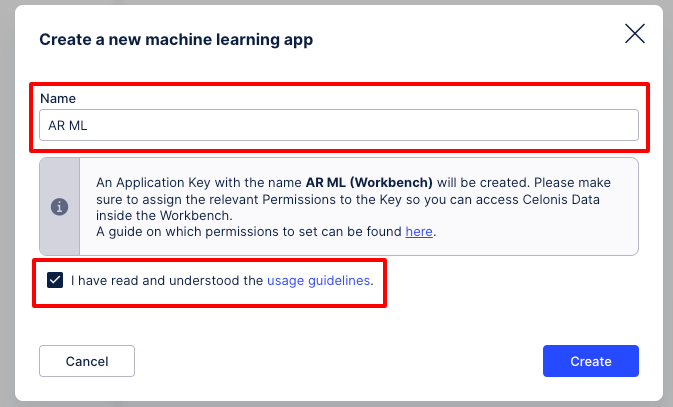
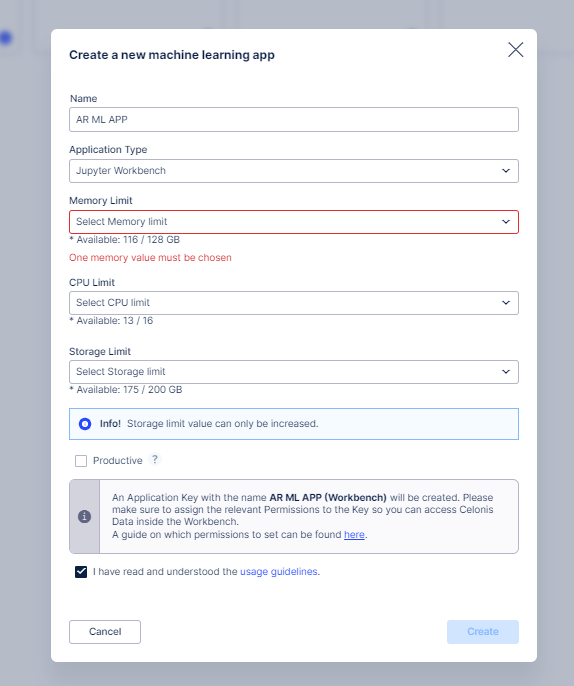
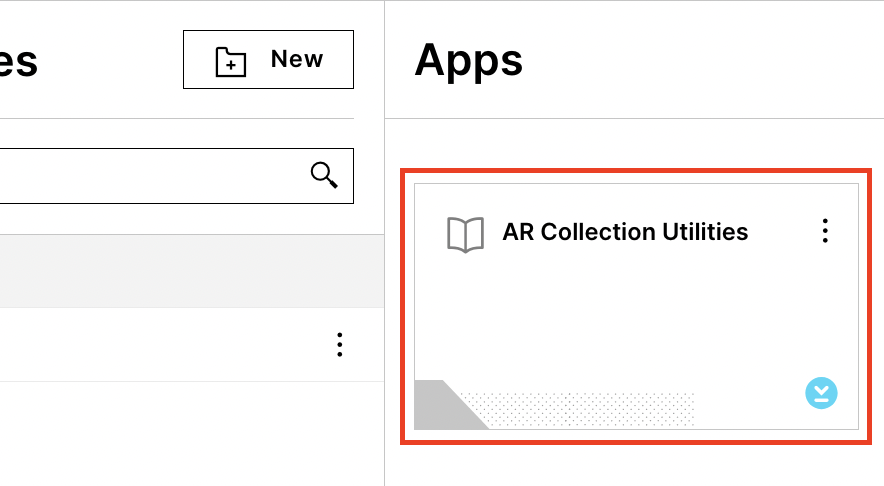
Create a new workbench app by clicking the New App button.

Enter the App Details shown below to create it. Please read the guide on which permissions need to be set for the app in order to read data from the Data Model.

Open the ML App by clicking on the App Card.
Download the python script from Github and follow the instructions to configure it.
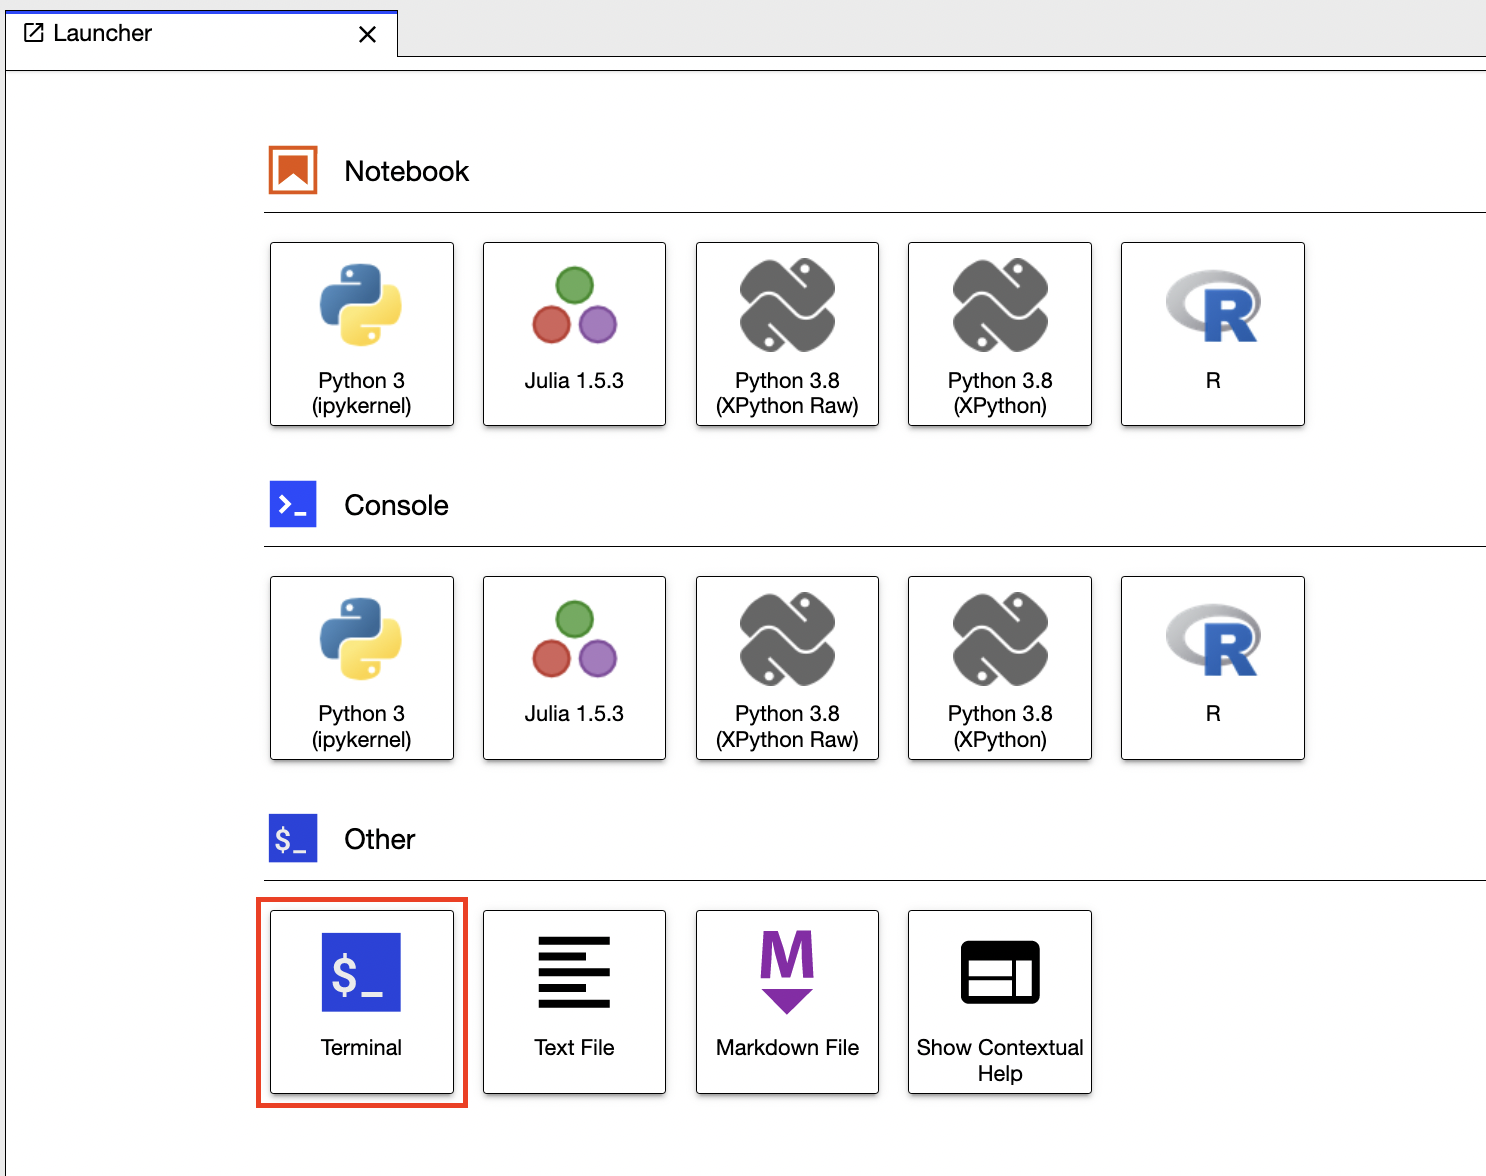
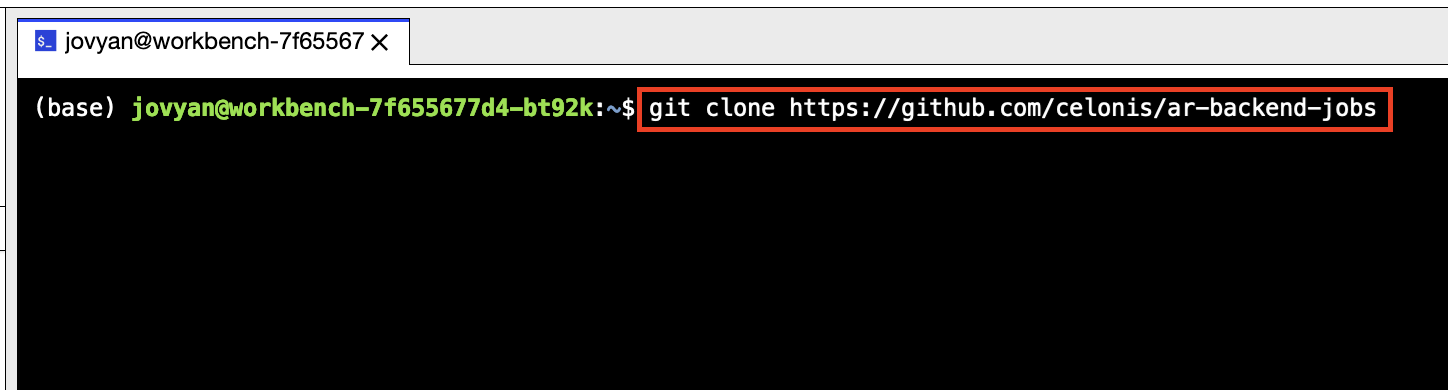
You can download the script from Github into the ML App. For that we have to open the Terminal in the app and clone the Github repository using the command below:
git clone https://github.com/celonis/ar-backend-jobs
Note
You can check repository access from this URL Github access.
Tip
Pre-requisites: You should have access to Celonis’s github organization and a “Read” access to ar-backend-jobs repository. Please contact the AR Product team(ar.support@celonis.com) if you don’t have access.
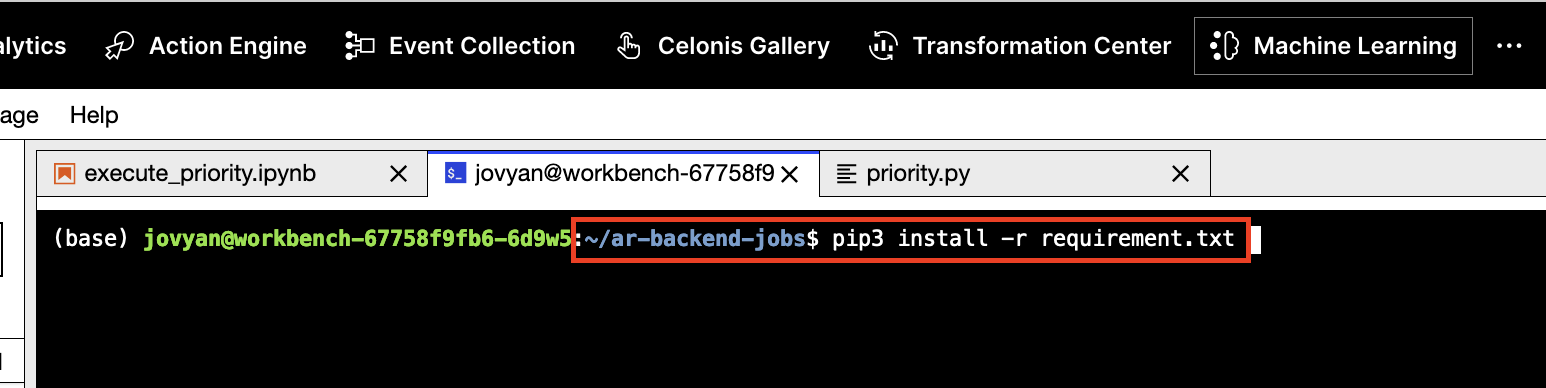
Go to the ar-backend-jobs folder and install the required libraries using the following commands:
pip3 install -r requirements.txt
pip3 install -r requirements-internal.txt
To configure the Customer Priority Calculation script, first we need to set the environment variable by creating a .env file in ar-backend-jobs folder.

API_KEY: Create an Application Key from User Profile > Team Setting > Applications > New Application Key and give appropriate permission as mentioned below to access the Data Pool.
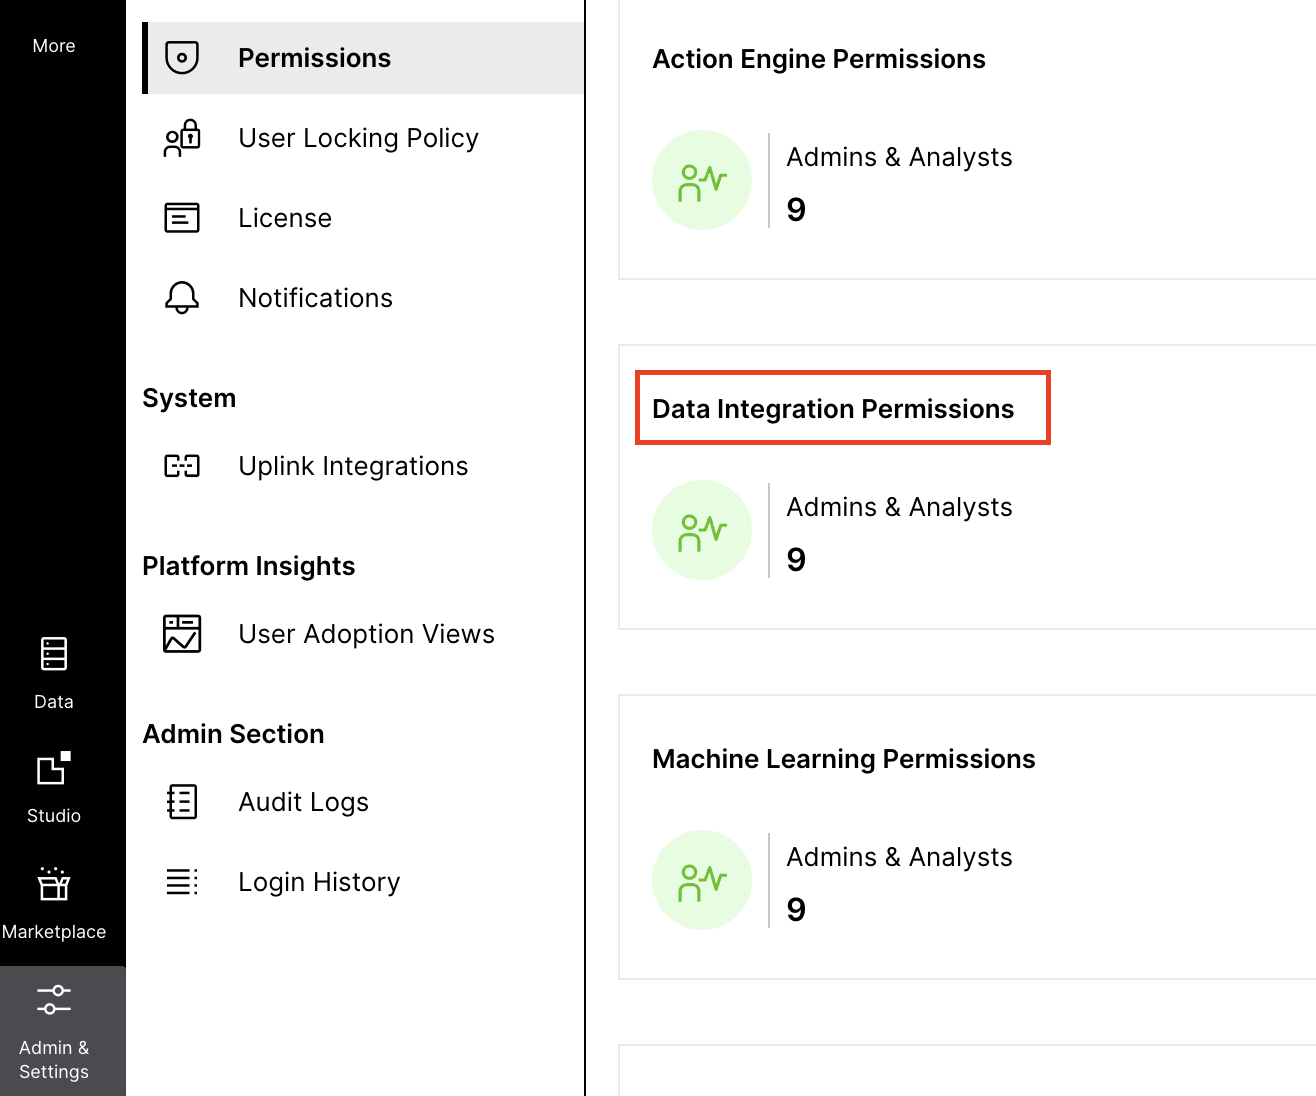
You have to go to Admin & Settings > Permissions > Data Integration Permissions and assign all permission to the App key that you have created.
CELONIS_URL: Configure the team host url.
PRIORITY_DATAPOOL_KEY: Configure the ID of the Data Pool for the AR Process Connector which you will get from the browser's URL.
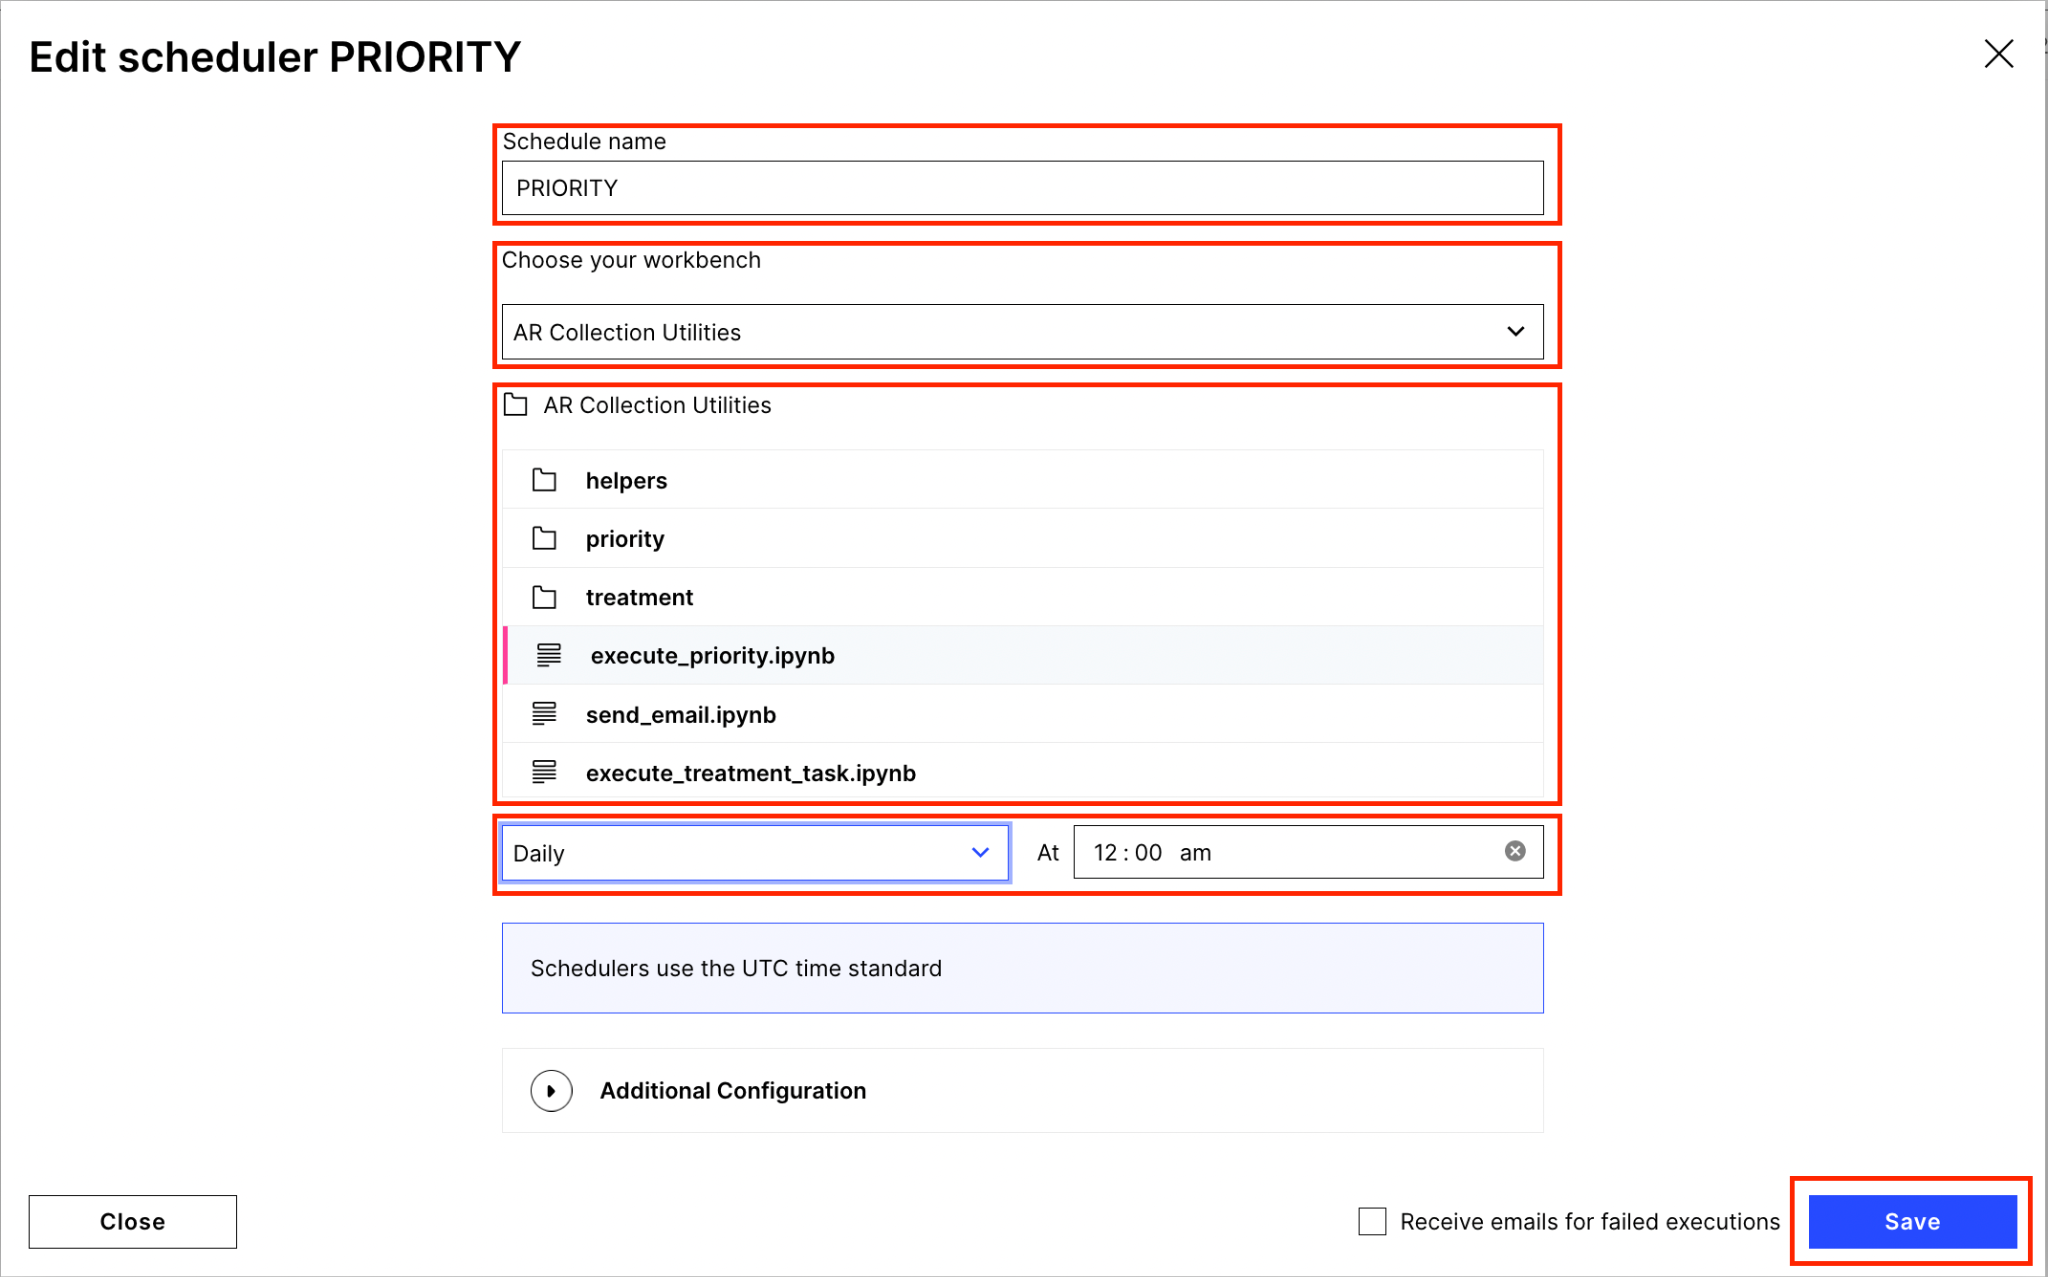
Schedule Priority Calculation Script: Next, schedule the priority script to run daily so that we can get the daily revised priority score of each customer. Go to the Machine Learning Tab > Scheduling > New Schedule which will open the screen below where you have to enter a Schedule Name and choose the workbench app that you created in Step 3. Then select the execute_priority.ipynb notebook and set the Schedule frequency as per your requirement.
Details of the calculations can be found in AR Collections - Priority Score Calculation Logic document.
Configure Data Importer: After cloning the ar-backend-jobs repository, you have to configure data importer to make it working. For that, open config.py under ar-backend-jobs > dataImporter folder and configure the following properties.
API_KEY: We need to create an Application Key from User Profile > Team Setting > Applications > New Application Key and give appropriate permission to access the Data Pool.
CELONIS_URL: Configure team host URL.
DATAPOOL_ID: Configure the ID of the data Pool of AR Process Connector which you will get from the browser's URL.
DATAMODEL_ID: Configure the ID of the Data Model of AR Process Connector which you will get from the browser's URL by opening the Process Data Model.
BUCKET_ID: Bucket ID of Celonis File Storage Manager. Kindly refer to the document for more details. This is required when you use Celonis FTP (IS_CELONIS_FTP = True).
IS_SANDBOX: Set to “True” if IBC is for a Sandbox.
TEAM_NAME: Name of the team which will be used in email communication.
IS_CELONIS_FTP: Set to “True” if you are using Celonis FTP to place a CSV file for import into the Celonis Data Pool.
FTP_PORT: FTP server port. This is required when IS_CELONIS_FTP=False
FTP_HOST: FTP server host. This is required when IS_CELONIS_FTP=False
FTP_USERNAME: FTP server user name. This is required when IS_CELONIS_FTP=False.
FTP_PASSWORD: FTP server password. This is required when IS_CELONIS_FTP=False.
SMTP_PORT: SMTP server port.
SMTP_SERVER: SMTP server host.
SMTP_USER: SMTP server User Name.
SMTP_PASSWORD: SMTP server password.
NOTIFICATION_SUBSCRIBER: Comma separated email ID for email notification subscriber of Data Importer Process.
RELOAD_DATAMODEL: After data import, if you want to reload the data model then set this to “True”, otherwise set to “False”.
FULL_LOAD: If set to “True” then Data Model will reload all tables, otherwise reload only tables which we have loaded using data importer in particular execution.
CSV_SEPERATOR: Column separator of CSV file. By default it is comma (,) but you can change to pipe(|) when using a pipe separated file.
DATE_FORMAT: Date format which we are receiving in a CSV file from a customer.
DATE_TIME_FORMAT: Date Time format which we are receiving in a CSV file from a customer.
ENABLE_CUSTOMIZATION: If you want to perform transformation on a CSV file received from the customer then set this as True and write your logic into the onInit method of the DataImporterCustomizations class and return the newly created file path.
PROCESSES: Define an array with active processes (file) in sequence. The Data Import process will import files in a given sequence in this array. The Process name configured here must match with the Process name given in the PROCESS_DETAILS property.
PROCESS_DETAILS: This contains the configuration of each CSV file as below:
tableName: Data Pool table in which CSV needs to be imported.
columnMapping: Mapping of CSV column with Table column along with data type.
fileName: CSV file name which needs to be fetched from FTP to load.
filePath: FTP File Path URL.
primaryKeys: Primary Keys list by which Data Importer will upsert the data.
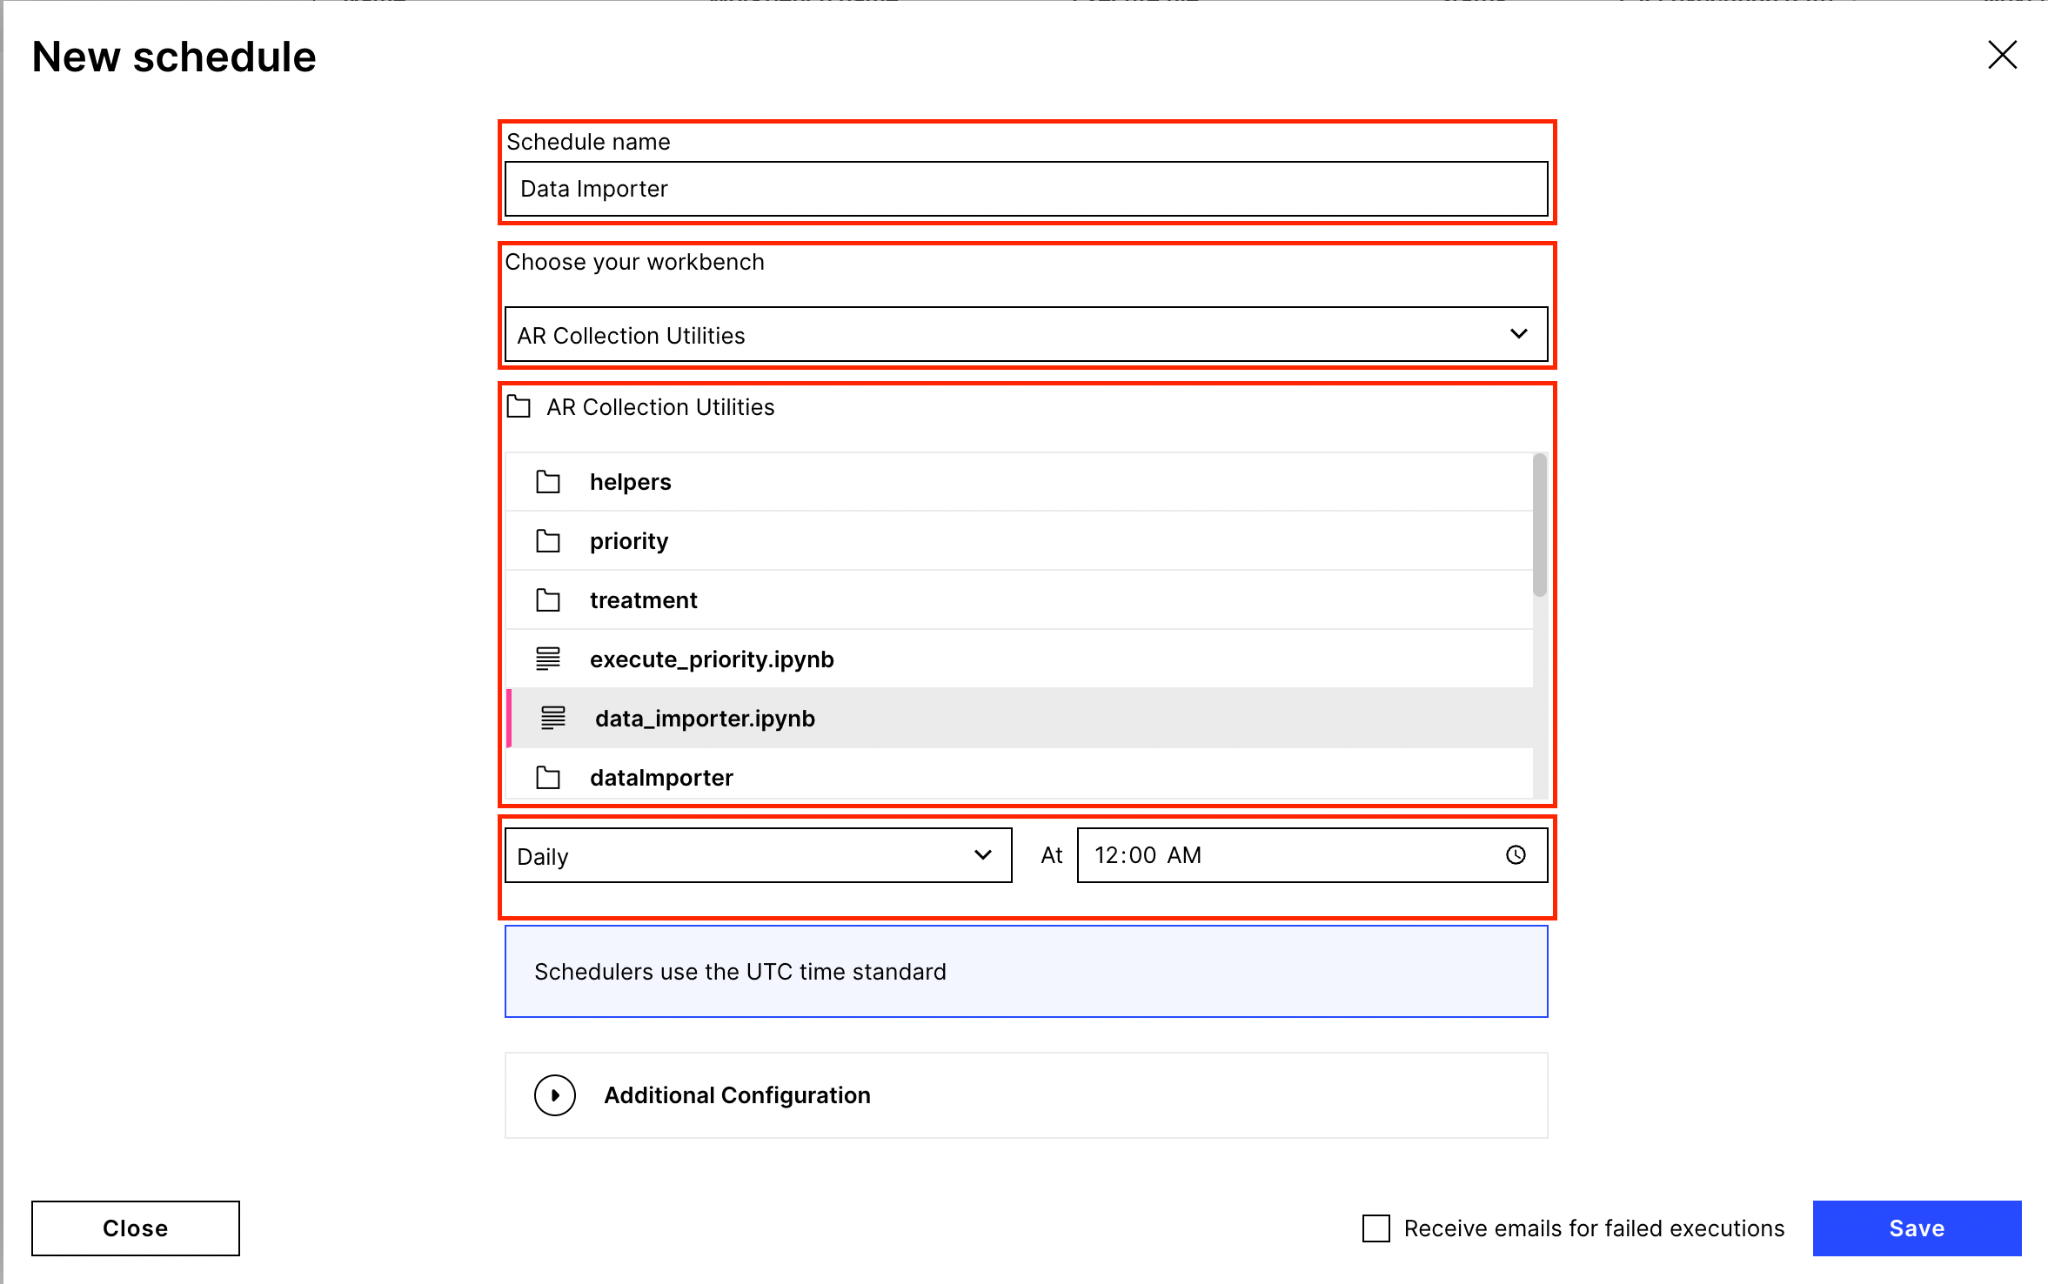
Schedule Data Importer Module: Need to schedule data importer script as per our requirement. For that, go to Machine Learning > Scheduling > New Schedule which will open the screen below where you have to enter the Schedule Name and choose the Workspace App that you created in Step 3. Then select the data_importer.ipynb Notebook and select the Schedule frequency as per your requirement.