Configuring a crop filter
Crop filters allow you to display activities occurring between two events in a process rather than viewing the full end-to-end process. By cropping the data displayed in your View component, you can then identify issues and fix inefficiences between these steps.
Crop filters can be manually configured in your Studio Views using components to populate a Knowledge Model variable. This variable then crops the relevant events / activities in the event logs in your Knowledge Model, which in turn changes the data displayed in your Studio components.
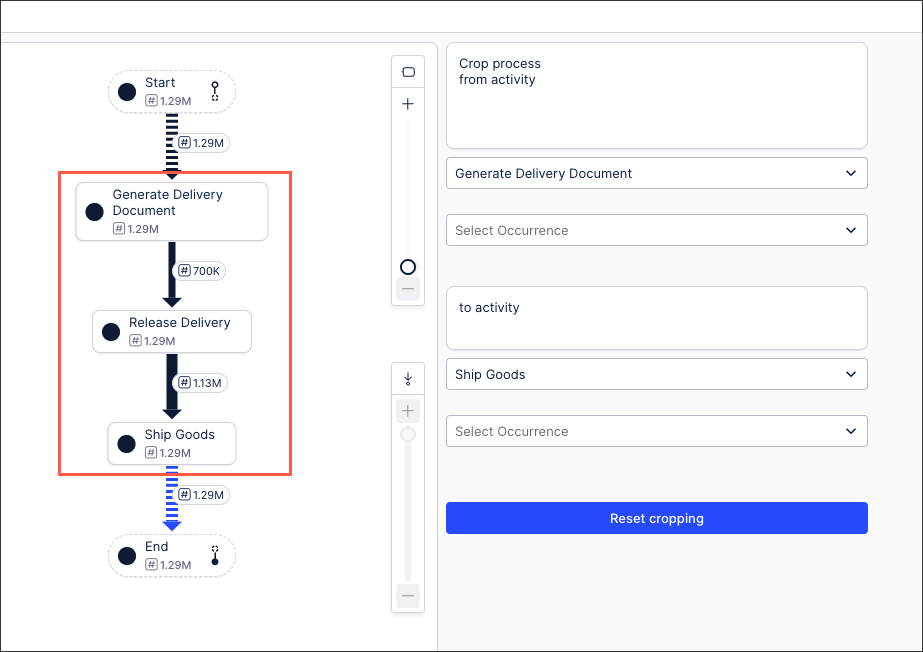
For example, in an Order Management process, you can use a Process Explorer component to crop the data to display only the events / activities from Generate Delivery Document to Ship Goods:
To configure this example, you need the following:
In the View: Create four Knowledge Model variables:
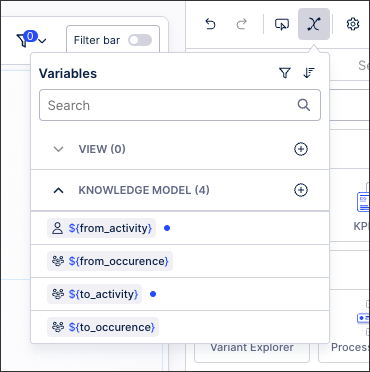
from_activity
from_occurence
to_activity
default FIRST
to_occurence
default LAST
In the Knowledge Model:Create a new event log that uses the variables to crop a custom event log.
For the PQL statement, we use the CALC_CROP_TO_NULL reference, see: CALC_CROP_TO_NULL.
For our Order Management example, the PQL statement for the cropped event log is:
CALC_CROP_TO_NULL(${from_occurence}_OCCURRENCE['${from_activity}']
      TO ${to_occurence}_OCCURRENCE['${to_activity}'],
     "ACTIVITY_TABLE"."ACTIVITY_EN"
)
In the View: Configure the View components that users fill the variables with:
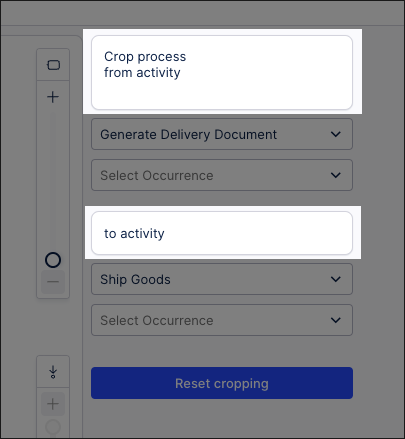
Text boxes (optional): Add text boxes to guide the user / provide more information.
For example, we've added text boxes in the highlighted areas:
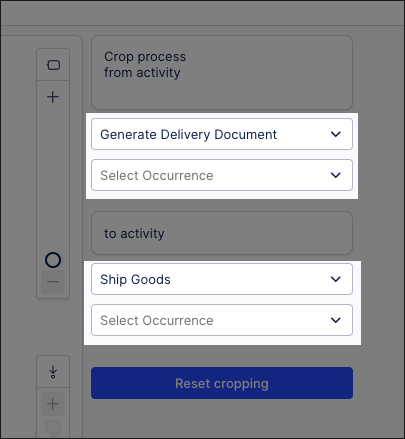
Input dropdown: Add input dropdowns to select the from/ to activity and occurrence.
For example, we've added input dropdowns in the highlighted areas:
Button: Add a button to reset the variables to the default value.
For example, we've added a 'Reset cropping' button in the highlighted area:
