Create Alerts
Enable automated incident monitoring within Celonis Studio. Use Smart Sensors and Alert Actions to flag specific record types and provide users with descriptive, hover-over context for every data incident.
 |
The Skill acts as the container for your alert logic and automation.
In your Studio package, click + New and select Skill.
Enter a unique Display Name (e.g., "Invoice Overdue Alert").
(Optional) Provide a Description to help other developers understand the alert's purpose.
Click Create.
The Smart Sensor monitors your data for specific "incidents" that should trigger the alert.
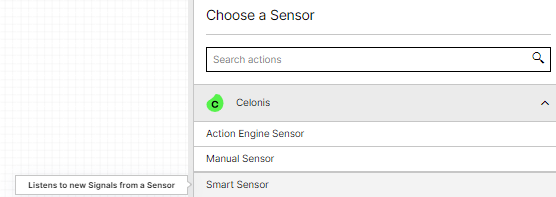
Within your new Skill, click Add Sensor.
Select Celonis - Smart Sensor.
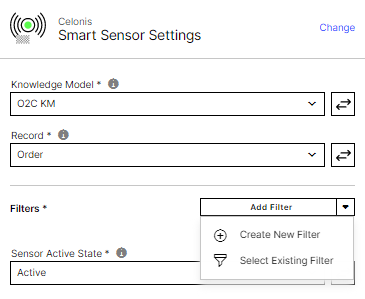
In the Knowledge Model field, select the KM containing the data you want to monitor.
Select the target Record (e.g., "Invoices").
Under Filters, define the PQL condition that identifies an incident (e.g.,
FILTER "Invoices"."Status" = 'Overdue';).Set the State to Active and click Save.
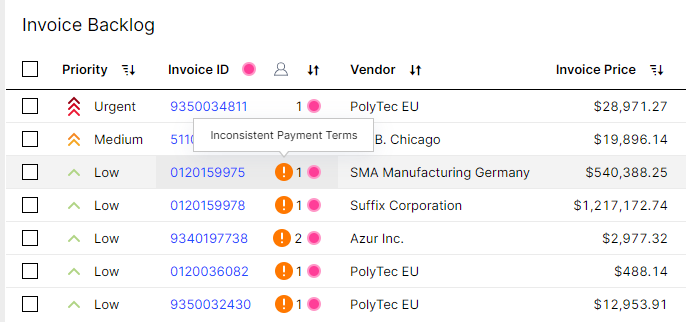
This step defines what the user actually sees in the frontend table.
Click Add Next Step in the Skill builder.
Search for and select the Create Alert action from the Celonis section.
In the Description field, enter the text you want users to see when they hover over the alert icon (e.g., "This invoice is 30+ days past due").
Click Save.
Before the alert goes live, you must validate the logic and activate the Skill.
Click Test in the top toolbar to run a manual check against current data.
Review the Execution Logs to ensure the Smart Sensor identifies the expected number of incidents.
Once verified, click Publish.
Note
Alerts will only appear on published Skills. Saving a draft is not enough to trigger notifications for end-users.
For the alert to be visible, it must be linked to a table component.
Open the View where you want the alerts to appear.
Select the Table component that uses the same Record Type defined in Step 2.
In the table settings, ensure the Alerts toggle is enabled (this is often on by default for Record-based tables).
The alert icon will now appear next to any row that meets your sensor's filter criteria.
|