Creating and importing object types
In the Celonis Platform, objects are the digital twins of your real-world business entities—like orders, invoices, or employees. They serve as the structural backbone of Object-Centric Process Mining (OCPM). Every object is governed by an Object Type, which defines:
Identity: How the object is uniquely identified.
Attributes: The specific properties that describe it.
Relationships: How it connects to events and other objects.
When you populate an object type via transformations, Celonis automatically generates one unique object instance for every unique ID found in your source data.
When creating custom object types, you can either model them from scratch or import them from existing tables in your source systems.
From scratch: Define object ID, attributes, and relationships manually; full flexibility for new entities.
Importing from table: When importing from existing source tables; columns become attributes, foreign keys suggest relationships, and transformation scripts are generated automatically. This approach can save time and ensure consistency if your source data is already object-centric, and you can extend imported object types later by adding more attributes or relationships.
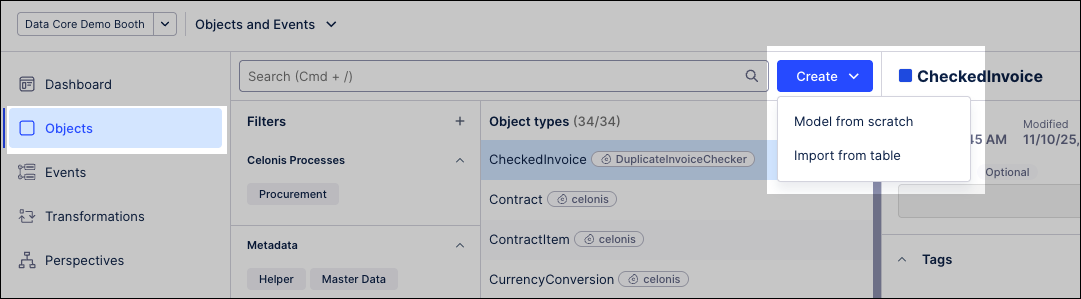
To create a custom object type from scratch using the Objects and Events dashboard:
Click Objects.
Click Create - Model from scratch.
Configure the object type:
Name: Enter a unique name up to 40 characters, using only letters and numbers (no spaces or special characters).
Color: Change the display color used for the object type in the model graph view.
Description: An optional description for this object type, visible when viewing the object in the table view only.
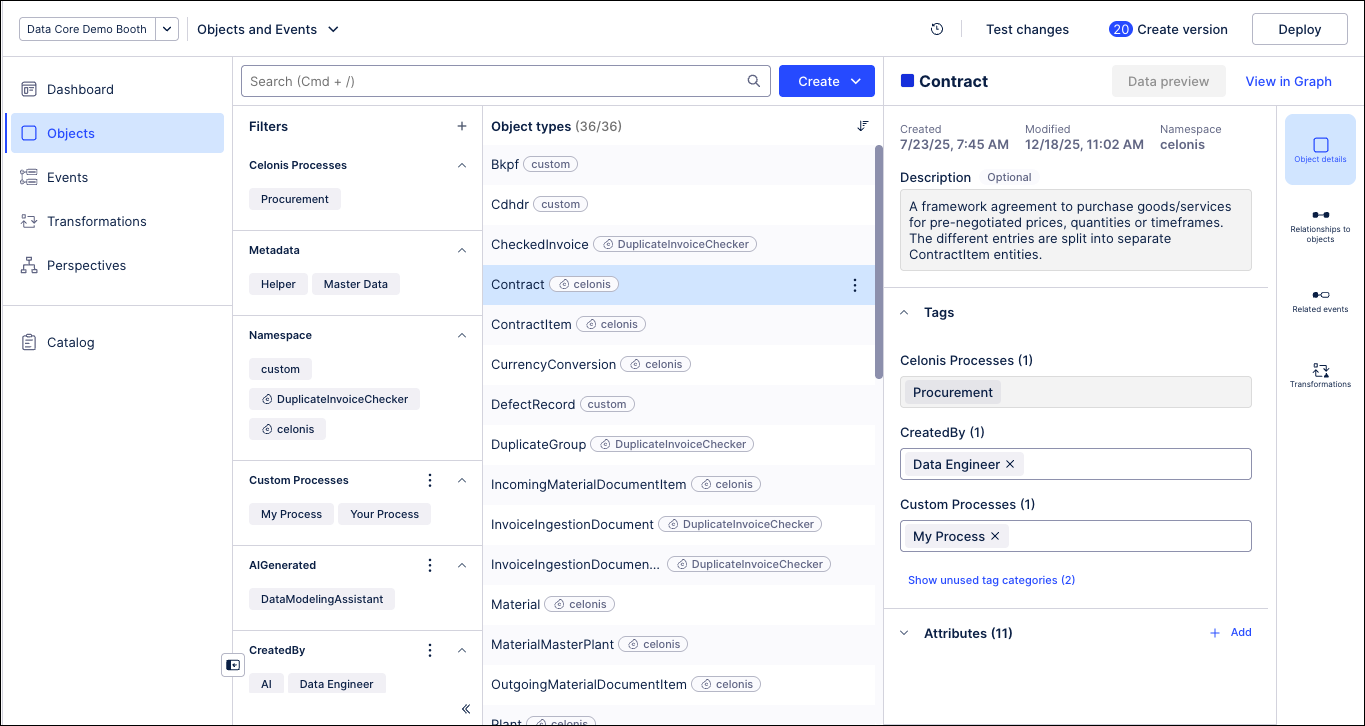
Tags: Tags are used to organize, categorize, and filter object types and event types within your object-centric data model. They don’t affect the data itself, they’re purely for management, navigation, and clarity.
Celonis processes: Choose from existing tags used as part of Celonis provided processes.
Custom processes: Enter text to create a new tag or select from existing tags.
Attributes: Configure object attributes to define the properties of an object type, choose data types, and enable filtering, grouping, and analysis of your objects. You can drag and drop the attribute to re-order how they are displayed in your transformations and Knowledge Model, too.
You can choose from the following attribure types: Boolean, datetime, floating point, long integer, and string.
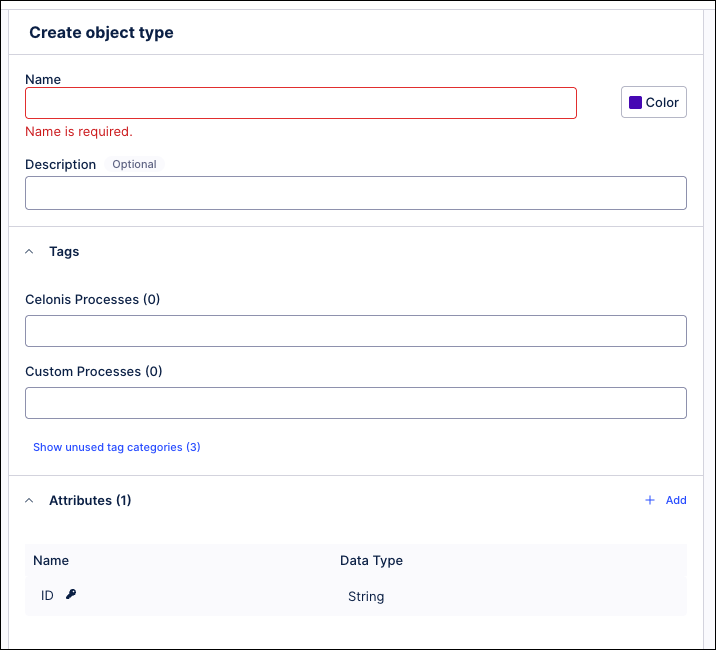
Click Save.
After completing these steps, your custom object type is created and ready to use, and you can publish it to the development environment to make it available for transformations and analysis.
You can create custom object types by importing existing tables from your source systems, which is useful when your data is already organized around identifiable business entities. During the import:
Table columns are automatically mapped to object attributes (you can add extra attributes later).
Foreign keys between tables are used to suggest one-to-many object-to-object relationships.
Celonis automatically generates the transformation scripts to populate the object type with data.
Before you begin
To import your objects and events, the data source must be accessible via a data connection in your data pool.
To share data between your data pools, see: Sharing data between data pools.
Importing custom object types
To import custom object types from a table:
Click Objects.
Click Create - Import from table.
Select the data source you want to use and then select the tables from that data source to import.
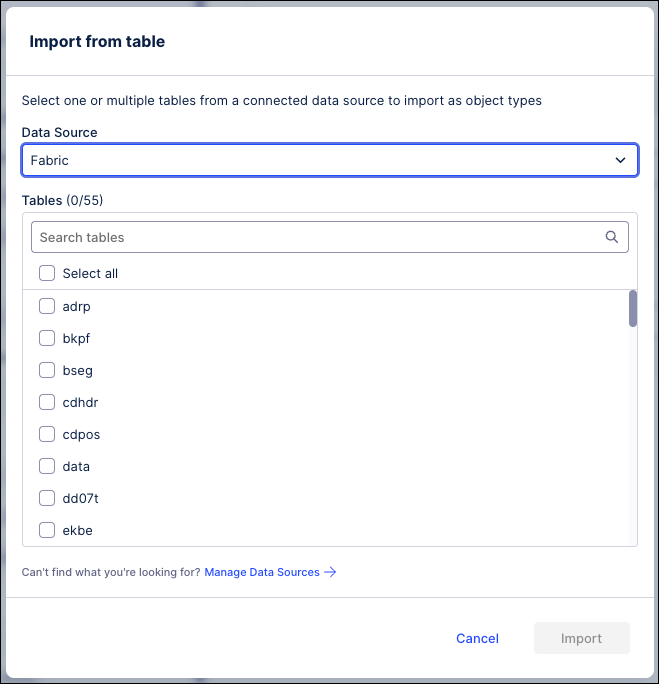
Click Import.
The imported tables are displayed in edit mode.
Select each imported table to review the object type generated from it.
You can optionally configure the following:
Object type ID: Use the dropdown next to the required ID attribute (this attribute can’t be renamed or removed). The selected column can’t be reused as another attribute. Alternatively, set this to None (create later) and generate the ID in your transformation script.
Columns: Check or uncheck columns to include or exclude them.
Add attributes: Click Add attribute to create additional attributes populated from data outside the selected table.
Rename attributes: Rename existing attributes (defaults to the column name).
Color: Set the object type’s display color in the object-centric data model.
Tags and descriptions: Apply existing Celonis tags or create custom tags (up to 41 characters) for filtering and reuse.
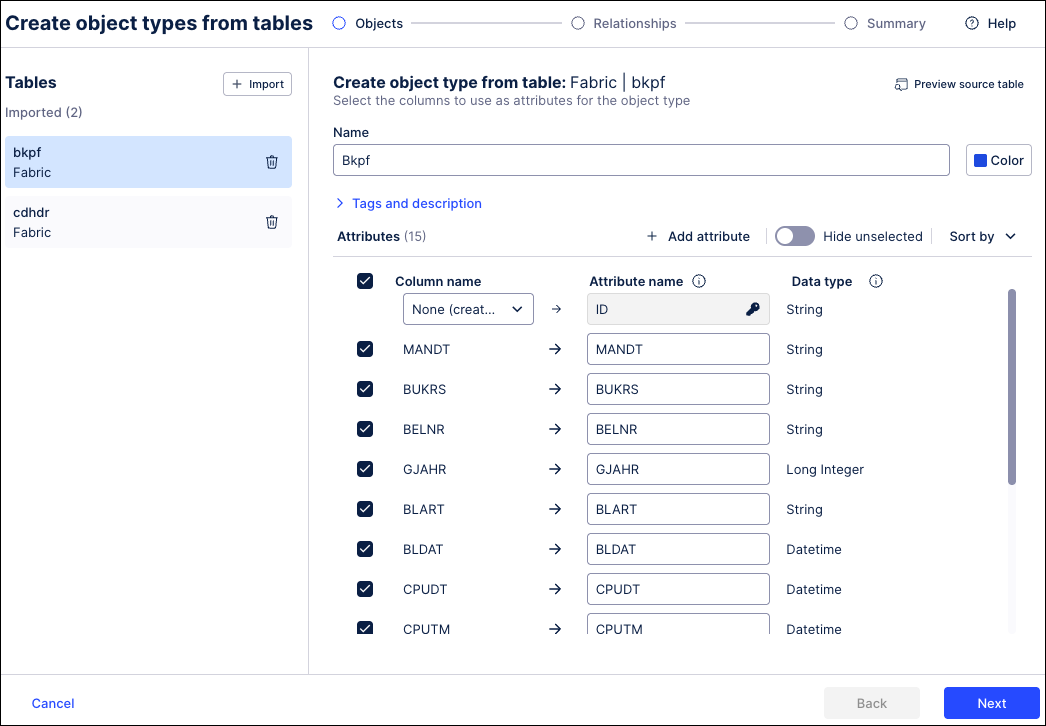
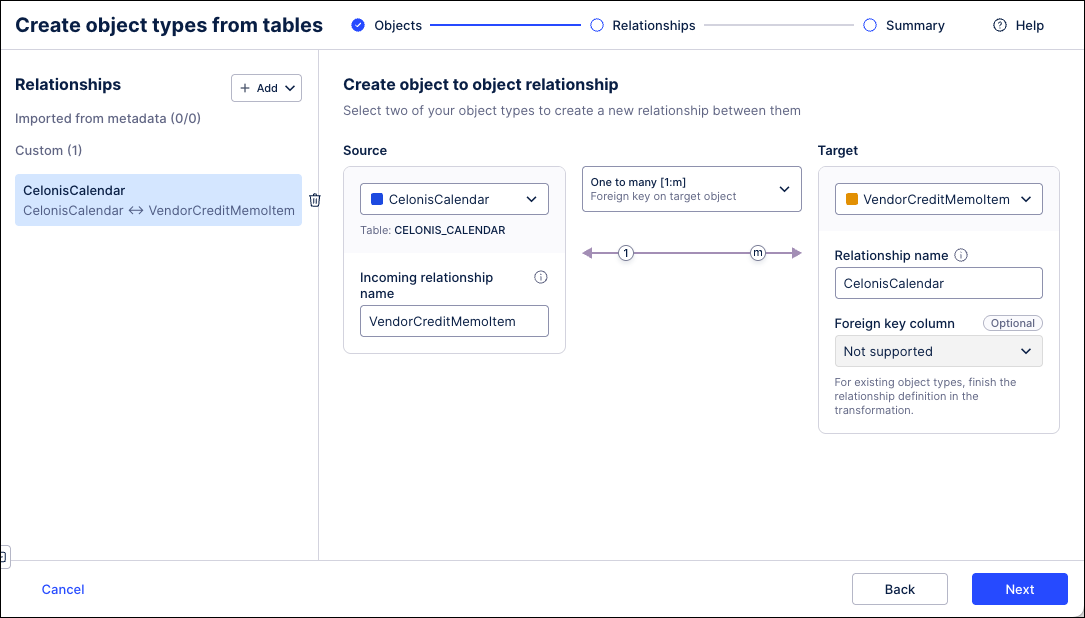
Click Next to move on to the Relationships step.
You have the following options here:
One table: Relationships aren’t available. Select Back to add tables, or Skip relationships to continue.
Multiple tables: Create relationships or select Skip relationships to continue.
Create relationships: Choose Create new or Import.
Click Next, review the object types that you're creating, and then click Create.
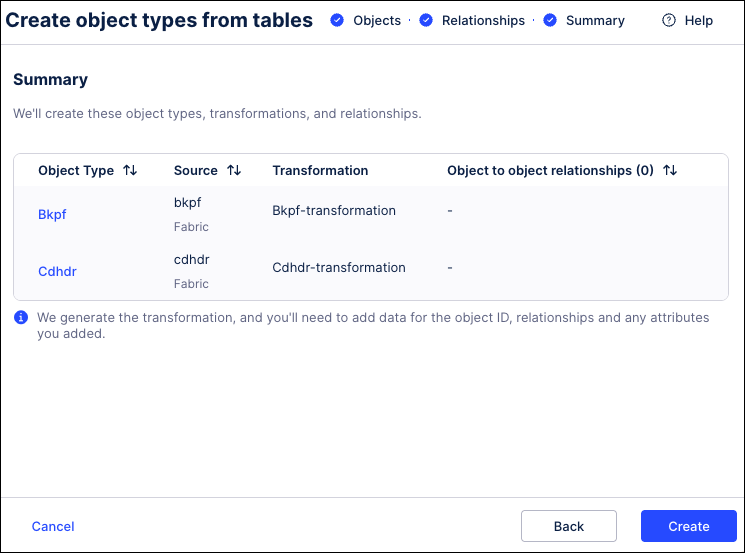
The objects are now created and can be viewed in your dashboard.
We recommend reviewing transformations now. To do this later or edit object types, click Go to object types.
Custom object types and event types can be extended over time by adding attributes and relationships, including links to existing Celonis objects and events. Object and event extensions are available after publishing in the current environment. A production deployment is only required if the analysis runs in production.
To extend or edit an existing object or event:
From the dashboard, click Objects / Events.
Select the object or event you want to extend, opening the configuration panel.
Make the necessary updates to the object or event, using the information provided in the above procedures.
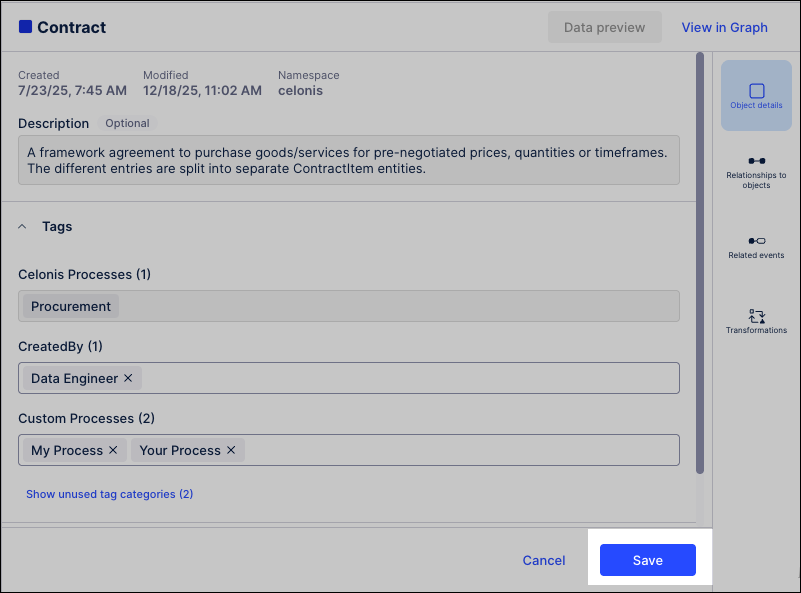
Click Save.
Optional: If the object or event extension is required in your production environment, click Deploy.
For more information about versioning and deployment, see: Versioning and deploying OCDM.