Cloudera Impala: How do I set up my database connection?
New data integration content available
You're currently viewing a data integration topic that has been replaced and will eventually be removed from our documentation.
For the latest data integration content, see: Data Integration.
Step 1: Download the Cloudera Impala JDBC Driver
Download the Cloudera Impala driver, e.g. here: https://www.cloudera.com/downloads/connectors/impala/jdbc/2-6-15.html
Make sure that you choose the correct version as the drivers are a bit different based on the version.
Step 2: Download the JDBC extractor package from your Celonis Help Page.
Download the JDBC extractor package, e.g. https://[team].[cluser].celonis.cloud/help/display/CIBC/Versions+-+Database+Extractor
Make sure to replace team and cluster (e.g. eu-1) with your Celonis details.
Step 3: Adapt the application-local.yml file
Open the application-local.yml file from the JDBC extractor package and replace the CliendID, ClientSecret with your specific Cloudera database credentials and replace the URL with your Celonis team name and cluster (see screenshot).
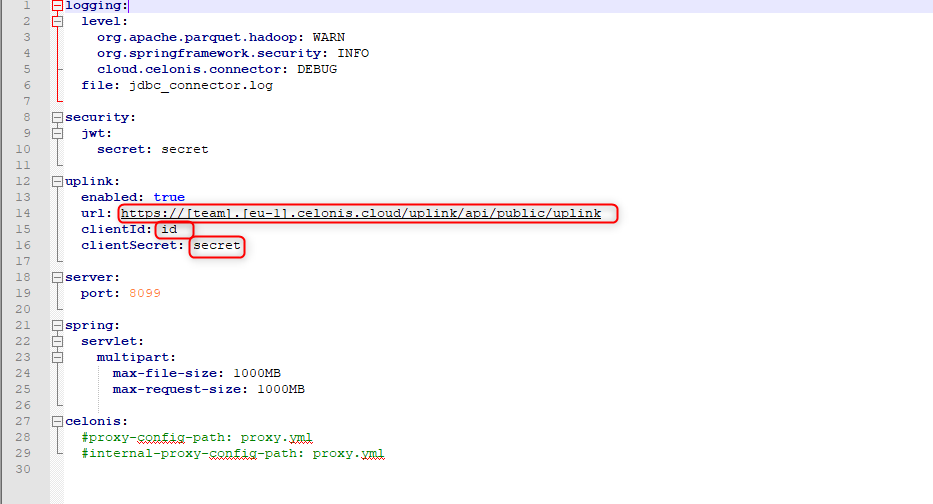 |
Step 4: Create .jar directory
Create a directory calledjarand move the .jar file from the Impala driver to this directory. When you download the driver package from Impala, there are actually three .jars.
Make sure to use the one starting with ClouderaImpalaJDBC41.
From this directory run the following command in order to run the extractor server:
java -Dloader.path=jar -Dspring.config.location=application-local.yml -jar connector-jdbc.jar
After that, check in the Celonis Platform if Uplink is connected (green status).
Step 5: Create a new on-premise database connection in Celonis
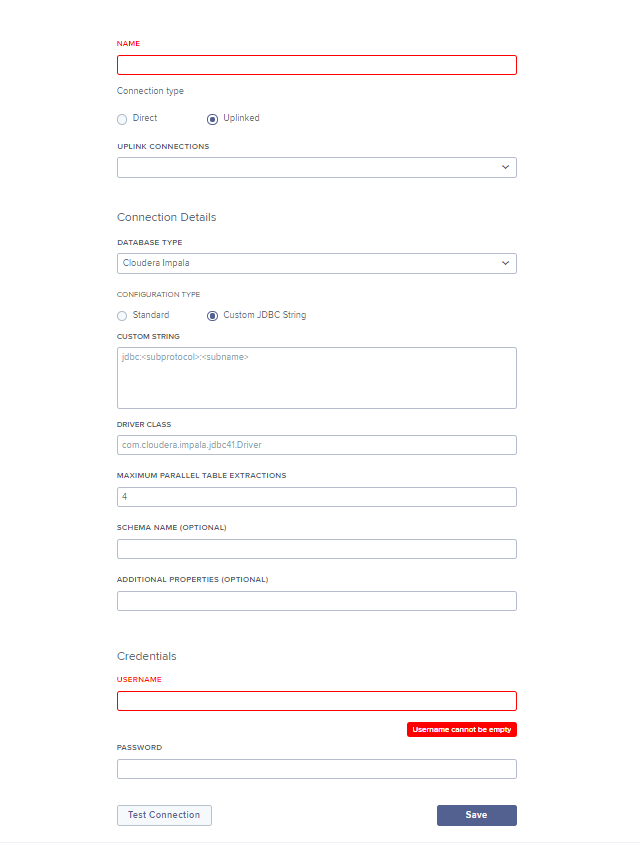
Fill in your connection details of the database that you would like to connect to:
Name: The name that you would like the data connection to have.
Connection Type: Choose the name of the connection that you’ve uplinked.
Database Type: Choose Cloudera Impala.
Configuration Type: Select Custom JDBC String and insert the following string depending on your connection configurations:
In case of the usage of SSL, the connection string is:
jdbc:impala://yourImpalaHostname:yourImpalaPort;AuthMech=3;
In case of the usage of SSL and a certificate file:
Add the certificate to the JDK keystore and instert the following connection string:
jdbc:impala://yourImpalaHostname:yourImpalaPort;AuthMech=3;SSL=1;
Note
For these two options, make sure, that you change the hostname and port to your database configurations.
In case of the usage of SSL and a .jks file, the connection string is:
jdbc:impala://yourImpalaHostname:yourImpalaPort;AuthMech=4;SSLTrustStore=<path>/<to>/<file>/cacerts.jks; SSLTrustStorePwd=changeit;tsasltransportbufsize=1000;usenativequery=0;useonlysspi=1;usesqlunicodetypes=0;
Note
Make sure to change theSSLTrustStore parameter to the directory of the .jks file containing the SSL Key and the SSLTrustStorePwd parameter to the respective password.
The certificate file needs to be in the same server that is used for the connection and the .jks file in the same folder.
Driver Class: Insert the class of your Cloudera Impala driver. Does not have to be changed from the default.
Maximum Parallel Table Extractions: Insert the number of tables that should be extracted in parallel.
Schema Name: The schema to use. This is optional.
Additional Properties: Optionally configure additional properties (not needed here).
Username: The username to connect to the database server.
Password: The password of the user.