ServiceNow Connection
New data integration content available
You're currently viewing a data integration topic that has been replaced and will eventually be removed from our documentation.
For the latest data integration content, see: Data Integration.
Important
Any references to third-party products or services do not constitute Celonis Product Documentation nor do they create any contractual obligations. This material is for informational purposes only and is subject to change without notice.
Celonis does not warrant the availability, accuracy, reliability, completeness, or usefulness of any information regarding the subject of third-party services or systems.
Data Connection Setup
There are three steps to set up a ServiceNow data connection:
Let's look at these in detail.
Configure a user with sufficient permissions in ServiceNow.
In order to extract data from ServiceNow the Celonis Extractor requires a user with sufficient permissions. The following permissions are required:
the role soap_query
the role rest_service
access to the table sys_db_object
access to each table which should be extracted
Important
You need to be logged in as a user with elevated privileges because you need to modify access control lists (ACL).
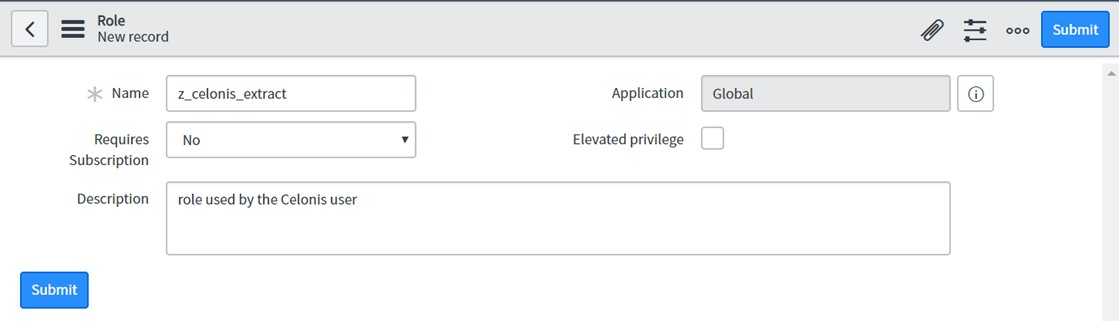
Create a new role.
In order to assign the correct access right to the user used for the Celonis extraction, we recommend creating a new role in the user administration section, e.g. z_celonis_extract as shown in the screenshot to the left.
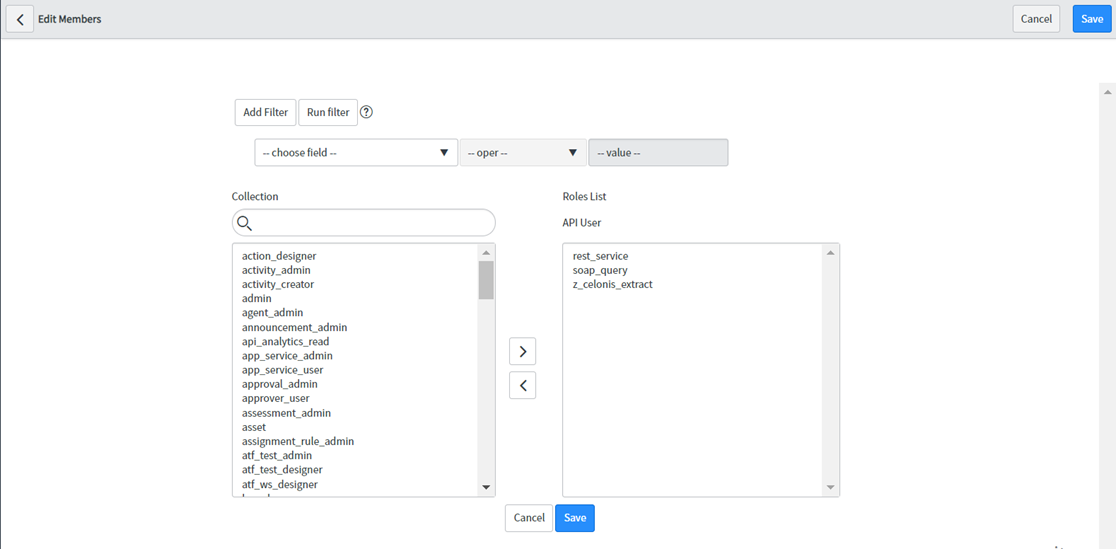
Create a new user and assign the required roles.
We recommend creating a new user for the data extraction. You need to assign the following roles to this user:
soap_query
rest_service
the role created in step 1a, e.g. z_celonis_extract
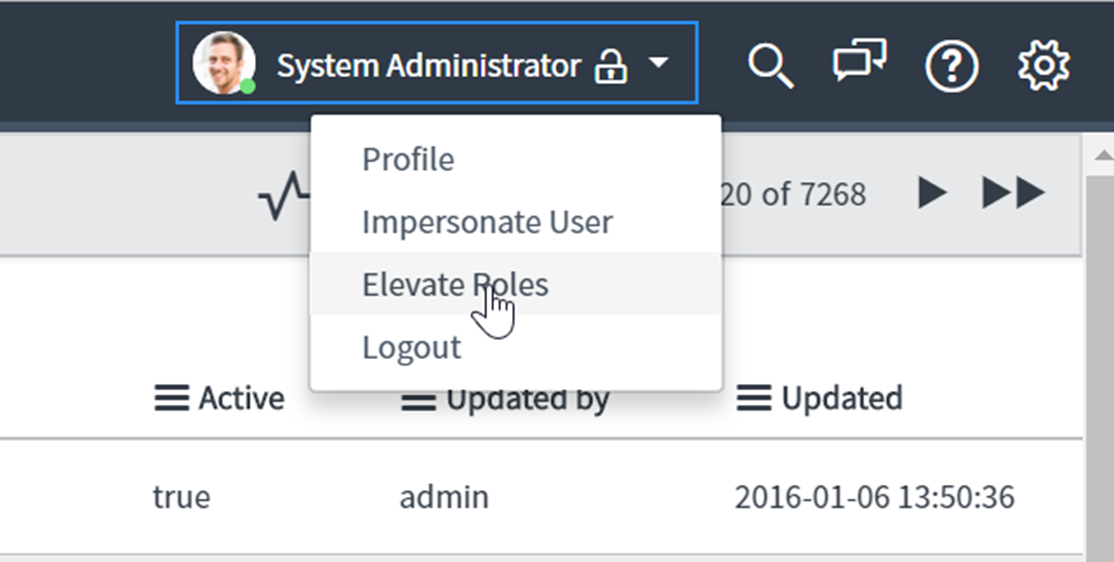
Elevate privileges of your user.
In order to modify access control for the newly created Celonis role you need to elevate your privileges. You find this option when clicking on your user name in the top bar (see screenshot). This will be only temporary and can be revoked after the next steps are completed.
Allow access to the table sys_db_object.
With the elevated role you can open access control lists (ACL). Here you need to create two new ACL.
One ACL with the following attributes:
Operation: read
Active: true
Name: Table [sys_db_object]
Field (Column): *
Required roles: the role created in step 1a, e.g. z_celonis_extract
And a second ACL with the following attributes:
Operation: read
Active: true
Name: Table [sys_db_object]
Field (Column): --None--
Required roles: the role created in step 1a, e.g. z_celonis_extract
Settings that take an asterisk (*) are dependent on their ServiceNow permission settings. If you experience problems, change * to None.
No other conditions should be necessary. For further information, consult the ServiceNow access control list rules.

Allow access to all the tables which should be extracted.
With the elevated role you can open access control lists (ACL). Here you need to create a new ACL with the following attributes:
Operation: read
Active: true
Name: the name of the table
Field (Column): table.* (all fields selected)
Required roles: the role created in step 1a, e.g. z_celonis_extract
Settings that take an asterisk (*) are dependent on their ServiceNow permission settings. If you experience problems, change * to None.
No other conditions should be necessary. For further information, consult the ServiceNow access control list rules.
This step has to be repeated for all required tables.
For every table, an additional ACL with the following attributes shall be created:
Operation: read
Active: true
Name: the name of the table
Field (Column): --None--
Required roles: the role created in step 1a, e.g. z_celonis_extract
Allowlist Celonis Platform IP addresses.
Note
Follow this step only if your system is IP-blocked.
If your system is only reachable within a certain IP range, you need to allowlist the outbound IPs of the Celonis Platform, otherwise data cannot be extracted. The IPs of the Celonis Platform are different depending on the cluster (eu-1 or us-1). For the list of clusters and their IP addresses, see Allowlisting domain names and IP addresses.
Create a Data Connection in a Data Pool.
Enter the name of the new ServiceNow connection and then enter the following:
User: The user name of the user connecting with the ServiceNow system.
Password: The password of the user connecting with the ServiceNow system.
Tenant: The realm of your ServiceNow instance. The realm can be found by looking at the system URL. For example, in this URL: https://mycompany.service-now.com, "mycompany" would be the realm.
Data Extraction
Authentication
In order to connect to your ServiceNow system, you can choose between two authentication types:
Stored Credentials: Requires a username and password that authenticate with ServiceNow using Basic Authentication
OAuth: Requires Client ID and Client Secret as inputs in the data connection. When saving the data connection, you additionally need to authenticate with your instance with a user. The OAuth connection can be limited to specific scopes in ServiceNow. In order to authenticate via OAuth, you need to register Celonis as an application that has access to your account. Please follow the information on this page.
For the Redirect URL, use the following: https://auth.redirect.celonis.cloud/service-now_redirect
When setting up the data connection you also have the option to authenticate via OAuth, using the credentials you've defined in the OAuth client application.
Data Access
The Celonis connector performs read-only operations on your ServiceNow data. No writing changes (like updates, deletions) will be performed at any time during the extraction process.
Source System Impact
None of our customers have ever experienced performance issues through the ServiceNow connector in any way.
Security
Transfer of the data from the ServiceNow system to the target system is secured through HTTPS via TLS 1.2, which allows for an encrypted exchange of information.
Duration
Depending on the amount of data in your ServiceNow source system, the data extraction can take several hours.
Filters
Not all filter combinations with AND and OR are possible. Please follow the guidelines below:
These filters are possible
A AND B, example: sys_created_on > '2011-09-14' AND sys_updated_by = 'system'
A OR B, example: sys_created_on > '2011-09-14' OR sys_updated_by = 'system'

(A AND B) AND C, example: (sys_created_on > '2011-09-14' AND sys_updated_by = 'system') AND sys_updated_on > '2018-12-05'
(A OR B) OR C, example: (sys_created_on > '2011-09-14' OR sys_updated_by = 'system') OR sys_updated_on > '2018-12-05'

A OR (B AND C), example: sys_updated_by = 'system' OR (sys_created_on > '2011-09-14' AND sys_updated_on > '2018-12-05')
If you would like to specify a filter like this
Impossible filter
A AND (B OR C), example: sys_updated_by = 'system' AND (sys_created_on > '2011-09-14' OR sys_updated_on > '2018-12-05')
it does not work in ServiceNow. However, you can use this logical equivalent instead:
Working filter
(A AND B) OR (A AND C), example: (sys_updated_by = 'system' AND sys_created_on > '2011-09-14') OR (sys_updated_by = 'system' AND sys_updated_on > '2018-12-05')
Extraction Configuration - Rolling page size
In the extraction configuration of a ServiceNow connection, you have the option to specify the Rolling Page Size for each table. The default value is 5. This is our recommended setting.
The purpose of this setting is to ensure data integrity and prevent any missing records. By utilizing this parameter, the pagination pages are sequentially incremented in a rolling manner.
If you decrease this parameter to 0, the number of requests made will be reduced, but there is a potential risk to miss out records. The rolling page sizes can lead to duplicates in the extraction, which are automatically removed.
Extraction configuration - batch size
The default and recommended batch size for the ServiceNow extractor is 100. Batch sizes significantly larger than 1,000 could slow down the system performance of your ServiceNow instance. See the ServiceNow documentation for more detail.
Extractions of large tables
If extraction from a large table fails, we recommend splitting the extraction into smaller batches by applying time range filters. The failure could be due to:
timeouts.
error during extraction, leading to an empty response.
Frequently Asked Questions (FAQs)
What are best practices to increase performance and limit the source system impact when extracting the sys_audit table?
The sys_audit table should not be extracted as a primary table, only as a dependent table. This means extractions will be limited to the retrieved sys_is fields (which are unique) and will therefore lead to a better performance.
Applied filters should be limited to indexed columns only.
Additional filtering on sys_created_on or sys_updated_on will also improve the performance.