Microsoft SharePoint Connection
New data integration content available
You're currently viewing a data integration topic that has been replaced and will eventually be removed from our documentation.
For the latest data integration content, see: Data Integration.
Important
Any references to third-party products or services do not constitute Celonis Product Documentation nor do they create any contractual obligations. This material is for informational purposes only and is subject to change without notice.
Celonis does not warrant the availability, accuracy, reliability, completeness, or usefulness of any information regarding the subject of third-party services or systems.
Limited Availability
This extractor is currently in limited availability mode and can be added to your Celonis Platform environment by request only.
To request access to this extractor, please create a support ticket on Celopeers.
The SharePoint Extractor is based on the Microsoft Graph API, which requires an Azure cloud infrastructure.
It is specifically designed to download files (xlsx and CSV) from Microsoft SharePoint and to push them to the Celonis Platform. The SharePoint Extractor is a python extractor implemented in the ML App. Additionally, the Extractor is currently in alpha. If you'd like to receive the Extractor's Python script, reach out to Celonis support.
Steps to set up a SharePoint connection
Step 1: Application Setup in Microsoft Azure
Azure Portal Account Type
All steps in the Azure Portal have to be done from an admin account.
The first step is to set up a new application within the Azure Portal.
Sign in to your Azure Portal and go to App Registrations. On the top left, you click on New registration.
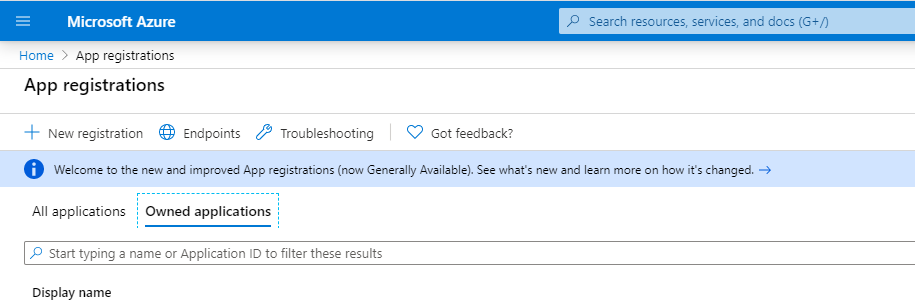
On the registration page, specify the following:
Name (e.g. msgraph-app)
Supported account types = <choose the fitting value> (e.g. Accounts in any organizational directory (Any Azure AD directory - Multitenant))
Press the Register button. You are directed to the application Overview page. Save your Application (client) ID and Directory (tenant) ID since you need them for the authorization setup of the python extractor. You can always come back to this page.
Go to Certificates & secrets and click on New client secret.
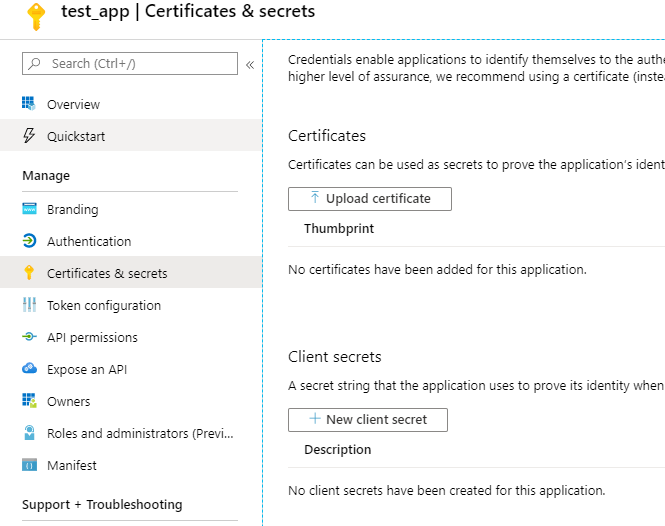
Choose a suitable description (e.g. Secret1), a suitable timeframe (e.g., in 1 year), and click on Add. You can then see your newly created client secret. Make sure to copy the value and store it somewhere safe. Since this value is equivalent to a password and you only see the value this one time.
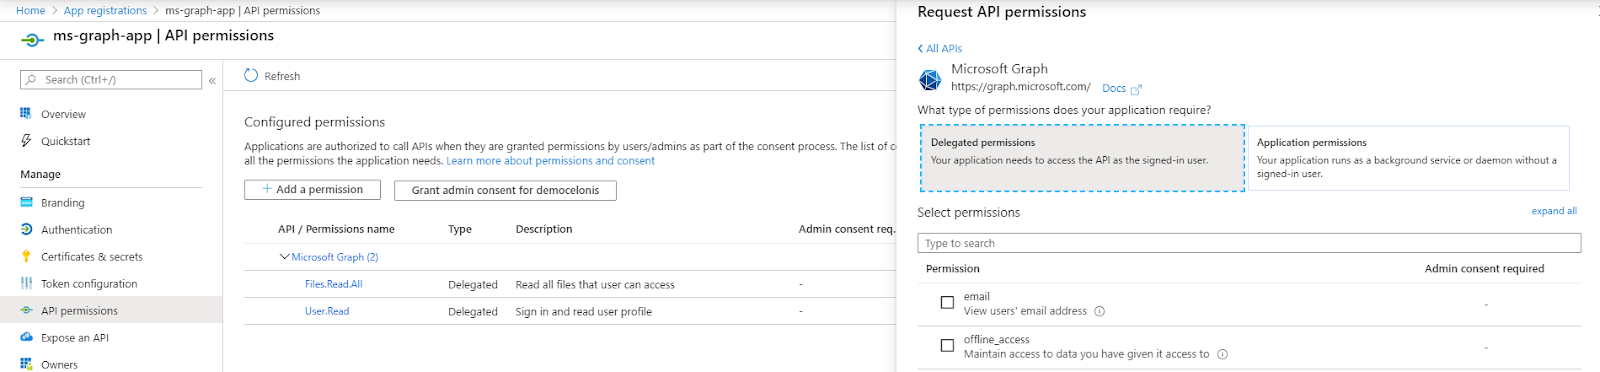
Step 3.1: Application Permissions
Click on API Permissions > Add a Permission > Microsoft Graph > Application Permissions.
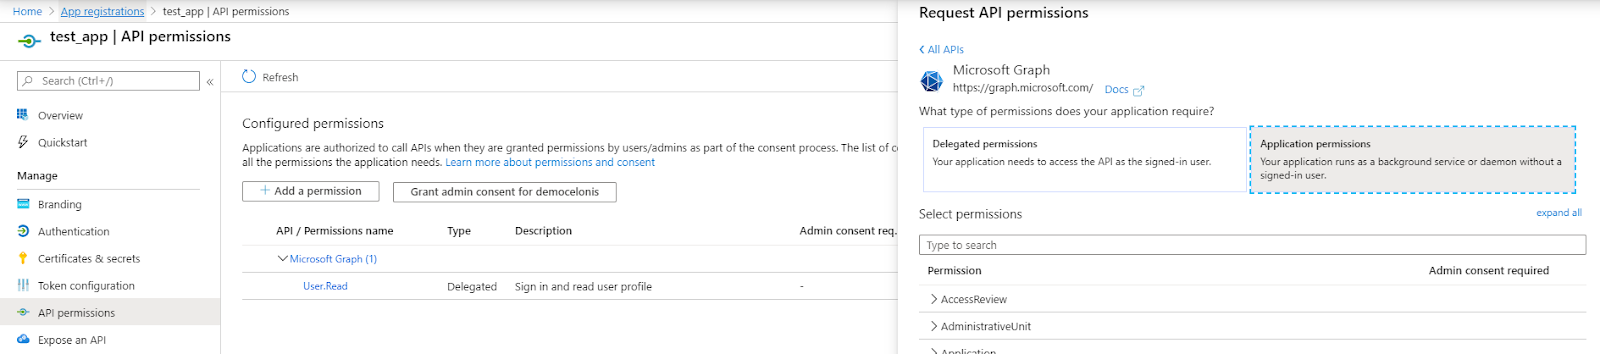
Search and select the following permissions:
Files.Read.All,
Sites.Read.All,
Sites.ReadWrite.All
Press Add permissions and Grand admin consent for <YOUR_ENVIRONMENT> (example from the image: Add permissions and Grand admin consent for democelonis).

As a result, it should look like in the image below with the green check marks next to the required permissions.

Go to Home and select Groups.

Here you can create a new group with all users that should have access to your files or you can choose an already existing group. You only need to copy the Object Id (also called Group Id) for the extractor.
Now you can go to the Celonis Platform and select the extractor script in your Machine Learning App.

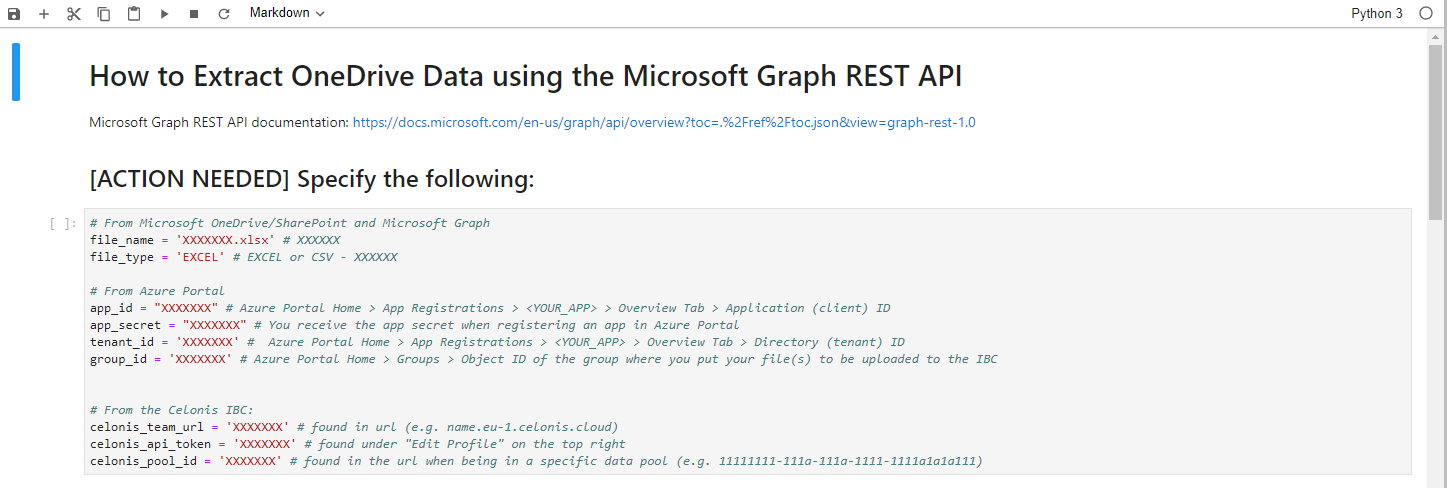
We are only interested in this field. Here you need to specify the following:
file_name: enter the file name with the correct spelling including the data type (.xlsx or .csv; e.g.test_file.xlsx)
file_type: enterEXCELfor an excel spreadsheet orCSVfor a CSV file
app_id: enter your application (client) id
app_secret: enter your application secret
tenant_id: enter your tenant id
group_id: enter your group id
celonis_team_url: your team URL can be found in URL of your Celonis environment (e.g.name.eu-1.celonis.cloud)
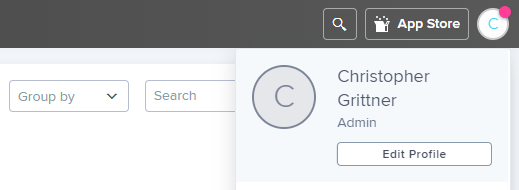
celonis_api_token: when you logged into your Celonis account on the Celonis Platform, click on your profile on the top right corner and then onEdit Profile. (See image below)
Scroll down to the API-Keys section, enter a name for your API key (e.g. MS Graph API Key), and press Create API Key.
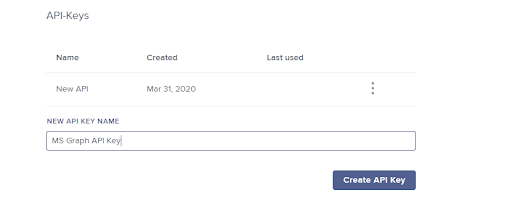
A pop-up appears which displays the API key you need to enter into the celonis_api_token field in the extractor script.
celonis_pool_id: you can find the Celonis pool id when you click on the Data Integration tab on the top. Now, select (or create) the data pool to which you want to push the spreadsheet data. Your URL should look like <ENVIRONMENT>.eu-1.celonis.cloud/integration/ui/pools/11111111-aaa1-111a-aa1a-11111a1a1111/overview. The relevant part for this field is right behind ...pools/ and before .../overview.
Now you can set up the scheduling for the ML App and the Data Model.
Step 3.2: Delegated Permissions
Click on API Permissions > Add a Permission > Microsoft Graph > Delegated Permissions.
Search and select the following permissions:
Files.Read.All
Press Add permissions and Grand admin consent for <YOUR_ENVIRONMENT>.

As a result, it should look like in the image below with the green check marks next to the required permissions.
Now you can go to the Celonis Platform and select the extractor script in your Machine Learning App.
We are only interested in this field (see image above). Here you need to specify the following:
file_name: enter the file name with the correct spelling including the data type (.xlsx or .csv; e.g.test_file.xlsx)
file_type: enterEXCELfor an excel spreadsheet orCSVfor a CSV file
app_id: enter your application (client) id
tenant_id: enter your tenant id
username: enter your Mircosoft username/email address
password: enter your Microsoft password
celonis_team_url: your team URL can be found in URL of your Celonis environment (e.g.name.eu-1.celonis.cloud)
celonis_api_token: when you logged into your Celonis account on the Celonis Platform, click on your profile on the top right corner and then onEdit Profile.

Scroll down to the API-Keys section, enter a name for your API key (e.g. MS Graph API Key), and press Create API Key.
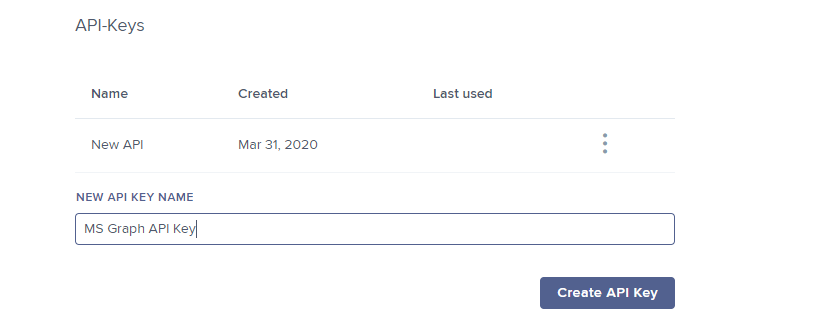
A pop-up appears which displays the API key you need to enter into the celonis_api_token field in the extractor script.
celonis_pool_id: you can find the Celonis pool id when you click on the Data Integration tab on the top. Now, select (or create) the data pool to which you want to push the spreadsheet data. Your URL should look like <ENVIRONMENT>.eu-1.celonis.cloud/integration/ui/pools/11111111-aaa1-111a-aa1a-11111a1a1111/overview. The relevant part for this field is right behind ...pools/ and before .../overview.
Now you can set up the scheduling for the ML App and the Data Model.
Dummy User
As one enters the username and password in the extractor script, it is highly recommended to create a dummy user for this.
User Setup
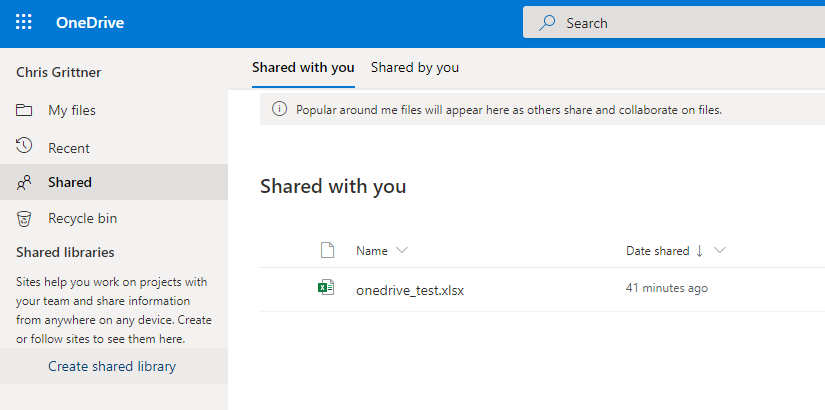
With this setup, the extractor is only able to find files that have been shared with the dummy user's OneDrive. In order to be able to extract the files, you should be able to see them under Shared > Shared with you in the dummy users OneDrive. You can share files from SharePoint with the dummy user and subsequently find them in the respective OneDrive.
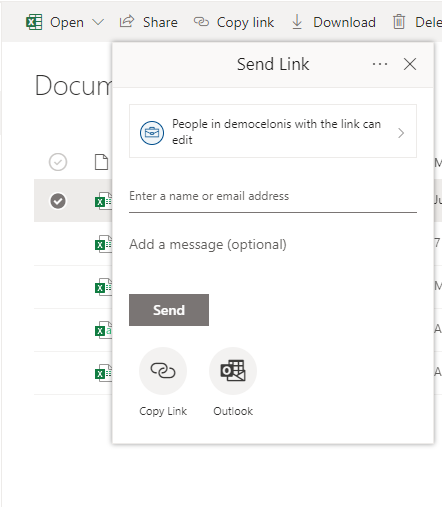
Share files with a user's OneDrive
Select the respective file in SharePoint and click on Share. Then send the link to the dummy account.
It might take up to one hour until the file appears in the dummy user's OneDrive Shared with me section.
Deleted File
When the shared file was deleted in SharePoint, you can in most cases still see the file with the dummy user afterward. Please note that the dummy user cannot access it anymore, and therefore, I cannot be extracted.
A new file with the same name as the deleted one can be accessed by the dummy user even though the new file has never been shared.