Table Joins and Syntax
New data integration content available
You're currently viewing a data integration topic that has been replaced and will eventually be removed from our documentation.
For the latest data integration content, see: Data Integration.
The following article describes the syntax and JSON capabilities when joining tables in the extractor settings.
For every database type, the validator will be the same to validate the user's input string. The join string will be processed differently in the backend.
General Case:
When joining another table during the extraction, add one table and specify the columns on which those two should be joined. If you want to join more tables, they have to be added separately by clicking "Add Join" in the UI.
In general, the Customer Join Condition field should look like the following below:
table1.column1 = table2.column2 and ... and …
Note
Writing and in all caps is also fine (→ AND)
Special Case & Best Practice
If you have special symbols in the names of the tables (like : or . ), you can use “ ” to separate the table name and column name. This is usually the case for Hana and it is best practice as well.
Example:
“table:1”.”column1” = “table.2”.”column2” and ...
Note
Double quotes can also be only used on one side, but it is not recommended not to do that.
Rules for Joining
In each custom join condition, we can only have one “=” in the middle among the “and”. This means you can use multiple and to connect the equations. Examples: This won't work
a = b = c
This works
a.b = c.d and a.e = c.x
Schema names must not be contained in the custom join condition. It is not possible to join tables in different schemas.
Use . to connect table 1 and column1. There must be no space between them. This doesn't work
table1. column1 = table2 .column2
This works
table1.column1 = table2.column2
There can be space around “=”Either works
table1.column1=table2.column2

table1.column1 = table2.column2

table1.column1        = table2.column2
Your join statement should include a parent table and a child table - both with their tables written before the columns. The statement must not include the schema name.
Around the =, there should always be one parent name and one child name. The order is not important here. E.g. parentName.column1 = childName.column1 is the same as childName.column1=parentName.column1. This works
parentName.column1 = childName.column1

... is the same as ...

childName.column1 = parentName.column1
If you add a new join statement, the parent table will be changed to the newly chosen one. The child table name is the last join’s parent table now. E.g. For example, we had hana_test2 above. But now I insert a new join by using “hana_test3”, then in the input field, “hana_test3” became the parentTableName, “hana_test2” is the child table name now, and “hana_test” should not appear anymore in this input field.
Example:
First Custom Join Condition
hana_test.id = hana_test2.id
Second Custom Join Condition
hana_test2.secondId = hana_test3.secondId
The join condition cannot be empty.
Data Type Conversion in Join Configuration
Since the v2.38.0 Release, the option to change the data type in the join configuration and the respective filtering is available for Oracle, MSSQL, and HANA databases.
The supported data type conversion operations are:
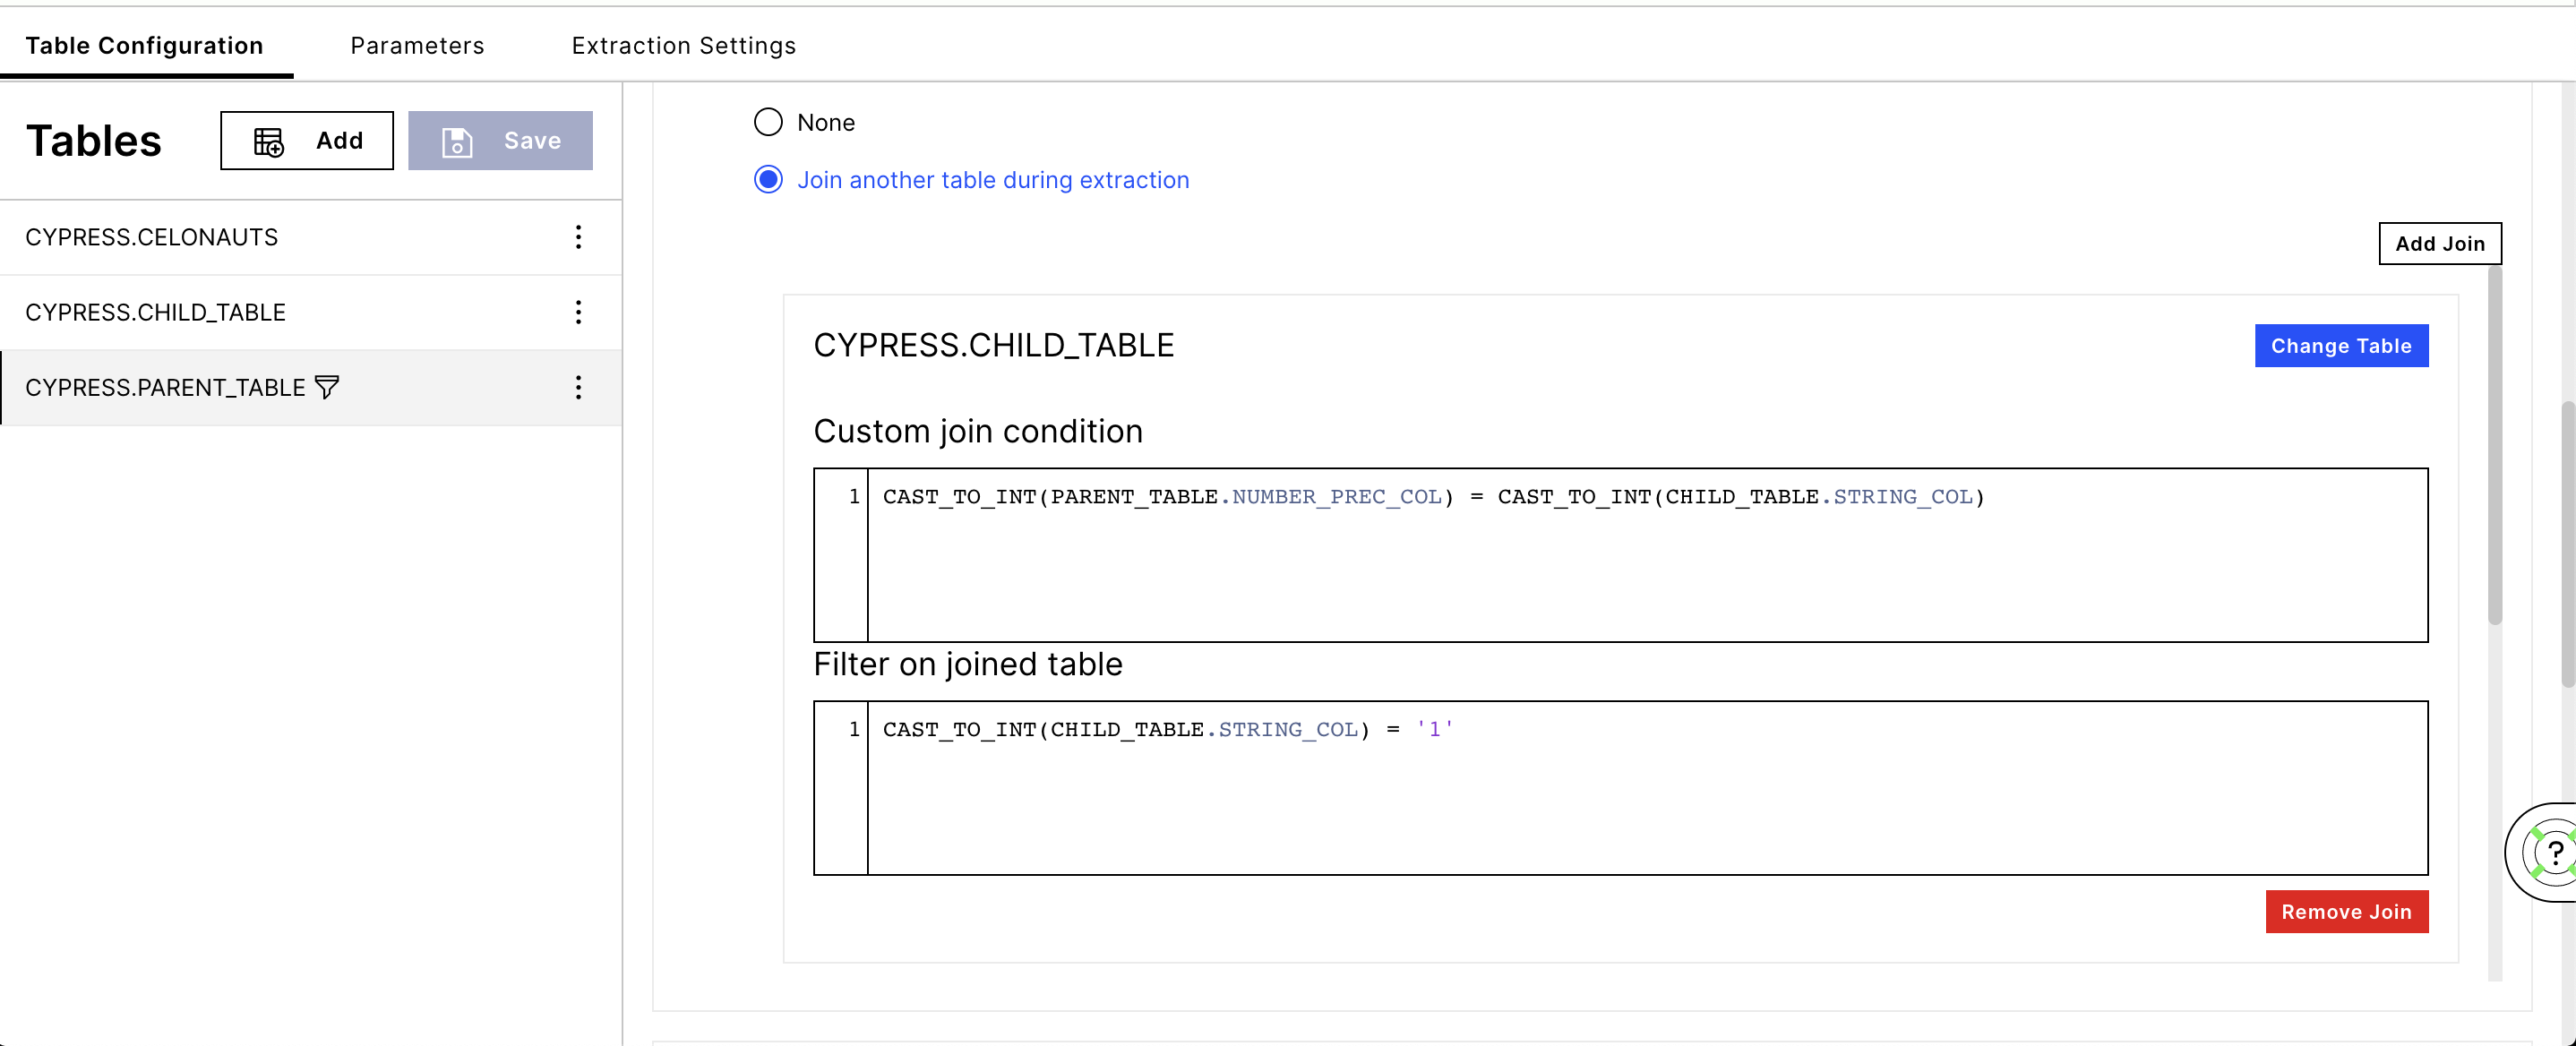
CAST_TO_INT(ColumnName, Format?) where the Format can be defined optionally
CAST_TO_FLOAT(ColumnName, Format?) where the Format can be defined optionally
CAST_TO_STRING(ColumnName, Format?) where the Format can be defined optionally
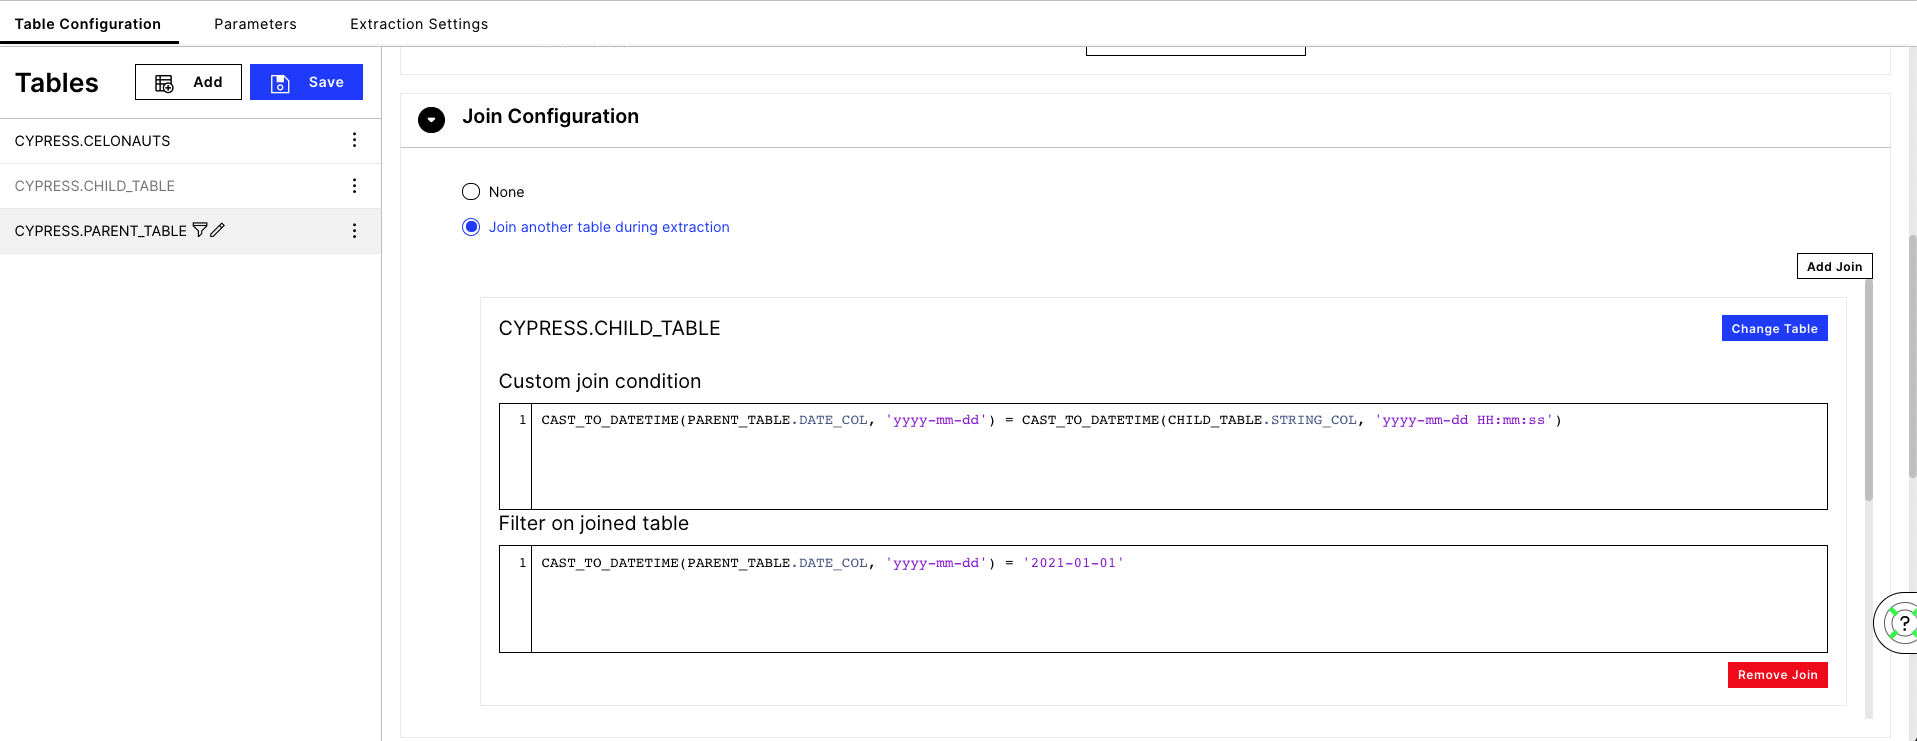
CAST_TO_DATETIME(ColumnName, Format?) where the Format is required (e.g. 'yyyy-mm-dd')
When including one of these operations in the join configuration, it will automatically be translated into the respective SQL syntax of the underlying database.
Please see the following examples:
CAST_TO_INT example:
CAST_TO_DATETIME example: